Beauty Tips
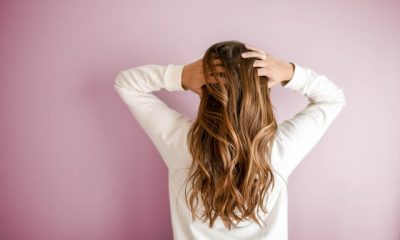
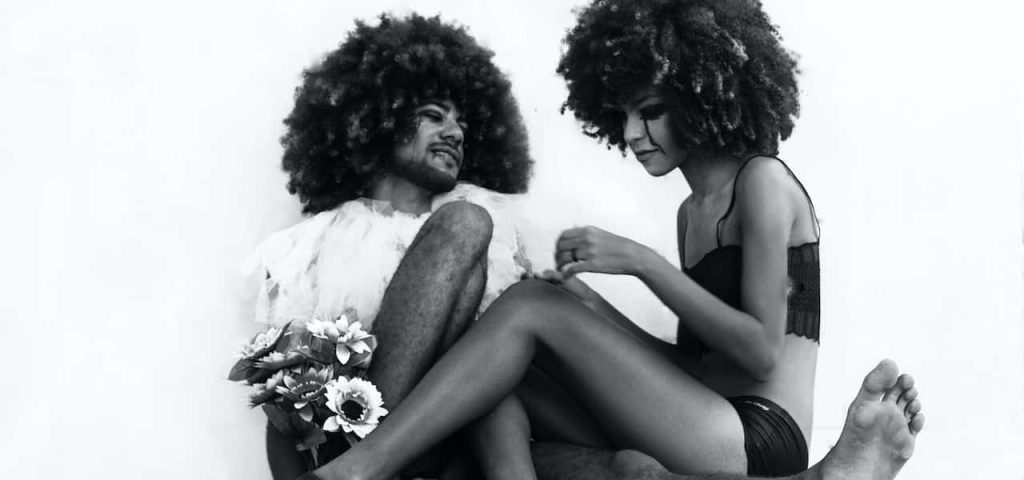
Curly Hair Protective Hairstyles: Your Ultimate Guide

Here is your complete guide to Curly Hair Protective Hairstyles
Introduction To Curly Hair Protective Hairstyles
Curly hair is unique and beautiful, but it also requires special care to keep it healthy and vibrant. One effective way to care for curly hair is by using protective hairstyles. In this ultimate guide, we will explore the world of curly hair protective hairstyles, including their benefits, how to properly install and maintain them, styling tips, and frequently asked questions. Whether you’re a seasoned naturalista or new to the curly hair journey, this comprehensive guide will provide you with valuable insights and inspiration to embrace and protect your curly locks with style and health. Here is your complete guide to Curly Hair Protective Hairstyles.
Understanding Curly Hair
Before diving into protective hairstyles, it’s important to understand the characteristics of curly hair. Curly hair comes in various types, including wavy, curly, and coily, and is characterized by its unique texture and porosity. Curly hair is often prone to dryness, frizz, tangling, and breakage due to its structure. Environmental factors such as heat, humidity, and pollution can also affect curly hair negatively. However, with proper care, curly hair can thrive and look stunning.
Benefits of Protective Hairstyles for Curly Hair
Protective hairstyles are hairstyles that keep the ends of the hair tucked away, reducing manipulation and friction, and protecting the hair from environmental factors. Here are some of the benefits of protective hairstyles for curly hair:
Minimizes manipulation and reduces hair breakage
Constant manipulation, such as combing, brushing, and styling, can cause hair breakage, especially for curly hair. Protective hairstyles help minimize manipulation by keeping the hair in a low-manipulation style, reducing the risk of breakage and promoting hair health.
Protects against environmental factors
Curly hair is often sensitive to environmental factors such as heat, humidity, and pollution, which can lead to frizz, dryness, and damage. Protective hairstyles provide a barrier against these external factors, helping to maintain moisture and protect the hair from environmental damage.
Retains moisture and promotes hair health
Curly hair tends to be dry due to its structure, and retaining moisture is crucial for maintaining healthy curls. Protective hairstyles help lock in moisture by reducing moisture loss through the ends of the hair, keeping the curls hydrated and promoting overall hair health.
Reduces tangling and knotting
Curly hair is prone to tangling and knotting, which can lead to breakage and damage. Protective hairstyles help minimize tangling and knotting by keeping the hair in a low-manipulation style, reducing the risk of tangles and knots forming.
Promotes length retention
Length retention is a common goal for many curly-haired individuals. Protective hairstyles can help promote length retention by minimizing breakage, tangling, and other forms of damage, allowing the hair to grow longer and healthier.
Popular Protective Hairstyles for Curly Hair
There are various protective hairstyles that are popular among curly-haired individuals. Here are some of the most commonly used protective hairstyles for curly hair:
Box Braids
Box braids are a classic protective hairstyle that involves sectioning the hair into small square or rectangular sections and braiding them from the roots to the ends. Box braids are versatile and can be styled in different ways, such as updos, buns, or left down.

Twists
Twists are another popular protective hairstyle for curly hair that involves twisting small sections of hair, typically in a two-strand or flat twist pattern. Twists can be worn as is, or styled into updos, buns, or other creative styles.
Bantu Knots
Bantu knots are a stylish protective hairstyle that involves twisting small sections of hair into knots close to the scalp. Bantu knots can be worn as a standalone style or unraveled for a beautiful twist-out or curl pattern.
Cornrows
Cornrows are a traditional protective hairstyle that involves braiding the hair close to the scalp in straight or curved lines. Cornrows can be worn as is or styled into different patterns, and they are a great option for those who prefer a more low-maintenance protective style.

Crochet Braids
Crochet braids are a popular protective hairstyle that involves attaching extensions to the hair using a crochet hook. Crochet braids come in various styles, such as curls, twists, or braids, and offer versatility and creativity in styling options.
Wigs and Weaves
Wigs and weaves are versatile protective hairstyles that involve wearing a wig or hair extensions to protect the natural hair underneath. Wigs and weaves come in different styles, lengths, and textures, allowing for endless styling possibilities.
How To Plop Curly Hair?
Plopping is a popular method for drying curly hair without disrupting the natural curl pattern. To plop curly hair, follow these steps:
- Start with freshly washed and conditioned hair. Apply your favorite leave-in conditioner or curl-enhancing product to damp hair.
- Lay a clean, microfiber towel or a cotton t-shirt on a flat surface. Flip your hair forward and gently lower your curls onto the towel or t-shirt, with your curls nestled in the center.
- Use the sides of the towel or t-shirt to gather the ends of the fabric together, forming a loose bun on top of your head.
- Secure the ends of the towel or t-shirt with a hair tie or clip, leaving the curls bundled up in the fabric for about 20-30 minutes.
- After the plopping time is up, carefully release your hair from the towel or t-shirt. Style your curls as desired, avoiding excessive touching or manipulation to maintain the natural curl pattern.
What’s The Difference Between Hair Plopping And Using A Twisted Towel?
Both hair plopping and using a twisted towel are methods for drying curly hair without causing frizz or disrupting the natural curl pattern. However, there are some differences between the two methods:
- Plopping: Plopping involves using a clean, microfiber towel or cotton t-shirt to bundle the curls on top of the head, creating a loose bun. The fabric is secured with a hair tie or clip, and the curls are left to dry for a short period of time, typically 20-30 minutes.
- Twisted Towel: Using a twisted towel involves using a regular bath towel, twisting it around the hair, and securing it with a hair tie or clip to create a turban-like shape. The towel is left on the hair for a longer period of time, usually overnight or for several hours, to allow the towel to absorb excess moisture from the hair.
The main difference between the two methods is the duration of time the curls are left bundled in the fabric. Plopping is a quicker method that allows for a faster drying time, while using a twisted towel is a longer-term method that can be done overnight or for extended periods of time.
Protective Hairstyles For Curly Hair: How To Sleep With Curly Hair
Sleeping with curly hair can be a challenge, as tossing and turning during the night can cause friction, resulting in frizz and breakage. Here are some tips for sleeping with curly hair and maintaining your protective hairstyle:
Pineapple Method
Gather your curls on top of your head and secure them with a soft, fabric-covered hair tie, creating a loose pineapple-like shape. This helps to protect the curls from being flattened or crushed while you sleep.
Satin Pillowcase or Bonnet
Swap your cotton pillowcase for a satin or silk pillowcase, or use a satin/silk bonnet or scarf to cover your hair while you sleep. Satin/silk materials reduce friction, helping to minimize frizz and breakage.
Loose Updo or Braids
If you prefer to keep your curls contained, you can try loosely braiding your hair or creating a loose updo before bedtime. Avoid tight hairstyles that can cause tension on the hair, leading to breakage.
Refresh With Water or Refreshing Spray
In the morning, you can refresh your curls by misting them with water or a refreshing spray and gently scrunching them to revive their shape.
Remember to use gentle hair care practices and avoid excessive manipulation or friction while you sleep to maintain the integrity of your protective hairstyle and keep your curly hair healthy and protected.
How to Install and Maintain Protective Hairstyles
Installing and maintaining protective hairstyles properly is crucial to ensure their effectiveness in protecting curly hair. Here are some steps to follow:
- Prepare the hair: Before installing a protective hairstyle, it’s important to properly cleanse and condition the hair. This helps to remove any buildup, detangle the hair, and prepare it for the protective style.
- Moisturize the hair: Curly hair needs moisture to thrive, so it’s essential to moisturize the hair before installing a protective style. Apply a water-based leave-in conditioner or moisturizer to keep the hair hydrated and prevent dryness.
- Be gentle during installation: When installing a protective hairstyle, it’s important to be gentle to avoid causing breakage or damage. Avoid pulling or tugging on the hair too tightly, as this can lead to tension and breakage.
- Protect the edges: The edges of the hair, also known as the baby hairs or hairline, are delicate and prone to breakage. When installing a protective hairstyle, be sure to protect the edges by not pulling or braiding them too tightly.
- Sleep with a satin or silk scarf or pillowcase: Sleeping with a satin or silk scarf or pillowcase helps to reduce friction and protect the hair from breakage while sleeping. Satin or silk materials are smoother and gentler on the hair, reducing the risk of tangles and knots.
- Keep the scalp clean: It’s important to maintain a clean and healthy scalp while wearing a protective hairstyle. Use a scalp-friendly cleanser or witch hazel to cleanse the scalp and remove any buildup or excess oil.
- Moisturize the hair and scalp regularly: Even with a protective hairstyle, it’s important to moisturize the hair and scalp regularly to prevent dryness and maintain hair health. Use a lightweight moisturizer or oil to keep the hair and scalp hydrated.
Styling Tips for Protective Hairstyles
Protective hairstyles can be versatile and creative, allowing for various styling options. Here are some styling tips to keep in mind:
- Use lightweight products: When styling a protective hairstyle, avoid using heavy products that can weigh down the hair or cause buildup. Opt for lightweight products, such as oils or creams, that won’t leave the hair greasy or weighed down.
- Experiment with different accessories: Protective hairstyles offer endless possibilities for accessorizing. Try adding headbands, scarves, or hairpins to enhance the style and make it uniquely yours.
- Change up the parting: Changing the parting of your protective hairstyle can create a completely different look. Experiment with middle parts, side parts, or diagonal parts to switch up your style.
- Try different updo styles: Protective hairstyles can be styled into various updo styles, such as buns, twists, or braids. Get creative with different updo styles to add variety to your protective hairstyle and keep it fresh.
- Add color or highlights: If you’re feeling adventurous, consider adding some color or highlights to your protective hairstyle. You can use temporary hair color sprays or try clip-in extensions to add pops of color or highlights without permanently altering your natural hair.
- Keep it moisturized: Even while wearing a protective hairstyle, it’s important to keep the hair and scalp moisturized. Use a lightweight moisturizer or oil to hydrate the hair and scalp, especially focusing on the ends and any exposed hair.
- Avoid excessive manipulation: Protective hairstyles are meant to minimize manipulation and stress on the hair, so avoid excessive touching, combing, or brushing of the hair. This can lead to breakage and frizz, defeating the purpose of the protective style.
Benefits of Protective Hairstyles for Curly Hair
Protective hairstyles offer numerous benefits for curly hair, making them a popular choice for many individuals. Here are some of the advantages of wearing protective hairstyles:
Reduced manipulation and breakage
Protective hairstyles minimize the manipulation and stress on the hair, reducing the risk of breakage and damage. This allows the hair to grow and retain length, promoting overall hair health.
Protection from environmental factors
Curly hair is often more susceptible to damage from environmental factors such as heat, humidity, and harsh weather conditions. Protective hairstyles provide a barrier against these factors, helping to keep the hair protected and healthy.
Versatility in styling: Protective hairstyles offer versatility in styling options, allowing for creativity and expression. From twists to braids to updos, there are endless possibilities for styling protective hairstyles to suit your personal style and preference.
Retained moisture
Curly hair tends to be dry and prone to moisture loss. Protective hairstyles help to retain moisture in the hair by sealing in the natural oils and preventing excessive moisture evaporation. This can result in softer, more moisturized hair.
Low maintenance
Many protective hairstyles are low maintenance, requiring minimal daily styling or manipulation. This can save time and effort in your hair care routine, making them a convenient option for those with busy lifestyles.
Reduced tangles and knots
Curly hair is prone to tangles and knots, which can lead to breakage and damage. Protective hairstyles help to reduce tangles and knots by keeping the hair in a contained and organized state, minimizing the risk of breakage.
Styling versatility
Protective hairstyles offer the option to change up your look without permanently altering your natural hair. You can experiment with different styles, lengths, and colors without committing to a long-term change.
Here’s a table outlining the top tips for safely managing curly hair
| Tips for Safe Curly Hair |
|---|
| 1. Moisturize regularly with a curly hair-friendly conditioner |
| 2. Use a wide-toothed comb or fingers to detangle gently while hair is wet and coated with conditioner |
| 3. Avoid using heat styling tools frequently or at high temperatures |
| 4. Use a diffuser when blow-drying to minimize heat damage and maintain curl pattern |
| 5. Limit or avoid the use of harsh chemicals such as sulfates, silicones, and alcohol in hair products |
| 6. Sleep on a satin or silk pillowcase or wear a satin/silk bonnet or scarf to reduce friction and minimize frizz |
| 7. Avoid tight hairstyles that cause tension and breakage, and opt for protective hairstyles like braids or updos |
| 8. Deep condition regularly to keep hair hydrated and nourished |
| 9. Be gentle when styling or manipulating curly hair to prevent breakage |
| 10. Trim regularly to prevent split ends and promote healthy hair growth |
FAQs
What is the most protective hairstyle for curly hair?
The most protective hairstyle for curly hair would be styles that keep the hair fully contained and minimize manipulation. Examples of such hairstyles include:
- Box braids: These are individual braids that are created by sectioning the hair into small boxes and braiding each section from the roots to the ends. Box braids provide excellent protection for curly hair as they keep the hair fully contained and minimize friction.
- Twists: Two-strand twists or mini twists are another great protective hairstyle for curly hair. They involve twisting two sections of hair together from the roots to the ends, which helps to keep the hair moisturized and protected from external factors.
- Updos: Updo styles like buns, twists, or braided updos can also be great protective hairstyles for curly hair. These styles keep the hair tucked away and protected, reducing manipulation and friction.
How to do protective hairstyles for curly hair?
Here are some general steps to follow when doing protective hairstyles for curly hair:
- Start with clean and well-moisturized hair: Wash your hair with a gentle shampoo and conditioner, and apply a leave-in conditioner or moisturizer to ensure your hair is hydrated.
- Section your hair: Divide your hair into small sections using clips or hairbands. This will make it easier to work on one section at a time and ensure that the hairstyle is evenly distributed.
- Choose your protective style: Select the protective hairstyle that you want to create, such as braids, twists, or an updo, based on your preference and hair type.
- Follow tutorials or seek professional help: If you’re new to protective styling, it’s best to follow tutorials or seek professional help to ensure that you’re using the right techniques and products for your hair type.
- Be gentle: Handle your hair with care to avoid excessive pulling, tugging, or tightness, which can cause breakage and damage. Use gentle motions and avoid using excessive heat or styling tools.
- Secure your style: Use hairbands, bobby pins, or other hair accessories to secure your protective style in place. Make sure that the style is comfortable and doesn’t cause any tension or discomfort on your scalp.
Read More About Should You Wear a Bra to Sleep?
Do braids protect curly hair?
Yes, braids can be a protective hairstyle for curly hair if done correctly. Braids help to keep the hair fully contained, reducing manipulation and friction, which can lead to breakage. Braids also provide a barrier against external factors such as heat, humidity, and harsh weather conditions, helping to protect the curly hair from damage.
However, it’s important to note that not all braids are protective for curly hair. Tight, small braids or braids that are done with excessive tension can cause tension alopecia and damage the hair. It’s essential to ensure that the braids are not too tight and are done with care to avoid any potential damage.
Read More About How Long Do Acrylic Nails Last?
What are damaging hairstyles for curly hair?
Some hairstyles that can be damaging to curly hair include:
- Tight ponytails or buns: Hairstyles that pull the hair tightly, such as high ponytails or buns, can cause tension and strain on the hair, leading to breakage and damage.
- Heat styling: Excessive use of heat styling tools, such as flat irons, curling irons, or blow dryers, can cause heat damage to curly hair. Heat can strip the hair of its natural moisture, leading to dryness, frizz, and breakage.
- Chemical treatments: Chemical treatments, such as relaxers, perms, or color treatments, can weaken the hair shaft and make it more prone to breakage and damage.
- Hairstyles with excessive manipulation: Hairstyles that require frequent combing, brushing, or manipulation of the hair, such as tight braiding, twisting, or constant styling, can also be damaging to curly hair. These hairstyles can cause friction, pulling, and tugging on the hair, leading to breakage and damage over time.
Read More About Makeup in the 70s.
Does curly hair damage easily?
Curly hair is generally more prone to damage compared to other hair types due to its unique structure. The natural curl pattern of curly hair makes it more susceptible to breakage and damage from external factors such as manipulation, friction, and weather conditions. Curly hair tends to be drier and more porous, which makes it more vulnerable to moisture loss, frizz, and breakage.
However, with proper care and protective hairstyles, curly hair can be safeguarded from damage. Regular moisturizing, gentle handling, and avoiding harsh hairstyles or styling tools can help to minimize damage and keep curly hair healthy and strong.
Read More About Hair and Makeup Trailers.
What is the least damaging hairstyle?
The least damaging hairstyle for curly hair is typically one that minimizes manipulation and friction on the hair. Here are some examples:
- Loose, natural hairstyles: Letting your curly hair flow naturally and loosely can be one of the least damaging hairstyles. Avoiding tight hairstyles or excessive manipulation allows the hair to move freely without causing breakage or damage.
- Low-manipulation hairstyles: Hairstyles that involve minimal manipulation, such as loose twists, loose braids, or loose updos, can also be less damaging to curly hair. These styles keep the hair contained without causing excessive tension or pulling on the hair shaft.
- Protective hairstyles: As discussed earlier, protective hairstyles such as box braids, twists, or updos can be beneficial for curly hair as they keep the hair fully contained and minimize manipulation, reducing the risk of damage.
Read More About Isolating Lashes.
Which hair type breaks the most?
Hair breakage can occur in all hair types, but certain hair types may be more prone to breakage than others. Fine, thin, or damaged hair tends to be more susceptible to breakage due to its fragile nature. Over-processed or chemically-treated hair is also more prone to breakage as the chemical treatments weaken the hair shaft.
However, it’s important to note that breakage can occur in any hair type, including curly hair. Curly hair is naturally more prone to breakage due to its unique structure and increased vulnerability to external factors. Therefore, it’s crucial to care for curly hair properly and use protective hairstyles to minimize the risk of breakage.
Read More About Powerlifting Weight Classes for Women: Everything You Need to Know.
Do braids damage curly hair?
Braids can potentially damage curly hair if done too tightly or with excessive tension. Tight braids can cause tension alopecia, which is a type of hair loss caused by constant pulling on the hair follicles. Tension alopecia can result in breakage, thinning, and damage to the hair.
To avoid damaging curly hair with braids, it’s essential to ensure that the braids are not too tight and are done with care. Choosing larger braids, avoiding excessive tension on the scalp, and using gentle techniques can help to minimize the risk of damage to curly hair.
Read More About Volume Lash vs. Classic Lash.
What is most damaging to hair?
Several factors can be damaging to hair, regardless of its type or texture. Some common damaging factors include:
- Excessive heat: Frequent use of heat styling tools, such as flat irons, curling irons, or blow dryers, can cause heat damage to the hair. Heat can strip the hair of its natural moisture, leading to dryness, frizz, and breakage.
- Harsh chemicals: Chemical treatments, such as relaxers, perms, or color treatments, can weaken the hair shaft and make it more prone to breakage and damage.
- Over-manipulation: Hairstyles that require frequent combing, brushing, or manipulation of the hair, such as tight ponytails, buns, or constant styling, can cause breakage and damage to the hair.
- Environmental factors: Exposure to environmental factors such as harsh sunlight, wind, pollution, and chlorine from swimming pools can also damage the hair, making it dry, brittle, and prone to breakage.
- Poor hair care practices: Using harsh hair care products, rough towel-drying, aggressive brushing, or excessive shampooing can also damage the hair, stripping it of its natural oils and causing breakage.
Read More About Does Acrylic Nails Hurt?
Conclusion
In conclusion, protective hairstyles are a great option for individuals with curly hair who want to protect their hair from damage while maintaining versatility in styling. From braids to twists to wigs, there are various options to choose from depending on your preference and lifestyle. By properly installing and maintaining protective hairstyles, you can enjoy the benefits of reduced manipulation, protection from environmental factors, retained moisture, and versatility in styling. So, embrace the beauty of your curly hair and rock those stunning protective hairstyles!


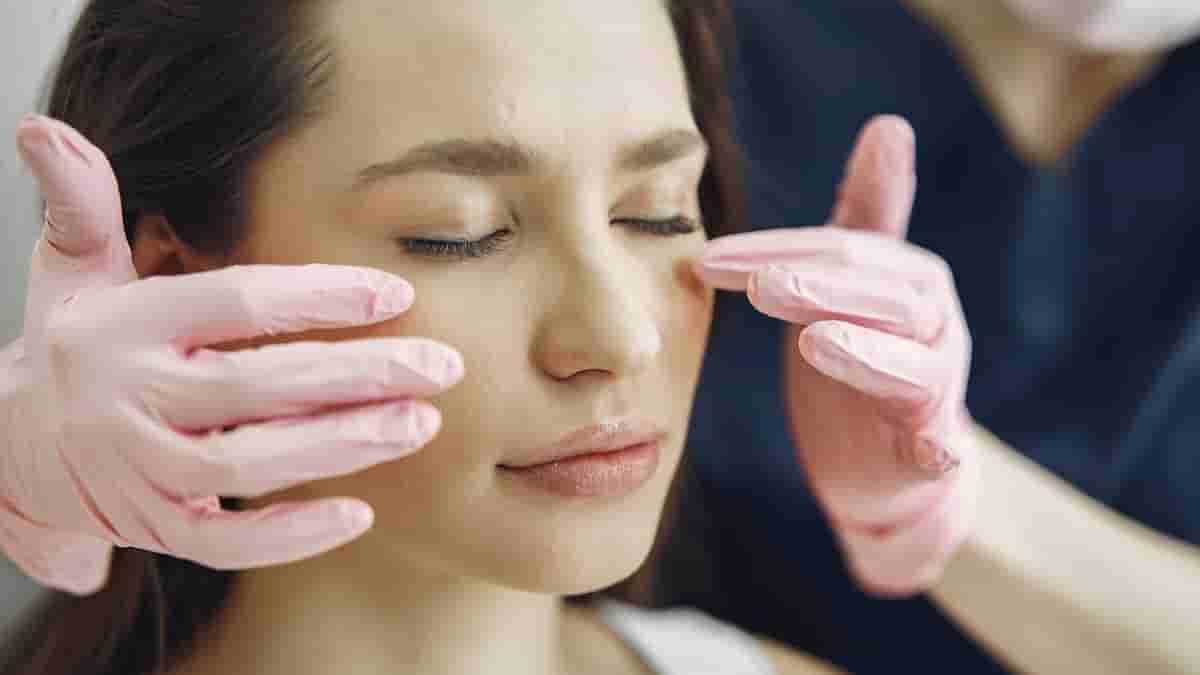
Here is your complete guide to jelly roll botox
Introduction to Jelly Roll Botox
In the world of cosmetic enhancements, jelly roll botox has emerged as a popular solution for addressing the pesky appearance of lumps and bumps in certain areas of the body. This innovative treatment offers a non-invasive way to smooth out uneven contours and enhance one’s overall appearance. Let’s delve into the details of jelly roll botox, from what it is to how it works, its benefits, potential risks, and more.
Jelly roll botox is a specialized cosmetic procedure designed to target and improve the appearance of jelly roll, a common concern for many individuals seeking to enhance their body contours. This treatment involves the strategic use of Botox injections to smooth out the lumpy or uneven areas, providing a more streamlined and toned look.
Understanding Jelly Roll Appearance
- Definition: Jelly roll refers to the appearance of uneven, lumpy contours in areas such as the abdomen, thighs, or buttocks.
- Causes: Factors like weight fluctuations, aging, and skin laxity can contribute to the development of jelly roll.
- Impact: The presence of jelly roll can affect one’s self-esteem and confidence, making it a concern for those seeking aesthetic improvements.
The Science Behind Jelly Roll Botox
Understanding the Mechanism of Action
Jelly roll Botox involves the strategic use of botulinum toxin injections to target specific muscles responsible for the appearance of under-eye puffiness. By precisely injecting Botox into the overactive muscles, the treatment aims to relax these muscles, thereby reducing the bulges or “jelly rolls” that form under the eyes when smiling or squinting.
Neuromodulator Effects on Muscle Activity
Botulinum toxin, commonly known as Botox, acts as a neuromodulator by blocking the release of acetylcholine, a neurotransmitter that signals muscle contractions. In the case of jelly roll Botox, the toxin temporarily inhibits the activity of the orbicularis oculi muscle, which is often overactive and contributes to the formation of under-eye puffiness.
Precision and Dosage Considerations
Achieving optimal results with jelly Botox requires precision in injection placement and dosage. Injectors must carefully target the specific muscles involved in creating the jelly roll effect while ensuring that the dosage is sufficient to relax the muscle without causing over-relaxation, which could lead to unintended side effects like swelling.
Longevity and Maintenance
The effects of jelly Botox typically last for 3-6 months, after which touch-up appointments may be necessary to maintain the results. The longevity of the treatment depends on various factors, including individual metabolism, muscle activity, and lifestyle habits. Regular maintenance sessions can help sustain the smooth and youthful appearance of the under-eye area.
Safety and Efficacy
When administered by qualified and experienced providers, jelly Botox is considered a safe and effective treatment for addressing under-eye puffiness. Providers must adhere to proper injection techniques and dosage guidelines to minimize the risk of adverse effects and ensure optimal outcomes for patients seeking to enhance their under-eye contours.
Jelly Roll Botox: The Procedure Explained
To address jelly roll, jelly botox utilizes the muscle-relaxing properties of Botox injections to smooth out the affected areas. Here’s a breakdown of the procedure:
- Consultation: A thorough consultation with a qualified provider to assess the individual’s concerns and goals.
- Treatment: Precise injections of Botox into targeted areas to relax the underlying muscles causing the lumps.
- Results: Over the following days and weeks, the treated area gradually smooths out, providing a more toned appearance.
- Maintenance: Periodic touch-up treatments may be recommended to sustain the results.
Advantages of Jelly Botox
- Smoothing and tightening of the jelly roll area for a more contoured look.
- Improved body confidence and self-image.
- Long-lasting results with proper maintenance.
- Comparatively less invasive than surgical options.
Potential Risks and Considerations
While jelly botox is generally considered safe, it’s essential to be aware of potential risks and considerations:
- Common side effects such as temporary redness or bruising at the injection site.
- Choosing a qualified and experienced provider is crucial for optimal results.
- Individual factors like skin type and lifestyle habits can influence the outcome.
Aftercare and Maintenance
Proper aftercare following jelly botox treatment is essential for optimal results:
- Avoiding strenuous activities immediately after treatment.
- Following any specific post-treatment instructions provided by the provider.
- Maintaining a healthy lifestyle to prolong the effects of the treatment.
Cost of Jelly Botox
| Clinic | Cost (USD) |
|---|---|
| Facefull Aesthetics | $150 |
| Sarasin Clinic | From $60 |
| The MW Clinic London | $295 |
| Glow Theory | Varies |
Comparison of Jelly Botox with Other Treatments
| Treatment | Cost Range (USD) | Duration of Results | Main Benefits |
|---|---|---|---|
| Jelly Roll Botox | $60 – $150 | 3-4 months | Smoothing under-eye wrinkles and fine lines |
| Chin Botox | $150 | 3-4 months | Enhancing chin contour and definition |
| Forehead Botox | $200 | 3-4 months | Smoothing forehead lines and wrinkles |
| Lip Filler | $120 – $220 | 6-12 months | Enhancing lip volume and definition |
| Cheek Filler | $300 – $400 | 12-18 months | Adding volume and contour to the cheeks |
Read Also: Black Facial Peel Mask.
FAQs
How long does jelly roll Botox last?
The duration of jelly botox results can vary but typically lasts several months before touch-up treatments may be needed.
Read Also: Partial Veneers Before and After.
Is jelly roll Botox painful?
Discomfort during the procedure is minimal, with some individuals experiencing mild discomfort at the injection sites.
Read Also: Hunter Green Gel Nail Polish.
Can jelly roll Botox be combined with other treatments?
Combining jelly botox with other complementary treatments may be possible, depending on individual goals and provider recommendations.
Read Also: Water Activated Eyeshadow.
How much does jelly roll Botox cost?
The cost of jelly botox can vary based on factors like the provider’s expertise, location, and the extent of treatment needed.
Read Also: Korean Hyaluronic Serum.
Who is a good candidate for jelly roll Botox?
Ideal candidates for jelly botox are individuals looking to address specific areas of jelly roll and improve their body contours without undergoing surgery.
Read Also: Pull Ups While Pregnant.
Conclusion
In conclusion, jelly roll botox offers a promising solution for those seeking to smooth out lumps and bumps in various body areas. With its non-invasive nature, long-lasting results, and minimal downtime, this treatment can be a game-changer for individuals looking to enhance their body contours and boost their confidence. If you’re considering jelly botox, consult with a qualified provider to explore how this innovative treatment can help you achieve your aesthetic goals.
Read Also: Olive Green Dip Nails.

Here is your complete guide to olive green dip nails
Introduction to Olive Green Dip Nails
In the ever-evolving world of nail care, olive green dip nails have emerged as a captivating trend that has captured the hearts of beauty enthusiasts worldwide. These versatile and long-lasting nail enhancements not only add a touch of elegance to your hands but also provide a healthier alternative to traditional nail polish.
Olive green dip nails offer a unique blend of strength, durability, and a stunning color palette that can complement a wide range of personal styles. Whether you’re a seasoned nail aficionado or just starting to explore the world of nail art, this comprehensive guide will take you on a journey to discover the benefits, application process, and maintenance tips for achieving the perfect olive green dip nails.
The Benefits of Olive Green Dip Nails
Olive green dip nails offer a multitude of advantages that make them a popular choice among nail enthusiasts. Let’s delve into the key benefits:
- Long-Lasting Color: The dipping powder used in olive green dip nails provides a vibrant and long-lasting color that can withstand the wear and tear of everyday life. Unlike traditional nail polish, which can chip and fade over time, olive green dip nails maintain their rich hue for weeks, allowing you to enjoy your manicure for an extended period.
- Nail Strengthening: The dipping powder used in olive green dip nails contains a blend of natural ingredients that help strengthen and fortify your nails. This can be particularly beneficial for those with weak, brittle, or damaged nails, as the dip powder helps to reinforce and protect the nail bed.
- Variety of Shades: The olive green color palette offers a wide range of shades, from deep, earthy tones to lighter, more vibrant hues. This versatility allows you to experiment with different shades and find the perfect match for your personal style and skin tone.
- Healthier Alternative: Olive green dip nails are generally considered a healthier alternative to traditional nail polish, as they do not contain the harsh chemicals often found in conventional nail products. This makes them a more gentle and nourishing option for your nails.
Importance of Choosing the Right Color
When it comes to nail fashion, color plays a pivotal role in expressing one’s personality and style. Olive green, with its earthy tones and timeless appeal, exudes elegance and sophistication. Choosing the right shade of olive green for your dip nails can elevate your look and make a lasting impression.
Achieving Olive Green Dip Nails
Mastering the art of olive green nails is a straightforward process that can be done at home or in a professional salon. Here’s a step-by-step guide to help you achieve the perfect manicure:
Required Materials and Tools
- Olive green dipping powder
- Nail primer
- Activator
- Buffer and file
- Cuticle pusher
- Topcoat (optional)
Step-by-Step Application
- Prepare Your Nails: Begin by filing and shaping your nails to your desired length and shape. Gently push back your cuticles and ensure your nails are clean and free of any oils or residue.
- Apply Nail Primer: Brush on a thin layer of nail primer to the surface of your nails, ensuring even coverage. This step helps to create a strong bond between your nails and the dipping powder.
- Dip Your Nails: Dip your nails into the olive green dipping powder, one at a time, until the desired coverage is achieved. Gently tap off any excess powder.
- Activate the Powder: Use the activator solution to seal the dipping powder onto your nails. Apply a thin layer, ensuring it covers the entire nail surface.
- File and Buff: Use a buffer to smooth out the surface of your olive green nails, removing any uneven edges or bumps.
- Topcoat (Optional): For an extra glossy finish, you can apply a clear topcoat over your olive green nails. This step is optional and depends on your personal preference.
- Repeat as Needed: Depending on the desired thickness and coverage, you may need to repeat the dipping and activating process until you achieve your desired look.
Maintenance and Care
Proper maintenance is key to ensuring your olive green nails last as long as possible. Here are some tips to keep your nails looking their best:
- Avoid Water Exposure: Try to limit the amount of time your olive green nails are exposed to water, as prolonged exposure can cause the powder to lift or become discolored.
- Use Cuticle Oil: Regularly applying cuticle oil to the skin around your nails can help keep them hydrated and prevent dryness.
- Avoid Harsh Chemicals: Steer clear of harsh chemicals, such as those found in cleaning products, that can potentially damage your olive green nails.
- Schedule Regular Fills: To maintain the longevity of your olive green nails, schedule regular fill-in appointments every 2-3 weeks, depending on your nail growth.
- Proper Removal: When it’s time to remove your olive green nails, it’s essential to follow the correct removal process to avoid damaging your natural nails.
Olive Green Dip Nails Inspiration
Unleash your creativity and explore the endless possibilities of olive green dip nails with these inspiring designs and styles:
Trending Designs
- Minimalist olive green with a matte finish
- Ombre olive green nails transitioning to a lighter shade
- Olive green with gold or silver accent nails
- Olive green nails with intricate nail art designs
Seasonal Variations
- Olive green nails with a touch of glitter for the holidays
- Olive green nails paired with warm, earthy tones for fall
- Olive green nails with a fresh, pastel twist for spring
- Olive green dip nails complemented by bright, vibrant shades for summer
Celebrity Inspiration
- Rihanna’s olive green nails with a sleek, modern twist
- Zendaya’s olive green nails with a subtle, natural look
- Beyoncé’s olive green nails accentuated by intricate nail art
Top 10 Olive Green Dip Nails Products
Elevate your nail game with these top-rated olive green nails products:
| Product | Description | Price |
|---|---|---|
| Kiara Sky Dip Powder – Olive Green | A high-quality dipping powder in a rich olive green shade. | $12.99 |
| SNS Nails Dipping Powder – Olive Leaf | A long-lasting olive green dipping powder with a natural finish. | $15.99 |
| Revel Nail Dip Powder – Olive Branch | A versatile olive green dip powder that can be used for various nail designs. | $14.99 |
| DipWell Dip Powder – Olive You | A creamy olive green dip powder with a smooth application. | $11.99 |
| Modelones Dip Powder – Olive Martini | A vibrant olive green dip powder with a subtle shimmer. | $13.99 |
| Nailboo Dip Powder – Olive You | A long-lasting olive green dip powder with a matte finish. | $16.99 |
| Beetles Dip Powder – Olive Leaf | A high-pigmented olive green dip powder for bold nail looks. | $12.99 |
| Makartt Dip Powder – Olive Grove | A versatile olive green dip powder that can be layered for depth. | $14.99 |
| Nailish Dip Powder – Olive Juice | A creamy olive green dip powder with a satin-like finish. | $15.99 |
| Gershion Dip Powder – Olive Blossom | A soft, pastel olive green dip powder for a delicate look. | $13.99 |
Emerging Olive Green Dip Nails Trends
As the beauty industry continues to evolve, olive green nails have become a captivating trend that showcases the versatility and creativity of nail art. Let’s explore some of the latest and most exciting developments in this space:
Innovative Techniques
- Ombre olive green nails: Transitioning from a deeper olive green at the cuticle to a lighter shade at the tip
- Negative space olive green nails: Incorporating a minimalist design with a portion of the nail left bare
- 3D olive green dip nail art: Incorporating dimensional elements, such as flowers or geometric shapes, into the dip nail design
Color Combinations
- Olive green nails paired with metallic accents (gold, silver, or bronze)
- Olive green nails combined with earthy, neutral tones for a natural, bohemian look
- Olive green nails contrasted with bright, vibrant colors for a bold, eye-catching statement
Sustainability and Eco-Friendly Alternatives
As consumers become more conscious of their environmental impact, the demand for eco-friendly nail care products has risen. Many brands are now offering olive green dip nail powders that are free from harsh chemicals, making them a more sustainable option for nail enthusiasts.
Olive Green Dip Nails vs. Other Nail Trends
In the ever-evolving world of nail care, olive green nails stand out as a unique and compelling option, offering distinct advantages over other popular nail trends. Let’s explore the key differences:
Gel Nails
- Gel nails provide a glossy, high-shine finish, while olive green nails offer a more matte, natural appearance.
- Gel nails require UV/LED light curing, while olive green nails can be applied without any special lighting.
- Gel nails are generally more prone to chipping and lifting, while olive green nails are known for their long-lasting wear.
Acrylic Nails
- Acrylic nails can be more damaging to the natural nail bed, while olive green nails are a gentler, more nourishing option.
- Acrylic nails require a more extensive application process, while olive green nails can be applied more quickly and easily.
- Acrylic nails can be more prone to lifting and separation, while olive green nails offer a more seamless and secure fit.
Traditional Nail Polish
- Traditional nail polish is more susceptible to chipping, fading, and peeling, while olive green nails maintain their vibrant color for weeks.
- Nail polish often requires multiple coats for full coverage, whereas olive green nails can achieve a uniform, opaque finish in fewer applications.
- Nail polish can be more drying and damaging to the natural nail, while olive green nails help to strengthen and protect the nail bed.
Comparison: Olive Green Dip Nails vs. Traditional Nail Polish
| Aspect | Olive Green Dip Nails | Traditional Nail Polish |
|---|---|---|
| Durability | Remarkably durable, lasting for two full weeks or more. Odor-free and less messy. | Tends to chip and fade over time, requiring more frequent touch-ups. |
| Application Process | Sealed with pigmented powder, no UV or LED lamps needed. | Lacquer refined to protect nails, quick and easy to apply. |
| Removal Process | Process needed for removal can be challenging. | Removal process involves using acetone solution. |
| Sanitation | Concerns about unsanitary practices during application and removal. | Generally more straightforward and hygienic application and removal process. |
| Maintenance | Requires specific removal process and after-care to avoid damage. | May require more frequent touch-ups due to chipping. |
Olive Green Dip Nails FAQs
What is the difference between olive green dip nails and traditional nail polish?
Olive green nails offer a longer-lasting and healthier alternative to traditional nail polish. The dipping powder used in dip nails helps to strengthen and protect the natural nail, while nail polish can be more prone to chipping and fading over time.
Read Also: Cheek filler before and after over 50.
How long do olive green dip nails typically last?
With proper care and maintenance, olive green nails can last anywhere from 2 to 4 weeks, depending on your nail growth and lifestyle.
Read Also: Black Facial Peel Mask.
Can olive green dip nails be removed at home?
While it is possible to remove olive green nails at home, it’s recommended to have them professionally removed to avoid damaging your natural nails.
Read Also: Partial Veneers Before and After.
Are olive green dip nails safe for my nails?
Yes, olive green nails are generally considered a safer and more nourishing option for your nails compared to traditional nail polish, as they do not contain harsh chemicals.
Read Also: Hunter Green Gel Nail Polish.
How do I maintain the appearance of my olive green dip nails?
To maintain the appearance of your olive green nails, it’s important to avoid excessive water exposure, use cuticle oil regularly, and schedule regular fill-in appointments every 2-3 weeks.
Read Also: Water Activated Eyeshadow.
Conclusion
In the captivating world of nail care, olive green dip nails have emerged as a standout trend that combines stunning aesthetics, long-lasting durability, and a healthier approach to nail enhancement. Whether you’re a seasoned nail enthusiast or just beginning to explore the world of nail art, this comprehensive guide has provided you with the knowledge and inspiration to elevate your nails with the timeless elegance of olive green nails.
Read Also: Pull Ups While Pregnant.
As you embark on your olive green dip nails journey, remember to embrace your creativity, experiment with different designs and techniques, and most importantly, have fun! Share your olive green nails experiences with us and inspire others to join in on this captivating nail trend.
Read Also: Korean Hyaluronic Serum.
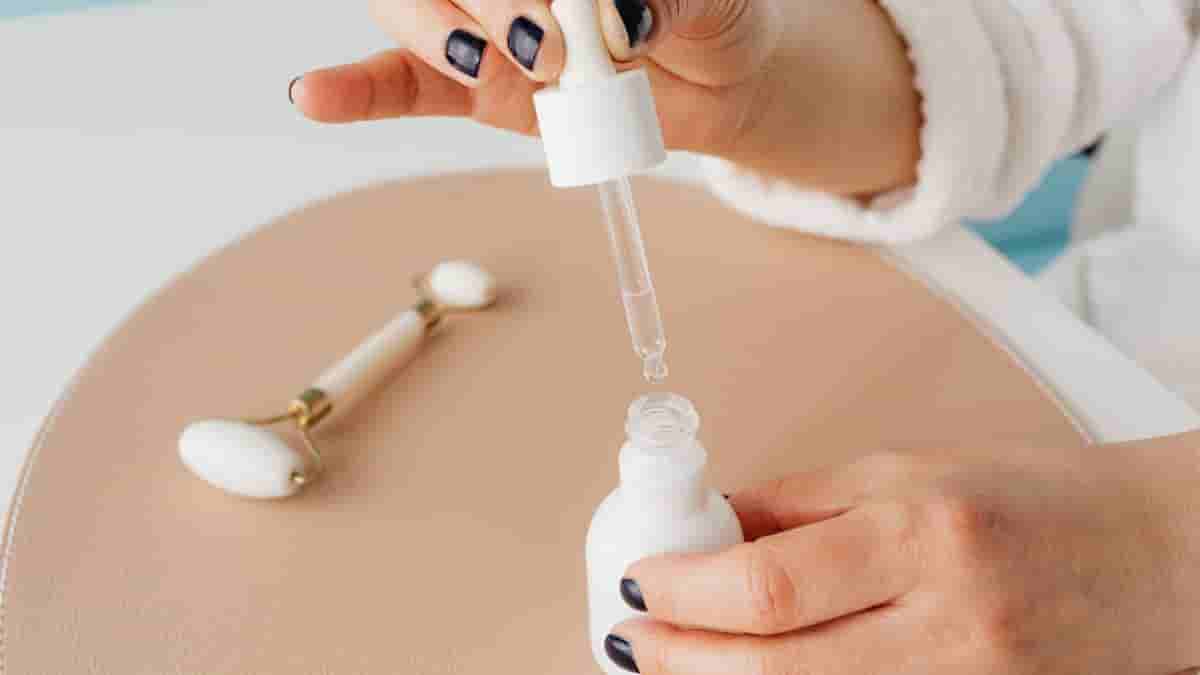
Here is your complete guide to korean hyaluronic serum
Introduction to Korean Hyaluronic Serum
In the ever-evolving world of skincare, Korean hyaluronic serum has emerged as a game-changer, captivating the attention of beauty enthusiasts worldwide. Harnessing the power of hyaluronic acid, these innovative serums have become a staple in the routines of those seeking radiant, youthful-looking skin.
Hyaluronic acid is a naturally occurring substance in the human body, responsible for maintaining skin hydration and elasticity. Korean skincare products, renowned for their cutting-edge formulations and effective results, have taken this ingredient to new heights, creating serums that deliver unparalleled skin benefits.
In this comprehensive guide, we’ll delve into the world of Korean hyaluronic serum, exploring its key features, the top products on the market, and how to incorporate it into your skincare routine for optimal results. Whether you’re a seasoned skincare aficionado or just starting your journey, this article will equip you with the knowledge to make an informed decision and achieve the glowing, hydrated skin you’ve been craving.
What is Hyaluronic Acid?
Hyaluronic acid is a remarkable molecule that plays a crucial role in skin health and hydration. It is a naturally occurring polysaccharide found in the human body, primarily in the skin, joints, and connective tissues.
This versatile ingredient has the remarkable ability to attract and retain water, making it an essential component for maintaining skin’s moisture levels. Hyaluronic acid acts as a powerful humectant, drawing water into the skin and preventing it from evaporating, resulting in a plump, dewy, and youthful-looking complexion.
In addition to its hydrating properties, hyaluronic acid also contributes to the skin’s overall health and appearance. It helps to:
- Reduce the appearance of fine lines and wrinkles: By plumping and smoothing the skin, hyaluronic acid can diminish the visible signs of aging.
- Improve skin elasticity: This ingredient helps to maintain the skin’s structural integrity, keeping it supple and firm.
- Soothe and calm irritated skin: Hyaluronic acid has anti-inflammatory properties, making it beneficial for those with sensitive or compromised skin barriers.
- Enhance skin barrier function: By locking in moisture, hyaluronic acid strengthens the skin’s protective barrier, preventing water loss and environmental stressors.
Why Choose Korean Hyaluronic Serum?
The Korean skincare industry has long been renowned for its innovative and effective formulations, and Korean hyaluronic serums are no exception. These serums offer a unique and compelling proposition for those seeking to elevate their skincare routine.
Unique Formulations
Korean hyaluronic serums often feature a blend of high-quality, skin-nourishing ingredients that go beyond just hyaluronic acid. Many of these serums incorporate additional active components, such as:
- Vitamin C for brightening and antioxidant protection
- Niacinamide for evening out skin tone and minimizing pores
- Peptides for firming and anti-aging benefits
- Botanical extracts for soothing and calming the skin
This synergistic combination of ingredients allows Korean hyaluronic serums to deliver a comprehensive approach to skin hydration and overall skin health.
Potent Hyaluronic Acid Concentrations
One of the standout features of Korean hyaluronic serums is their high concentration of hyaluronic acid. Many of these formulations contain a blend of different molecular weights of hyaluronic acid, allowing for deeper penetration and more effective hydration at multiple skin levels.
Innovative Delivery Systems
Korean skincare brands are known for their cutting-edge delivery systems, and Korean hyaluronic serums are no exception. Some serums utilize advanced technologies, such as liposomal encapsulation or time-release mechanisms, to ensure optimal absorption and prolonged hydration.
Gentle and Suitable for All Skin Types
Korean hyaluronic serums are typically formulated with a focus on gentle, non-irritating ingredients, making them suitable for a wide range of skin types, including sensitive and acne-prone complexions.
Proven Efficacy and User Testimonials
The popularity and success of Korean hyaluronic serums are further bolstered by the overwhelmingly positive reviews and testimonials from users who have experienced the transformative effects of these products on their skin.
Top 10 Korean Hyaluronic Serums
To help you navigate the vast array of Korean hyaluronic serums available, we’ve compiled a list of the top 10 products that have garnered praise from skincare enthusiasts and industry experts alike.
1. COSRX Advanced Snail 96 Mucin Power Essence
Key Ingredients: Snail Secretion Filtrate, Hyaluronic Acid
Benefits: Hydration, Skin Barrier Repair, Brightening
2. Missha Time Revolution The First Treatment Essence
Key Ingredients: Fermented Yeast Extract, Hyaluronic Acid
Benefits: Hydration, Radiance, Pore Refinement
3. Innisfree Jeju Volcanic Color Clay Mask
Key Ingredients: Volcanic Rock Mineral, Hyaluronic Acid
Benefits: Detoxification, Pore Cleansing, Hydration
4. The Face Shop Rice Water Bright Cleansing Foam
Key Ingredients: Rice Water, Hyaluronic Acid
Benefits: Gentle Cleansing, Hydration, Brightening
5. Etude House Soon Jung pH 6.0 Relief Toner
Key Ingredients: Panthenol, Hyaluronic Acid
Benefits: Soothing, Hydration, Calming
6. Laneige Water Bank Hydro Essence
Key Ingredients: Mineral Water, Hyaluronic Acid
Benefits: Intense Hydration, Plumping, Radiance
7. Skin Food Black Sugar Mask Wash Off
Key Ingredients: Black Sugar, Hyaluronic Acid
Benefits: Exfoliation, Hydration, Brightening
8. Tony Moly Chok Chok Green Tea Watery Cream
Key Ingredients: Green Tea, Hyaluronic Acid
Benefits: Hydration, Nourishment, Soothing
9. Sulwhasoo Concentrated Ginseng Renewing Serum
Key Ingredients: Korean Red Ginseng, Hyaluronic Acid
Benefits: Anti-Aging, Firming, Radiance
10. Innisfree Jeju Volcanic Color Clay Mask
Key Ingredients: Volcanic Rock Mineral, Hyaluronic Acid
Benefits: Detoxification, Pore Cleansing, Hydration
How to Use Korean Hyaluronic Serum
Incorporating Korean hyaluronic serum into your skincare routine is a straightforward process that can yield remarkable results. Here’s a step-by-step guide to help you maximize the benefits of this transformative product:
- Cleanse your face: Begin by thoroughly cleansing your skin to remove any impurities, makeup, or excess oil. This will ensure that your skin is primed and ready to absorb the serum.
- Apply the serum: Dispense a small amount of the Korean hyaluronic serum onto your fingertips and gently pat it into your skin, focusing on areas that need extra hydration, such as the cheeks, forehead, and under-eye area.
- Massage the serum: Gently massage the serum into your skin using upward and outward motions. This will help to improve absorption and ensure even distribution.
- Follow with other skincare products: After applying the Korean hyaluronic serum, you can proceed with the rest of your skincare routine, such as using a moisturizer, eye cream, or facial oil.
- Use the serum consistently: For best results, incorporate the Korean hyaluronic serum into your daily skincare routine, both morning and evening. Consistency is key to achieving the desired hydration and skin benefits.
- Adjust usage as needed: If you have particularly dry or dehydrated skin, you may want to use the Korean hyaluronic serum more frequently or apply a thicker layer. Conversely, if you have oily or combination skin, you may want to use a lighter application.
Remember, the key to unlocking the full potential of Korean hyaluronic serum is to listen to your skin’s needs and adjust your usage accordingly. With regular and proper application, you’ll be well on your way to achieving the radiant, hydrated complexion you’ve been craving.
Ingredients to Look for in Korean Hyaluronic Serums
When selecting a Korean hyaluronic serum, it’s important to be mindful of the ingredients that make these products so effective. Here are some of the key components to look for:
Hyaluronic Acid
The star ingredient in Korean hyaluronic serums, hyaluronic acid, comes in various molecular weights to ensure deep penetration and long-lasting hydration.
Botanical Extracts
Many Korean hyaluronic serums incorporate soothing and nourishing botanical extracts, such as green tea, centella, and cica, to provide additional skin benefits.
Antioxidants
Ingredients like vitamin C, vitamin E, and ferulic acid can help to protect the skin from environmental stressors and free radical damage.
Peptides
Peptides, such as palmitoyl tripeptide-1 and palmitoyl tetrapeptide-7, can help to improve skin elasticity and reduce the appearance of fine lines and wrinkles.
Ceramides
Ceramides are essential for maintaining the skin’s protective barrier, and their inclusion in Korean hyaluronic serums can help to lock in moisture and prevent water loss.By familiarizing yourself with these key ingredients, you can make an informed decision when selecting the Korean hyaluronic serum that best suits your skin’s needs.
Comparison Table of Top 10 Korean Hyaluronic Serums
| Serum Name | Key Ingredients | Benefits | Price Range |
|---|---|---|---|
| Torriden Dive-In Serum | Panthenol, Hyaluronic Acid | Skin rejuvenation, Moisturization | $30-$40 |
| Huxley Secret of Sahara Grab Water Essence | Cactus Extract, Hyaluronic Acid | Hydration, Nourishment | $35-$45 |
| Korea Devilkin Hyaluronic Acid 90% Peptides Water-Locking Ampoule | Hyaluronic Acid, Peptides | Skin hydration, Anti-aging | $40-$50 |
| COSRX Propolis Ampoule | Propolis Extract, Hyaluronic Acid | Skin repair, Nourishment | $25-$35 |
| CNP Laboratory Propolis Energy Ampule Serum | Propolis Extract, Hyaluronic Acid | Energy boost, Skin revitalization | $30-$40 |
| Beplain Multi Hyaluronic Acid Ampoule | Hyaluronic Acid, Agave Tequilana Leaf Extract | Intense hydration, Moisture lock | $35-$45 |
| Sulwhasoo First Care Activating Serum | Ginseng Extract, Hyaluronic Acid | Skin activation, Radiance | $50-$60 |
| SkinCeuticals Hyaluronic Acid Intensifier | Licorice Root Extract, Hyaluronic Acid | Skin elasticity, Wrinkle reduction | $70-$80 |
| Jumiso Waterfull Hyaluronic Acid Serum | Hyaluronic Acid, Vitamin E | Hydration, Antioxidant protection | $25-$35 |
| Ample:N Ceramide Shot Ampoule | Ceramides, Hyaluronic Acid | Skin barrier repair, Nourishment | $40-$50 |
FAQs about Korean Hyaluronic Serum
What are the benefits of using a Korean hyaluronic serum?
Korean hyaluronic serums offer a range of benefits for the skin, including:
- Intense hydration and plumping
- Reduced appearance of fine lines and wrinkles
- Improved skin elasticity and firmness
- Soothing and calming effects for sensitive skin
- Brightening and evening out of skin tone
- Enhanced skin barrier function and protection
Read Also: What Massage Oils Are Best.
How often should I use a Korean hyaluronic serum?
For best results, it’s recommended to use a Korean hyaluronic serum twice a day, once in the morning and once in the evening, as part of your skincare routine. However, you can adjust the frequency based on your skin’s individual needs and preferences.
Read Also: Gua Sha Oil.
Can Korean hyaluronic serum be used on all skin types?
Yes, Korean hyaluronic serums are generally suitable for all skin types, including sensitive, acne-prone, and mature skin. The gentle, non-irritating formulations make them a versatile choice for a wide range of complexions.
Read Also: Cheek filler before and after over 50.
How long does it take to see results from using a Korean hyaluronic serum?
The results from using a Korean hyaluronic serum can vary, but most users report seeing improvements in skin hydration and plumpness within the first few weeks of consistent use. For more visible anti-aging and skin-smoothing benefits, it may take 4-8 weeks of regular application.
Read Also: Black Facial Peel Mask.
Can Korean hyaluronic serum be used with other skincare products?
Absolutely! Korean hyaluronic serums can be seamlessly incorporated into your existing skincare routine. They can be used in conjunction with other products, such as cleansers, moisturizers, and facial oils, to enhance the overall effectiveness of your regimen.
Read Also: Partial Veneers Before and After.
Conclusion
Korean hyaluronic serum has undoubtedly revolutionized the world of skincare, offering a transformative solution for those seeking radiant, youthful-looking skin. By harnessing the power of hyaluronic acid and incorporating a range of skin-nourishing ingredients, these innovative serums have become a must-have in the routines of beauty enthusiasts worldwide.
Read Also: Hunter Green Gel Nail Polish.
Whether you’re looking to combat the signs of aging, improve skin hydration, or simply achieve a healthy, glowing complexion, Korean hyaluronic serum is a versatile and effective addition to your skincare arsenal. By understanding the key ingredients, usage guidelines, and top product recommendations, you can embark on a journey to unlock the full potential of your skin and enjoy the transformative benefits of these remarkable serums.
Read Also: Pull Ups While Pregnant.
So, what are you waiting for? Dive into the world of Korean hyaluronic serum and experience the radiance and hydration your skin deserves.
Read Also: Water Activated Eyeshadow.

Jelly Roll Botox: Discover the Magic of Youthful Radiance!

Olive Green Dip Nails: Master the Art of Manicures

Korean Hyaluronic Serum: Skin Transformation Essentials

What Is Balayage: Your Ultimate Guide Is Here

The Meaning of Teeth Falling Out in a Dream: Exploring the Symbolism

What Vitamins C Is Good For? The Ultimate Guide
-

 Beauty Tips1 year ago
What Is Balayage: Your Ultimate Guide Is Here
-
Dreams Interpretation1 year ago
The Meaning of Teeth Falling Out in a Dream: Exploring the Symbolism
-
Diet Tips1 year ago
What Vitamins C Is Good For? The Ultimate Guide
-
Uncategorized1 year ago
Understanding the Five Languages of Love: A Comprehensive Guide
-
Beauty Tips11 months ago
How to Make Clear Skin: Your Comprehensive Guide
-
Beauty Tips11 months ago
Coconut Oil in Face Benefits: Unlocking the Secrets to Radiant Skin
-
Women Tips11 months ago
How Long Breast Augmentation Surgery Take? A Complete Guide
-
Beauty Tips1 year ago
The Surprising Benefit to Coconut Oil: Your Complete Guide