Connect with us

Beauty Tips

Hunter Green Gel Nail Polish: Indulge in Luxurious Nail Shades

Published

on

hunter green gel nail polish

Here is your complete guide to hunter green gel nail polish

Introduction to Hunter Green Gel Nail Polish

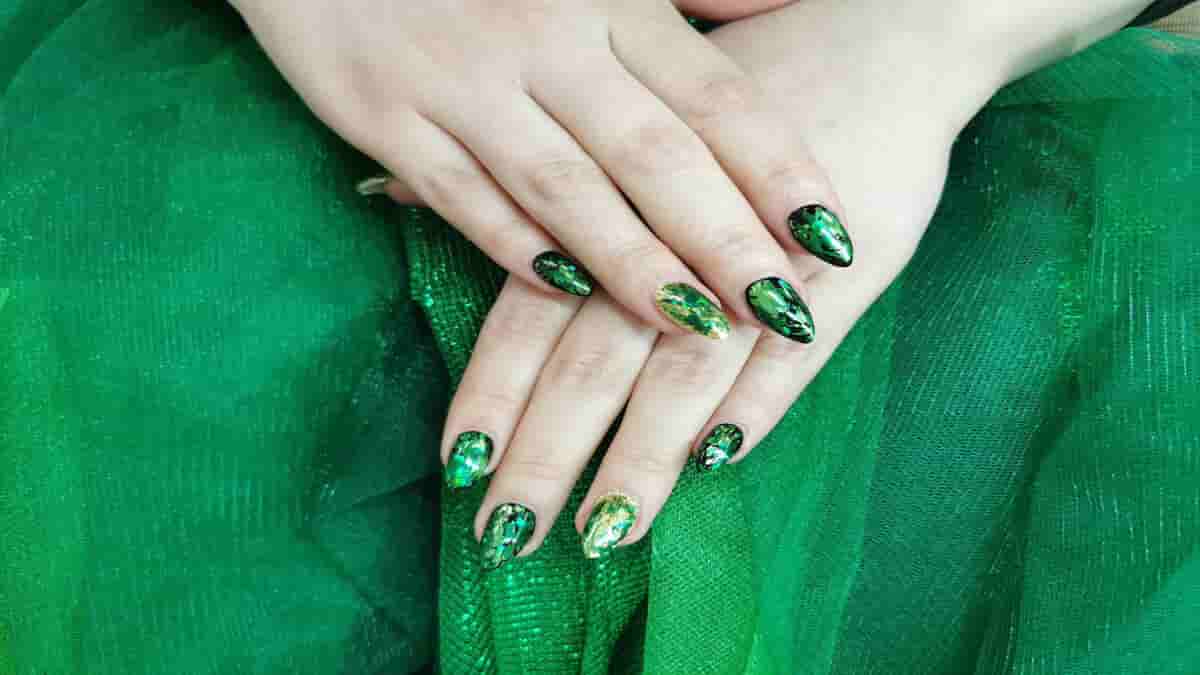
In the ever-evolving world of nail care, hunter green gel nail polish has emerged as a captivating and versatile choice, captivating the hearts of beauty enthusiasts worldwide. This timeless hue, with its rich and sophisticated undertones, has become a staple in the nail care industry, offering a unique blend of elegance and modern flair.

As the popularity of hunter green gel nail polish continues to soar, it’s no wonder that more and more individuals are drawn to its allure. Whether you’re a seasoned nail polish aficionado or a newcomer to the world of gel manicures, this classic color has the power to transform your nails and elevate your overall look. In this comprehensive guide, we’ll delve into the world of hunter green gel nail polish, exploring its key benefits, the art of selection, the intricacies of application, and the secrets to maintaining its long-lasting brilliance.

Understanding Hunter Green Gel Nail Polish

Hunter green gel nail polish is a unique and captivating nail color that has captured the hearts of beauty enthusiasts worldwide. Unlike traditional nail polish, gel-based formulas offer a distinct set of advantages, including exceptional longevity, chip-resistance, and a high-shine finish that can elevate any look.

The composition of hunter green gel nail polish sets it apart from its conventional counterparts. Formulated with a blend of specialized gel-based ingredients, this nail color is designed to provide a long-lasting, glossy, and durable finish that can withstand the rigors of everyday life. The curing process, which involves the use of a UV or LED lamp, is a crucial step in ensuring the proper application and adherence of the gel polish to the nails.

Choosing the Right Hunter Green Gel Nail Polish

When it comes to selecting the perfect hunter green gel nail, there are several factors to consider to ensure a flawless and long-lasting manicure. From brand reputation to formula composition, each element plays a crucial role in the overall quality and performance of the nail color.

To help you navigate the vast array of options, we’ve compiled a comprehensive table comparing the top hunter green gel nail brands, highlighting their key features, price range, and customer ratings:

BrandFormulaFinishPrice RangeCustomer Rating
OPIGel-based, long-lastingGlossy, high-shine$15 – $254.8/5
EssieGel-couture formula, chip-resistantSatin, subtle sheen$12 – $184.6/5
GelishSalon-quality gel, durableGlossy, high-shine$12 – $204.7/5
CND ShellacGel-based, salon-gradeGlossy, high-shine$18 – $254.8/5
Kiara SkyGel-based, long-lastingGlossy, high-shine$10 – $154.5/5

When selecting a hunter green gel nail, it’s essential to consider factors such as the brand’s reputation, the formula’s composition, the desired finish, and the overall value. By carefully evaluating these elements, you can ensure that you choose a high-quality product that will deliver a flawless and long-lasting manicure.

Applying Hunter Green Gel Nail Polish

Mastering the art of applying hunter green gel nail is crucial for achieving a professional-looking manicure that can last for weeks. The process involves several key steps, each of which plays a vital role in ensuring a smooth, even, and durable application.

Nail Preparation

  • Thoroughly clean and file the nails to remove any existing polish or debris.
  • Push back the cuticles gently to create a clean, well-groomed canvas.
  • Buff the nails lightly to create a smooth surface for the gel polish application.

Base Coat Application

  • Apply a thin, even layer of a gel-based base coat to the nails, ensuring complete coverage.
  • Cure the base coat under a UV or LED lamp according to the manufacturer’s instructions.

Color Application

  • Carefully apply a thin, even layer of hunter green gel nail to the nails, starting at the cuticle and working your way towards the tip.
  • Cure the color coat under the UV or LED lamp, following the recommended curing time.
  • Repeat the color application process, if necessary, to achieve the desired opacity and coverage.

Top Coat Application

  • Apply a generous layer of a gel-based top coat to the nails, sealing in the color and providing a glossy, high-shine finish.
  • Cure the top coat under the UV or LED lamp, ensuring a complete and durable seal.

Finishing Touches

  • Gently wipe the nails with a lint-free cloth to remove any tacky residue.
  • Trim and shape the nails as desired, ensuring a polished and well-groomed appearance.

By following these step-by-step instructions and incorporating the proper techniques, you can achieve a flawless hunter green gel nail manicure that will leave your nails looking stunning and long-lasting.

Maintaining Hunter Green Gel Nail Polish

Maintaining the vibrant and glossy appearance of your hunter green gel nail manicure is essential for ensuring its longevity. With the right care and attention, you can extend the life of your gel polish and keep your nails looking their best.

Wear Time and Longevity

One of the primary advantages of hunter green gel nail is its exceptional wear time and longevity. Depending on the brand and formula, a well-applied gel manicure can last anywhere from 2 to 4 weeks, with minimal chipping or fading.

Removal and Reapplication

When it’s time to remove your hunter green gel nail, it’s crucial to use the proper techniques to avoid damage to your natural nails. Acetone-based removers are the most effective, but it’s important to soak the nails and gently file away the gel polish, rather than peeling or picking it off.

To maintain the integrity of your nails, it’s recommended to have your hunter green gel nail removed by a professional at a nail salon. They have the expertise and tools to ensure a gentle and thorough removal process.

Nail Care Routine

Incorporating a regular nail care routine can help you maintain the vibrant and glossy appearance of your hunter green gel nail manicure. This may include:

  • Applying cuticle oil or moisturizer to keep the nails and surrounding skin hydrated.
  • Using a nail buffer to gently smooth and shine the nails between manicures.
  • Avoiding activities that may cause excessive wear or chipping, such as manual labor or household chores.

By following these maintenance tips, you can ensure that your hunter green gel nail manicure remains flawless and long-lasting, allowing you to enjoy the timeless elegance of this captivating nail color.

Read Also: Lash Extension Styles.

FAQs about Hunter Green Gel Nail Polish

How long does hunter green gel nail polish typically last?

The longevity of hunter green gel nail can vary depending on the brand and formula, but a well-applied gel manicure can generally last between 2 to 4 weeks with minimal chipping or fading.

Read Also: Marula Oil for Hair.

Is hunter green gel nail polish suitable for all skin tones?

Yes, hunter green gel nail is a versatile color that can complement a wide range of skin tones. The rich, sophisticated hue of hunter green is particularly flattering on fair, medium, and olive skin tones.

Read Also: Walnut Oil.

How do I remove hunter green gel nail polish properly?

To remove hunter green gel nail, it’s recommended to use an acetone-based remover and soak the nails for 10-15 minutes. Gently file away the gel polish, rather than peeling or picking it off, to avoid damage to the natural nails.

Read Also: What Massage Oils Are Best.

Can I use hunter green gel nail polish for nail art designs?

Absolutely! The bold and rich color of hunter green gel nail makes it an excellent choice for creating intricate nail art designs. Whether you opt for simple geometric patterns or more elaborate floral motifs, this versatile hue can elevate your nail art to new heights.

Read Also: Gua Sha Oil.

How do I maintain the glossy finish of my hunter green gel nail polish manicure?

To maintain the glossy finish of your hunter green gel nail manicure, be sure to apply a high-quality gel-based top coat and cure it properly under a UV or LED lamp. Additionally, using a nail buffer to gently shine the nails between manicures can help preserve the vibrant and glossy appearance.

Read Also: Cheek filler before and after over 50.

Conclusion

In the captivating world of nail care, hunter green gel nail polish has emerged as a true standout, offering a timeless and sophisticated look that can elevate any ensemble. From its rich and captivating hue to its exceptional longevity and high-shine finish, this versatile nail color has captured the hearts of beauty enthusiasts worldwide.

Read Also: Black Facial Peel Mask.

Whether you’re a seasoned gel manicure aficionado or a newcomer to the world of nail care, we hope this comprehensive guide has provided you with the knowledge and confidence to embrace the allure of hunter green gel nail. By understanding the unique properties of this captivating color, mastering the art of application, and maintaining its long-lasting brilliance, you can transform your nails into a true work of art.

Read Also: Pull Ups While Pregnant.

So, why not elevate your nail game and indulge in the timeless elegance of hunter green gel nail polish? Embrace the power of this captivating hue and let it be the finishing touch that elevates your overall look and leaves a lasting impression.

Read Also: Partial Veneers Before and After.

Continue Reading
Click to comment

Leave a Reply

Your email address will not be published. Required fields are marked *

Beauty Tips

Skincare for Sensitive Skin Mastery: Unlock Your Glow

Published

on

skincare for sensitive skin

Here is your complete guide to skincare for sensitive skin

Introduction to Skincare for Sensitive Skin

Having sensitive skin can be a frustrating and challenging experience, but with the right approach, you can achieve a healthy, glowing complexion. In this comprehensive guide, we’ll delve into the intricacies of skincare for sensitive skin, providing you with the knowledge and tools to navigate the world of skincare with confidence.

Sensitive skin is a common condition that affects a significant portion of the population. It’s characterized by a heightened reaction to various environmental factors, skincare products, and even certain foods. Individuals with sensitive skin often experience redness, irritation, dryness, and even breakouts, making it crucial to adopt a tailored skincare routine that caters to their unique needs.

In this article, we’ll explore the underlying causes of sensitive skin, the importance of understanding your skin type, and the essential steps to building a skincare routine for sensitive skin that will leave your complexion radiant and healthy. We’ll also dive into the ingredients to avoid, the best products to incorporate, and lifestyle tips to support your skin’s well-being.

Understanding Sensitive Skin

Sensitive skin is a complex condition that can be influenced by a variety of factors, including genetics, environmental stressors, and the use of harsh or unsuitable skincare products. To better understand your sensitive skin, let’s explore the key characteristics and potential causes.

Characteristics of Sensitive Skin

Individuals with sensitive skin often experience the following symptoms:

  • Redness and flushing
  • Stinging or burning sensation
  • Dryness and flakiness
  • Increased sensitivity to environmental factors like wind, cold, or heat
  • Reactivity to certain skincare ingredients or products

Causes of Sensitive Skin

The causes of sensitive skin can be multifaceted, but some of the most common factors include:

  • Genetics: Some people are simply predisposed to having more reactive and delicate skin.
  • Environmental factors: Exposure to pollution, harsh weather conditions, and UV radiation can contribute to skin sensitivity.
  • Skincare products: The use of harsh, drying, or irritating ingredients in skincare products can disrupt the skin’s natural barrier and lead to sensitivity.
  • Underlying skin conditions: Conditions like rosacea, eczema, or dermatitis can also manifest as sensitive skin.

Understanding the unique characteristics and potential causes of your sensitive skin is the first step in developing an effective skincare routine.

Building a Skincare Routine for Sensitive Skin

Crafting a skincare routine for sensitive skin requires a delicate balance of gentle, nourishing ingredients and a thoughtful approach to each step. Let’s explore the key components of a sensitive skin routine.

Cleansing

When it comes to sensitive skin, the cleansing step is crucial. Opt for gentle cleansers that are free of harsh surfactants, fragrances, and alcohol. These ingredients can strip the skin of its natural oils, leading to further irritation and dryness.

Look for cleansers that contain soothing ingredients like:

  • Ceramides
  • Glycerin
  • Aloe vera
  • Chamomile
  • Oatmeal

Avoid cleansers with the following ingredients:

  • Sodium lauryl sulfate (SLS)
  • Alcohol
  • Fragrances
  • Essential oils

Moisturizing

Proper hydration is essential for sensitive skin. Choose moisturizers that are fragrance-freenon-comedogenic, and formulated with calming, nourishing ingredients.

Some moisturizing ingredients to look for include:

  • Hyaluronic acid
  • Ceramides
  • Glycerin
  • Squalane
  • Niacinamide

Steer clear of moisturizers containing the following:

  • Alcohol
  • Fragrances
  • Essential oils
  • Retinoids

Sun Protection

Protecting your sensitive skin from the harmful effects of UV radiation is crucial. Sunscreens for sensitive skin should be mineral-basedfragrance-free, and non-comedogenic.

Look for sunscreens containing:

  • Zinc oxide
  • Titanium dioxide

Avoid sunscreens with:

  • Chemical filters (oxybenzone, avobenzone)
  • Fragrances
  • Alcohol

Treatment Products

Incorporating targeted treatment products can help address specific concerns for sensitive skin. However, it’s essential to introduce new products slowly and with caution to avoid further irritation.

Some treatment products to consider include:

  • Serums with calming ingredients like centella, green tea, or cica
  • Facial oils rich in nourishing fatty acids
  • Gentle exfoliants with lactic acid or enzymatic formulas

Avoid treatment products with the following:

  • Retinoids
  • AHAs (glycolic acid, lactic acid)
  • Fragrances
  • Essential oils

Ingredients to Avoid for Sensitive Skin

When it comes to skincare for sensitive skin, it’s crucial to be mindful of the ingredients in your products. Certain ingredients can trigger irritation, inflammation, and further sensitivity. Let’s explore the common culprits to steer clear of.

Fragrances

Synthetic fragrances are a leading cause of skin sensitivity. They can irritate the skin, leading to redness, itching, and even allergic reactions. Opt for fragrance-free products whenever possible.

Alcohol

Alcohol-based products can be drying and disruptive to the skin’s natural barrier, exacerbating sensitivity. Avoid tonersastringents, and cleansers that contain alcohol.

Harsh Chemicals

Ingredients like sodium lauryl sulfate (SLS)parabens, and formaldehyde-releasing preservatives can be harsh and irritating for sensitive skin.

Essential Oils

While natural, essential oils can be potent and potentially irritating for sensitive skin. Steer clear of products containing essential oils like peppermintcitrus, or eucalyptus.

Retinoids

Retinoids, such as retinol and tretinoin, can be too potent for sensitive skin. They can cause dryness, peeling, and increased sensitivity to the sun.

By being mindful of these irritating ingredients, you can ensure that your skincare routine for sensitive skin is tailored to your unique needs, promoting a healthy, radiant complexion.

Best Skincare Products for Sensitive Skin

Navigating the vast array of skincare products for sensitive skin can be overwhelming, but fear not! We’ve curated a selection of top-recommended products that cater to the specific needs of sensitive skin.

Cleansers

ProductKey Features
CeraVe Hydrating Facial Cleanser– Fragrance-free
– Contains ceramides and hyaluronic acid
– Gentle, non-irritating formula
La Roche-Posay Toleriane Hydrating Gentle Cleanser– Fragrance-free
– Formulated with thermal spring water
– Suitable for dry to sensitive skin
Cetaphil Daily Facial Cleanser– Fragrance-free
– Gentle, non-irritating formula
– Suitable for all skin types, including sensitive

Moisturizers

ProductKey Features
Vanicream Moisturizing Cream– Fragrance-free
– Contains ceramides and glycerin
– Suitable for very dry, sensitive skin
CeraVe Moisturizing Cream– Fragrance-free
– Contains ceramides and hyaluronic acid
– Helps restore the skin’s natural barrier
Avène Tolerance Extreme Emulsion– Fragrance-free
– Formulated with Avène thermal spring water
– Soothing and calming for sensitive skin

Sunscreens

ProductKey Features
EltaMD UV Clear Broad-Spectrum SPF 46– Mineral-based formula
– Contains niacinamide and hyaluronic acid
– Non-comedogenic and fragrance-free
La Roche-Posay Anthelios Mineral Sunscreen SPF 50– Mineral-based formula
– Contains antioxidants and soothing ingredients
– Suitable for sensitive and acne-prone skin
Neutrogena Sensitive Skin Mineral Sunscreen SPF 50– Mineral-based formula
– Fragrance-free and non-comedogenic
– Gentle and suitable for sensitive skin

Treatment Products

ProductKey Features
The Ordinary Niacinamide 10% + Zinc 1%– Helps reduce the appearance of blemishes
– Calms and soothes the skin
– Fragrance-free and suitable for sensitive skin
Drunk Elephant Protini Polypeptide Cream– Contains a blend of signal peptides and growth factors
– Helps improve skin’s appearance and texture
– Fragrance-free and non-irritating
SkinCeuticals Phyto Corrective Gel– Formulated with botanical extracts like cucumber and thyme
– Helps soothe and calm sensitive skin
– Fragrance-free and non-comedogenic

By incorporating these sensitive skin-friendly products into your routine, you can address your specific concerns while maintaining a healthy, balanced complexion.

Lifestyle Tips for Sensitive Skin

While a tailored skincare routine is essential, your overall lifestyle and habits can also have a significant impact on the health and appearance of sensitive skin. Let’s explore some key lifestyle tips to support your skin’s well-being.

Diet and Hydration

Maintaining a balanced, nutrient-rich diet and staying hydrated can have a positive effect on sensitive skin. Incorporate foods rich in antioxidants, healthy fats, and anti-inflammatory properties, such as:

  • Omega-3-rich foods (salmon, walnuts, chia seeds)
  • Fruits and vegetables (berries, leafy greens, bell peppers)
  • Probiotic-rich foods (yogurt, kefir, fermented vegetables)

Staying hydrated by drinking plenty of water can also help support the skin’s natural barrier and reduce inflammation.

Stress Management

Chronic stress can take a toll on the skin, exacerbating sensitivity and leading to various skin concerns. Incorporate stress-reducing practices into your daily routine, such as:

  • Meditation or mindfulness exercises
  • Gentle exercise like yoga or walking
  • Engaging in relaxing hobbies or activities

By managing stress, you can help calm the skin and promote a healthier, more resilient complexion.

Adequate Sleep

Getting enough quality sleep is crucial for skin health. Aim for 7-9 hours of sleep each night to allow your skin to regenerate and repair itself, which can help reduce sensitivity and improve overall skin appearance.

By incorporating these lifestyle tips into your routine, you can provide additional support for your sensitive skin, complementing your tailored skincare routine for optimal results.

Best Brands and Products for Skincare for Sensitive Skin

Best Brands

BrandDescription
BentonOffers gentle and soothing skincare products suitable for sensitive skin.
By WishtrendProvides effective and calming skincare solutions specifically designed for sensitive skin.
COSRXKnown for a range of products formulated without harsh ingredients, ideal for sensitive skin.
IsntreeOffers gentle and nourishing skincare options tailored to the needs of sensitive skin.
La Roche-PosayProvides dermatologist-recommended products that are gentle and suitable for sensitive skin.

Best Products

ProductDescription
Vanicream Daily Facial Moisturizer With Ceramides and Hyaluronic AcidProvides hydration and soothing for sensitive skin.
The Original MakeUp EraserA gentle makeup remover suitable for sensitive skin.
BeamCream Smoothing Body Moisturizer by Ole HenriksenA body moisturizer that calms and hydrates sensitive skin.
Alpha Beta Daily Cleanser by Dr. Dennis Gross SkincareA gentle exfoliating cleanser that prevents pore buildup without damaging the skin barrier.
Bakuchiol Lightweight Cream by HerbivoreA lightweight, alcohol-free moisturizer suitable for sensitive and blemish-prone skin.

FAQs – People Also Ask

What are the best ingredients for sensitive skin?

The best ingredients for sensitive skin are those that are gentle, nourishing, and calming. Some of the top ingredients to look for include:

  • Ceramides
  • Glycerin
  • Hyaluronic acid
  • Niacinamide
  • Squalane
  • Centella asiatica
  • Green tea
  • Aloe vera

These ingredients help to soothe, hydrate, and strengthen the skin’s natural barrier, reducing sensitivity and irritation.

Can sensitive skin be cured?

While sensitive skin cannot be “cured” per se, it can be effectively managed and improved through the right skincare routine and lifestyle adjustments. By identifying and avoiding triggers, using gentle and nourishing products, and supporting the skin’s overall health, you can significantly reduce the symptoms of sensitive skin and achieve a more resilient, healthy complexion.

Read Also: Summer Shampoo.

How to soothe sensitive skin reactions?

If you experience a sensitive skin reaction, such as redness, irritation, or stinging, there are several steps you can take to soothe the skin:

  • Cleanse with a gentle, fragrance-free cleanser
  • Apply a cool, damp cloth to the affected area to help reduce inflammation
  • Use a fragrance-free, hypoallergenic moisturizer to hydrate and calm the skin
  • Avoid any additional skincare products or makeup until the reaction subsides
  • Protect the skin from further irritation by staying out of the sun and using a mineral-based sunscreen

With the right approach, you can help your sensitive skin recover and return to a healthy, balanced state.

Read Also: lip lift before and after.

Is natural skincare better for sensitive skin?

While natural skincare products can be a good option for sensitive skin, it’s important to note that “natural” does not always mean “non-irritating.” Some natural ingredients, such as essential oils or certain plant extracts, can still be potential triggers for sensitive skin.

The key is to look for natural, gentle, and non-irritating ingredients that are specifically formulated for sensitive skin. Avoid products with a long list of unfamiliar or potentially irritating natural ingredients. Instead, focus on simple, minimalist formulas that contain soothing, nourishing, and non-reactive ingredients.

Read Also: lip lift before and after.

How to build a skincare routine for sensitive skin?

Building a skincare routine for sensitive skin involves a thoughtful and gradual approach. Start with the following steps:

  1. Cleanse with a gentle, fragrance-free cleanser to remove impurities without stripping the skin.
  2. Moisturize with a fragrance-free, non-comedogenic moisturizer that contains hydrating and calming ingredients.
  3. Protect your skin with a mineral-based, fragrance-free sunscreen to shield it from harmful UV rays.
  4. Gradually introduce treatment products, such as serums or facial oils, that are specifically formulated for sensitive skin.
  5. Listen to your skin and make adjustments as needed, removing any products that cause irritation or discomfort.

By building a tailored, gentle skincare routine, you can effectively address the unique needs of your sensitive skin and achieve a healthy, radiant complexion.

Read Also: lip lift before and after.

Conclusion

Navigating the world of skincare for sensitive skin can be a journey, but with the right knowledge and approach, you can unlock the secrets to a radiant, healthy complexion. Remember to be mindful of the ingredients in your products, build a gentle, nourishing routine, and incorporate lifestyle habits that support your skin’s well-being.

Read Also: Pull Ups While Pregnant.

By following the tips and recommendations outlined in this comprehensive guide, you’ll be well on your way to achieving the glowing, resilient skin you deserve. Embrace your sensitive skin and embark on a journey of self-care and skin empowerment.

Read Also: Emface Before and After.

Continue Reading

Beauty Tips

Emface Before and After: Embrace Magic through Transformation

Published

on

Here is your complete guide to emface before and after

Introduction to Emface Before and After

In the ever-evolving world of aesthetic treatments, a new and innovative solution has been capturing the attention of those seeking to enhance their facial appearance. Emface, a cutting-edge technology that combines high-intensity focused electromagnetic (HIFEM) energy with radiofrequency (RF) technology, has been making waves in the beauty industry, promising remarkable Emface before and after results.

As the demand for non-invasive facial rejuvenation continues to grow, Emface has emerged as a game-changer, offering a unique approach to improving facial contours, reducing wrinkles, and achieving an overall more youthful and radiant complexion. In this comprehensive article, we’ll delve into the world of Emface, exploring its working mechanism, the treatment process, and the transformative Emface before and after results that have been captivating individuals across the globe.

What is Emface?

Emface is a revolutionary facial treatment that harnesses the power of HIFEM and RF technologies to stimulate muscle contractions and improve skin appearance. Unlike traditional cosmetic procedures, Emface is a non-invasive solution that targets the underlying facial muscles, triggering a series of contractions that lead to visible improvements in facial contours and skin texture.

The Emface technology works by delivering high-intensity focused electromagnetic energy to the targeted facial areas, causing the muscles to undergo intense contractions. This muscle stimulation not only helps to tone and tighten the facial features but also promotes the production of collagen, a crucial protein responsible for maintaining skin elasticity and youthfulness.

In addition to the HIFEM component, Emface also utilizes radiofrequency (RF) technology to further enhance the treatment’s effectiveness. The RF energy heats the deeper layers of the skin, stimulating the production of new collagen and improving overall skin quality.

Emface Procedure: Step-by-Step

The Emface treatment process is designed to be comfortable and efficient, with minimal downtime for the patient. Here’s a step-by-step overview of the Emface procedure:

  1. Consultation: Before the treatment, patients will undergo a consultation with a qualified healthcare professional, who will assess their facial concerns and determine if Emface is the most suitable solution.
  1. Preparation: The treatment area is thoroughly cleaned, and any necessary markings are made to ensure precise targeting of the desired facial regions.
  2. Treatment: During the Emface procedure, the patient will recline comfortably while the healthcare provider gently applies the Emface applicator to the targeted areas. The device then delivers the HIFEM and RF energy, causing the facial muscles to contract and the skin to heat up.
  3. Duration: A typical Emface treatment session lasts approximately 20-30 minutes, depending on the specific areas being addressed.
  4. Post-Treatment Care: After the procedure, patients may experience mild redness or tingling sensations, which typically subside within a few hours. No significant downtime is required, and patients can resume their normal daily activities immediately.
  1. Treatment Plan: Most patients require a series of 4-6 Emface treatments, scheduled approximately one week apart, to achieve optimal results.

To better understand the treatment process, let’s take a look at the following table:

StepDescription
ConsultationAssessment of facial concerns and suitability for Emface treatment
PreparationCleaning and marking of the treatment area
TreatmentDelivery of HIFEM and RF energy to stimulate muscle contractions and skin heating
DurationApproximately 20-30 minutes per session
Post-Treatment CareMild redness or tingling, no significant downtime
Treatment Plan4-6 sessions scheduled one week apart for optimal results

Emface Before and After: Real-Life Transformations

The true power of Emface can be seen in the remarkable before and after results that patients have experienced. By stimulating the facial muscles and promoting collagen production, Emface has the ability to:

  • Improve Facial Contours: It can help to tighten and tone the facial muscles, leading to a more defined and sculpted appearance.
  • Reduce Wrinkles and Fine Lines: The treatment’s ability to stimulate collagen production helps to smooth out wrinkles and fine lines, resulting in a more youthful and rejuvenated complexion.
  • Enhance Skin Texture and Radiance: It can improve overall skin quality, leaving it smoother, more even-toned, and with a healthy, radiant glow.

Let’s take a closer look at some real-life before and after transformations:

BeforeAfter
Emface BeforeEmface After
This patient’s facial contours appear more defined, with a noticeable reduction in wrinkles and fine lines around the eyes and forehead.The patient’s skin appears smoother, more radiant, and with a more youthful, rejuvenated appearance.
BeforeAfter
Emface BeforeEmface After
The patient’s jawline and neck area appear more toned and sculpted, with a more defined and contoured appearance.The patient’s skin texture has improved, with a reduction in sagging and a more lifted, rejuvenated look.

These before and after showcase the remarkable transformative power of this innovative facial treatment. Patients have reported feeling more confident, youthful, and satisfied with their appearance after undergoing the procedure.

Emface vs. Other Facial Treatments

As the demand for non-invasive facial rejuvenation continues to grow, Emface has emerged as a unique and compelling alternative to traditional cosmetic procedures. Let’s compare to some other popular facial treatments:

Emface vs. Alternative Solutions

TreatmentKey FeaturesDurationResultsCustomization
EmfaceImmediate lifting effects, full results in 12 weeks, improves facial contours and youthful appearance20 minutes per session, 4-6 sessions recommendedLasting results up to a year, natural-looking improvements in wrinkles and fine linesLimited customization, focuses on facial muscles and skin tightening
UltherapyGradual results over several months, lasting up to three years, improved facial contours and youthful appearanceResults may vary, multiple sessions requiredLong-lasting results, gradual improvement in facial contoursVaries, may require multiple sessions for optimal results
BotoxRestores facial contours, reduces wrinkles, improves sagging skinQuick procedure, maintenance sessions every 3-4 monthsTemporary results, requires ongoing maintenanceLimited customization, focuses on specific areas of the face
V FaceLifts and tightens jawline and cheeks, reduces wrinkles, improves skin tone and texture40-45 minutes per session, customizable treatmentsTargeted results, stronger contractions, asymmetry correctionHighly customizable, tailored to individual needs
ThermageMitigates aging signs, diminishes wrinkles and sagging skin, enhances facial contours45 minutes to 1.5 hours per session, multiple sessions recommendedCorrects skin laxity, improves skin tone and textureLimited customization, focuses on deeper skin layers

As this table illustrates, Emface stands out from traditional facial treatments by offering a unique combination of benefits. Unlike Botox or fillers, which primarily address specific wrinkles or volume loss, it takes a more holistic approach, targeting the underlying facial muscles and skin quality to deliver comprehensive and long-lasting results.

Furthermore, it boasts a significantly shorter recovery period compared to many other facial treatments, allowing patients to resume their normal routines with minimal disruption.

Cost Comparison: Emface vs. Alternative Solutions

TreatmentCost per SessionTotal Treatment Cost
Emface$1,250$5,000 (4 sessions + 1 maintenance session every 6-12 months)
Ultherapy$3,000 – $5,000$3,000 – $15,000 (multiple sessions may be required)
Botox$300 – $600 per area$900 – $1,800 (every 3-4 months for maintenance)
V Face$500 – $1,000$2,000 – $4,000 (4 sessions)
Thermage$3,000 – $5,000$3,000 – $15,000 (multiple sessions may be required)

As the table shows, Emface is generally more expensive than some alternative solutions like Botox, but it offers a more comprehensive and long-lasting approach to facial rejuvenation. The total treatment cost for Emface, including the initial 4 sessions and a maintenance session every 6-12 months, can range from $5,000 to $7,500.

In comparison, treatments like Ultherapy and Thermage, which also use radiofrequency technology, can have a higher overall cost due to the need for multiple sessions to achieve the desired results. Botox, while more affordable per session, requires ongoing maintenance treatments every 3-4 months to maintain the effects.

The V Face treatment, which combines both HIFEM and RF technologies like Emface, falls in the middle range in terms of cost, with a total treatment plan typically costing between $2,000 and $4,000.

It’s important to note that the actual cost of these treatments may vary depending on the location, the healthcare provider’s experience, and any additional fees or discounts that may be available. Patients should always consult with a qualified professional to discuss the specific costs and payment options for their desired treatment.

Frequently Asked Questions (FAQs)

As Emface continues to gain popularity, patients often have questions about the treatment. Here are some of the most frequently asked questions:

Who is an ideal candidate for Emface?

  • It is suitable for individuals of various ages who are looking to improve the appearance of their facial features, reduce wrinkles, and enhance overall skin quality.
  • The treatment is particularly beneficial for those who are starting to notice signs of aging, such as sagging skin, loss of facial volume, and the development of fine lines and wrinkles.

Read Also: Summer Nails with Glitter.

How long do the Emface results last?

  • The results from Emface can last for several months, with many patients reporting continued improvements in their facial appearance for up to a year or more.
  • To maintain the results, most patients require a series of follow-up treatments, typically scheduled every 6-12 months.

Read Also: Summerween Nails.

Is Emface safe?

  • It is considered a safe and well-tolerated treatment, as it is non-invasive and does not involve any incisions or injections.
  • The treatment has been extensively studied and approved for use, with a low risk of side effects or complications.

Read Also: Dip Nails Summer.

How much does Emface cost?

  • The cost can vary depending on the location, the healthcare provider performing the treatment, and the number of sessions required.
  • On average, the cost of a single treatment can range from $500 to $1,000, with a full treatment plan typically costing between $2,000 and $5,000.

Read Also: Summer Shampoo.

Does Emface hurt?

  • Most patients report that the treatment is relatively comfortable, with only mild sensations of muscle contractions and skin heating during the procedure.
  • Any discomfort experienced is typically minimal and well-tolerated, with no significant pain or downtime.

By addressing these frequently asked questions, we hope to provide you with a comprehensive understanding of the Emface treatment and its potential benefits.

Read Also: Juicy Fruit Perfume.

Conclusion

In the ever-evolving world of aesthetic treatments, Emface has emerged as a game-changer, offering a unique and innovative approach to facial rejuvenation. By harnessing the power of HIFEM and RF technologies, Emface is able to stimulate the underlying facial muscles, promote collagen production, and deliver remarkable Emface before and after results.

Read Also: Dark Cherry Lip.

Whether you’re seeking to improve facial contours, reduce wrinkles, or enhance overall skin quality, it may be the solution you’ve been searching for. With its non-invasive nature, minimal downtime, and long-lasting results, this cutting-edge treatment has the potential to transform the way we approach facial aesthetics.

Read Also: Pull Ups While Pregnant.

If you’re intrigued by the transformative power of Emface, we encourage you to consult with a qualified healthcare professional to learn more about this innovative treatment and determine if it’s the right choice for you. Unlock the secrets to a more youthful, radiant, and confident appearance with Emface.

Read Also: lip lift before and after.

Continue Reading

Beauty Tips

lip lift before and after: Appreciating the Stunning Results

Published

on

lip lift before and after

Here is your complete guide to lip lift before and after

Introduction to lip lift before and after

Are you curious about the transformative power of a lip lift? Preparing to embark on your own cosmetic journey? Look no further! In this comprehensive guide, we’ll delve into the world of lip lift before and after results, uncovering the secrets to achieving the perfect pout.

Lip lifts have become an increasingly popular procedure, offering a way to enhance the appearance of the lips and create a more youthful, rejuvenated look. Whether you’re seeking to address concerns like a gummy smile, thin lips, or age-related changes, understanding the lip lift before and after process is crucial to setting realistic expectations and achieving your desired outcome.

In this article, we’ll explore the ins and outs of lip lift surgery, from the different techniques to the recovery process and potential risks. We’ll also dive into real-life lip lift before and after case studies, providing you with a glimpse into the transformative power of this procedure. By the end of this journey, you’ll be equipped with the knowledge to make an informed decision about whether a lip lift is the right choice for you.

What is a Lip Lift?

lip lift is a surgical procedure that aims to enhance the appearance of the upper lip by reducing the distance between the nose and the upper lip. This procedure can be particularly beneficial for individuals who feel their upper lip appears too long or who have a gummy smile, as it can help create a more balanced and youthful facial appearance.

There are several different types of lip lift techniques, each with its own unique approach and benefits:

Bullhorn Lip Lift

The Bullhorn lip lift is a popular technique that targets the central portion of the upper lip, lifting and shortening it to create a more defined and prominent pout.

Gull-Wing Lip Lift

The Gull-Wing lip lift focuses on lifting the corners of the mouth, helping to create a more upturned and youthful appearance.

Corner Lip Lift

The Corner lip lift is designed to address concerns with the corners of the mouth, such as downturned or drooping lips, by lifting and reshaping this area.

Regardless of the specific technique, the goal of a lip lift is to enhance the overall appearance of the lips, creating a more balanced and harmonious facial aesthetic.

Types of Lip Lifts

Type of Lip LiftDescription
Bullhorn Lip LiftLifts the central portion of the upper lip
Gull-Wing Lip LiftLifts the corners of the mouth
Corner Lip LiftTargets the corners of the mouth

Lip Lift Before and After: What to Expect

When it comes to before and after results, it’s important to have realistic expectations. While this procedure can produce stunning transformations, the extent of the changes will depend on various factors, including the individual’s facial anatomy, the specific technique used, and the skill of the surgeon.

Realistic Expectations

It’s crucial to understand that lip lift before and after results can vary significantly from person to person. Some individuals may experience a more dramatic change, while others may see a more subtle improvement. The key is to work closely with your surgeon to discuss your goals and ensure that you have a clear understanding of what the procedure can and cannot achieve.

Factors Affecting Results

Several factors can influence the before and after outcome, including:

  • Facial anatomy: The shape and proportions of your face can play a significant role in the final results.
  • Skin elasticity: Individuals with more youthful, elastic skin tend to experience better results.
  • Surgeon’s expertise: The skill and experience of the surgeon performing the procedure can greatly impact the outcome.
  • Healing process: The way your body heals and responds to the surgery can affect the final appearance.

By understanding these factors, you can set realistic expectations and work with your surgeon to achieve the best possible lip lift before and after results.

Before and After: Case Studies

To better understand the transformative power of lip lift surgery, let’s explore some real-life lip lift before and after case studies.

Case Study 1: Addressing a Gummy Smile

Sarah, a 35-year-old woman, had always been self-conscious about her gummy smile. After researching her options, she decided to undergo a Bullhorn lip lift procedure. The results were remarkable, as the surgery effectively reduced the distance between her nose and upper lip, creating a more balanced and aesthetically pleasing appearance.

Case Study 2: Enhancing Lip Volume

John, a 45-year-old man, felt that his lips had become thinner and less defined over the years. He opted for a Gull-Wing lip lift, which lifted the corners of his mouth and added subtle volume to his upper lip.

Case Study 3: Correcting Downturned Lips

Emily, a 55-year-old woman, had been struggling with downturned lips that made her appear perpetually unhappy. She underwent a Corner lip lift procedure, which successfully lifted the corners of her mouth and restored a more natural, uplifted expression.

These case studies demonstrate the transformative power of lip lift surgery, highlighting the diverse range of concerns that can be addressed through this procedure. By reviewing these lip lift before and after examples, you can gain a better understanding of the potential outcomes and set realistic expectations for your own cosmetic journey.

Lip Lift Before and After: Recovery Process

Undergoing a lip lift procedure is a significant decision, and it’s essential to be well-informed about the recovery process. While the specific timeline may vary depending on the individual and the surgical technique used, there are some general guidelines to keep in mind.

Post-Operative Care

Immediately after the surgery, you can expect some swelling, bruising, and discomfort in the treated area. Your surgeon will provide you with detailed instructions on how to care for the incision site, including the use of cold compresses and the application of ointments or medications to promote healing.

Healing Timeline

The recovery process typically takes several weeks, with the majority of the swelling and bruising subsiding within the first 7-10 days. However, it’s important to note that the final results may not be fully visible for several months, as the lips continue to settle and the incision lines fade.

Tips for a Smooth Recovery

To ensure a smooth recovery and optimal before and after results, it’s crucial to follow your surgeon’s instructions closely. This may include:

  • Avoiding strenuous activities and exercise for the first few weeks
  • Maintaining a soft, liquid diet to minimize stress on the lips
  • Practicing good oral hygiene and keeping the incision site clean
  • Applying sunscreen to the treated area to prevent discoloration
  • Attending all follow-up appointments to monitor the healing process

By prioritizing your recovery and following your surgeon’s guidance, you can increase your chances of achieving the desired lip lift before and after outcome.

Lip Lift Before and After: Risks and Complications

While lip lift surgery is generally considered a safe and effective procedure, it’s important to be aware of the potential risks and complications that may arise. Understanding these factors can help you make an informed decision and work with your surgeon to minimize any potential issues.

Potential Risks

Some of the potential risks associated with lip lift surgery include:

  • Infection at the incision site
  • Scarring or poor wound healing
  • Asymmetry or uneven results
  • Numbness or loss of sensation in the lips
  • Excessive swelling or bruising
  • Dissatisfaction with the final results

Potential Risks of Lip Lift Surgery

RiskDescription
InfectionBacterial or viral infection at the incision site
ScarringVisible or raised scarring from the incision
AsymmetryUneven or unbalanced results
NumbnessLoss of sensation or feeling in the lips
DissatisfactionUnhappiness with the final aesthetic outcome

Minimizing Complications

To minimize the risk of complications, it’s crucial to choose a board-certified plastic surgeon with extensive experience in performing lip lift procedures. Additionally, following your surgeon’s pre-and post-operative instructions closely can help reduce the likelihood of issues.

Long-term Results

While lip lift surgery can produce long-lasting results, it’s important to note that the aging process and other factors may eventually lead to changes in the appearance of the lips over time. Maintaining good skin health and considering touch-up procedures can help extend the longevity of your before and after results.

By understanding the potential risks and taking proactive steps to minimize complications, you can increase your chances of achieving a successful lip lift before and after outcome.

Before and After: Cost and Consultation

The cost of the procedure can vary depending on several factors, including the surgeon’s experience, the geographic location, and the specific techniques used. It’s important to keep in mind that the cost of the surgery is just one aspect to consider, as the expertise and qualifications of the surgeon should be the primary focus.

Consultation Process

During the initial consultation, your surgeon will thoroughly evaluate your facial anatomy, discuss your goals and concerns, and provide you with a personalized treatment plan. This is an essential step in the before and after process, as it allows you to work closely with your surgeon to ensure that you achieve the desired outcome.

Pricing Factors

Some of the key factors that can influence the cost of the procedure include:

  • Surgeon’s fees
  • Anesthesia and facility fees
  • Geographic location
  • Complexity of the procedure
  • Additional treatments or procedures

Pricing Factors for Lip Lift Procedures

FactorDescription
Surgeon’s FeesThe cost charged by the plastic surgeon
Anesthesia and Facility FeesFees for the anesthesia provider and surgical facility
Geographic LocationVariations in costs based on the region
Complexity of ProcedureMore complex techniques may incur higher fees
Additional TreatmentsThe cost of any complementary procedures

Financing Options

If the cost of a lip lift is a concern, many plastic surgery practices offer financing options or payment plans to help make the procedure more accessible. It’s important to discuss these options with your surgeon during the consultation process.

By understanding the cost and consultation process, you can make an informed decision and take the first step towards achieving your desired before and after results.

Lip Lift Before and After: Comparing Different Techniques

When it comes to the procedures, there are several different techniques to consider, each with its own unique advantages and considerations. Understanding the differences between these approaches can help you make an informed decision about the best course of action for your individual needs.

Surgical vs. Non-Surgical Options

The procedures can be divided into two main categories: surgical and non-surgical. Surgical lip lifts involve making incisions and physically altering the structure of the lips, while non-surgical options, such as dermal fillers or Botox, aim to achieve similar results through less invasive means.

Lip Lift vs. Lip Fillers

While both lip surgery and lip fillers can enhance the appearance of the lips, they work in different ways. the procedures focus on reshaping and repositioning the lips, while lip fillers add volume and plumpness. The choice between the two will depend on your specific goals and the advice of your surgeon.

Choosing the Right Procedure for You

When deciding between the various lip lift techniques or comparing to other cosmetic options, it’s essential to work closely with your surgeon. They will be able to evaluate your facial anatomy, understand your desired outcome, and recommend the most suitable approach to achieve your before and after goals.

By exploring the different techniques and comparing them to other cosmetic options, you can make an informed decision and take the first step towards achieving your desired look.

Lip Lift Before and After: Maintenance and Longevity

Achieving the perfect before and after results is just the beginning of your journey. Maintaining the longevity of your results and enhancing their appearance over time requires a dedicated approach to aftercare and ongoing maintenance.

Aftercare Tips

Following your procedure, your surgeon will provide you with detailed instructions on how to care for the treated area. This may include:

  • Keeping the incision site clean and protected
  • Applying ointments or medications as directed
  • Avoiding strenuous activities and exercise
  • Practicing good oral hygiene
  • Protecting the lips from sun exposure

Results Maintenance

To help maintain the long-term results of your lip lift, it’s important to follow a consistent skincare routine and consider touch-up procedures as needed. This may include:

  • Using sun protection to prevent discoloration and premature aging
  • Incorporating moisturizing and nourishing products into your daily regimen
  • Considering periodic touch-up procedures, such as dermal fillers or Botox, to enhance the appearance of the lips

Enhancing Longevity of Results

While the results are generally long-lasting, there are steps you can take to help extend the longevity of your transformation:

  • Maintaining a healthy lifestyle, including a balanced diet and regular exercise
  • Avoiding habits that can accelerate the aging process, such as smoking or excessive sun exposure
  • Attending regular follow-up appointments with your surgeon to monitor the results and address any concerns

By prioritizing aftercare, maintaining a consistent skincare routine, and making lifestyle choices that support the longevity of your before and after results, you can enjoy the benefits of your transformation for years to come.

Lip Lift Before and After: Frequently Asked Questions

As you consider a lip lift procedure, you may have a variety of questions and concerns. To help address these, we’ve compiled a list of frequently asked questions and their corresponding answers.

What is the recovery time for a lip lift surgery?

The recovery time for this procedure can vary, but typically, patients can expect to experience swelling and bruising for the first 7-10 days. The majority of the visible healing process takes place within the first few weeks, but it may take several months for the final results to fully emerge.

Are lip lift results permanent?

The results are generally considered long-lasting, but they are not entirely permanent. Over time, the aging process and other factors may lead to changes in the appearance of the lips. However, with proper care and maintenance, the results can be enjoyed for many years.

Read Also: Desire Pheromone Perfume.

How soon can I see results after a lip lift procedure?

Patients can typically see initial results within the first few weeks following a the procedure, as the swelling and bruising begin to subside. However, the final, optimal results may not be fully visible for several months, as the lips continue to settle and the incision lines fade.

Read Also: Summer Nails with Glitter.

Can a lip lift be combined with other cosmetic procedures?

Yes, it can often be combined with other cosmetic procedures, such as dermal fillers, Botox, or even a facelift, to achieve a more comprehensive facial rejuvenation. Your surgeon will be able to advise you on the best course of action based on your individual needs and goals.

Read Also: Summerween Nails.

What are the common risks associated with lip lift surgery?

Some of the potential risks associated with surgery include infection, scarring, asymmetry, numbness, and dissatisfaction with the final results. However, these risks can be minimized by choosing an experienced, board-certified plastic surgeon and following their pre- and post-operative instructions closely.

Read Also: Dip Nails Summer.

By addressing these frequently asked questions, we hope to provide you with a better understanding of the before and after process and help you make an informed decision about whether this procedure is right for you.

Read Also: Summer Shampoo.

Conclusion

Embarking on a lip lift journey can be a transformative experience, offering the opportunity to enhance your appearance and boost your confidence. By understanding the lip lift before and after process, exploring real-life case studies, and familiarizing yourself with the recovery, risks, and maintenance requirements, you can make an informed decision and take the first step towards achieving your desired look.

Read Also: Juicy Fruit Perfume.

Remember, the key to a successful lip lift outcome lies in working closely with an experienced, board-certified plastic surgeon who can guide you through the process and help you achieve the best possible results. With the right approach and a commitment to your recovery, you can unlock the power of a lip lift and unveil a more confident, rejuvenated version of yourself.

Read Also: Pull Ups While Pregnant.

So, are you ready to explore the world of before and after transformations? Take the first step towards your desired look and schedule a consultation with a trusted plastic surgeon today.

Read Also: Dark Cherry Lip.

Continue Reading

Trending