Connect with us

Beauty Tips

Partial Veneers Before and After: Smile Transformation Wonders

Published

on

partial veneers before and after

Here is your complete guide to partial veneers before and after

Introduction to Partial Veneers Before and After

Are you tired of feeling self-conscious about your smile? Do you wish you could achieve a more polished and confident look without undergoing extensive dental work? If so, partial veneers might be the solution you’ve been searching for. In this comprehensive guide, we’ll explore the world of partial veneers, delving into the before and after transformations that have captivated countless individuals.

They are a game-changing dental treatment that can address a wide range of cosmetic concerns, from discolored and misshapen teeth to gaps and alignment issues. Unlike traditional full veneers, which cover the entire visible surface of the tooth, partial veneers are designed to target specific problem areas, offering a more conservative and cost-effective approach to enhancing your smile.

Throughout this article, we’ll guide you through the partial veneers before and after process, providing you with a detailed understanding of what to expect, from the initial consultation to the stunning results. Get ready to embark on a journey that could forever change the way you view your smile.

What are Partial Veneers?

Partial veneers, also known as “dental veneers” or “composite veneers,” are thin, custom-made shells that are bonded to the front surface of your teeth. These shells are typically made of porcelain or a composite resin material, and they are designed to improve the appearance of your teeth by addressing a variety of cosmetic concerns.

Unlike full veneers, which cover the entire visible surface of the tooth, partial veneers are tailored to address specific problem areas, such as discoloration, chips, cracks, or misshapen teeth. This targeted approach allows for a more conservative and cost-effective solution, making it an attractive option for those seeking to enhance their smile without undergoing extensive dental work.

The primary purpose of partial veneers is to improve the aesthetic appearance of your teeth, but they can also provide some functional benefits, such as protecting weakened or damaged tooth enamel and improving the overall health of your teeth.

Before the Procedure

Before you can undergo the partial veneers procedure, you’ll need to schedule a consultation with your dentist. During this initial appointment, your dentist will thoroughly examine your teeth and discuss your specific concerns and goals.

During the consultation, your dentist will:

  • Assess the condition of your teeth and gums
  • Determine if you are a suitable candidate for partial veneers
  • Discuss the various treatment options available to you
  • Explain the partial veneers procedure in detail
  • Provide an estimate of the cost and timeline for the treatment

It’s important to be honest with your dentist about your dental history, any existing conditions, and your expectations for the outcome. This will help your dentist develop a personalized treatment plan that addresses your unique needs and ensures the best possible results.

During the Procedure

Once you and your dentist have agreed on the treatment plan, the partial veneers procedure can begin. The process typically involves the following steps:

  1. Tooth Preparation: Your dentist will lightly buff the surface of the teeth that will receive the partial veneers. This step is necessary to create a rough surface that will help the veneers adhere securely.
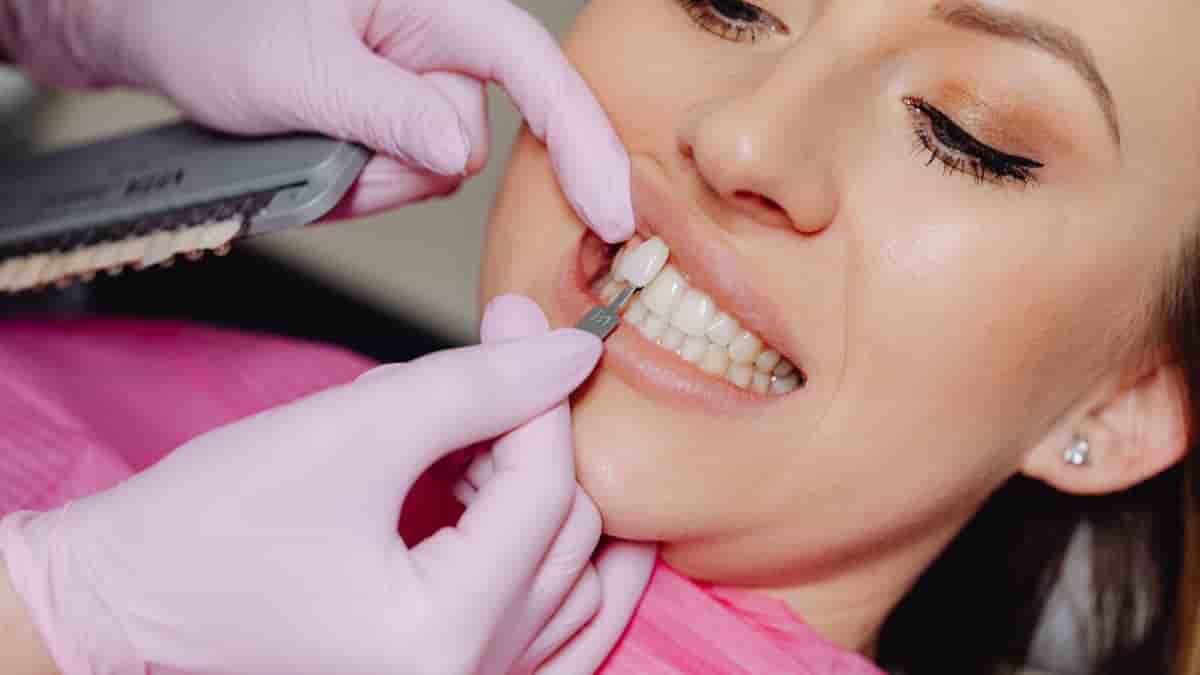
  2. Impression Taking: Your dentist will take an impression of your teeth, which will be used to create the custom-made partial veneers.
  3. Temporary Veneers: In some cases, your dentist may place temporary veneers on your teeth to protect them while the permanent partial veneers are being fabricated.
  1. Veneer Placement: When the partial veneers are ready, your dentist will carefully bond them to the front of your teeth using a special adhesive. They will then trim and polish the veneers to ensure a seamless and natural-looking finish.
  2. Final Adjustments: Your dentist may make minor adjustments to the partial veneers to ensure a comfortable and aesthetically pleasing fit.

The entire veneers procedure typically takes two to three visits, depending on the complexity of your case and the number of teeth being treated.

Aftercare and Recovery

After the partial veneers procedure, it’s important to follow your dentist’s instructions for proper aftercare and recovery. This may include:

  • Avoiding Certain Foods: For the first few days, you may need to avoid hard, crunchy, or sticky foods that could potentially dislodge or damage the new veneers.
  • Maintaining Oral Hygiene: Brushing and flossing your teeth regularly is crucial to keep the veneers and surrounding teeth healthy.
  • Attending Follow-up Appointments: Your dentist will likely schedule one or more follow-up appointments to ensure the veneers are functioning properly and to make any necessary adjustments.
  • Protecting the Veneers: Wearing a nightguard or mouthguard during sleep can help prevent grinding or clenching, which can potentially damage the veneers over time.

It’s important to note that while they are generally durable and long-lasting, they may require occasional maintenance or replacement over time. Your dentist will provide you with specific instructions on how to care for your new veneers and ensure their longevity.

Benefits of Partial Veneers

Partial veneers offer a range of benefits that make them an attractive option for those seeking to enhance their smile:

  1. Aesthetic Improvements: They can dramatically improve the appearance of your teeth, addressing issues such as discoloration, chips, cracks, and misshapen or uneven teeth.
  2. Minimal Tooth Preparation: Unlike full veneers, they require less tooth preparation, preserving more of your natural tooth structure.
  3. Cost-Effective: They are generally more affordable than full veneers, making them a more accessible option for many patients.
  4. Reversible TreatmentPartial veneers can be removed without causing permanent damage to your natural teeth, providing you with more flexibility in the future.
  1. Improved Confidence: By transforming your smile, partial veneers can boost your self-esteem and help you feel more confident in social and professional settings.

Risks and Considerations

While partial veneers are generally a safe and effective dental treatment, there are a few risks and considerations to keep in mind:

  1. Tooth Sensitivity: Some patients may experience temporary tooth sensitivity after the partial veneers procedure, particularly to hot or cold temperatures.
  2. Gum Irritation: The placement of veneers can sometimes cause minor gum irritation, which can be managed with proper oral hygiene and follow-up care.
  3. Chipping or Cracking: Although partial veneers are durable, they can still be susceptible to chipping or cracking, especially if subjected to excessive force or biting on hard objects.
  4. Discoloration: Over time, the veneers may become discolored, particularly if they are not properly maintained or if you consume staining foods and beverages.
  5. Suitability: Not everyone is a suitable candidate for veneers. Your dentist will evaluate your oral health and determine if this treatment is the best option for you.

Cost of Partial Veneers Before and After

Cost AspectBefore Partial VeneersAfter Partial Veneers
Per Tooth Cost$800 – $2,500 per tooth$925 – $2,500 per tooth
Full Mouth Cost$4,800 – $20,000 for 6-8 veneers$5,550 – $20,000 for 6-8 veneers
Insurance CoverageUnlikely to be covered, considered cosmeticUnlikely to be covered, considered cosmetic
Financing OptionsPayment plans available, 0% interestPayment plans available, 0% interest
LongevityN/A5-10 years on average, can last up to 20 years with proper care

The cost can vary significantly depending on factors such as the number of teeth being treated, the materials used (porcelain vs. composite), the dentist’s experience, and the geographic location.

Before getting partial veneers, the per-tooth cost typically ranges from $800 to $2,500. For a full mouth treatment of 6-8 veneers, the total cost can be anywhere from $4,800 to $20,000.After the procedure, the per-tooth cost remains in the $925 to $2,500 range, with a full mouth treatment of 6-8 veneers costing between $5,550 and $20,000.It’s important to note that dental insurance is unlikely to cover the cost, as they are generally considered a cosmetic treatment. However, many dentists offer financing options, including 0% interest payment plans, to help make the treatment more affordable for patients.

Partial veneers are a long-lasting solution, with an average lifespan of 5 to 10 years. With proper care and maintenance, they can even last up to 20 years, making them a worthwhile investment in the long run.

Partial Veneers Before and After: Visual Comparisons

One of the most compelling aspects of partial veneers is the dramatic transformation they can bring to your smile. By carefully selecting the right teeth to receive the veneers, your dentist can create a seamless and natural-looking improvement that can significantly boost your confidence and self-esteem.

To give you a better understanding of the partial veneers before and after results, let’s take a look at some real-life examples:

Example 1: Discolored and Misshapen Teeth

Before: The patient had several discolored and misshapen teeth, which caused them to feel self-conscious about their smile.After: With the application of partial veneers, the patient’s teeth were transformed, becoming brighter, more uniform in shape, and significantly more aesthetically pleasing.

Example 2: Chipped and Uneven Teeth

Before: The patient had several chipped and uneven teeth, which detracted from the overall appearance of their smile.After: They were used to restore the damaged teeth, creating a more symmetrical and harmonious smile.

Example 3: Gaps and Alignment Issues

Before: The patient had noticeable gaps between their teeth, as well as some misalignment, which made them feel self-conscious.After: They were strategically placed to close the gaps and improve the overall alignment of the teeth, resulting in a more polished and confident smile.

These examples showcase the remarkable transformative power of veneers, demonstrating how this innovative dental treatment can address a wide range of cosmetic concerns and deliver stunning results.

FAQs

As you consider partial veneers as a solution for your smile, you may have several questions. Here are some of the most frequently asked questions, along with detailed answers:

How long do partial veneers last?

They are designed to be a long-lasting solution for improving the appearance of your teeth. With proper care and maintenance, they can typically last between 5 to 10 years, and in some cases, even longer. The longevity of your veneers will depend on factors such as your oral hygiene habits, the materials used, and any underlying dental issues.

Are partial veneers reversible?

Yes, they are generally considered a reversible dental treatment. Unlike full veneers, which require the removal of a significant amount of tooth enamel, they can be removed without causing permanent damage to your natural teeth. This makes them a more conservative option for those who may want to explore alternative treatments in the future.

Read Also: Lash Extension Styles.

Do partial veneers stain?

Partial veneers, particularly those made of porcelain, are generally resistant to staining. However, it’s important to maintain good oral hygiene habits, such as regular brushing and flossing, to prevent discoloration. Additionally, avoiding staining foods and beverages, like coffee, tea, and red wine, can help keep your veneers looking their best.

Read Also: Marula Oil for Hair.

Can partial veneers be whitened?

While veneers themselves cannot be whitened, the surrounding natural teeth can be. Your dentist may recommend professional teeth whitening treatments to help brighten the appearance of your smile and create a more uniform look.

Read Also: Walnut Oil.

How much do partial veneers cost?

The cost can vary depending on several factors, including the number of teeth being treated, the materials used, and the location of your dentist. On average, the cost can range from $800 to $2,000 per tooth. It’s important to discuss the specific costs with your dentist during your initial consultation.

Read Also: What Massage Oils Are Best.

It’s important to discuss these risks and considerations with your dentist during your initial consultation to ensure that veneers are the right choice for your specific needs and goals.

Read Also: Gua Sha Oil.

Conclusion

If you’re looking to transform your smile without undergoing extensive dental work, partial veneers may be the solution you’ve been searching for. By addressing specific cosmetic concerns, this innovative treatment can deliver stunning results that can boost your confidence and improve your overall appearance.

Read Also: Cheek filler before and after over 50.

Throughout this comprehensive guide, we’ve explored the world of partial veneers before and after, providing you with a detailed understanding of the procedure, the potential benefits, and the associated risks and considerations. With the help of your trusted dentist, you can embark on a journey towards a more beautiful and confident smile.

Read Also: Pull Ups While Pregnant.

So, what are you waiting for? Take the first step towards your dream smile and schedule a consultation with a qualified dental professional today. Get ready to unveil the transformation and embrace the power of partial veneers.

Read Also: Black Facial Peel Mask.

Continue Reading
Click to comment

Leave a Reply

Your email address will not be published. Required fields are marked *

Beauty Tips

Emface Before and After: Embrace Magic through Transformation

Published

on

Here is your complete guide to emface before and after

Introduction to Emface Before and After

In the ever-evolving world of aesthetic treatments, a new and innovative solution has been capturing the attention of those seeking to enhance their facial appearance. Emface, a cutting-edge technology that combines high-intensity focused electromagnetic (HIFEM) energy with radiofrequency (RF) technology, has been making waves in the beauty industry, promising remarkable Emface before and after results.

As the demand for non-invasive facial rejuvenation continues to grow, Emface has emerged as a game-changer, offering a unique approach to improving facial contours, reducing wrinkles, and achieving an overall more youthful and radiant complexion. In this comprehensive article, we’ll delve into the world of Emface, exploring its working mechanism, the treatment process, and the transformative Emface before and after results that have been captivating individuals across the globe.

What is Emface?

Emface is a revolutionary facial treatment that harnesses the power of HIFEM and RF technologies to stimulate muscle contractions and improve skin appearance. Unlike traditional cosmetic procedures, Emface is a non-invasive solution that targets the underlying facial muscles, triggering a series of contractions that lead to visible improvements in facial contours and skin texture.

The Emface technology works by delivering high-intensity focused electromagnetic energy to the targeted facial areas, causing the muscles to undergo intense contractions. This muscle stimulation not only helps to tone and tighten the facial features but also promotes the production of collagen, a crucial protein responsible for maintaining skin elasticity and youthfulness.

In addition to the HIFEM component, Emface also utilizes radiofrequency (RF) technology to further enhance the treatment’s effectiveness. The RF energy heats the deeper layers of the skin, stimulating the production of new collagen and improving overall skin quality.

Emface Procedure: Step-by-Step

The Emface treatment process is designed to be comfortable and efficient, with minimal downtime for the patient. Here’s a step-by-step overview of the Emface procedure:

  1. Consultation: Before the treatment, patients will undergo a consultation with a qualified healthcare professional, who will assess their facial concerns and determine if Emface is the most suitable solution.
  1. Preparation: The treatment area is thoroughly cleaned, and any necessary markings are made to ensure precise targeting of the desired facial regions.
  2. Treatment: During the Emface procedure, the patient will recline comfortably while the healthcare provider gently applies the Emface applicator to the targeted areas. The device then delivers the HIFEM and RF energy, causing the facial muscles to contract and the skin to heat up.
  3. Duration: A typical Emface treatment session lasts approximately 20-30 minutes, depending on the specific areas being addressed.
  4. Post-Treatment Care: After the procedure, patients may experience mild redness or tingling sensations, which typically subside within a few hours. No significant downtime is required, and patients can resume their normal daily activities immediately.
  1. Treatment Plan: Most patients require a series of 4-6 Emface treatments, scheduled approximately one week apart, to achieve optimal results.

To better understand the treatment process, let’s take a look at the following table:

StepDescription
ConsultationAssessment of facial concerns and suitability for Emface treatment
PreparationCleaning and marking of the treatment area
TreatmentDelivery of HIFEM and RF energy to stimulate muscle contractions and skin heating
DurationApproximately 20-30 minutes per session
Post-Treatment CareMild redness or tingling, no significant downtime
Treatment Plan4-6 sessions scheduled one week apart for optimal results

Emface Before and After: Real-Life Transformations

The true power of Emface can be seen in the remarkable before and after results that patients have experienced. By stimulating the facial muscles and promoting collagen production, Emface has the ability to:

  • Improve Facial Contours: It can help to tighten and tone the facial muscles, leading to a more defined and sculpted appearance.
  • Reduce Wrinkles and Fine Lines: The treatment’s ability to stimulate collagen production helps to smooth out wrinkles and fine lines, resulting in a more youthful and rejuvenated complexion.
  • Enhance Skin Texture and Radiance: It can improve overall skin quality, leaving it smoother, more even-toned, and with a healthy, radiant glow.

Let’s take a closer look at some real-life before and after transformations:

BeforeAfter
Emface BeforeEmface After
This patient’s facial contours appear more defined, with a noticeable reduction in wrinkles and fine lines around the eyes and forehead.The patient’s skin appears smoother, more radiant, and with a more youthful, rejuvenated appearance.
BeforeAfter
Emface BeforeEmface After
The patient’s jawline and neck area appear more toned and sculpted, with a more defined and contoured appearance.The patient’s skin texture has improved, with a reduction in sagging and a more lifted, rejuvenated look.

These before and after showcase the remarkable transformative power of this innovative facial treatment. Patients have reported feeling more confident, youthful, and satisfied with their appearance after undergoing the procedure.

Emface vs. Other Facial Treatments

As the demand for non-invasive facial rejuvenation continues to grow, Emface has emerged as a unique and compelling alternative to traditional cosmetic procedures. Let’s compare to some other popular facial treatments:

Emface vs. Alternative Solutions

TreatmentKey FeaturesDurationResultsCustomization
EmfaceImmediate lifting effects, full results in 12 weeks, improves facial contours and youthful appearance20 minutes per session, 4-6 sessions recommendedLasting results up to a year, natural-looking improvements in wrinkles and fine linesLimited customization, focuses on facial muscles and skin tightening
UltherapyGradual results over several months, lasting up to three years, improved facial contours and youthful appearanceResults may vary, multiple sessions requiredLong-lasting results, gradual improvement in facial contoursVaries, may require multiple sessions for optimal results
BotoxRestores facial contours, reduces wrinkles, improves sagging skinQuick procedure, maintenance sessions every 3-4 monthsTemporary results, requires ongoing maintenanceLimited customization, focuses on specific areas of the face
V FaceLifts and tightens jawline and cheeks, reduces wrinkles, improves skin tone and texture40-45 minutes per session, customizable treatmentsTargeted results, stronger contractions, asymmetry correctionHighly customizable, tailored to individual needs
ThermageMitigates aging signs, diminishes wrinkles and sagging skin, enhances facial contours45 minutes to 1.5 hours per session, multiple sessions recommendedCorrects skin laxity, improves skin tone and textureLimited customization, focuses on deeper skin layers

As this table illustrates, Emface stands out from traditional facial treatments by offering a unique combination of benefits. Unlike Botox or fillers, which primarily address specific wrinkles or volume loss, it takes a more holistic approach, targeting the underlying facial muscles and skin quality to deliver comprehensive and long-lasting results.

Furthermore, it boasts a significantly shorter recovery period compared to many other facial treatments, allowing patients to resume their normal routines with minimal disruption.

Cost Comparison: Emface vs. Alternative Solutions

TreatmentCost per SessionTotal Treatment Cost
Emface$1,250$5,000 (4 sessions + 1 maintenance session every 6-12 months)
Ultherapy$3,000 – $5,000$3,000 – $15,000 (multiple sessions may be required)
Botox$300 – $600 per area$900 – $1,800 (every 3-4 months for maintenance)
V Face$500 – $1,000$2,000 – $4,000 (4 sessions)
Thermage$3,000 – $5,000$3,000 – $15,000 (multiple sessions may be required)

As the table shows, Emface is generally more expensive than some alternative solutions like Botox, but it offers a more comprehensive and long-lasting approach to facial rejuvenation. The total treatment cost for Emface, including the initial 4 sessions and a maintenance session every 6-12 months, can range from $5,000 to $7,500.

In comparison, treatments like Ultherapy and Thermage, which also use radiofrequency technology, can have a higher overall cost due to the need for multiple sessions to achieve the desired results. Botox, while more affordable per session, requires ongoing maintenance treatments every 3-4 months to maintain the effects.

The V Face treatment, which combines both HIFEM and RF technologies like Emface, falls in the middle range in terms of cost, with a total treatment plan typically costing between $2,000 and $4,000.

It’s important to note that the actual cost of these treatments may vary depending on the location, the healthcare provider’s experience, and any additional fees or discounts that may be available. Patients should always consult with a qualified professional to discuss the specific costs and payment options for their desired treatment.

Frequently Asked Questions (FAQs)

As Emface continues to gain popularity, patients often have questions about the treatment. Here are some of the most frequently asked questions:

Who is an ideal candidate for Emface?

  • It is suitable for individuals of various ages who are looking to improve the appearance of their facial features, reduce wrinkles, and enhance overall skin quality.
  • The treatment is particularly beneficial for those who are starting to notice signs of aging, such as sagging skin, loss of facial volume, and the development of fine lines and wrinkles.

Read Also: Summer Nails with Glitter.

How long do the Emface results last?

  • The results from Emface can last for several months, with many patients reporting continued improvements in their facial appearance for up to a year or more.
  • To maintain the results, most patients require a series of follow-up treatments, typically scheduled every 6-12 months.

Read Also: Summerween Nails.

Is Emface safe?

  • It is considered a safe and well-tolerated treatment, as it is non-invasive and does not involve any incisions or injections.
  • The treatment has been extensively studied and approved for use, with a low risk of side effects or complications.

Read Also: Dip Nails Summer.

How much does Emface cost?

  • The cost can vary depending on the location, the healthcare provider performing the treatment, and the number of sessions required.
  • On average, the cost of a single treatment can range from $500 to $1,000, with a full treatment plan typically costing between $2,000 and $5,000.

Read Also: Summer Shampoo.

Does Emface hurt?

  • Most patients report that the treatment is relatively comfortable, with only mild sensations of muscle contractions and skin heating during the procedure.
  • Any discomfort experienced is typically minimal and well-tolerated, with no significant pain or downtime.

By addressing these frequently asked questions, we hope to provide you with a comprehensive understanding of the Emface treatment and its potential benefits.

Read Also: Juicy Fruit Perfume.

Conclusion

In the ever-evolving world of aesthetic treatments, Emface has emerged as a game-changer, offering a unique and innovative approach to facial rejuvenation. By harnessing the power of HIFEM and RF technologies, Emface is able to stimulate the underlying facial muscles, promote collagen production, and deliver remarkable Emface before and after results.

Read Also: Dark Cherry Lip.

Whether you’re seeking to improve facial contours, reduce wrinkles, or enhance overall skin quality, it may be the solution you’ve been searching for. With its non-invasive nature, minimal downtime, and long-lasting results, this cutting-edge treatment has the potential to transform the way we approach facial aesthetics.

Read Also: Pull Ups While Pregnant.

If you’re intrigued by the transformative power of Emface, we encourage you to consult with a qualified healthcare professional to learn more about this innovative treatment and determine if it’s the right choice for you. Unlock the secrets to a more youthful, radiant, and confident appearance with Emface.

Read Also: lip lift before and after.

Continue Reading

Beauty Tips

lip lift before and after: Appreciating the Stunning Results

Published

on

lip lift before and after

Here is your complete guide to lip lift before and after

Introduction to lip lift before and after

Are you curious about the transformative power of a lip lift? Preparing to embark on your own cosmetic journey? Look no further! In this comprehensive guide, we’ll delve into the world of lip lift before and after results, uncovering the secrets to achieving the perfect pout.

Lip lifts have become an increasingly popular procedure, offering a way to enhance the appearance of the lips and create a more youthful, rejuvenated look. Whether you’re seeking to address concerns like a gummy smile, thin lips, or age-related changes, understanding the lip lift before and after process is crucial to setting realistic expectations and achieving your desired outcome.

In this article, we’ll explore the ins and outs of lip lift surgery, from the different techniques to the recovery process and potential risks. We’ll also dive into real-life lip lift before and after case studies, providing you with a glimpse into the transformative power of this procedure. By the end of this journey, you’ll be equipped with the knowledge to make an informed decision about whether a lip lift is the right choice for you.

What is a Lip Lift?

lip lift is a surgical procedure that aims to enhance the appearance of the upper lip by reducing the distance between the nose and the upper lip. This procedure can be particularly beneficial for individuals who feel their upper lip appears too long or who have a gummy smile, as it can help create a more balanced and youthful facial appearance.

There are several different types of lip lift techniques, each with its own unique approach and benefits:

Bullhorn Lip Lift

The Bullhorn lip lift is a popular technique that targets the central portion of the upper lip, lifting and shortening it to create a more defined and prominent pout.

Gull-Wing Lip Lift

The Gull-Wing lip lift focuses on lifting the corners of the mouth, helping to create a more upturned and youthful appearance.

Corner Lip Lift

The Corner lip lift is designed to address concerns with the corners of the mouth, such as downturned or drooping lips, by lifting and reshaping this area.

Regardless of the specific technique, the goal of a lip lift is to enhance the overall appearance of the lips, creating a more balanced and harmonious facial aesthetic.

Types of Lip Lifts

Type of Lip LiftDescription
Bullhorn Lip LiftLifts the central portion of the upper lip
Gull-Wing Lip LiftLifts the corners of the mouth
Corner Lip LiftTargets the corners of the mouth

Lip Lift Before and After: What to Expect

When it comes to before and after results, it’s important to have realistic expectations. While this procedure can produce stunning transformations, the extent of the changes will depend on various factors, including the individual’s facial anatomy, the specific technique used, and the skill of the surgeon.

Realistic Expectations

It’s crucial to understand that lip lift before and after results can vary significantly from person to person. Some individuals may experience a more dramatic change, while others may see a more subtle improvement. The key is to work closely with your surgeon to discuss your goals and ensure that you have a clear understanding of what the procedure can and cannot achieve.

Factors Affecting Results

Several factors can influence the before and after outcome, including:

  • Facial anatomy: The shape and proportions of your face can play a significant role in the final results.
  • Skin elasticity: Individuals with more youthful, elastic skin tend to experience better results.
  • Surgeon’s expertise: The skill and experience of the surgeon performing the procedure can greatly impact the outcome.
  • Healing process: The way your body heals and responds to the surgery can affect the final appearance.

By understanding these factors, you can set realistic expectations and work with your surgeon to achieve the best possible lip lift before and after results.

Before and After: Case Studies

To better understand the transformative power of lip lift surgery, let’s explore some real-life lip lift before and after case studies.

Case Study 1: Addressing a Gummy Smile

Sarah, a 35-year-old woman, had always been self-conscious about her gummy smile. After researching her options, she decided to undergo a Bullhorn lip lift procedure. The results were remarkable, as the surgery effectively reduced the distance between her nose and upper lip, creating a more balanced and aesthetically pleasing appearance.

Case Study 2: Enhancing Lip Volume

John, a 45-year-old man, felt that his lips had become thinner and less defined over the years. He opted for a Gull-Wing lip lift, which lifted the corners of his mouth and added subtle volume to his upper lip.

Case Study 3: Correcting Downturned Lips

Emily, a 55-year-old woman, had been struggling with downturned lips that made her appear perpetually unhappy. She underwent a Corner lip lift procedure, which successfully lifted the corners of her mouth and restored a more natural, uplifted expression.

These case studies demonstrate the transformative power of lip lift surgery, highlighting the diverse range of concerns that can be addressed through this procedure. By reviewing these lip lift before and after examples, you can gain a better understanding of the potential outcomes and set realistic expectations for your own cosmetic journey.

Lip Lift Before and After: Recovery Process

Undergoing a lip lift procedure is a significant decision, and it’s essential to be well-informed about the recovery process. While the specific timeline may vary depending on the individual and the surgical technique used, there are some general guidelines to keep in mind.

Post-Operative Care

Immediately after the surgery, you can expect some swelling, bruising, and discomfort in the treated area. Your surgeon will provide you with detailed instructions on how to care for the incision site, including the use of cold compresses and the application of ointments or medications to promote healing.

Healing Timeline

The recovery process typically takes several weeks, with the majority of the swelling and bruising subsiding within the first 7-10 days. However, it’s important to note that the final results may not be fully visible for several months, as the lips continue to settle and the incision lines fade.

Tips for a Smooth Recovery

To ensure a smooth recovery and optimal before and after results, it’s crucial to follow your surgeon’s instructions closely. This may include:

  • Avoiding strenuous activities and exercise for the first few weeks
  • Maintaining a soft, liquid diet to minimize stress on the lips
  • Practicing good oral hygiene and keeping the incision site clean
  • Applying sunscreen to the treated area to prevent discoloration
  • Attending all follow-up appointments to monitor the healing process

By prioritizing your recovery and following your surgeon’s guidance, you can increase your chances of achieving the desired lip lift before and after outcome.

Lip Lift Before and After: Risks and Complications

While lip lift surgery is generally considered a safe and effective procedure, it’s important to be aware of the potential risks and complications that may arise. Understanding these factors can help you make an informed decision and work with your surgeon to minimize any potential issues.

Potential Risks

Some of the potential risks associated with lip lift surgery include:

  • Infection at the incision site
  • Scarring or poor wound healing
  • Asymmetry or uneven results
  • Numbness or loss of sensation in the lips
  • Excessive swelling or bruising
  • Dissatisfaction with the final results

Potential Risks of Lip Lift Surgery

RiskDescription
InfectionBacterial or viral infection at the incision site
ScarringVisible or raised scarring from the incision
AsymmetryUneven or unbalanced results
NumbnessLoss of sensation or feeling in the lips
DissatisfactionUnhappiness with the final aesthetic outcome

Minimizing Complications

To minimize the risk of complications, it’s crucial to choose a board-certified plastic surgeon with extensive experience in performing lip lift procedures. Additionally, following your surgeon’s pre-and post-operative instructions closely can help reduce the likelihood of issues.

Long-term Results

While lip lift surgery can produce long-lasting results, it’s important to note that the aging process and other factors may eventually lead to changes in the appearance of the lips over time. Maintaining good skin health and considering touch-up procedures can help extend the longevity of your before and after results.

By understanding the potential risks and taking proactive steps to minimize complications, you can increase your chances of achieving a successful lip lift before and after outcome.

Before and After: Cost and Consultation

The cost of the procedure can vary depending on several factors, including the surgeon’s experience, the geographic location, and the specific techniques used. It’s important to keep in mind that the cost of the surgery is just one aspect to consider, as the expertise and qualifications of the surgeon should be the primary focus.

Consultation Process

During the initial consultation, your surgeon will thoroughly evaluate your facial anatomy, discuss your goals and concerns, and provide you with a personalized treatment plan. This is an essential step in the before and after process, as it allows you to work closely with your surgeon to ensure that you achieve the desired outcome.

Pricing Factors

Some of the key factors that can influence the cost of the procedure include:

  • Surgeon’s fees
  • Anesthesia and facility fees
  • Geographic location
  • Complexity of the procedure
  • Additional treatments or procedures

Pricing Factors for Lip Lift Procedures

FactorDescription
Surgeon’s FeesThe cost charged by the plastic surgeon
Anesthesia and Facility FeesFees for the anesthesia provider and surgical facility
Geographic LocationVariations in costs based on the region
Complexity of ProcedureMore complex techniques may incur higher fees
Additional TreatmentsThe cost of any complementary procedures

Financing Options

If the cost of a lip lift is a concern, many plastic surgery practices offer financing options or payment plans to help make the procedure more accessible. It’s important to discuss these options with your surgeon during the consultation process.

By understanding the cost and consultation process, you can make an informed decision and take the first step towards achieving your desired before and after results.

Lip Lift Before and After: Comparing Different Techniques

When it comes to the procedures, there are several different techniques to consider, each with its own unique advantages and considerations. Understanding the differences between these approaches can help you make an informed decision about the best course of action for your individual needs.

Surgical vs. Non-Surgical Options

The procedures can be divided into two main categories: surgical and non-surgical. Surgical lip lifts involve making incisions and physically altering the structure of the lips, while non-surgical options, such as dermal fillers or Botox, aim to achieve similar results through less invasive means.

Lip Lift vs. Lip Fillers

While both lip surgery and lip fillers can enhance the appearance of the lips, they work in different ways. the procedures focus on reshaping and repositioning the lips, while lip fillers add volume and plumpness. The choice between the two will depend on your specific goals and the advice of your surgeon.

Choosing the Right Procedure for You

When deciding between the various lip lift techniques or comparing to other cosmetic options, it’s essential to work closely with your surgeon. They will be able to evaluate your facial anatomy, understand your desired outcome, and recommend the most suitable approach to achieve your before and after goals.

By exploring the different techniques and comparing them to other cosmetic options, you can make an informed decision and take the first step towards achieving your desired look.

Lip Lift Before and After: Maintenance and Longevity

Achieving the perfect before and after results is just the beginning of your journey. Maintaining the longevity of your results and enhancing their appearance over time requires a dedicated approach to aftercare and ongoing maintenance.

Aftercare Tips

Following your procedure, your surgeon will provide you with detailed instructions on how to care for the treated area. This may include:

  • Keeping the incision site clean and protected
  • Applying ointments or medications as directed
  • Avoiding strenuous activities and exercise
  • Practicing good oral hygiene
  • Protecting the lips from sun exposure

Results Maintenance

To help maintain the long-term results of your lip lift, it’s important to follow a consistent skincare routine and consider touch-up procedures as needed. This may include:

  • Using sun protection to prevent discoloration and premature aging
  • Incorporating moisturizing and nourishing products into your daily regimen
  • Considering periodic touch-up procedures, such as dermal fillers or Botox, to enhance the appearance of the lips

Enhancing Longevity of Results

While the results are generally long-lasting, there are steps you can take to help extend the longevity of your transformation:

  • Maintaining a healthy lifestyle, including a balanced diet and regular exercise
  • Avoiding habits that can accelerate the aging process, such as smoking or excessive sun exposure
  • Attending regular follow-up appointments with your surgeon to monitor the results and address any concerns

By prioritizing aftercare, maintaining a consistent skincare routine, and making lifestyle choices that support the longevity of your before and after results, you can enjoy the benefits of your transformation for years to come.

Lip Lift Before and After: Frequently Asked Questions

As you consider a lip lift procedure, you may have a variety of questions and concerns. To help address these, we’ve compiled a list of frequently asked questions and their corresponding answers.

What is the recovery time for a lip lift surgery?

The recovery time for this procedure can vary, but typically, patients can expect to experience swelling and bruising for the first 7-10 days. The majority of the visible healing process takes place within the first few weeks, but it may take several months for the final results to fully emerge.

Are lip lift results permanent?

The results are generally considered long-lasting, but they are not entirely permanent. Over time, the aging process and other factors may lead to changes in the appearance of the lips. However, with proper care and maintenance, the results can be enjoyed for many years.

Read Also: Desire Pheromone Perfume.

How soon can I see results after a lip lift procedure?

Patients can typically see initial results within the first few weeks following a the procedure, as the swelling and bruising begin to subside. However, the final, optimal results may not be fully visible for several months, as the lips continue to settle and the incision lines fade.

Read Also: Summer Nails with Glitter.

Can a lip lift be combined with other cosmetic procedures?

Yes, it can often be combined with other cosmetic procedures, such as dermal fillers, Botox, or even a facelift, to achieve a more comprehensive facial rejuvenation. Your surgeon will be able to advise you on the best course of action based on your individual needs and goals.

Read Also: Summerween Nails.

What are the common risks associated with lip lift surgery?

Some of the potential risks associated with surgery include infection, scarring, asymmetry, numbness, and dissatisfaction with the final results. However, these risks can be minimized by choosing an experienced, board-certified plastic surgeon and following their pre- and post-operative instructions closely.

Read Also: Dip Nails Summer.

By addressing these frequently asked questions, we hope to provide you with a better understanding of the before and after process and help you make an informed decision about whether this procedure is right for you.

Read Also: Summer Shampoo.

Conclusion

Embarking on a lip lift journey can be a transformative experience, offering the opportunity to enhance your appearance and boost your confidence. By understanding the lip lift before and after process, exploring real-life case studies, and familiarizing yourself with the recovery, risks, and maintenance requirements, you can make an informed decision and take the first step towards achieving your desired look.

Read Also: Juicy Fruit Perfume.

Remember, the key to a successful lip lift outcome lies in working closely with an experienced, board-certified plastic surgeon who can guide you through the process and help you achieve the best possible results. With the right approach and a commitment to your recovery, you can unlock the power of a lip lift and unveil a more confident, rejuvenated version of yourself.

Read Also: Pull Ups While Pregnant.

So, are you ready to explore the world of before and after transformations? Take the first step towards your desired look and schedule a consultation with a trusted plastic surgeon today.

Read Also: Dark Cherry Lip.

Continue Reading

Beauty Tips

Dark Cherry Lip Beauty: Embrace the Glamour

Published

on

Here is your complete guide to dark cherry lip

Introduction to Dark Cherry Lip

The allure of dark cherry lip has captivated beauty enthusiasts for decades. This rich, sultry lip color has become a staple in the makeup routines of fashion icons, celebrities, and everyday individuals alike. Whether you’re seeking to enhance your natural beauty or make a bold statement, dark cherry lip offers a timeless and versatile option that can elevate any look.

What is Dark Cherry Lip?

Dark cherry lip refers to a deep, burgundy-toned lip color that evokes the rich hue of ripe cherries. This captivating shade can range from a deep, almost-black cherry to a more vibrant, wine-inspired tone, depending on the specific product and application.

Why is Dark Cherry Lip a Popular Choice?

The popularity of dark cherry lip can be attributed to its ability to flatter a wide range of skin tones, its timeless appeal, and its versatility in both casual and formal settings. This bold lip color can instantly add depth, drama, and a touch of sophistication to any makeup look.

How to Achieve the Perfect Dark Cherry Lip

Achieving the perfect dark cherry lip requires a combination of the right products, techniques, and a bit of practice. From selecting the ideal lipstick shade to mastering the application, this guide will provide you with the necessary tools and tips to help you create a stunning cherry lip look.

History of Dark Cherry Lip

The roots of dark cherry lip can be traced back to the early 20th century, when bold, dramatic lip colors began to gain popularity in the fashion and beauty industries. As the decades passed, cherry lip evolved, becoming a staple in the makeup routines of iconic figures, from Hollywood starlets to fashion-forward trendsetters.

Evolution of Dark Cherry Lip

Over the years, cherry lip has undergone various transformations, with different formulations, finishes, and application techniques emerging to cater to the changing preferences of beauty enthusiasts. From the matte, long-wearing lipsticks of the 1950s to the glossy, hydrating formulas of today, dark lip has remained a timeless and versatile option.

Influence of Dark Cherry Lip on Beauty Trends

The enduring appeal of dark lip has had a significant impact on the beauty industry, inspiring countless trends and influencing the way we perceive and approach makeup. From the bold, statement-making lips of the 1940s to the more subtle, everyday applications of the modern era, cherry lip has consistently been a source of inspiration for beauty brands and makeup artists alike.

Impact of Dark Cherry Lip on Pop Culture

Cherry lip has also left an indelible mark on pop culture, with iconic figures and memorable moments forever associated with this captivating lip color. From the sultry, red-carpet appearances of Hollywood starlets to the edgy, rock-and-roll aesthetic of musical artists, dark lip has become a symbol of confidence, sophistication, and timeless beauty.

Benefits of Dark Cherry Lip

Enhanced Beauty

One of the primary benefits of dark lip is its ability to enhance the natural beauty of the wearer. This rich, pigmented lip color can help to define and accentuate the lips, creating the illusion of a fuller, more voluptuous pout.

Confidence Boost

Wearing cherry lip can also provide a significant confidence boost, as the bold, statement-making color can help to make the wearer feel empowered and self-assured. This can be particularly beneficial for those who may be hesitant to experiment with more daring lip shades.

Versatility

Dark lip is a remarkably versatile option, as it can be worn in a variety of settings, from casual daytime looks to glamorous evening events. This adaptability allows beauty enthusiasts to incorporate cherry lip into their makeup routines with ease, making it a go-to choice for a wide range of occasions.

Timeless Appeal

Perhaps one of the most significant benefits of cherry lip is its timeless appeal. Unlike some makeup trends that come and go, dark lip has remained a beloved and enduring option, making it a classic choice that will never go out of style.

How to Get Dark Cherry Lip

Natural Methods

For those who prefer a more natural approach to achieving dark lip, there are several options available. These include using tinted lip balms, stains, or even DIY lip tints made from natural ingredients like beets or cherries.

Makeup Techniques

When it comes to creating cherry lip using makeup, there are a variety of techniques and products to explore. From applying a bold, pigmented lipstick to layering lip liners and glosses, the possibilities are endless.

Professional Treatments

For those seeking a more long-lasting or defined cherry lip look, professional treatments such as lip tattooing or permanent makeup may be worth considering. These options can provide a more precise and durable application, making them a popular choice for those with busy lifestyles.

Product Recommendations

To help you achieve the perfect dark lip, here are some top-rated product recommendations:

ProductDescription
Nars Audacious Lipstick in “Liv”A highly pigmented, creamy lipstick with a satin finish
MAC Retro Matte Lipstick in “Diva”A long-wearing, matte lipstick with a rich, velvety texture
Fenty Beauty Stunna Lip Paint in “Uncensored”A liquid lipstick with a comfortable, transfer-resistant formula
Bobbi Brown Luxe Lip Color in “Blackberry”A hydrating, semi-matte lipstick with a luxurious feel
Clinique Chubby Stick Intense Moisturizing Lip Colour Balm in “Heftiest Hibiscus”A moisturizing lip crayon with a buildable, cherry-inspired color

Dark Cherry Lip Color Options

Shades of Cherry Lip

When it comes to cherry lip, there is a wide range of shades to choose from, each with its own unique undertones and depth of color. From deep, almost-black cherry to vibrant, wine-inspired tones, the options are endless.

Dark Cherry Lip Colors for Different Skin Tones

Selecting the right dark lip shade can be a game-changer, as the color can have a significant impact on the overall appearance of the look. Here’s a breakdown of some recommended dark lip colors for different skin tones:

Skin ToneRecommended Dark Cherry Lip Colors
FairPlum-based cherry, deep burgundy
MediumRich, wine-inspired cherry, deep berry
OliveBlackberry-toned cherry, deep crimson
DarkVampy, almost-black cherry, deep bordeaux

Dark Cherry Lip Colors for Different Hair Colors

The interplay between dark lip and hair color can also be a crucial factor in achieving a harmonious and flattering look. Consider these recommendatio²ns:

  • Blonde: Opt for a warmer, reddish-toned dark lip
  • Brunette: Experiment with deeper, more plum-based dark lip shades
  • Red: Complement your fiery locks with a bold, berry-inspired dark lip
  • Gray/White: Pair with a cooler, more blue-based dark lip for a striking contrast

Dark Cherry Lip Colors for Different Eye Colors

The choice of cherry lip can also be influenced by the wearer’s eye color, as the right shade can help to enhance and accentuate the eyes. Consider these recommendations:

  • Blue Eyes: Opt for a dark lip with cool, blue-based undertones
  • Green Eyes: Experiment with warmer, more reddish-toned cherry lip shades
  • Hazel Eyes: Complement your eyes with a cherry lip that has a mix of warm and cool undertones
  • Brown Eyes: Versatile cherry lip shades, from deep burgundy to rich plum, will flatter your eyes

Dark Cherry Lip Makeup Tips

Choosing the Right Lipstick

When it comes to dark lip, the choice of lipstick is crucial. Look for formulas that are highly pigmented, long-wearing, and comfortable on the lips. Matte, satin, and cream finishes can all work well, depending on your personal preference and the desired look.

Applying Dark Lip

Proper application is key to achieving a flawless cherry lip. Start by exfoliating and hydrating your lips to create a smooth canvas. Then, use a lip liner to define the edges of your lips and fill them in, followed by the application of your chosen lipstick. Blot with a tissue and reapply as needed for a polished, long-lasting look.

Enhancing Dark Cherry Lip

To further enhance your cherry lip, consider adding depth and dimension with the use of lip glosses, highlighters, or even a touch of eyeshadow in a complementary shade. These additional steps can help to create a more dimensional and visually striking look.

Maintaining Dark Cherry Lip

Maintaining the vibrancy and longevity of your dark lip is essential. Carry a touch-up lipstick or lip liner with you, and be mindful of blotting and reapplying as needed throughout the day. Avoid eating or drinking too much, as this can cause the color to fade prematurely.

Read Also: Desire Pheromone Perfume.

Dark Cherry Lip FAQs

How do I choose the right dark cherry lip color for my skin tone?

When selecting the perfect cherry lip color, consider your skin’s undertones and depth. Cooler skin tones may gravitate towards plum-based cherry shades, while warmer skin tones may prefer reddish-toned cherry hues. Olive and darker skin tones can experiment with deeper, more vampy cherry shades.

Read Also: Summer Nails with Glitter.

Can I wear dark cherry lip with a bold eye look?

Absolutely! Dark lip pairs beautifully with a bold eye look, creating a striking and dramatic overall appearance. Experiment with smoky eyes, winged eyeliner, or even a touch of glitter to complement your cherry lip.

Read Also: Summerween Nails.

How do I maintain dark cherry lip throughout the day?

To maintain the vibrancy and longevity of your dark lip, be sure to blot and reapply as needed throughout the day. Carry a touch-up lipstick or lip liner with you, and avoid eating or drinking too much, as this can cause the color to fade prematurely.

Read Also: Dip Nails Summer.

Can I use dark cherry lip as a bold lip color for a special occasion?

Yes, dark lip is an excellent choice for a bold, statement-making lip color for special occasions. Whether you’re attending a formal event, a night out on the town, or a red-carpet affair, cherry lip can help you make a lasting impression.

Read Also: Summer Shampoo.

Conclusion

In conclusion, dark cherry lip is a captivating and timeless beauty trend that has captivated the hearts and minds of makeup enthusiasts for decades. From its rich, sultry hues to its versatility and enduring appeal, this bold lip color has become a staple in the makeup routines of fashion icons, celebrities, and everyday individuals alike.

Read Also: Pull Ups While Pregnant.

Whether you’re seeking to enhance your natural beauty or make a bold statement, dark lip offers a versatile and sophisticated option that can elevate any look. With the right products, techniques, and a bit of practice, you can achieve the perfect cherry lip and embrace the allure of this captivating beauty trend.

Read Also: Juicy Fruit Perfume.

Continue Reading

Trending