Connect with us

Beauty Tips

Hair and Makeup Trailers: What is it? The Ultimate Guide

Published

on

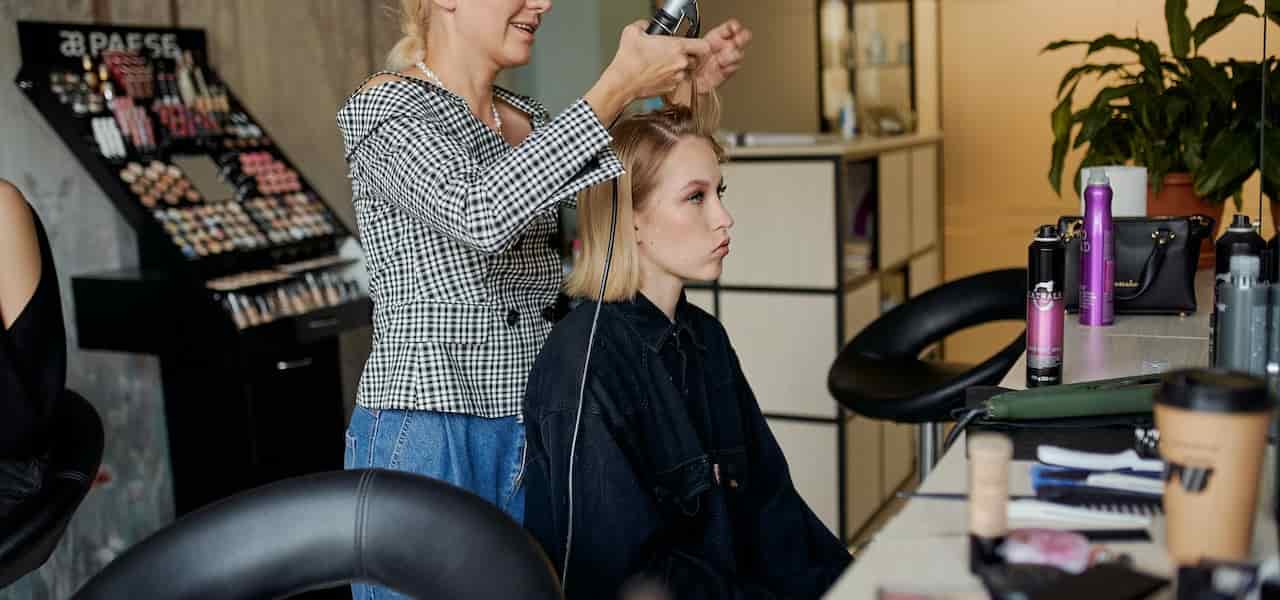
hair and makeup trailers

Here is your complete guide to hair and makeup trailers

Introduction to Hair and Makeup Trailers

The world of entertainment is a realm of creativity, where every detail matters. From the costumes to the sets, and the lighting to the makeup, each element contributes to the magic on screen. Among these, hair and makeup play a pivotal role in transforming actors into characters, bringing their roles to life. And when it comes to ensuring that hair and makeup artists have the best working conditions, hair and makeup trailers are the unsung heroes on sets. In this comprehensive guide, we will delve into the world of hair and makeup trailers, exploring their benefits, features, and how they enhance productions. So, let’s dive in and discover how these trailers are revolutionizing the entertainment industry.

Benefits of Hair and Makeup Trailers

Hair and makeup trailers are more than just mobile dressing rooms. They offer a range of benefits that contribute to a seamless production process. One of the primary advantages is the convenience and mobility they provide for on-location shoots. These trailers can be easily transported to any shooting location, eliminating the need for actors and actresses to travel to and from a separate location for hair and makeup. This saves precious time and energy, allowing them to focus on their performances.

Moreover, hair and makeup trailers provide a comfortable and well-equipped space for hair and makeup artists to work their magic. These trailers are designed with hair and makeup stations, ample lighting, mirrors, and storage, creating a conducive environment for artists to create stunning looks. Additionally, they offer privacy, allowing actors and actresses to have personal grooming sessions away from the prying eyes of the public, maintaining the element of surprise for their characters.

Furthermore, opting for hair and makeup trailers can be a cost-effective solution for production companies. Renting or owning these trailers eliminates the need for building and maintaining separate hair and makeup rooms on set, saving production costs in the long run. The mobility and versatility of hair and makeup trailers also provide flexibility in set locations, accommodating different production requirements and budgets.

Features of Hair and Makeup Trailers

Hair and makeup trailers come in various sizes and layouts, offering options to suit different production needs. These trailers are equipped with amenities that cater to the specific requirements of hair and makeup artists. Typically, they feature multiple hair and makeup stations with ample counter space, mirrors with proper lighting, and storage for equipment and products. Some trailers also include additional amenities such as seating areas, restrooms, and changing rooms to provide a comfortable and functional space for artists.

Moreover, hair and makeup trailers can be customized to meet specific production requirements. Customization options include layout modifications, electrical and lighting upgrades, and branding opportunities. For instance, trailers can be designed to accommodate special effects makeup or wig styling, depending on the production’s needs. Accessibility and safety features, such as ramps, handrails, and fire safety measures, are also important considerations in the design of hair and makeup trailers, ensuring a safe and inclusive working environment.

How Hair and Makeup Trailers Enhance Productions

They play a crucial role in enhancing the production process in various ways.

Firstly, these trailers provide a streamlined workflow for hair and makeup artists, allowing them to work efficiently and effectively. With all the necessary tools and equipment readily available in the trailer, artists can focus on their craft and create stunning looks for the actors and actresses. This streamlines the production process, saving time and ensuring that the hair and makeup aspects are executed flawlessly.

Secondly, they contribute to efficient time management during production. Actors and actresses can have their hair and makeup done in the same location where they are needed on set, eliminating the need for time-consuming travel between locations. This allows for a more organized and punctual shooting schedule, reducing downtime and maximizing productivity. Additionally, the privacy provided by hair and makeup trailers allows actors and actresses to have personal grooming sessions without interruptions, ensuring that they look their best on camera.

They also create a comfortable and conducive working environment for hair and makeup artists. The well-equipped stations, ample lighting, and storage space in the trailers enable artists to work efficiently and effectively, resulting in high-quality hair and makeup looks for the production. Moreover, the customizable options of them allow for a tailored workspace that meets the specific needs of the production, further enhancing the artists’ workflow.

Furthermore, the mobility of hair and makeup trailers allows for flexibility in set locations. Productions can choose to shoot on location without worrying about the availability of hair and makeup facilities, as these trailers can be transported to any location. This provides the production team with more creative freedom in choosing set locations and ensures that hair and makeup services are readily available wherever they are needed.

They also contribute to cost-effectiveness in production. Renting or owning hair and makeup trailers eliminates the need for building and maintaining separate hair and makeup rooms on set, saving production costs in the long run. These trailers can also be shared among multiple productions, further reducing expenses. Additionally, the versatility of hair and makeup trailers allows for their use in various types of productions, such as films, TV shows, commercials, and events, making them a cost-effective solution for different entertainment projects.

FAQs

What is hair and makeup in film?

Hair and makeup in film refer to the artistic and technical processes of styling and grooming actors’ hair and applying makeup to their faces and bodies to create specific looks that fit the characters and the overall visual aesthetic of a film. Hair and makeup play a crucial role in transforming actors into their roles, enhancing their performances, and contributing to the storytelling and visual aspects of the film.

Read More About How Long to Wait to Wash Hair Before Coloring.

What makes a good trailer?

A good trailer is one that effectively captures the essence of the film, creates anticipation and excitement in the audience, and compels them to watch the full movie. Here are some key elements that make a good trailer:

  1. Engaging visuals: The trailer should have visually appealing and well-crafted shots that showcase the film’s style, tone, and genre.
  2. Compelling storytelling: The trailer should provide a glimpse of the film’s plot, characters, and conflict while leaving enough suspense to intrigue the audience.
  3. Memorable moments: The trailer should highlight the film’s standout moments, such as action sequences, emotional scenes, or witty dialogue, to create memorable impressions.
  4. Appropriate pacing: The trailer should have a well-paced rhythm that builds up excitement and maintains the audience’s attention throughout.
  5. Effective use of music and sound: The trailer should have an impactful music score and sound design that enhance the visuals and evoke emotions in the audience.
  6. Clear messaging: The trailer should clearly communicate the film’s genre, tone, and release date, along with any notable cast or crew involved.

Read More About Powerlifting Weight Classes for Women: Everything You Need to Know.

What are the different types of movie trailers?

There are several different types of movie trailers that serve different purposes in promoting a film:

  1. Teaser trailers: These trailers are released early in the film’s marketing campaign and provide a brief glimpse of the film’s tone, style, and main characters without revealing too much of the plot.
  2. Theatrical trailers: These trailers are the most common type of movie trailers and are released closer to the film’s release date. They typically provide a more in-depth look at the film’s plot, characters, and visual elements.
  3. Red band trailers: These trailers are restricted to mature audiences and can include explicit content, such as violence, profanity, or nudity. They are often used for R-rated films or movies with edgier content.
  4. International trailers: These trailers are tailored for specific international markets and may include localized footage, voice-overs, or subtitles to cater to the cultural preferences of those markets.
  5. TV spots: These trailers are shorter versions of theatrical trailers and are typically aired on television to reach a wider audience. They are usually 30 seconds to a minute long and focus on the film’s most captivating moments.
  6. Special event trailers: These trailers are created for specific events, such as film festivals or special screenings, and may have unique footage or messaging tailored for those events.

Read More About Should You Wear a Bra to Sleep?

What is the purpose of trailers?

The purpose of trailers is to promote and generate buzz for a film before its release, creating anticipation and excitement among the target audience. Trailers serve as a powerful marketing tool to capture the attention of potential viewers, generate interest in the film’s story, characters, and visuals, and ultimately drive audiences to watch the full movie in theaters or on other platforms. Trailers also help to build awareness, create hype, and generate word-of-mouth buzz, which can contribute to the success of a film’s box office performance.

Read More About How Long Do Acrylic Nails Last?

Conclusion

In conclusion, hair and makeup trailers are a game-changer in the entertainment industry, providing numerous benefits, features, and enhancing productions on and off set. From saving time and providing a comfortable working environment for artists to offering flexibility in set locations and cost-effectiveness, these trailers are revolutionizing the way hair and makeup services are provided on productions. So, next time you watch your favorite movie or TV show, remember the behind-the-scenes magic that happens in these hair and makeup trailers, making the characters come to life on screen.

Read More About Makeup in the 70s.

Continue Reading
Click to comment

Leave a Reply

Your email address will not be published. Required fields are marked *

Beauty Tips

Marula Oil for Hair Health: Nourish and Protect

Published

on

marula oil for hair

Here is your complete guide to marula oil for hair

Introduction to Marula Oil for Hair

Marula oil is a popular ingredient in hair care products, and for good reason. This lightweight, nutrient-rich oil is derived from the nuts of the marula tree, which is native to southern Africa. Marula oil is packed with antioxidants, vitamins, and essential fatty acids that can help to improve the health and appearance of your hair. In this article, we will explore the benefits of marula oil for hair, how to use it, and the best products to look for. We will also answer some frequently asked questions about this amazing oil.

What is Marula Oil?

Marula oil is extracted from the kernels of the Marula fruit, scientifically known as Sclerocarya birrea. This tree, also known as the “Elephant Tree” or “King of African Trees,” thrives in the arid landscapes of southern Africa. The extraction process involves cold-pressing the kernels to retain its potent nutrients, resulting in a lightweight, non-greasy oil with a pale yellow hue.

Comparison of Marula Oil and Other Popular Hair Oils

OilBenefits
Marula OilLightweight, absorbs quickly, high in antioxidants, vitamins, and essential fatty acids
Coconut OilHeavy, takes time to absorb, high in saturated fats, good for deep conditioning
Argan OilHeavy, takes time to absorb, high in vitamin E, good for repairing damaged hair
Olive OilHeavy, takes time to absorb, high in monounsaturated fats, good for deep conditioning
Jojoba OilLightweight, absorbs quickly, similar to sebum, good for balancing oil production

Benefits of Marula Oil for Hair

Marula oil is a versatile ingredient that can offer many benefits for your hair. Here are some of the ways that marula oil can help:

Moisturizing Properties

It is a lightweight oil that is easily absorbed by the hair, making it an excellent moisturizer. It can help to hydrate and nourish dry, brittle hair, leaving it soft, shiny, and manageable.

Anti-inflammatory Properties

Marula oil has anti-inflammatory properties, which can help to soothe a dry, itchy scalp. It can also help to reduce redness and irritation, making it a great option for those with sensitive skin.

UV Protection

Marula contains antioxidants that can help to protect your hair from the damaging effects of the sun. It can help to prevent your hair from becoming dry, brittle, and damaged by UV rays.

Hair Growth Promotion

Marula is rich in nutrients that can help to promote hair growth. It can help to strengthen the hair follicles, reduce hair fall, and improve the overall health of your hair.

Damage Repair

Marula is high in essential fatty acids, which can help to repair damaged hair. It can help to smooth the cuticle, reduce frizz, and restore shine to your hair.

Styling and Finishing

It can also be used as a styling and finishing product. It can help to tame flyaways, add shine, and protect your hair from heat damage.

How to Use Marula Oil for Hair

Marula is easy to use and can be incorporated into your hair care routine in a number of ways. Here are some tips for using marula for your hair:

Choosing the Right Marula Oil

When choosing marula oil, look for a high-quality, cold-pressed oil that is 100% pure and natural. Avoid oils that contain additives, fragrances, or other ingredients that can be harmful to your hair.

Application Techniques

Marula can be applied to damp or dry hair. To apply, simply place a few drops of oil in the palm of your hand and rub your hands together. Then, distribute the oil evenly throughout your hair, focusing on the ends.

Carrier Oils and Essential Oils

It can be mixed with other oils, such as carrier oils or essential oils, to enhance its benefits. Some popular carrier oils for marula oil include jojoba oil, coconut oil, and olive oil.

Essential oils, such as lavender oil or rosemary oil, can be added to marula to promote hair growth and soothe a dry, itchy scalp.

Frequency of Use

Marula can be used daily or as needed. If you have dry, brittle hair, you may want to use this oil more frequently. If you have oily hair, you may want to use marula oil less frequently to avoid weighing down your hair.

Marula Oil Hair Products

It is a popular ingredient in hair care products, and there are many products available that contain this amazing oil. Here are some of the best marula oil products to look for:

Top Marula Oil Hair Products

Product NameBrandProduct TypeKey FeaturesPros and Cons
Marula Hair OilAfrican BotanicsHair OilLightweight, absorbs quickly, high in antioxidants, vitamins, and essential fatty acidsExpensive, small bottle
Marula Hydrating ShampooJohn Masters OrganicsShampooGentle, hydrating, sulfate-free, contains marula oil and other natural ingredientsMay not lather well, expensive
Marula Deep Conditioning MaskShea MoistureHair MaskDeeply hydrating, contains marula oil, shea butter, and other natural ingredientsMay be too heavy for fine hair, takes time to rinse out
Marula Leave-in ConditionerOGXLeave-in ConditionerLightweight, detangles, adds shine, contains marula oil and other natural ingredientsMay not be hydrating enough for very dry hair, can be sticky
Marula Styling CreamLiving ProofStyling CreamLightweight, adds texture, reduces frizz, contains marula oil and other natural ingredientsMay be too heavy for fine hair, expensive

Marula Oil Hair Care Routine

It can be incorporated into your hair care routine in a number of ways. Here is a sample marula oil care routine:

Cleansing

Start by cleansing your hair with a gentle, hydrating shampoo that contains marula. This will help to remove dirt, oil, and other impurities from your hair, while also providing hydration and nourishment.

Conditioning

After cleansing, apply a deep conditioning mask that contains marula oil. This will help to deeply hydrate and nourish your hair, leaving it soft, shiny, and manageable.

Styling

Before styling your hair, apply a styling cream that contains marula oil. This will help to add texture, reduce frizz, and protect your hair from heat damage.

Maintenance

To maintain the health and appearance of your hair, use a leave-in conditioner or hair oil that contains marula. This will help to keep your hair hydrated and nourished, while also adding shine and reducing frizz.

FAQs

Can marula oil be used on all hair types?

It can be used on all hair types, including dry, brittle, oily, and damaged hair. It is a lightweight oil that is easily absorbed by the hair, making it a great option for those with fine or oily hair.

Read Also: Lip Filler Before and After.

How often should marula oil be used?

    Marula oil can be used daily or as needed. If you have dry, brittle hair, you may want to use marula more frequently. If you have oily hair, you may want to use marula less frequently to avoid weighing down your hair.

    Read Also: Before and After Microneedling.

    Can marula oil be used on wet or dry hair?

      It can be used on both wet and dry hair. If you have dry, brittle hair, you may want to apply marula to damp hair before styling. If you have oily hair, you may want to apply marula to dry hair to add shine and reduce frizz.

      Read Also: Brazilian Blowout Before and After.

      Is marula oil better than argan oil for hair?

        Both marula and argan oil are excellent oils for hair, and each has its own unique benefits. Marula oil is a lightweight oil that is easily absorbed by the hair, making it a great option for those with fine or oily hair. Argan oil is a heavier oil that is better suited for those with dry, damaged hair.

        Read Also: Yellow Nail Designs.

        Can marula oil be used to treat dandruff?

          Marula oil has anti-inflammatory properties, which can help to soothe a dry, itchy scalp. It can also help to reduce redness and irritation, making it a great option for those with sensitive skin. However, if you have severe dandruff, you may want to talk to your doctor or a dermatologist for treatment options.

          Read Also: Neck Botox.

          Conclusion

          Marula oil is a versatile ingredient that can offer many benefits for your hair. It is a lightweight oil that is easily absorbed by the hair, making it a great option for those with fine or oily hair. Marula oil is packed with antioxidants, vitamins, and essential fatty acids that can help to improve the health and appearance of your hair.

          Read Also: Thermage Before and After.

          If you are looking to incorporate marula oil into your hair care routine, there are many products available that contain this amazing oil. From hair oils and shampoos to hair masks and styling creams, there is a marula oil product for every hair type and need.

          Read Also: Pull Ups While Pregnant.

          So, go ahead and give marula oil a try. Your hair will thank you!

          Read Also: Lash Extension Styles.

          Continue Reading

          Beauty Tips

          Lash Extension Styles: Mastering the Art of Beautiful Eyelashes

          Published

          on

          lash extension styles

          Here is your complete guide to lash extension styles

          Introduction to Lash Extension Styles

          Lash extensions have become a popular beauty trend in recent years, offering a way to enhance the natural beauty of the eyes without the need for daily makeup application. But with so many different lash extension styles to choose from, it can be overwhelming to know which one is right for you. In this article, we’ll explore the different types of lash extension styles, their pros and cons, and how to apply them.

          What are Lash Extension Styles?

          Lash extension styles refer to the different ways that lash extensions can be applied to enhance the natural beauty of the eyes. From classic to mega volume, there are many different options to choose from, each with its own unique look and benefits.

          Why are Lash Extension Styles Important?

          They can help to enhance the natural beauty of the eyes, making them look bigger, fuller, and more defined. They can also save time and money on daily makeup application, as well as provide a more natural and long-lasting alternative to false lashes.

          Who are Lash Extension Styles for?

          They are for anyone who wants to enhance the natural beauty of their eyes, whether for a special occasion or as part of their daily beauty routine. They are suitable for all ages and can be customized to suit individual eye shapes and preferences.

          How to Choose the Right Lash Extension Style

          Selecting the perfect lash extension style requires careful consideration of several factors, including your face shape, eye shape, and lifestyle preferences. Here’s a step-by-step guide to help you navigate the decision-making process:

          Consideration Factors

          • Personal Style: Are you drawn to a natural, understated look, or do you prefer something more dramatic and eye-catching?
          • Occasion: Will you be wearing your lash extensions for everyday wear or a special event?
          • Comfort Level: Are you comfortable with the maintenance requirements associated with certain lash extension styles?

          Face Shape Guide

          • Round Face: Angular lash styles, such as cat-eye or elongated lashes, can help elongate the face and create a more balanced appearance.
          • Square Face: Soft, wispy lash styles, like doll or babydoll lashes, can soften the angles of a square face and add femininity.
          • Oval Face: Oval faces are versatile and can pull off various lash styles, so feel free to experiment with different looks.
          • Heart-Shaped Face: Fluttery, tapered lashes that are longest at the outer corners can complement a heart-shaped face by drawing attention to the eyes.

          Eye Shape Guide

          • Almond Eyes: Almond-shaped eyes are well-suited to most lash extension, making them the perfect canvas for experimentation.
          • Round Eyes: To elongate round eyes, opt for lashes that are longer in the center and shorter at the inner and outer corners.
          • Hooded Eyes: Focus on lifting the eyes with curled lashes and avoiding styles that are too heavy or dense, which can weigh down the lids.
          • Monolid Eyes: Curled lashes with varying lengths can create the illusion of depth and dimension on monolid eyes.

          Lifestyle and Maintenance Considerations

          • Active Lifestyle: If you lead an active lifestyle or enjoy swimming or exercising regularly, opt for a durable lash extension style that can withstand moisture and movement.
          • Maintenance Routine: Consider how much time and effort you’re willing to devote to maintaining your lash extensions. While some styles require minimal upkeep, others may necessitate more frequent touch-ups.

          Different Types of Styles

          Lash Extension StyleDescription
          ClassicSingle lash extension applied per natural lash
          VolumeMultiple lash extensions applied per natural lash for a fuller look
          HybridCombination of classic and volume lash extensions
          Mega VolumeMore than 2-3 lash extensions applied per natural lash for a dramatic look
          Russian VolumeThinner lash extensions applied in a fan-like shape for a more natural look
          ColoredLash extensions in various colors for a bold and unique look
          3D, 4D, 5DIncreased number of lash extensions applied per fan for a fuller look
          Baby DollLonger lashes in the center and shorter lashes on the sides for a doe-eyed look
          Cat EyeLonger lashes on the outer corners for an almond-shaped look
          Kitten EyeSubtle cat eye look for a more natural appearance

          Classic Lash Extension Styles

          Classic lash extension styles involve the application of a single lash extension to each natural lash. This creates a subtle and natural-looking enhancement to the eyes.

          Pros of Classic Lash Extension Styles

          • Natural-looking enhancement
          • Suitable for all eye shapes
          • Low maintenance

          Cons

          • May not provide as much volume as other styles
          • Can be more time-consuming to apply

          How to Apply Classic Lash Extension Styles

          1. Clean the natural lashes thoroughly
          2. Apply a bonding agent to the natural lash
          3. Place the lash extension onto the natural lash, ensuring it is aligned with the natural growth direction
          4. Allow the bonding agent to dry
          5. Repeat for each natural lash

          Volume Lash Extension Styles

          Volume lash styles involve the application of multiple lash extensions to each natural lash, creating a fuller and more voluminous look.

          Pros of Volume Lash Extension Styles

          • Fuller and more voluminous appearance
          • Customizable to individual preferences
          • Suitable for all eye shapes

          Cons

          • May require more maintenance than classic styles
          • Can be more expensive than classic styles

          How to Apply Volume Lash Extension Styles

          1. Clean the natural lashes thoroughly
          2. Apply a bonding agent to the natural lash
          3. Place the lash extension fan onto the natural lash, ensuring it is aligned with the natural growth direction
          4. Allow the bonding agent to dry
          5. Repeat for each natural lash

          Hybrid Lash Extension Styles

          Hybrid lash styles combine the benefits of classic and volume styles, creating a natural-looking enhancement with added volume.

          Pros of Hybrid Lash Extension Styles

          • Natural-looking enhancement with added volume
          • Customizable to individual preferences
          • Suitable for all eye shapes

          Cons

          • May require more maintenance than classic styles
          • Can be more expensive than classic styles

          How to Apply

          1. Clean the natural lashes thoroughly
          2. Apply a bonding agent to the natural lash
          3. Place a combination of single and multiple lash extensions onto the natural lash, ensuring they are aligned with the natural growth direction
          4. Allow the bonding agent to dry
          5. Repeat for each natural lash

          Mega Volume Lash Extension Styles

          Mega volume lash styles involve the application of more than 2-3 lash extensions to each natural lash, creating a dramatic and voluminous look.

          Pros of Mega Volume Lash Extension Styles

          • Dramatic and voluminous appearance
          • Customizable to individual preferences
          • Suitable for special occasions

          Cons

          • May require more maintenance than classic styles
          • Can be more expensive than classic styles
          • May not be suitable for everyday wear

          How to Apply

          1. Clean the natural lashes thoroughly
          2. Apply a bonding agent to the natural lash
          3. Place a fan of multiple lash extensions onto the natural lash, ensuring it is aligned with the natural growth direction
          4. Allow the bonding agent to dry
          5. Repeat for each natural lash

          Russian Volume Lash Extension Styles

          Russian volume lash styles involve the application of thinner lash extensions in a fan-like shape, creating a more natural and subtle enhancement.

          Pros of Russian Volume Lash Extension Styles

          • More natural and subtle enhancement
          • Customizable to individual preferences
          • Suitable for all eye shapes

          Cons

          • May require more maintenance than classic styles
          • Can be more expensive than classic styles

          How to Apply

          1. Clean the natural lashes thoroughly
          2. Apply a bonding agent to the natural lash
          3. Place a fan of thinner lash extensions onto the natural lash, ensuring it is aligned with the natural growth direction
          4. Allow the bonding agent to dry
          5. Repeat for each natural lash

          Colored Lash Extension Styles

          They involve the application of lash extensions in various colors, creating a bold and unique look.

          Pros of Colored Lash Extension Styles

          • Bold and unique appearance
          • Customizable to individual preferences
          • Suitable for special occasions

          Cons

          • May not be suitable for everyday wear
          • May require more maintenance than classic styles

          How to Apply

          1. Clean the natural lashes thoroughly
          2. Apply a bonding agent to the natural lash
          3. Place a lash extension in the desired color onto the natural lash, ensuring it is aligned with the natural growth direction
          4. Allow the bonding agent to dry
          5. Repeat for each natural lash

          Cost of Lash Extension Styles

          StyleFull SetRefill
          Classic$150$75
          Hybrid$190$95
          Volume$227$113
          Mega Volume$345$220

          The cost of lash extension varies depending on the style, material, duration, and lash artist’s technique. On average, a full set of classic lash extensions costs around $150, while a full set of Russian volume lashes is more expensive and is usually around $230. Hybrid lashes, which are a combination of classic and volume lashes, typically cost around $190. The cost of lash extensions infills is usually 50-70% of the full set price, and is required every 3-4 weeks to maintain the fresh, fluffy look of lash extensions. The more often you have fill-ins, the less you will pay. It is important to ensure the quality of lash extensions before applying them to your eyes, as health and safety matter the most.

          Read Also: Lip Filler Before and After.

          FAQs

          How Long Do Lash Extension Styles Last?

          Lash extension can last anywhere from 2-4 weeks, depending on the individual’s natural lash growth cycle and maintenance.

          Read Also: Before and After Microneedling.

          Are Lash Extension Styles Safe?

          Yes, lash styles are safe when applied by a trained and certified professional. However, it is important to follow proper aftercare instructions to ensure the health and safety of the natural lashes.

          Read Also: Brazilian Blowout Before and After.

          How Much Do Lash Extension Styles Cost?

          The cost of lash extension can vary depending on the type of style, the number of lashes applied, and the location of the salon. On average, classic lash extensioncan range from $100-$200, while volume and mega volume styles can range from $200-$400.

          Read Also: Yellow Nail Designs.

          Can I Wear Makeup with Lash Extension Styles?

          Yes, makeup can be worn with lash extension , but it is important to avoid oil-based products and heavy eyeliners that can break down the bonding agent.

          Read Also: Neck Botox.

          How Do I Care for My Lash Extension Styles?

          Proper care and maintenance are essential for the health and longevity of lash extension. This includes avoiding water and oil-based products for the first 24 hours, brushing the lashes daily, and avoiding rubbing or pulling on the lashes.

          Read Also: Pull Ups While Pregnant.

          Conclusion

          Lash extension styles offer a way to enhance the natural beauty of the eyes, providing a more natural and long-lasting alternative to false lashes. With so many different styles to choose from, it’s important to consider individual preferences and eye shapes when selecting the right style. Proper care and maintenance are also essential for the health and longevity of Lash styles.

          Read Also: Thermage Before and After.

          Continue Reading

          Beauty Tips

          Thermage Before and After: Transform Your Look Revealed

          Published

          on

          thermage before and after

          Here is your complete guide to thermage before and after

          Introduction to Thermage Before and After

          If you’re looking for a non-surgical way to tighten your skin, reduce wrinkles, and improve your overall appearance, then you might want to consider Thermage. Thermage is a popular cosmetic treatment that uses radiofrequency energy to stimulate collagen production and improve the texture and tone of your skin. In this article, we’ll take a closer look at Thermage and what you can expect before and after the treatment.

          What is Thermage?

          Thermage is a non-invasive cosmetic procedure that uses radiofrequency energy to heat the deep layers of your skin, stimulating collagen production and tightening the skin. The treatment is usually performed on the face, neck, and body, and can be used to address a variety of skin concerns, including:

          • Sagging skin
          • Wrinkles and fine lines
          • Cellulite
          • Body contouring

          Thermage Before and After: What to Expect

          Before the treatment, your doctor will evaluate your skin and discuss your goals and expectations with you. They will also explain the procedure, including the potential risks and benefits, and answer any questions you may have.

          During the treatment, your doctor will apply a cooling gel to the area being treated and then use a handheld device to deliver the radiofrequency energy. The device will heat the deep layers of your skin, causing the collagen fibers to contract and stimulating new collagen production.

          After the treatment, you may experience some redness, swelling, and mild discomfort, but these side effects usually resolve within a few hours. You can expect to see some results immediately after the treatment, but the full effects will become apparent over time as your body produces new collagen.

          Thermage Before and After: Skin Tightening

          Thermage is often used to tighten loose or sagging skin on the face and neck. The treatment can help to improve the appearance of jowls, turkey neck, and other signs of aging. Here’s what you can expect in terms of results:

          TimeframeResults
          Immediately after treatmentTighter, smoother skin
          2-6 months after treatmentContinued improvement as new collagen is produced
          12 months after treatmentMaximum results

          Thermage Before and After: Wrinkle Reduction

          Thermage can also be used to reduce the appearance of wrinkles and fine lines on the face and body. The treatment can help to smooth out crow’s feet, forehead lines, and other signs of aging. Here’s what you can expect in terms of results:

          TimeframeResults
          Immediately after treatmentSmoother, more even skin texture
          2-6 months after treatmentContinued improvement as new collagen is produced
          12 months after treatmentMaximum results

          Thermage Before and After: Cellulite Reduction

          Thermage can be used to reduce the appearance of cellulite on the thighs, hips, and buttocks. The treatment can help to smooth out the skin and improve the overall appearance of the area. Here’s what you can expect in terms of results:

          TimeframeResults
          Immediately after treatmentSmoother, more even skin texture
          2-6 months after treatmentContinued improvement as new collagen is produced
          12 months after treatmentMaximum results

          Thermage Before and After: Body Contouring

          Thermage can be used to contour and shape the body, helping to improve the appearance of love handles, saddlebags, and other areas of excess fat. Here’s what you can expect in terms of results:

          TimeframeResults
          Immediately after treatmentSlimmer, more toned appearance
          2-6 months after treatmentContinued improvement as new collagen is produced
          12 months after treatmentMaximum results

          Side Effects of Thermage Before and After

          Tingling

          After your Thermage treatment, you might experience some temporary tingling in the treated areas. This sensation is a result of the Thermage device heating your skin’s underlying layers, stimulating collagen production for a skin tightening treatment. To maximize the benefits of Thermage treatment, don’t panic and stop the process. This tingling is temporary and usually subsides within a few hours. Indeed, it’s a positive sign that the treatment is working effectively. Just continue with your normal skincare routine, keeping your skin hydrated and protected from the sun.

          Burns and Blisters

          While rare, it’s possible that you might experience temporary burns or blisters after your Thermage treatment. These side effects are typically short-lived and resolve on their own. However, if you notice any burns or blisters, apply a prescribed topical cream to soothe and heal the area.

          Bumpy Skin

          Experiencing a temporary change in your skin’s texture, such as bumpy or lumpy skin, is another possible side effect of Thermage treatment. This is typically a mild and temporary condition, fading away within a few weeks. It’s crucial to not panic or stress over this change in skin texture. This bumpy skin is a result of the heating and cooling cycles of the Thermage treatment, and it’s a sign that your skincare treatment is stimulating collagen production.

          Uneven Pigmentation

          Transitioning from bumpy skin, uneven pigmentation is another temporary side effect that might pop up post-Thermage treatment. This skin discoloration can result from inflammation caused by the heat energy of the Thermage treatment. But don’t fret, it’s typically temporary and can be managed with the right skincare products. To tackle uneven pigmentation, use a good quality sunscreen. UV damage can exacerbate pigmentation, so ensure you’re applying a broad-spectrum sunscreen daily. If your pigmentation doesn’t improve, consult your dermatologist. They may recommend certain skincare products designed to even out skin tone.

          Swelling and Redness

          Some redness or swelling may occur, but these side effects subside within a few hours to a few days.

          Other Potential Side Effects

          Potential side effects may include redness, swelling, blisters, bumps, and rarely, surface irregularities (but these are usually mild).

          It’s important to note that the risk of complications with Thermage is very low, and most people experience only mild side effects that resolve on their own within a short amount of time. However, it’s crucial to go to a provider with the right education, experience, and technique to better your chances of receiving excellent results and minimizing the risk of complications.

          Thermage FAQs

          Here are some of the most common questions people ask about Thermage:

          How long does the treatment take?

          The treatment typically takes between 30 minutes and two hours, depending on the area being treated.

          Is the treatment painful?

          Most people find the treatment to be comfortable, but some may experience mild discomfort. Your doctor can use a topical anesthetic to help manage any discomfort.

          Read Also: Trap Botox Before and After.

          How many treatments will I need?

          Most people see significant results after just one treatment, but additional treatments may be recommended for optimal results.

          Read Also: Lip Filler Before and After.

          Who is a good candidate for Thermage?

          Thermage is suitable for most people, but it may not be appropriate for those with certain medical conditions or skin types. Your doctor will evaluate your skin and discuss any potential risks with you.

          Read Also: Before and After Microneedling.

          How long do the results last?

          The results of Thermage can last for several years, but the exact duration will vary from person to person.

          Read Also: Brazilian Blowout Before and After.

          Conclusion

          Thermage is a safe and effective way to tighten loose or sagging skin, reduce wrinkles and fine lines, and improve the overall appearance of your body. With minimal downtime and long-lasting results, it’s no wonder that Thermage has become a popular choice for those looking for a non-surgical alternative to more invasive procedures.

          Read Also: Yellow Nail Designs.

          If you’re considering Thermage, be sure to consult with a qualified doctor who has experience performing the procedure. They can help you determine if Thermage is right for you and develop a treatment plan that meets your individual needs and goals.

          Read Also: Pull Ups While Pregnant.

          With Thermage, you can enjoy smoother, more youthful-looking skin and a more confident, radiant appearance. So why wait? Schedule your Thermage consultation today and start your journey to a more beautiful you!

          Read Also: Neck Botox.

          Continue Reading

          Trending