MakeUp Tips
Volume Lash vs. Classic Lash: Understanding the Key Differences for Perfect Lashes

Introduction Volume Lash vs Classic Lash
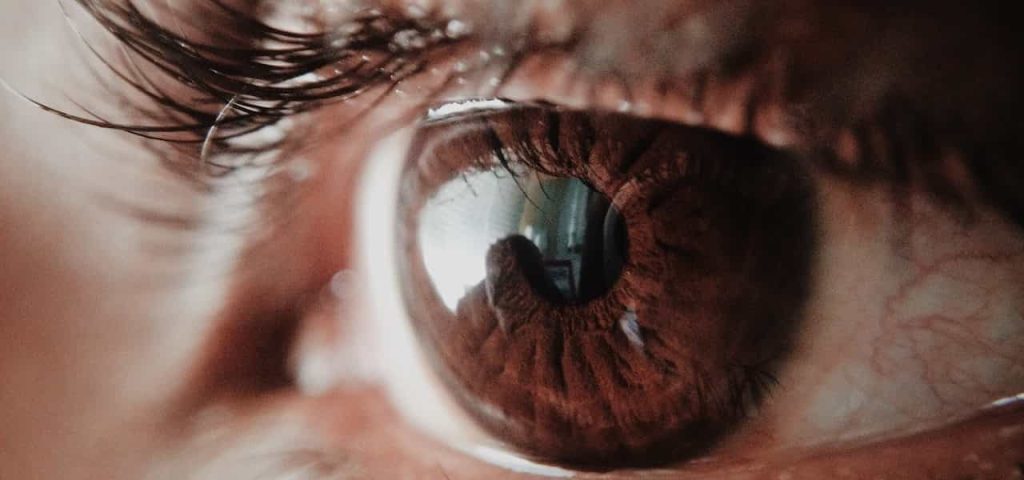
When it comes to enhancing our natural lashes, eyelash extensions have become a popular choice. With various lash styles available, it’s essential to understand the key differences between volume lash and classic lash to make an informed decision. In this article, we will delve into the world of eyelash extensions, exploring the techniques, benefits, and durability of volume lash and classic lash. So, whether you’re a lash enthusiast or a newbie, let’s uncover the secrets to achieving perfect lashes. So what you need to know exactly about volume lash vs classic lash? Here is your complete guide to volume lash vs classic lash.
Understanding Volume Lash
Volume lash is a lash extension technique that involves applying multiple lightweight lash extensions to a single natural lash, creating a fan-like effect. This technique requires advanced skills and expertise from a trained lash technician. One of the significant benefits of volume lash is the fuller and fluffier look it provides. The application of multiple lash extensions gives a more dramatic and voluminous appearance compared to classic lash.
The customizable and versatile nature of volume lash is another advantage. Lash technicians can create a wide range of styles, from natural to dramatic, by adjusting the number of lashes and their thickness. This makes volume lash suitable for clients with different preferences and eye shapes. Moreover, volume lash can be used to address sparse natural lashes, providing a denser and fuller look.
The longevity of volume lash is also noteworthy. Due to the lightweight nature of the lash extensions used in volume lash, they are less likely to cause strain on the natural lashes, resulting in a longer retention period. With proper aftercare and maintenance, volume lash can last up to 4-6 weeks before needing a touch-up. However, the initial application process of volume lash may take longer compared to classic lash, as it requires meticulous attention to detail.

Understanding Classic Lash
Classic lash is a traditional lash extension technique that involves applying one single lash extension to one natural lash. This technique is known for creating a natural and defined look, as it mimics the natural lash pattern. Classic lash is suitable for clients who prefer a more subtle and everyday look, without the added drama of volume lash.
One of the significant benefits of classic lash is its time-efficient application. Since only one lash extension is applied to each natural lash, the process is generally faster compared to volume lash. This makes classic lash a convenient option for clients who are short on time or prefer a quicker lash application process.
Another advantage of classic lash is its suitability for clients with thin or weak natural lashes. The lightweight lash extensions used in classic lash are ideal for delicate lashes, as they do not cause excessive strain. Classic lash can provide a natural enhancement to thin lashes, giving them a fuller and more defined appearance.
However, classic lash may not provide the same level of customization and versatility as volume lash. Since only one lash extension is applied per natural lash, the style options may be limited, and it may not achieve the same level of volume also drama as volume lash. Additionally, the retention period of classic lash may be shorter compared to volume lash, as the single lash extension may have less staying power.
Key Differences between Volume Lash and Classic Lash
To make an informed decision between volume lash and classic lash, it’s crucial to understand the key differences between the two techniques. Let’s explore these differences in detail:
Application Technique
The application technique is one of the primary differences between volume lash and classic lash. Volume lash involves applying multiple lash extensions to a single natural lash in a fan-like effect, while classic lash involves applying one single lash extension to one natural lash. The volume lash technique requires advanced skills and expertise, as it involves creating a customized fan using multiple lash extensions, whereas the classic lash technique is relatively simpler and faster, as it involves applying only one lash extension per natural lash.
Appearance
Another significant difference between volume lash and classic lash is the appearance they create. Volume lash provides a fuller, fluffier, and more dramatic look compared to classic lash. The fan-like effect created by multiple lash extensions in volume lash gives a more voluminous and glamorous appearance, ideal for clients who desire a bold and dramatic lash look. On the other hand, classic lash creates a more natural and defined look, mimicking the natural lash pattern, which is suitable for clients who prefer a subtle and everyday lash enhancement.
Read More About Powerlifting Weight Classes for Women: Everything You Need to Know.
Customization
Volume lash offers greater customization options compared to classic lash. Since multiple lash extensions are used in volume lash, lash technicians have more flexibility in creating different styles, from natural to dramatic, by adjusting the number of lashes and their thickness. This makes volume lash suitable for clients with different preferences and eye shapes. On the other hand, classic lash may have limited style options, as only one lash extension is applied per natural lash, which may not achieve the same level of customization and versatility as volume lash.
Read More About Should You Wear a Bra to Sleep?
Durability
The longevity of lash extensions is an essential factor to consider when choosing between volume lash and classic lash. Volume lash tends to have a longer retention period compared to classic lash. The lightweight nature of the lash extensions used in volume lash puts less strain on the natural lashes, resulting in a longer-lasting lash look. With proper aftercare and maintenance, volume lash can last up to 4-6 weeks before needing a touch-up. On the other hand, classic lash may have a shorter retention period, as the single lash extension may have less staying power.
Read More About How Long Do Acrylic Nails Last?
Time and Cost
The application process and cost may also vary between volume lash and classic lash. Since volume lash requires the application of multiple lash extensions, the initial application process may take longer compared to classic lash, as it requires meticulous attention to detail. However, the time may vary depending on the skill level of the lash technician. In terms of cost, volume lash may be relatively more expensive compared to classic lash, as it requires more lash extensions and advanced skills. Classic lash, being a simpler and faster technique, may be a more budget-friendly option for clients who are conscious of the cost.
Read More About Makeup in the 70s.
Conclusion
In conclusion, volume lash and classic lash are two different techniques of eyelash extensions, each with its own benefits and limitations. Volume lash provides a fuller, more dramatic, and customizable look, with a longer retention period, making it suitable for clients who desire a bold and glamorous lash appearance. On the other hand, classic lash creates a natural and defined look, with a simpler and faster application process, making it ideal for clients who prefer a subtle and everyday lash enhancement. When choosing between volume lash and classic lash, it’s essential to consider factors such as the desired lash look, customization options, durability, time, and cost, and consult with a trained lash technician for the best recommendation based on individual preferences also needs.
Read More About Hair and Makeup Trailers.
In conclusion, whether you choose volume lash or classic lash, both techniques have their unique features and advantages. It’s important to understand the differences between the two and consider your preferences, eye shape, and desired lash look to make the best decision. Consulting with a trained and experienced lash technician can also provide valuable insights and recommendations. With proper aftercare and maintenance, both volume lash and classic lash can give you beautiful, enhanced lashes that make you feel confident and glamorous. So, go ahead and choose the perfect lash extension technique for yourself also flaunt those stunning lashes!
MakeUp Tips
Steps of How to Apply Makeup: A Comprehensive Guide

Makeup application can be a creative and empowering process, allowing you to enhance your natural beauty and express your unique style. Whether you’re a makeup novice or looking to refine your skills, this step-by-step guide will walk you through the essential steps of how to apply makeup like a pro. From preparing your face to adding those final touches, we’ve got you covered. Let’s dive in and unlock the secrets to a flawless makeup application. So what do you need to know about the steps of how to apply makeup? Here is your complete guide to steps of how to apply makeup. So let’s explore the steps of how to apply makeup. So what are the steps of how to apply makeup?
Introduction
Welcome to the world of makeup! This guide will provide you with the knowledge and techniques you need to achieve a stunning makeup look. Follow these steps and unleash your inner artist. So, let’s get started!
Preparing Your Face
Before diving into the exciting world of makeup, it’s crucial to prepare your face properly. This ensures a smooth and long-lasting application. Follow these steps:
- Cleanse Your Face: Begin by cleansing your face with a gentle facial cleanser, removing any dirt, oil, or impurities. This step ensures a clean canvas for your makeup application. Look for a cleanser that suits your skin type and massage it in a circular motion. Rinse thoroughly and pat dry.
- Apply Moisturizer: Hydrated skin is the key to flawless makeup. Choose a moisturizer that matches your skin type and apply it evenly all over your face. This step helps create a smooth base for your foundation.
- Primer Application: Apply a makeup primer to further enhance the longevity of your makeup. Primers fill in fine lines, pores, and wrinkles, creating a smooth surface. Take a small amount and apply it all over your face, focusing on areas prone to oiliness or large pores.
Creating a Flawless Base
A flawless base sets the stage for the rest of your makeup. Follow these steps to achieve a natural and even complexion:
- Foundation Selection: Choosing the right foundation is crucial for achieving a seamless finish. Consider your skin type, undertone, and desired coverage. Test a few shades on your jawline and select the one that blends seamlessly with your neck. Remember, matching your foundation to your skin tone is essential for a natural look.
- Applying Foundation: Start by applying small dots of foundation on your forehead, cheeks, nose, and chin. Use a beauty sponge or foundation brush to blend the product into your skin. Work in gentle, circular motions to ensure even coverage. Pay extra attention to areas that need more coverage, such as blemishes or redness.
- Concealer Usage: Concealers are your best friends when it comes to hiding imperfections. Choose a shade that matches your skin tone or go for a slightly lighter shade for highlighting. Apply it under your eyes to cover dark circles, on blemishes, and any other areas of discoloration. Gently blend it using a small brush or your fingertips.

Enhancing Your Features
Now that your base is flawless, it’s time to enhance your features and add some color to your face. Follow these steps for captivating eyes, defined brows, and a radiant complexion:
- Eyebrow Shaping and Filling: Well-groomed eyebrows frame your face and give it a polished look. Start by brushing your eyebrows upward with a spoolie brush. Use an eyebrow pencil or powder to fill in any sparse areas. Make short, feathery strokes to mimic the appearance of natural hair. Set your eyebrows in place with a clear or tinted brow gel.
- Eyeshadow Application: Apply a neutral shade all over your eyelid as a base. Then, choose a slightly darker shade for your crease and blend it using a fluffy blending brush. Add depth by applying a darker shade on the outer corner of your eye. Finally, highlight the inner corners and brow bone with a shimmery shade. Blend well for a seamless transition between colors.
- Eyeliner and Mascara: Eyeliner adds definition and enhances the shape of your eyes. Use a pencil, liquid, or gel eyeliner to create your desired look. Apply it close to the lash line, starting from the inner corner and extending outward. Finish with a coat or two of mascara to add volume and length to your lashes.
- Blush and Bronzer: Bring a healthy glow to your cheeks by applying blush and bronzer. Smile to locate the apples of your cheeks and apply blush in a circular motion. Choose a shade that complements your skin tone. Apply bronzer on the hollows of your cheeks, temples, and jawline for a natural, sun-kissed look.
- Lipstick or Lip Gloss: Choose a lip color that suits your mood and outfit. Outline your lips with a lip liner to define their shape and prevent feathering. Fill in your lips with lipstick or apply lip gloss for a shiny finish. Blot with a tissue and reapply for longer-lasting color.
Read More About Are Brazil Nuts Good for You?
Makeup Brushes and Their Uses
Brush Name | Purpose |
---|---|
Foundation brush | Applying and blending liquid foundation |
Eyeshadow brush | Applying and blending eyeshadow |
Blending brush | Blending and softening harsh lines |
Contour brush | Creating shadows and defining facial features |
Powder brush | Applying loose or pressed powder |

Final Touches and Setting
To ensure your makeup stays in place all day long, follow these final steps:
- Setting Powder or Spray: Set your makeup by applying a light dusting of setting powder or using a setting spray. This step helps to control shine and prolongs the wear of your makeup. Choose a powder that matches your skin tone and use a fluffy brush to apply it gently over your face. Alternatively, mist a setting spray all over your face for a refreshing and long-lasting hold.
- Highlighting and Contouring: Accentuate your best features by highlighting and contouring. Apply a highlighter on the high points of your face, such as the cheekbones, bridge of the nose, and cupid’s bow. Use a contouring powder or cream to create shadows and add definition to areas like the hollows of your cheeks, temples, and jawline. Blend well for a seamless finish.
Read More About The Powerful Benefits of Turmeric with Milk.
Common Makeup Mistakes to Avoid
Mistake | Description |
---|---|
Applying too much foundation, resulting in a cakey appearance. | Over-applying foundation can create a heavy and unnatural look, emphasizing texture and lines on the skin. |
Neglecting to blend your makeup properly, leaving visible lines. | Failure to blend your makeup properly can result in harsh lines and uneven application, detracting from a seamless and natural finish. |
Overdrawing your eyebrows, resulting in an unnatural look. | When eyebrows are drawn on with excessive thickness or length, they can appear fake and unnatural, disrupting the overall harmony of your facial features. |
Applying too much blush, making your cheeks look overly flushed. | Excessive application of blush can lead to an exaggerated, overly flushed appearance, undermining the desired natural and healthy glow. |
Using the wrong shade of lipstick that doesn’t flatter your complexion. | Choosing a lipstick shade that clashes with your skin tone can wash you out or make your complexion appear dull, detracting from your overall makeup look. |

Essential Makeup Products for Beginners
Product | Description |
---|---|
Foundation or BB cream | Provides coverage and evens out skin tone for a flawless complexion. |
Concealer | Helps hide blemishes, dark circles, and other imperfections. |
Eyeshadow palette with neutral shades | Offers a versatile range of neutral colors for everyday eye makeup looks. |
Mascara | Enhances and adds volume to lashes, making eyes appear more defined and awake. |
Blush | Adds a touch of color to the cheeks for a healthy and youthful appearance. |
Lipstick or lip gloss | Adds color and shine to the lips, completing the overall makeup look. |
Makeup brushes (foundation brush, eyeshadow brush, blending brush) | Essential tools for precise and seamless application of makeup products. |
Makeup remover or cleansing oil | Effectively removes makeup and impurities from the skin, allowing it to breathe. |
Moisturizer | Hydrates the skin and creates a smooth base for makeup application. |
Setting powder or spray | Sets makeup in place, controls shine, and prolongs its wear throughout the day. |
Removal and Skincare
At the end of the day, it’s crucial to remove your makeup and take care of your skin. Follow these steps:
- Makeup Removal: Use a gentle makeup remover or cleansing oil to remove your makeup thoroughly. Apply the remover to a cotton pad and gently wipe away the makeup, starting from your eyes and moving to the rest of your face. Rinse with water and pat dry.
- Skincare Routine: Follow up with a skincare routine suited to your skin type. Cleanse your face with a gentle cleanser, apply toner to restore the skin’s pH balance, and moisturize to keep your skin hydrated. Remember to apply an eye cream and sunscreen for added protection.
FAQs
How to apply makeup step by step?
Applying makeup step by step involves several key stages. Start by preparing your face with cleansing, moisturizing, and applying primer. Then, create a flawless base with foundation, concealer, and setting powder. Enhance your features with eyeshadow, eyeliner, mascara, blush, and lipstick. Finish by setting your makeup and adding final touches.
What do I need for a full face of makeup?
For a full face of makeup, you’ll need several essential products. These include foundation or BB cream, concealer, eyeshadow palette, mascara, blush, lipstick or lip gloss. Additionally, you’ll require makeup brushes such as a foundation brush, eyeshadow brush, and blending brush. Don’t forget makeup remover or cleansing oil, moisturizer, and setting powder or spray.
Do you set your makeup before or after foundation?
To achieve a long-lasting makeup application, it’s recommended to set your makeup after applying foundation. Once you have applied your foundation, concealer, and other complexion products, lightly dust setting powder over your face to lock everything in place. This helps control shine and extends the wear of your makeup.
How to do makeup step by step without foundation?
If you prefer to skip foundation in your makeup routine, you can still achieve a beautiful look. Start with a cleansed and moisturized face. Apply concealer to areas that need extra coverage, such as under-eye circles or blemishes. Use a tinted moisturizer or BB cream for a lightweight, sheer coverage. Then proceed with the rest of your makeup routine, focusing on enhancing your eyes, cheeks, and lips.
Conclusion
Congratulations! You’ve now mastered the steps of how to apply makeup like a pro. With practice, you’ll become more confident in creating a variety of looks to suit any occasion. Remember to experiment, have fun, and embrace your unique style. Now go out there and rock your flawless makeup!
Read More About Home Remedies for Fungal Rashes.
So, are you ready to elevate your makeup skills? Explore our table on the different types of makeup brushes and their uses, common makeup mistakes to avoid, and a list of essential makeup products for beginners.
MakeUp Tips
Master the Art of Makeup Application: A Step-by-Step Guide

Introduction To the Steps of How to Apply Makeup
Welcome to the transformative world of makeup application! Whether you’re a beginner or someone looking to refine your skills, mastering the art of makeup can enhance your natural beauty, boost your confidence, and allow you to express your personal style. In this step-by-step guide, we will take you through the entire process of applying makeup, ensuring that you understand each step clearly. So grab your brushes and let’s dive into the wonderful world of makeup! What are the steps of how to apply makeup? What you need to know about the steps of how to apply makeup. Here is your complete guide to the steps of how to apply makeup. So let’s explore the steps of how to apply makeup.
Steps of How to Apply Makeup
Below is a table outlining the steps of how to apply makeup:
Step | Description |
---|---|
1 | Skincare Routine: Cleanse, tone, moisturize, and apply primer. |
2 | Foundation: Apply foundation evenly, matching your skin tone. |
3 | Concealer: Conceal any imperfections like dark circles or blemishes. |
4 | Powder and Setting Spray: Set foundation and concealer for longevity. |
5 | Contour and Highlight: Add depth and dimension to your face. |
6 | Eyebrows: Shape and fill in your eyebrows to frame your face. |
7 | Eye Makeup: Apply eyeshadow, eyeliner, and mascara. |
8 | Blush: Add a touch of color to the cheeks for a natural flush. |
9 | Lip Liner and Lipstick: Define and color your lips. |
10 | Setting Powder or Spray: Lock in your makeup for long-lasting wear. |
By following these steps in order, you can achieve a well-executed makeup look that enhances your natural features and brings out your unique beauty. Remember, makeup application is a personal and creative process, so feel free to adapt and experiment with these steps to suit your preferences and style.So let’s explore the details.

WHAT IS THE CORRECT ORDER OF MAKEUP?
The correct order of makeup application is as follows:
- Skincare: Start with a clean and moisturized face. This includes cleansing, toning, and moisturizing your skin to create a smooth canvas for makeup.
- Primer: Apply a primer to create a smooth base for your makeup, helping it adhere better and last longer.
- Foundation: Apply foundation evenly to even out your skin tone and create a uniform base for the rest of your makeup.
- Concealer: Use concealer to cover any blemishes, dark circles, or areas of discoloration that the foundation didn’t fully cover.
- Powder: Set your foundation and concealer with a light dusting of translucent powder to prevent creasing and increase longevity.
- Contour and Highlight: Use contouring products to sculpt and define your facial features, creating shadows and highlights for added dimension.
- Blush: Apply blush to add a natural flush of color to your cheeks, giving your face a healthy and vibrant appearance.
- Eye Makeup: Start with eyeshadow, followed by eyeliner, and finish with mascara to enhance and define your eyes.
- Eyebrows: Shape and fill in your eyebrows to frame your face and add structure to your overall look.
- Lip Color: Finish off your makeup with lip liner and lipstick or lip gloss to add color and definition to your lips.
Remember, the order may vary slightly based on personal preference and the specific products you’re using. The key is to start with a well-prepped canvas, apply your base products, and then move on to enhancing individual features like eyes and lips.
WHAT MAKEUP GOES FIRST?
The general rule of thumb is to start with face makeup before moving on to eye makeup. This allows for a clean canvas and prevents eyeshadow fallout from affecting your foundation. Here’s the recommended order:
- Skincare: Begin with a cleansed and moisturized face.
- Primer: Apply a primer to create a smooth base for your makeup.
- Foundation: Apply foundation evenly to even out your skin tone.
- Concealer: Use concealer to cover any blemishes or dark circles.
- Powder: Set your foundation and concealer with translucent powder.
- Contour and Highlight: Add depth and dimension to your face using contour and highlight products.
- Blush: Apply blush to add a pop of color to your cheeks.
- Eyebrows: Shape and fill in your eyebrows to frame your face.
- Eye Makeup: Apply eyeshadow, eyeliner, and mascara to enhance your eyes.
- Lip Color: Finish off with lip liner and lipstick or lip gloss to add color to your lips.
Preparing Your Canvas
Before we begin applying makeup, it’s essential to prepare our canvas properly. Just like a painter preps their canvas, we need to care for our skin to achieve flawless results.
Skincare Routine
The first step in any makeup application process is a solid skincare routine. It forms the foundation for a smooth and radiant complexion. Begin by cleansing your face to remove any dirt or impurities. Follow it up with exfoliation to slough away dead skin cells and reveal a fresh layer. Next, tone and moisturize your skin to balance its pH levels and provide hydration. Finally, apply a primer to create a smooth base for your makeup.
Choosing the Right Foundation
Finding the perfect foundation is crucial for a seamless makeup look. Determine your skin type and undertones to select the appropriate formula and shade. Whether you have oily, dry, or combination skin, there’s a foundation out there for you. Apply it evenly, either using a brush, sponge, or your fingers, depending on your preference.
Enhancing the Features
Now that we have a well-prepped canvas, it’s time to enhance our features to create a flawless complexion and highlight our natural beauty.
Creating a Flawless Complexion
Concealing imperfections is the first step towards achieving a flawless complexion. Learn how to cover dark circles, blemishes, and redness effectively. Then, set your foundation with powder and finish it off with a setting spray for a long-lasting look.
Sculpting the Face
Contouring and highlighting techniques can bring dimension to your face. Learn how to identify your face shape and use contouring to create the illusion of shadows and highlighter to accentuate your best features. Blend everything seamlessly for a natural and sculpted look.
Accentuating the Eyes
The eyes are the windows to the soul, and they deserve special attention. Shape and fill your eyebrows to frame your face and enhance your eye makeup. Discover eyeshadow application techniques, including blending different shades for a stunning look. Master the art of eyeliner application and choose the right mascara to achieve luscious lashes.
Adding Color to the Cheeks
A touch of blush can instantly add a healthy glow to your complexion. Learn how to select the right shade for your skin tone and apply it correctly to the apples of your cheeks. Blend it out for a natural flush that complements your overall look.
Enhancing the Lips
Luscious lips complete a makeup look. Find the perfect lip color that suits your complexion and learn how to apply lip liner for a defined pout. Finally, apply your lipstick with precision and confidence.

Finishing Touches
We’re almost there! These final touches will ensure your makeup stays flawless throughout the day.
Setting the Makeup
To ensure your makeup lasts longer, use setting powder or spray. This step locks in your hard work and provides a matte finish or a subtle glow, depending on your preference. Explore techniques for long-lasting makeup and enjoy the confidence of knowing your look will stay put.
Setting the Brows
Groomed brows make a significant difference in your overall appearance. Apply brow gel or wax to set your brows in place, giving them a polished and well-defined look. This step adds that final touch of sophistication to your makeup.
Final Check and Touch-Ups
Before you step out into the world, take a moment to review your overall makeup look. Ensure everything is blended seamlessly and that there are no visible harsh lines or smudges. Use a magnifying mirror to check for any imperfections or areas that may need touch-ups. Make any necessary adjustments, and you’re ready to conquer the day!
Read More About The Ultimate Guide to Curly Hair Protective Hairstyles.
FAQs
What is the correct order of makeup?
The correct order of makeup application is as follows:
- Skincare Routine: Begin by cleansing, exfoliating, toning, moisturizing, and applying primer to create a smooth canvas for your makeup.
- Foundation: Apply foundation evenly, matching it to your skin tone and type.
- Concealer: Conceal any imperfections such as dark circles, blemishes, or redness.
- Powder and Setting Spray: Set your foundation and concealer with powder to prevent creasing and increase longevity. Finish with a setting spray for a seamless look.
- Contour and Highlight: Use contouring techniques to add depth and dimension to your face, followed by highlighting to accentuate your best features.
- Eyebrows: Shape and fill in your eyebrows to frame your face and enhance your eye makeup.
- Eye Makeup: Apply eyeshadow, eyeliner, and mascara to enhance your eyes and create the desired look.
- Blush: Add a touch of blush to the apples of your cheeks for a natural flush of color.
- Lip Liner and Lipstick: Define your lips with lip liner and apply lipstick in your chosen shade.
- Setting Powder or Spray: Use setting powder or spray to lock in your makeup and ensure long-lasting wear.
Read More About How to Safely Remove Acrylic Nails at Home.
What are the steps of natural makeup?
To achieve a natural makeup look, follow these steps:
- Skincare Prep: Cleanse, tone, and moisturize your skin to create a smooth base.
- Tinted Moisturizer or Sheer Foundation: Use a lightweight formula to even out your skin tone while maintaining a natural finish.
- Concealer: Apply concealer only where needed, focusing on areas such as under-eye circles or blemishes.
- Setting Powder: Lightly dust setting powder on areas prone to oiliness or shine.
- Brows: Groom your eyebrows and fill in any sparse areas using a brow pencil or powder for a natural, defined look.
- Neutral Eyeshadow: Apply a neutral eyeshadow shade to your eyelids for a subtle enhancement.
- Mascara: Coat your lashes with mascara to add length and definition.
- Blush: Use a natural-looking blush to add a touch of color to your cheeks.
- Lip Balm or Nude Lipstick: Finish off with a hydrating lip balm or a nude lipstick for a subtle lip color.
Read More About Makeup in the 70s.
Which makeup to do first?
The general rule of thumb is to start with skincare, followed by face makeup, and then move on to eye and lip makeup. Here’s the recommended order:
- Skincare Routine: Begin with cleansing, exfoliating, toning, moisturizing, and applying primer.
- Face Makeup: Start by applying foundation, followed by concealer to hide any imperfections. Set with powder and finish with setting spray.
- Contour, Highlight, and Blush: Apply contour, highlight, and blush to sculpt and add dimension to your face.
- Eyebrows: Shape and fill in your eyebrows.
- Eye Makeup: Apply eyeshadow, eyeliner, and mascara to enhance your eyes.
- Lips: Finish off with lip liner and lipstick.
Read More About How Often Should You Change Your Hair Color?
Conclusion
Congratulations on mastering the art of makeup application! By following this step-by-step guide, you have learned the essential techniques and tricks to create a flawless and personalized makeup look. Remember, practice makes perfect, so don’t be discouraged if your first attempts aren’t exactly as you envisioned. With time and patience, you’ll become more skilled and confident in your abilities.
Read More About The Amazing Benefits of Avocado Oil.
Makeup is not just about enhancing your physical appearance; it’s also a form of self-expression. Embrace your creativity and have fun experimenting with different colors, textures, and styles. Each makeup application can be a unique expression of your personality and mood.
Read More About the Influence of Zodiac Signs.
Don’t forget to take care of your skin and maintain a consistent skincare routine. Healthy skin serves as a strong foundation for flawless makeup. Prioritize proper cleansing, moisturizing, and protecting your skin from the sun’s harmful rays.
Read More About The Love Language of Physical Touch.
Lastly, always remember that makeup should enhance your natural beauty, rather than mask it. Embrace your individuality and let your inner radiance shine through. Use makeup as a tool to boost your confidence and feel empowered in your own skin.
Read More About The Love Language of Physical Touch.
Now, armed with this step-by-step guide, it’s time to grab your brushes, play with colors, and embark on your journey to becoming a makeup maestro. Enjoy the process, embrace your unique beauty, and let your creativity soar. The world is your canvas, and you’re the artist creating your masterpiece with each stroke of the brush. Happy makeup applying!
MakeUp Tips
The Ultimate Guide on How to Apply Primer: Step-by-Step Tutorial

Introduction To How To Apply a Primer
Welcome to the ultimate guide on how to apply primer! If you’re a makeup enthusiast or someone looking to achieve a flawless base for your makeup, using a primer is a game-changer. In this comprehensive tutorial, we will delve into the world of primers, their benefits, and provide you with a step-by-step approach to achieving a flawless and long-lasting makeup look. So, let’s get started!
Understanding Primer: What is it and Why Use it?
Before we dive into the application process, let’s understand what a primer is and why it’s essential. A primer is a lightweight, silicone-based or water-based product that acts as a base for your makeup. It creates a smooth canvas for foundation and other products, extending their wear time and enhancing their performance. But that’s not all—primers also help to minimize the appearance of pores, fine lines, and wrinkles, while providing an even skin tone. It’s like a magic potion for your skin!

Choosing the Right Primer for Your Skin Type
The key to a successful primer application lies in selecting the right product for your skin type. Everyone’s skin is unique, so it’s crucial to identify whether you have oily, dry, combination, or sensitive skin before making a purchase. For oily skin, opt for mattifying primers that control excess shine. Dry skin types benefit from hydrating primers that provide a burst of moisture. Combination skin can benefit from versatile primers that address both oiliness and dryness. Additionally, color-correcting primers are available to target specific skin concerns like redness or sallowness. Remember, choosing the right primer tailored to your skin’s needs will yield the best results.
Preparing Your Skin for Primer Application
Before you apply primer, it’s essential to prepare your skin properly. Start by cleansing your face thoroughly to remove any dirt, oil, or residual makeup. Follow up with a gentle toner to balance the pH of your skin. Exfoliating once or twice a week will help remove dead skin cells and ensure a smoother application. Don’t forget to moisturize your skin! A lightweight moisturizer helps create a hydrated canvas for the primer and prevents the skin from feeling dry. If you’re stepping out during the day, apply sunscreen as a final step before primer application.
Step-by-Step Tutorial: How to Apply Primer
Step 1: Gather your tools and products
Before you begin, gather the necessary tools and products for a seamless application. You’ll need your chosen primer, a clean makeup brush or sponge, and your regular skincare products.
Step 2: Prep your skin
Start by cleansing your face with a gentle cleanser. Pat your skin dry and follow up with a toner if desired. Apply a lightweight moisturizer suitable for your skin type and give it a few minutes to absorb fully.
Step 3: Prime your face
Take a small amount of primer, about the size of a pea, and dispense it onto the back of your hand. Using clean fingers, a makeup brush, or a damp sponge, dot the primer onto your forehead, cheeks, nose, and chin.
Step 4: Blend the primer
Using gentle circular motions, blend the primer into your skin. Start from the center of your face and work your way outwards. Pay extra attention to areas with large pores or noticeable texture. Ensure an even application by blending thoroughly.
Step 5: Targeted primer application
If you have specific skin concerns like redness or discoloration, you can use color-correcting primers. Apply a small amount of the appropriate color-correcting primer to the affected areas and blend it gently.
Step 6: Let the primer settle
After applying the primer, allow it to settle on your skin for a few minutes. This gives the product enough time to adhere to your skin and create a smooth base for your makeup application. While waiting, you can use this time to gather your foundation, concealer, and other makeup products you plan to use.

Step-by-Step Guide on How to Apply Primer
Step | Description |
---|---|
Step 1 | Gather your tools and products |
– Primer | |
– Clean makeup brush or sponge | |
– Regular skincare products | |
Step 2 | Prep your skin |
– Cleanse your face with a gentle cleanser | |
– Pat your skin dry | |
– Apply a lightweight moisturizer | |
– Allow a few minutes for absorption | |
Step 3 | Prime your face |
– Take a small amount of primer and dispense it onto the back of your hand | |
– Dot the primer onto your forehead, cheeks, nose, and chin | |
Step 4 | Blend the primer |
– Use gentle circular motions to blend the primer into your skin | |
– Start from the center of your face and work outward | |
– Pay extra attention to areas with large pores or noticeable texture | |
Step 5 | Targeted primer application |
– Apply color-correcting primer to specific areas with concerns (if applicable) | |
– Gently blend the color-correcting primer | |
Step 6 | Let the primer settle |
– Allow the primer to settle on your skin for a few minutes | |
– Use this time to gather your foundation and other makeup products | |
Bonus Tips | – Consider using an eye primer for your eyelids |
– Use a lip primer for a flawless pout | |
– Layer foundation on top of the primer for a seamless finish |
Bonus Tips for Primer Application
Eye Primer
Don’t forget about your eyelids! Using an eye primer before applying eyeshadow can help prevent creasing and make your eyeshadow colors more vibrant and long-lasting.
Lip Primer
For a flawless pout, consider using a lip primer before applying lipstick. It helps smooth out lip texture and prolongs the wear of your lip color.
Layering Primer with Foundation
After allowing the primer to settle, you can proceed with applying your foundation. Gently blend the foundation onto your primed skin for a seamless and natural-looking finish. The primer will help the foundation adhere better and last longer.
Special Occasion or Long-lasting Makeup
If you’re attending a special event or need your makeup to last for an extended period, applying a primer is crucial. It acts as a reliable base that keeps your makeup intact throughout the day or evening.
Frequently Asked Questions (FAQs) about Primers
Can I skip using a primer?
While using a primer is not mandatory, it significantly improves the longevity and appearance of your makeup. If you want your makeup to last longer and look flawless, incorporating a primer into your routine is highly recommended.
Can I use a primer without foundation?
Absolutely! Primers can be used even if you don’t wear foundation. They can help even out your skin tone, minimize the appearance of pores, and provide a smooth canvas for any other makeup products you choose to apply.
Is primer suitable for sensitive skin?
Yes, there are primers specifically formulated for sensitive skin. Look for products labeled as hypoallergenic or designed for sensitive skin types. Always perform a patch test before trying any new product to ensure it doesn’t cause any irritation.
Read More About The Ultimate Guide to Curly Hair Protective Hairstyles.
How often should I use a primer?
Primer is typically applied before makeup application, so it depends on how often you wear makeup. If you wear makeup daily, you can use a primer daily. However, on days when you prefer a more natural look, you can skip using a primer.
Read More About How to Safely Remove Acrylic Nails at Home.
Can I use a primer with sunscreen?
Yes! In fact, it’s a great idea to use a primer that contains SPF for added sun protection. However, keep in mind that the level of SPF in most primers is not sufficient on its own. It’s still important to use a separate sunscreen for full protection.
Read More About Makeup in the 70s.
Do you put primer all over your face?
Yes, when applying primer, it is generally recommended to apply it all over your face. However, you can focus more on areas where you have concerns such as large pores, fine lines, or uneven texture. By applying primer to your entire face, you create a smooth and even canvas for your makeup, ensuring it lasts longer and looks flawless.
Read More About How Often Should You Change Your Hair Color?
Do you let primer dry before applying makeup?
Yes, it is important to let the primer dry before applying makeup. After applying the primer, give it a few minutes to fully dry and set on your skin. This allows the primer to create a smooth base and adhere better to your skin, ensuring your makeup applies evenly and stays in place throughout the day.
Read More About The Amazing Benefits of Avocado Oil.
Do you put moisturizer on before or after primer?
Generally, it is recommended to apply moisturizer before applying primer. After cleansing your face, apply a lightweight moisturizer suited for your skin type. Allow the moisturizer to fully absorb into your skin before moving on to primer application. Moisturizer provides hydration to your skin, while the primer creates a barrier between your skin and makeup, ensuring a smooth application and longer-lasting results. However, if you prefer, you can use a moisturizing primer that combines the benefits of both moisturizer and primer in one step.
Read More About the Influence of Zodiac Signs.
Conclusion
Congratulations! You’ve reached the end of our ultimate guide on how to apply primer. By now, you should have a clear understanding of the importance of using a primer, how to choose the right one for your skin type, and the step-by-step process for applying it. Remember, a primer is a secret weapon that enhances your makeup’s longevity, creates a flawless base, and minimizes skin imperfections. So, embrace the power of primer and elevate your makeup game to a whole new level. Enjoy your beautifully primed and long-lasting makeup look!
-
Beauty Tips2 months ago
10 Surprising Health Benefits of Coconut Oil You Need to Know
-
Women Tips2 months ago
Are You a People-Pleaser? The Signs and How to Overcome It
-
Women Tips4 months ago
Coffee Maker Clean With Vinegar: How?
-
Family Tips2 months ago
The Best Dog for Family: A Comprehensive Guide
-
Beauty Tips3 months ago
What Is Balayage: Your Ultimate Guide Is Here
-
Zodiac Sign2 months ago
Unlocking the Zodiac: The Best Sign Matches for Every Sun Sign
-
Dreams Interpretation3 months ago
The Meaning of Teeth Falling Out in a Dream: Exploring the Symbolism
-
Diet Tips3 months ago
What Vitamins C Is Good For?