MakeUp Tips
i Beauty Brushes: Your Path to Makeup Mastery

Here is your complete guide to i beauty brushes
Introduction to i Beauty Brushes
In the world of makeup, the right tools can make all the difference. If you’re on a quest for that flawless finish, you’ve likely heard of i beauty brushes. But what are they, and why are they generating so much buzz in the beauty community? In this comprehensive guide, we’ll delve into everything you need to know about these magical brushes, from their basics to the top 10 products on the market. By the end of this article, you’ll be armed with the knowledge and expertise to enhance your makeup game using i beauty brushes.
The Basics of i Beauty Brushes
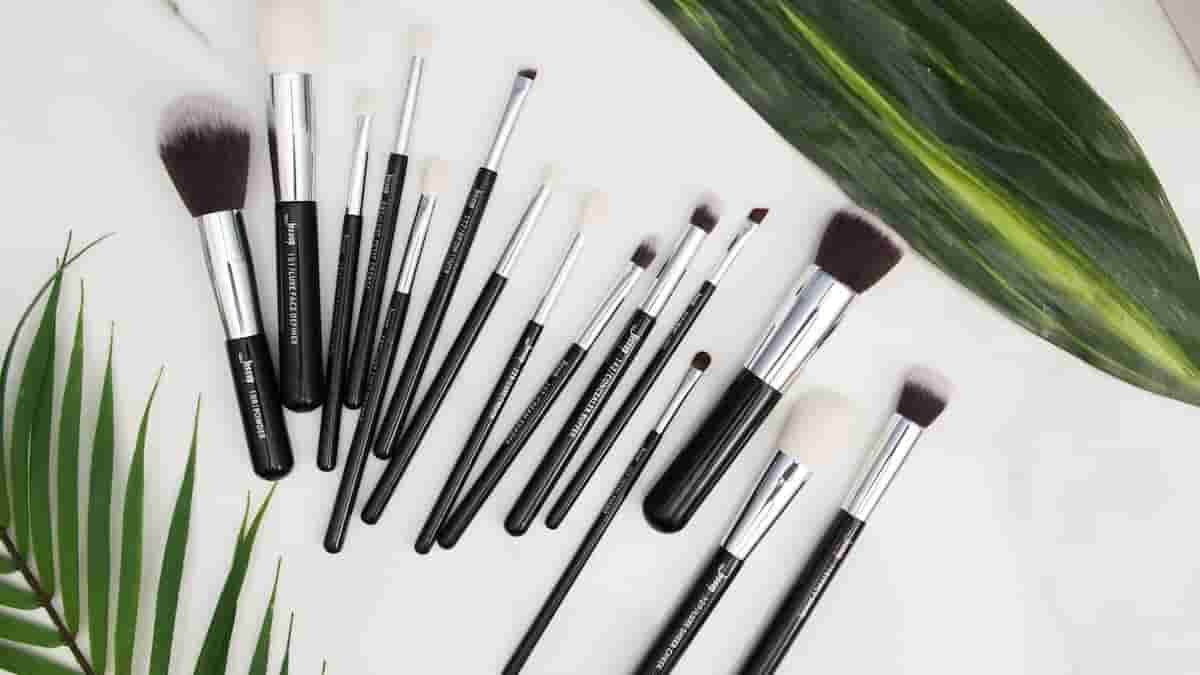
i Beauty brushes, often referred to as intelligent beauty brushes, are the latest innovation in makeup tools. These brushes are designed to provide a superior application experience, revolutionizing the way you apply your makeup. Here’s what sets them apart:
- Advanced Technology: i beauty brushes incorporate cutting-edge technology to optimize makeup application. They often feature sensors, microprocessors, and even smartphone connectivity.
- Precision Design: These brushes come in various shapes and sizes, each tailored to specific makeup applications, ensuring precision and accuracy.
- Customization: Some i beauty brushes allow you to customize settings to achieve your desired makeup look effortlessly.
- Quality Materials: They are typically crafted from high-quality materials, ensuring durability and longevity.
i Beauty brushes have gained popularity for their ability to streamline the makeup process, making it easier for both beginners and professionals to achieve stunning results.
How to Choose the Right i Beauty Brushes
With so many options available, selecting the perfect i beauty brushes can be overwhelming. Here are some key considerations to help you make an informed decision:
- Brush Type: Determine the makeup application you want to focus on, such as foundation, eyeshadow, or contouring. Choose brushes specifically designed for that purpose.
- Brush Shape: Different brush shapes are optimized for various techniques. For example, flat brushes are great for foundation, while angled brushes excel in contouring.
- Materials: Look for high-quality, synthetic bristles that are soft on the skin and easy to clean.
- Customization: If you prefer a personalized makeup experience, opt for brushes with customizable settings.
Use the table below to compare your options:
Feature | What to Look For |
---|---|
Brush Type | Foundation, eyeshadow, contour, etc. |
Brush Shape | Flat, angled, round, etc. |
Materials | Synthetic, natural, etc. |
Customization | Yes/No |
Remember that the right i beauty brushes can significantly enhance your makeup application, so choose wisely.
Using i Beauty Brushes Effectively
Now that you have your i beauty brushes in hand, let’s explore how to make the most of them:
- Prep Your Skin: Start with clean and moisturized skin to ensure a smooth canvas for makeup application.
- Primer: Apply a makeup primer to create a flawless base for your foundation.
- Foundation: Use your i beauty brush to apply foundation evenly, starting from the center of your face and blending outwards.
- Contouring: Utilize the brush’s precision to contour your cheeks and nose for sculpted definition.
- Eyeshadow: Experiment with different brush heads to achieve various eyeshadow looks.
- Blending: Blend, blend, blend! This is the key to achieving seamless transitions between colors.
- Highlighting: Highlight your cheekbones, brow bones, and the tip of your nose for a radiant glow.
- Finishing Touches: Finish your makeup with setting powder, blush, and lipstick.
i Beauty brushes are designed to simplify these steps and help you achieve a professional makeup look effortlessly.
Maintenance and Cleaning of i Beauty Brushes
Proper care and maintenance are crucial to keep your i beauty brushes in pristine condition. Follow these steps:
- Regular Cleaning: Clean your brushes at least once a week to prevent the buildup of makeup and bacteria.
- Mild Cleanser: Use a gentle brush cleanser or mild shampoo to clean the bristles.
- Avoid Soaking: Be cautious not to soak the brushes as it can damage the electronics in some i beauty brushes.
- Drying: Allow your brushes to air dry with bristles hanging off the edge of a counter to maintain their shape.
Here’s a handy table with dos and don’ts for cleaning your i beauty brushes:
Cleaning Dos | Cleaning Don’ts |
---|---|
Use a mild cleanser | Soak the brushes excessively |
Clean bristles gently | Use hot water |
Rinse thoroughly | Scrub vigorously |
Allow to air dry | Dry brushes upright |
Using i Beauty Brushes: A Step-by-Step Guide
Step 1: Gather Your i Beauty Brushes
Before diving into your makeup routine, ensure you have the appropriate i beauty brushes for the look you want to achieve. Here’s how to get started:
- Select the Brushes: Choose the i beauty brushes that are designed for the makeup application you’re planning. Common brush types include foundation brushes, eyeshadow brushes, contour brushes, and more.
- Inspect Your Brushes: Examine the condition of your brushes to make sure they are clean and in good shape. Clean them if necessary, as clean brushes provide better makeup application.
Step 2: Prep Your Skin
Before you start applying makeup, it’s essential to prepare your skin for a flawless finish. Follow these steps:
- Cleanse: Begin with a gentle cleanser to remove any dirt or oil from your face.
- Moisturize: Apply a suitable moisturizer to hydrate your skin and create a smooth canvas for makeup.
- Prime: If you use a makeup primer, apply it evenly to help your makeup last longer and create a flawless base.
Step 3: Foundation Application
Applying foundation with your i beauty brush can result in a seamless, airbrushed finish. Here’s how to do it:
- Dab Foundation: Place a small amount of foundation on the back of your hand or a palette.
- Brush Selection: Choose an i beauty brush suitable for foundation application. These brushes often have flat, dense bristles for even coverage.
- Start in the Center: Begin by applying the foundation in the center of your face (nose, cheeks, and chin).
- Blend Outwards: Use gentle strokes to blend the foundation outward towards your hairline and jawline. Make sure to blend thoroughly for a natural look.
Step 4: Contouring and Highlighting
They are excellent tools for contouring and highlighting to enhance your facial features. Here’s how to do it effectively:
- Choose the Right Brushes: Select brushes specifically designed for contouring and highlighting. These brushes often have angled or tapered bristles.
- Contouring: Apply a contour shade slightly darker than your skin tone in the hollows of your cheeks, along your jawline, and on the sides of your nose. Blend well for a sculpted look.
- Highlighting: Use a lighter shade or a highlighter to accentuate your cheekbones, brow bone, and the bridge of your nose. Gently blend to avoid harsh lines.
Step 5: Eyeshadow Application
They can help you create stunning eyeshadow looks with precision. Follow these steps:
- Primer: Apply an eyeshadow primer to your eyelids to ensure your eyeshadow stays in place.
- Choose the Right Brushes: Depending on the eyeshadow effect you want, select brushes with the appropriate shapes and sizes.
- Apply Base Color: Use a flat eyeshadow brush to apply a base color to your eyelids. This creates a foundation for your eyeshadow look.
- Blend: Use a blending brush to blend different eyeshadow shades into your crease for dimension.
- Detail Work: For detailed work, like applying eyeshadow to the lower lash line or inner corner, use a smaller, precise brush.
Step 6: Finishing Touches
Complete your makeup look with these final steps:
- Blush: Apply blush to the apples of your cheeks using a i beauty brush designed for blush application.
- Setting Powder: Use a large, fluffy brush to set your makeup with translucent setting powder.
- Lipstick: Apply your chosen lipstick shade, either directly or with a lip brush for precision.
Read Also: Lipstick Color with Orange Dress.
Step 7: Clean and Store Your Brushes
Properly maintaining your i beauty brushes is crucial for their longevity and hygiene. Here’s what you should do:
- Clean Regularly: Clean your brushes regularly, preferably once a week, using a mild brush cleanser or shampoo.
- Gentle Cleaning: Be gentle when cleaning to avoid damaging the bristles or electronic components in some brushes.
- Air Dry: Let your brushes air dry with the bristles hanging off the edge of a counter to maintain their shape.
With these steps, you can make the most out of your i beauty brushes and achieve flawless makeup looks effortlessly. Remember that practice makes perfect, so don’t be discouraged if it takes some time to master these techniques. Happy makeup-ing!
Read Also: Hormone Reset Diet Recipes.
FAQs About i Beauty Brushes
You’re not alone if you have questions about i beauty brushes. Here are some common queries:
What makes i beauty brushes different from traditional brushes?
They incorporate advanced technology, such as sensors and customizable settings, for a more precise and efficient makeup application.
Read Also: Blonde Hair Under Black Hair.
Can I use i beauty brushes for everyday makeup?
Absolutely! They are designed for both professionals and everyday makeup enthusiasts, making them suitable for any routine.
Read Also: 90s Grunge Lipstick.
Are i beauty brushes easy to clean?
Yes, but it’s essential to follow the manufacturer’s cleaning instructions to avoid damaging the electronic components.
Read Also: Winter Wonderland Theme Nails.
Are there budget-friendly options for i beauty brushes?
Yes, you can find affordable i beauty brushes that offer great performance. Check out the list above for options.
Read Also: Confidence Lipstick.
Do I need to replace my i beauty brushes regularly?
With proper care, they can last for a long time. However, it’s essential to replace them if you notice any wear and tear.
Read Also: Pink Dress Red Lipstick.
Expert Tips and Tricks
For those looking to take their makeup skills to the next level with i beauty brushes, here are some expert tips:
- Practice: Experiment with different brush heads and settings to find your perfect makeup routine.
- Clean Regularly: Maintain a consistent cleaning schedule to keep your brushes in top shape.
- Watch Tutorials: There are numerous online tutorials that can help you master the art of using i beauty brushes.
Read Also: Cinnamon Shade Lipstick Magic.
Conclusion
In conclusion, they are more than just makeup tools; they are a game-changer for your beauty routine. Whether you’re a makeup novice or a seasoned pro, these brushes can elevate your makeup game to new heights. So, choose your i beauty brushes wisely, follow the tips provided, and get ready to slay your makeup looks like never before!
Read Also: Orange Blue Nails.
Remember, the key to mastering i beauty brushes is practice, experimentation, and a little bit of patience. Happy makeup-ing!
Read Also: Absolute Regain Hair Fibers.
MakeUp Tips
Out of Office Makeup: Perfecting Professional Eye Looks

Here is your complete guide to out of office makeup
Introduction to Out of Office Makeup
Are you tired of your everyday office makeup routine? Do you want to look professional and polished without spending hours in front of the mirror? Look no further than “out of office makeup” – a subtle and natural look that is perfect for the workplace. In this article, we will guide you through the steps to achieve the perfect out of office makeup look, including base makeup, eye makeup, lip makeup, and tips for different skin types. We will also provide answers to frequently asked questions about office makeup.
When it comes to office makeup, less is more. The goal is to look professional and polished without drawing too much attention to yourself. Out of office makeup is a subtle and natural look that is perfect for the workplace. It involves using minimal makeup to enhance your natural features and create a polished look. In this article, we will guide you through the steps to achieve the perfect out of office makeup look.
Base Makeup
The first step to achieving the perfect out of office makeup look is to create a flawless base. Here are the steps to follow:
- Moisturize: Start by applying a moisturizer to your face to hydrate your skin and create a smooth canvas for your makeup.
- CC Cream: Use a CC cream to even out your skin tone and provide light coverage. CC creams are perfect for out of office makeup because they are lightweight and provide a natural finish.
- Concealer: Use a concealer to cover any problem areas, such as dark circles or blemishes. Apply the concealer in dots all over the problem areas and blend by lightly dabbing with your finger. Always go for a concealer that is one shade lighter than your foundation.
- Setting Powder: Finish the base with a setting powder to keep your makeup in place all day. Use a translucent powder to set your base.
Eye Makeup
The eyes are the windows to the soul, and they are also the focal point of your face. Here are the steps to follow to create a natural and professional eye makeup look:
- Eyeshadow: Use a neutral eyeshadow palette to create a natural look. Apply a light shade all over your lid and a slightly darker shade in the crease.
- Eyeliner: Use a brown or black eyeliner to define your eyes. Apply the eyeliner close to your lash line and smudge it slightly for a natural look.
- Mascara: Finish the look with mascara to make your eyes pop. Use a black or brown mascara for a natural look.
Lip Makeup
Lipstick is the finishing touch to any makeup look. Here are the steps to follow to create the perfect lip makeup look:
- Lip Color: Choose a lip color that complements your skin tone and outfit. For a natural look, go for a nude or pink shade.
- Lip Balm: Apply a lip balm to keep your lips hydrated and prevent your lipstick from drying out.
- Lipstick as Blush: Use your lipstick as blush for a natural and cohesive look. Apply a small amount of lipstick to the apples of your cheeks and blend with your fingers.
Brows and Hair
Grooming your eyebrows and hair is just as important as your makeup. Here are the steps to follow:
- Eyebrow Grooming: Use an eyebrow pencil or powder to fill in your eyebrows and create a polished look.
- Hair Color and Accessories: Use hair color and accessories to complement your outfit and create a cohesive look.
Tips for Different Skin Types
Different skin types require different makeup techniques. Here are some tips for different skin types:
- Oily Skin: Control oil production with blotting papers and powder. Use a mattifying primer to keep your makeup in place all day.
- Dry Skin: Use hydrating products and avoid harsh makeup. Use a moisturizing primer to create a smooth canvas for your makeup.
- Combination Skin: Balance your skin type with a combination of products. Use a mattifying primer on your T-zone and a hydrating primer on the rest of your face.
Makeup for Special Occasions
Sometimes, you need to transition your office makeup for a night out or a special occasion. Here are some tips:
- Holiday Parties: Add some sparkle to your out of office makeup with a shimmery eyeshadow or lip gloss.
- Other Events: Use a bold lip color or a smoky eye to create a more dramatic look.
Out of Office Makeup Trends
In the ever-evolving landscape of beauty, certain trends stand out as ideal for the versatile professional look:
Trend | Description |
---|---|
Natural Glow | Emphasizing radiant, natural-looking skin with minimal foundation |
Subtle Smokey Eyes | Soft, blended eye makeup for a sophisticated yet understated appeal |
Multi-Tasking Products | Makeup items designed for multiple uses, saving time and space |
These trends offer a perfect balance between a professional appearance and a touch of individuality.
Essential Makeup Products for the Out of Office Look
Achieving a flawless out-of-office look requires the right arsenal of products:
Product | Features | Usage |
---|---|---|
BB Cream | Lightweight coverage with skincare benefits | Even out skin tone, moisturize |
Neutral Palette | Versatile shades for both day and night looks | Create various eye makeup styles |
Lip Stain | Long-lasting color without frequent touch-ups | Add a pop of color to lips |
Setting Spray | Locks makeup in place for extended wear | Enhance makeup longevity |
Multipurpose Stick | For cheeks, lips, and eyes | Streamline makeup routine with multi-use product |
Makeup Routine for the Busy Professional
For the modern professional, time is of the essence. Follow this quick routine for an efficient out-of-office look:
- Prep: Cleanse, tone, and moisturize for a smooth base.
- Base: Apply BB cream for light coverage and a natural finish.
- Eyes: Use neutral shades from the palette for a subtle yet defined eye look.
- Cheeks and Lips: Use the multipurpose stick for a coordinated finish.
- Set: Lock the look with setting spray for long-lasting wear.
Transitioning from Office to Evening Look
Transitioning from the office desk to an evening outing is a breeze with minor adjustments:
Day Look | Night Look |
---|---|
Natural makeup with neutral tones | Intensify eye makeup with darker shades |
Subtle lip color | Bold lipstick for a statement |
Light blush | Build up blush for a more dramatic look |
Makeup Dos and Don’ts for Office Settings
In an office environment, maintaining professionalism with makeup is crucial:
Dos:
- Opt for natural-looking makeup.
- Ensure a well-groomed appearance.
- Use makeup to enhance, not overpower your features.
Don’ts:
- Avoid heavy makeup that appears distracting.
- Steer clear of strong fragrances in makeup products.
- Skip overly vibrant or neon-colored makeup.
Out of Office Makeup for Different Skin Types
Different skin types require tailored approaches to makeup:
Skin Type | Recommended Products |
---|---|
Dry Skin | Hydrating foundation, cream blush |
Oily Skin | Oil-free foundation, mattifying primer |
Combination | Dual-finish foundation, powder blush |
Sensitive Skin | Hypoallergenic foundation, mineral makeup |
Step-by-Step Guide to Out of Office Makeup
1. Prep Your Skin
Before diving into makeup application, ensure your skin is clean and moisturized:
Product | Purpose |
---|---|
Cleanser | Remove dirt and impurities from the skin |
Toner | Balance skin pH and prep for products |
Moisturizer | Hydrate and create a smooth canvas |
2. Apply a Light Base
Achieve a natural yet polished look with a lightweight base:
Product | Features | Usage |
---|---|---|
BB Cream | Lightweight coverage with skincare benefits | Apply evenly for a natural finish |
Tinted Moisturizer | Sheer coverage with added hydration | Blend well for a fresh, dewy look |
3. Enhance Your Eyes
Subtly define your eyes for a professional appearance:
Product | Features | Usage |
---|---|---|
Neutral Eyeshadow Palette | Versatile shades for day-to-night looks | Apply neutral shades for a soft, defined look |
Mascara | Lengthen and volumize lashes | Apply to upper and lower lashes |
4. Add Color to Cheeks and Lips
Bring life to your face with coordinated blush and lip color:
Product | Features | Usage |
---|---|---|
Multipurpose Stick | Multi-use for cheeks, lips, and eyes | Dab onto cheeks and lips for a coordinated look |
Cream Blush | Blendable and natural-looking | Apply sparingly for a subtle flush |
5. Set Your Makeup
Lock in your makeup for extended wear:
Product | Features | Usage |
---|---|---|
Setting Spray | Increases makeup longevity | Spray lightly over the face for a lasting finish |
Out-of-Office Makeup Brands and Prices
Brand | Products | Price Range (USD) |
---|---|---|
Fenty Beauty | Foundation, Lipsticks | $20 – $40 |
Glossier | Brow Gels, Highlighters | $12 – $30 |
MAC Cosmetics | Lipsticks, Eyeshadow Palettes | $15 – $60 |
NARS | Blushes, Concealers | $25 – $50 |
Bobbi Brown | Bronzers, Mascara | $25 – $45 |
Too Faced | Eyeliners, Setting Sprays | $15 – $40 |
Urban Decay | Eyeshadows, Setting Powders | $18 – $55 |
Tarte | Blushes, Lip Glosses | $20 – $45 |
Maybelline | BB Creams, Mascaras | $6 – $15 |
L’Oréal Paris | Foundations, Eyeliners | $8 – $20 |
Read Also: Eyebrows Redhead.
FAQs – People Also Ask Section
Can I use the same makeup for the office and evening events?
Yes, by adjusting certain elements like eye makeup intensity and lipstick shades, you can seamlessly transition your look.
Read Also: Shooting Star Makeup.
How can I make my makeup last longer throughout the day?
Using a primer, setting spray, and long-wear products can significantly increase makeup longevity.
Read Also: Is Shea Butter Vegan.
What makeup products should I avoid for an office setting?
Avoid products with excessive glitter or shimmer, as well as overly bright colors.
Read Also: All Natural Room Spray.
Is it necessary to follow a specific order when applying makeup?
Yes, starting with skincare, followed by base, eyes, cheeks, and lips ensures a more polished finish.
Read Also: Black Dress with Black Gloves.
Can I wear bold lipstick colors to the office?
Opt for muted or toned-down versions of bold colors to maintain a professional appearance.
Read Also: Candy Made with Stevia.
Conclusion
Out of office makeup is the perfect way to look professional and polished without spending hours in front of the mirror. Follow these tips and tricks to achieve the perfect out of office makeup look. Remember, less is more when it comes to office makeup. Use minimal makeup to enhance your natural features and create a subtle look.
Read Also: Mascara Wands.
MakeUp Tips
Mascara Wands: Mastering Eye Charm with Essential Tools!

Here is your complete guide to mascara wands
Introduction to Mascara Wands
When it comes to achieving luscious, fluttery lashes, the type of mascara wand you use can make all the difference. From defining and lengthening to volumizing and curling, there are a plethora of mascara wands available, each designed to cater to specific lash needs. In this comprehensive guide, we will explore everything you need to know about mascara wands, including the different types, how to choose the right one for your lashes, maintenance tips, and more.
Different Types of Mascara Wands
Mascara wands come in various shapes and sizes, each serving a unique purpose. Understanding the different types can help you achieve your desired lash look. Here are some common mascara wand types:
- Straight Wands: Ideal for adding length and definition to the lashes1.
- Curved Wands: Perfect for lifting and curling the lashes1.
- Tapered Wands: Great for reaching the inner and outer corner lashes1.
- Ball Wands: Designed to add volume and separation to the lashes1.
- Hourglass Wands: Suitable for volumizing and coating each lash evenly1.
- Comb Wands: Perfect for separating and defining the lashes, especially for those with sparse lashes1.
- Customizable Wands: Wands that allow you to adjust the bristle length and shape for a customized application.
To better understand the different mascara wand types, refer to the table below:
Mascara Wand Type | Description |
---|---|
Straight Wands | Ideal for lengthening and defining the lashes |
Curved Wands | Designed to lift and curl the lashes |
Tapered Wands | Great for reaching corner lashes |
Ball Wands | Adds volume and separation to the lashes |
Hourglass Wands | Suitable for volumizing and coating each lash evenly |
Comb Wands | Perfect for separating and defining sparse lashes |
Customizable Wands | Allows for a customized application by adjusting the bristle length and shape |
Evolution of Mascara Wands
The history of mascara wands is a testament to beauty innovation. They’ve evolved from simple brushes to sophisticated, purpose-driven tools. Technological advancements have introduced materials that enhance not only application but also the overall lash health.
Mascara Wand Materials and Their Effects
Material | Effect on Application |
---|---|
Silicone | Offers precise application |
Nylon | Adds volume to lashes |
Fiber | Lengthens lashes |
Understanding these materials empowers makeup enthusiasts to choose wands tailored to their desired lash effects.
Impact of Wand Design on Application
Different wand shapes cater to various needs:
- Curved Wands: Perfect for lifting and curling lashes.
- Ball-shaped Wands: Ideal for reaching smaller lashes and lower lash lines.
- Comb Wands: Separate and define lashes with precision.
Best Practices for Using Mascara Wands
- Preparation Tips: Always curl lashes before applying mascara for an extra lift.
- Application Techniques: Zigzag the wand from roots to tips for even distribution.
Maintenance and Cleaning of Mascara Wands
Regular cleaning isn’t just hygienic—it’s vital for the wand’s longevity and ensures clump-free application. Follow these steps:
- Gently wipe excess product with a tissue.
- Dip the wand in makeup remover to dissolve remaining mascara.
- Rinse with warm water and mild soap.
- Air dry the wand thoroughly before use.
How to Choose the Right Mascara Wand
Choosing the right mascara wand is crucial for achieving your desired lash look. Here are some factors to consider when selecting a mascara wand:
- Eye Shape: Consider your eye shape when choosing a mascara wand. For example, if you have hooded eyes, a curved wand can help lift and open up your eyes.
- Lash Type: Different mascara wands cater to various lash types. If you have short lashes, a small wand can help coat each lash, while those with long lashes may benefit from a larger wand.
- Desired Look: The look you want to achieve, whether it’s length, volume, or curl, can determine the type of mascara wand you should choose.
- Mascara Formula: The formula of the mascara you use can also influence the type of wand you need. For example, a volumizing mascara may pair well with a ball wand, while a lengthening mascara may work best with a straight wand.
- Wand Size and Material: The size and material of the mascara wand can also impact the application. A smaller wand can provide more precision, while a larger wand can offer more volume. Additionally, silicone wands are ideal for separating lashes, while fiber wands are great for adding volume.
To further illustrate how to choose the right mascara wand, refer to the table below:
Factor | Consideration | Recommended Wand Type |
---|---|---|
Eye Shape | Hooded eyes – Curved wand | Curved wand |
Lash Type | Short lashes – Small wand | Small wand |
Desired Look | Volume – Ball wand | Ball wand |
Mascara Formula | Volumizing mascara – Ball wand | Ball wand |
Wand Size | Precision – Small wand | Small wand |
Wand Material | Separation – Silicone wand, Volume – Fiber wand | Silicone wand, Fiber wand |
Applying Mascara with Mascara Wands: A Step-by-Step Guide
Preparing Your Lashes
- Cleanse and Prime
- Remove any old mascara using makeup remover.
- Optionally, use an eyelash primer for added volume and length.
Choosing the Right Mascara Wand
- Understanding Wand TypesWand TypeEffect on LashesCurvedLifts and curls lashes.CombDefines and separates lashes.Ball-shapedAdds volume and reaches smaller lashes easily.
- Selecting Based on Desired Effect
- Choose a wand that aligns with your desired lash look (volume, length, definition).
Application Techniques
- Basic Application StepsStepsDescriptionStart at the BasePlace wand at the base of lashes and wiggle it to coat evenly.Wiggle and SweepWiggle wand while sweeping upward for even distribution.Focus on TipsApply extra product on the tips for added length and definition.Repeat for VolumeLayer mascara for additional volume (if desired).
- Tips for PrecisionTipsDescriptionUse the Wand’s CurveUtilize the wand’s shape to reach corner and lower lashes.Control Product ApplicationRemove excess mascara from the wand for precise coating.Avoid ClumpingUse a lash comb to separate lashes if clumping occurs.
Finishing Touches
- Clean-Up
- Use a cotton swab dipped in makeup remover for any smudges or mistakes.
- Setting the Look
- Optional: Apply a clear mascara or lash sealer for a longer-lasting finish.
Maintenance
- Proper Storage
- Close mascara tightly after use to prevent drying out.
- Replacing Mascara
- Replace mascara every 3-6 months for hygiene and optimal performance.
Best Brands of Mascara Wands
Brand | Distinctive Features | Price Range |
---|---|---|
Maybelline | Curved wand for voluminous and lengthened lashes. | $5 – $10 |
L’Oréal | Hourglass-shaped wand for precise application and separation. | $8 – $12 |
CoverGirl | Comb wand design for lash definition and separation. | $6 – $9 |
Benefit Cosmetics | Ball-shaped wand for reaching smaller lashes and adding volume. | $12 – $20 |
Too Faced | Silicone wand with varied bristle lengths for a customized lash look. | $15 – $25 |
Tips from Experts and Makeup Artists
Expert Tip | Makeup Artist Recommendation |
---|---|
Experiment with various wand types for best fit. | “Different wands offer unique effects; explore them.” |
Master application techniques for optimal results. | “Technique matters as much as the wand itself.” |
Invest time in understanding your lash needs. | “Know your lashes to choose the right wand.” |
Replace mascara wands regularly for hygiene. | “Hygiene is crucial; don’t overlook wand replacement.” |
Mascara Wand FAQs
What is the best mascara wand for short lashes?
The best mascara wand for short lashes is a small wand that can coat each lash effectively.
Read Also: RealHer Metallic Bronze Eyeliner.
What is the best mascara wand for long lashes?
For long lashes, a larger wand can help add volume and definition to the lashes.
Read Also: Eyebrows Redhead.
What is the best mascara wand for volume?
A ball wand is ideal for adding volume to the lashes, as it can coat each lash with the volumizing mascara formula.
Read Also: Shooting Star Makeup.
What is the best mascara wand for curling?
A curved wand is perfect for curling the lashes and lifting them for a wide-eyed look.
Read Also: Is Shea Butter Vegan.
What is the best mascara wand for separating lashes?
A comb wand is great for separating and defining sparse lashes, as it can comb through each lash for a clump-free look.
Read Also: All Natural Room Spray.
Can I use different mascara wands for different effects?
Yes, you can use different mascara wands to achieve various lash looks. For example, you can use a ball wand for volume and a curved wand for curling.
Read Also: Candy Made with Stevia.
Conclusion
In conclusion, the right mascara wand can elevate your lash game and help you achieve the perfect fluttery lashes. By understanding the different types of mascara wands and how to choose the right one for your lashes, you can enhance your overall makeup look. Whether you’re aiming for length, volume, or curl, there’s a mascara wand out there to cater to your specific needs. Experiment with different mascara wands to find the perfect match for your lashes and elevate your beauty routine.
Read Also: Black Dress with Black Gloves.
MakeUp Tips
Shooting Star Makeup: Your Guide to Celestial Glamour

Here is your complete guide to shooting star makeup
Introduction to Shooting Star Makeup
Shooting star makeup has taken the beauty world by storm, offering a mesmerizing way to add celestial charm to your look. From subtle shimmer to bold galactic designs, this trend allows makeup enthusiasts to explore their creativity while embracing the cosmic allure. Let’s dive into the enchanting realm of shooting star makeup and discover how to achieve stellar looks effortlessly.
The allure of shooting star makeup has taken the beauty world by storm, offering a mesmerizing way to express creativity and individuality. This article aims to explore the enchanting world of shooting star makeup, from its inception to practical application, providing a detailed guide for both beginners and seasoned makeup artists.
History of Shooting Star Makeup
The origins of shooting star makeup can be traced back to the fascination with celestial elements and the desire to embody the mystique of the cosmos. This section will delve into the evolution of this trend, highlighting its journey from a niche concept to a mainstream sensation.
How to Create Shooting Star Makeup
- Preparing Your Canvas: Before diving into the cosmic realm, ensure your skin is prepped and primed. Cleanse, moisturize, and apply a suitable primer to create a smooth base.
- Choosing the Right Products: Highlighters, glitters, and eyeshadows are the stars of this makeup trend. Opt for highly pigmented and iridescent products to achieve the celestial glow.
- Step-by-Step Guide to Application Techniques:
- Apply a base eyeshadow and blend it outwards to create a subtle background.
- Use a precise brush to apply the highlighter in a shooting star pattern, emphasizing the high points of your face.
- Layer glitter in a gradient manner to emulate the twinkling effect of stars.
- Tools and Brushes Required: Precision brushes and makeup sponges are essential for achieving the intricate details of shooting star makeup.
Inspiring Shooting Star Makeup Looks
The versatility of shooting star makeup allows for a spectrum of awe-inspiring looks:
- Celestial-Inspired Looks: Embrace the ethereal beauty of the cosmos with soft, pastel hues resembling nebulae and galaxies.
- Galaxy and Nebula Effects: Create bold, vibrant looks using deep blues, purples, and blacks, mimicking the vastness of space.
- Day-to-Day Wearable Styles: Subtle shimmer and delicate starry accents make for versatile looks suitable for daily wear.
Best Products for Shooting Star Makeup
Selecting the right products is crucial for achieving an impeccable shooting star look. A detailed review of recommended makeup products, accompanied by a table featuring product names, brands, and unique features, will be provided to assist readers in making informed choices.
Recommended Makeup Products for Shooting Star Makeup
Product Name | Brand | Unique Features |
---|---|---|
Celestial Eyeshadow | Stellar Cos. | Shimmering pigments for a starry effect |
Galaxy Highlighter | Nebula Beauty | Multi-dimensional glow for celestial radiance |
Long-Lasting Products Comparison
Product | Features | Longevity |
---|---|---|
Setting Spray | Locks in makeup | All-day wear |
Touch-Up Kit | Portable, mini products | Quick touch-ups |
Comparison of Shooting Star Makeup Brands
Brand | Product Name | Description | Cost | Star Status |
---|---|---|---|---|
Surreal Makeup | Shooting Star Eyeshadow | Multicolored iridescence, reflects light like crushed diamonds, perfect for superior sparkle. | $15.99 | ★★★★☆ |
Rare Beauty | Shooting Star Highlighter | Creates a celestial glow, long-lasting, suitable for all skin tones. | $24.00 | ★★★★★ |
Fenty Beauty | Starlit Hyper-Glitz Lipstick | Intense shimmer, long-wearing, available in various celestial shades. | $19.00 | ★★★★★ |
Huda Beauty | Mercury Retrograde Eyeshadow Palette | Versatile palette with celestial shades, highly pigmented, and blendable. | $67.00 | ★★★★☆ |
ColourPop | Shooting Star Glitter Gel | Ultra-reflective glitter gel, easy to apply, suitable for face and body. | $10.00 | ★★★★☆ |
The star status is based on customer reviews and popularity. The costs are approximate and may vary based on the retailer. These brands offer a range of shooting makeup products, each with its unique features and appeal, catering to diverse preferences and styles.
Tips for Long-Lasting Shooting Star Makeup
- Setting Techniques: Lock in your cosmic masterpiece with a setting spray to ensure it lasts throughout the day or night.
- Touch-Up Suggestions: Carry a small touch-up kit including a mini highlighter and glitter for quick touch-ups.
- Removal and Skincare After Wearing: Gently remove makeup using a makeup remover suitable for glitter, followed by a hydrating skincare routine.
Step-by-Step Application Guide
Step | Technique |
---|---|
1. Prepare Canvas | Cleanse, moisturize, and apply primer |
2. Base Eyeshadow | Apply a neutral base eyeshadow and blend |
3. Shooting Star | Use a precise brush for star-shaped highlighter strokes |
4. Layer Glitter | Apply glitter in a gradient for a twinkling effect |
Read Also: How to Cover Tyndall Effect with Makeup.
Shooting Star Makeup for Different Occasions
Adapting shooting makeup for various occasions adds versatility to this trend. Readers will discover tailored makeup ideas for parties, festivals, and photo shoots, along with suitable color palettes and styles to complement different events.
Read Also: How Long Does Grease Makeup Take to Dry.
DIY Shooting Star Makeup Kits
Creating your DIY kit is a fun and budget-friendly way to explore this trend. Components may include:
- A versatile highlighter palette with iridescent shades
- Glitter eyeshadows in various celestial tones
- Precision brushes and makeup sponges for detailed application
Read Also: Camping Hairstyles for Curly Hair.
FAQs Section
Based on “People Also Ask”
How to achieve a shooting star makeup look?
Follow our step-by-step guide using high-quality highlighters and glitters for a celestial glow.
Read Also: Maybelline Free Sample.
Are there variations of shooting star makeup for different skin tones?
Absolutely! It is versatile and can be adapted to complement various skin tones.
Read Also: RealHer Metallic Bronze Eyeliner.
What tools are essential for creating shooting star makeup?
Precision brushes and makeup sponges are vital for achieving intricate details.
Read Also: Candy Made with Stevia.
Conclusion
In conclusion, shooting star makeup offers a celestial canvas for artistic expression, allowing individuals to embody the enchanting allure of the cosmos through makeup artistry. Embracing this trend opens up a world of creativity and self-expression, inviting everyone to explore the celestial realm through the transformative power of makeup.
Read Also: Eyebrows Redhead.
-
Beauty Tips10 months ago
What Is Balayage: Your Ultimate Guide Is Here
-
Dreams Interpretation9 months ago
The Meaning of Teeth Falling Out in a Dream: Exploring the Symbolism
-
Diet Tips9 months ago
What Vitamins C Is Good For? The Ultimate Guide
-
Uncategorized9 months ago
Understanding the Five Languages of Love: A Comprehensive Guide
-
Beauty Tips6 months ago
How to Make Clear Skin: Your Comprehensive Guide
-
Women Tips6 months ago
How Long Breast Augmentation Surgery Take? A Complete Guide
-
Beauty Tips6 months ago
Coconut Oil in Face Benefits: Unlocking the Secrets to Radiant Skin
-
Beauty Tips9 months ago
The Surprising Benefit to Coconut Oil: Your Complete Guide