Women Tips
How Long Breast Augmentation Surgery Take? A Complete Guide

Here is your complete guide to how long breast augmentation surgery
Introduction to How Long Breast Augmentation Surgery
Breast augmentation surgery is a popular cosmetic procedure that aims to enhance the size and shape of the breasts. One common question among individuals considering this surgery is, “How long does breast augmentation surgery take?” In this article, we will delve into the factors that affect the duration of the procedure, the average surgical time, pre-operative preparation, the surgical process itself, the recovery period, and address frequently asked questions about the surgery.
Breast Augmentation Procedure Steps
Here is a breakdown of the typical steps involved in a breast augmentation procedure:
Step | Description |
---|---|
1. Consultation and Evaluation | Discuss goals, evaluate health, examine breasts, and determine the most suitable approach. |
2. Preparing for Surgery | Follow pre-operative instructions, make necessary lifestyle adjustments, and consider medication restrictions. |
3. Anesthesia and Incision | Administer anesthesia for comfort and pain-free surgery, then make an incision in the chosen location. |
4. Implant Placement | Create a pocket for the implant, considering subglandular, submuscular, or dual-plane placement techniques. |
5. Closing Incisions and Recovery | Close incisions with sutures or surgical adhesive, apply dressings or special bras to support healing. |
6. Recovery and Post-operative Period | Observe immediate recovery in the hospital, follow post-operative care instructions for optimal healing. |
7. Long-term Recovery and Results | Engage in a gradual return to normal activities, attend follow-up appointments, and expect final results |
Please note that these steps are generalized, and the actual procedure may vary based on individual circumstances and surgeon preference. It is essential to consult with a qualified plastic surgeon to receive personalized guidance and information about the specific steps involved in your breast augmentation surgery.

Factors Affecting the Duration of Breast Augmentation Surgery
Several factors influence the length of time required for breast augmentation surgery. These factors include:
Complexity of the Procedure
The complexity of the surgery plays a significant role in determining the duration. Different factors that contribute to the complexity of the procedure include:
- Submuscular Placement: Placing the implants beneath the chest muscle may require additional time compared to subglandular placement.
- Multiple Incisions: If multiple incisions are necessary to achieve the desired results, it can increase the duration of the surgery.
- Combining with Other Procedures: Breast augmentation surgery may be combined with other cosmetic procedures, such as breast lift or tummy tuck. The addition of these procedures can extend the surgical time.
Implant Type and Size
The choice of implant type and size can also affect the duration of the surgery. Some considerations include:
- Saline Implants: The insertion of saline implants may take slightly less time compared to silicone implants.
- Silicone Implants: The process of placing silicone implants requires meticulous attention to detail, potentially increasing the duration of the surgery.
- Different Sizes and Shapes: If different implant sizes or shapes are used to achieve the desired outcome, it can impact the surgical time.
Surgical Technique
The surgical technique employed by the plastic surgeon can influence the duration of the procedure. Some common techniques include:
- Traditional Incision Technique: This technique involves making an incision either in the inframammary fold (under the breast), around the areola, or in the armpit.
- Endoscopic Technique: In this approach, a small camera called an endoscope is used to guide the surgeon during the surgery, which may slightly increase the duration.
- Transumbilical Technique: This technique involves making a small incision in the navel, and then using an endoscope to create a tunnel to the breast area for implant placement.
Surgeon’s Experience and Skill Level
The experience and skill level of the plastic surgeon can significantly impact the duration of the surgery. A skilled and experienced surgeon can perform the procedure more efficiently, potentially reducing the surgical time.
Average Duration of Breast Augmentation Surgery
The duration of breast augmentation surgery can vary depending on the individual case and the factors mentioned above. On average, the surgery typically takes between one to three hours. However, it is important to note that this timeframe can be shorter or longer, depending on the specific circumstances.
To provide a clearer understanding, let’s take a closer look at the average surgical time based on different factors:
Factor | Estimated Surgical Time |
---|---|
Complexity of the Procedure | |
Subglandular placement | 1-2 hours |
Submuscular placement | 2-3 hours |
Multiple incisions | 2-3 hours |
Combining with other procedures | Additional time |
Implant Type and Size | |
Saline implants | 1-2 hours |
Silicone implants | 2-3 hours |
Different sizes and shapes | Additional time |
Surgical Technique | |
Traditional incision technique | 1-2 hours |
Endoscopic technique | 2-3 hours |
Transumbilical technique | 2-3 hours |
Surgeon’s Experience and Skill Level | |
Skilled and experienced surgeon | Potential time savings |
Pre-operative Preparation
Before undergoing breast augmentation surgery, thorough pre-operative preparation is essential. This preparation ensures optimal results and reduces the risk of complications. Key steps in pre-operative preparation include:
Consultation and Evaluation
During the initial consultation, you will discuss your goals and expectations with the plastic surgeon. They will evaluate your overall health, examine your breasts, and discuss the various aspects of the surgery. This evaluation helps determine the most suitable approach for your individual case.
Preparing for Surgery
To prepare for breast augmentation surgery, follow these guidelines:
- Pre-operative instructions: Your surgeon will provide detailed instructions regarding fasting, medication restrictions, and any necessary preparations before the surgery.
- Lifestyle adjustments and restrictions: Avoid smoking, alcohol, and certain medications that can increase the risk of complications.
- Medication and supplement considerations: Inform your surgeon about any medications or supplements you are currently taking, as some may need to be temporarily discontinued before the surgery.
On the Day of Your Breast Augmentation
Here is a table outlining what to do on the day of your breast augmentation surgery:
Task | Description |
---|---|
1. Follow Fasting Guidelines | Adhere to the fasting instructions provided by your surgeon to ensure an empty stomach before surgery. |
2. Take Prescribed Medications | Take any prescribed medications, such as antibiotics or pain relievers, as directed by your surgeon. |
3. Dress Comfortably | Wear loose, comfortable clothing that is easy to remove and put back on after surgery. |
4. Avoid Makeup and Jewelry | Do not wear makeup, lotions, perfumes, or jewelry on the day of the surgery to minimize infection risks. |
5. Arrange for Transportation | Ensure you have a reliable means of transportation to and from the surgical facility. |
6. Follow Hygiene Guidelines | Shower and cleanse your body with an antimicrobial soap as instructed by your surgeon. |
7. Remove Nail Polish | Remove nail polish or acrylic nails from at least one finger for monitoring oxygen levels during surgery. |
8. Bring Necessary Documents | Bring all necessary documents, such as identification, insurance information, and any completed forms. |
9. Follow Pre-operative Instructions | Adhere to any additional pre-operative instructions given by your surgeon, such as avoiding certain foods. |
10. Arrive on Time | Arrive at the surgical facility on time, allowing for check-in procedures and pre-operative preparations. |
It’s important to note that these instructions may vary depending on your surgeon’s specific requirements. Make sure to consult with your plastic surgeon and follow their personalized recommendations for the day of your breast augmentation surgery.
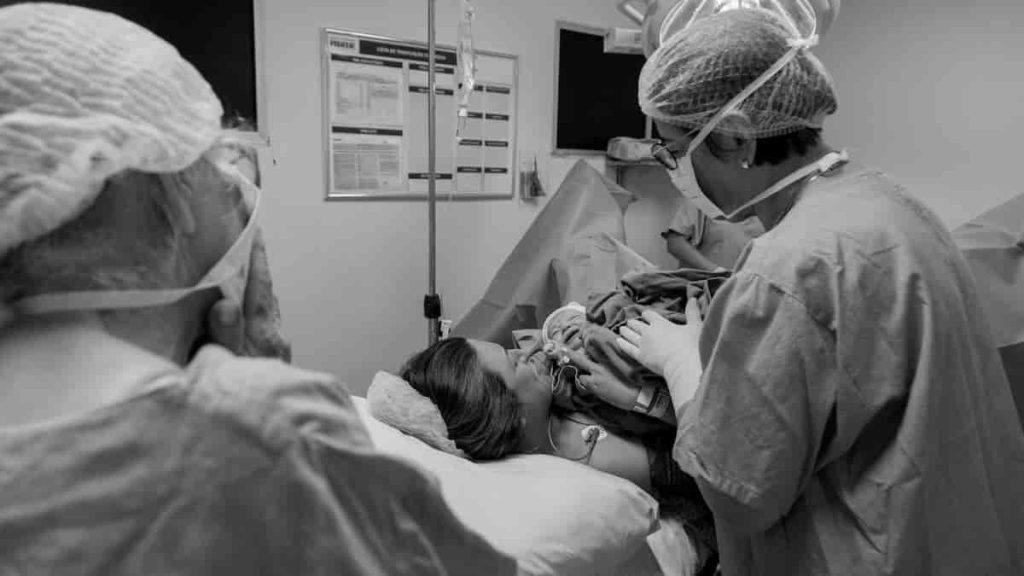
The Surgical Process
Breast augmentation surgery involves several stages. Let’s walk through the typical surgical process:
Anesthesia and Incision
Prior to the surgery, anesthesia is administered to ensure you are comfortable and pain-free throughout the procedure. The surgeon will make an incision, which can be placed in different locations, depending on the chosen technique and individual factors.
Implant Placement
After the incision, the surgeon will create a pocket for the implant. The placement can be subglandular (behind the breast tissue, but above the muscle), submuscular (underneath the chest muscle), or a dual-plane technique, which combines both approaches.
Closing Incisions and Recovery
Once the implants are correctly positioned, the incisions are closed using sutures or surgical adhesive. The surgeon may apply dressings or use special bras to provide support and aid in the healing process.
Recovery and Post-operative Period
After breast augmentation surgery, a proper recovery period is crucial for optimal healing and results. Here’s what you can expect during the recovery phase:
Immediate Recovery
Depending on the specific circumstances and the surgeon’s recommendations, you may stay in the hospital for a short period of observation. During this time, your vital signs will be monitored, and appropriate pain management techniques will be implemented.
Post-operative Care Instructions
To facilitate a smooth recovery, it is important to follow the post-operative care instructions provided by your surgeon. Some key instructions may include:
- Medications and pain management at home: Take prescribed medications as directed, and follow any additional pain management strategies recommended by your surgeon.
- Restrictions on physical activities: Avoid strenuous activities, heavy lifting, and exercises that put strain on the chest muscles.
- Follow-up appointments: Schedule and attend all follow-up appointments with your surgeon to monitor your progress and address any concerns.
Long-term Recovery and Results
The recovery period after breast augmentation surgery can vary from person to person. Typically, it takes several weeks to return to normal daily activities. Full recovery and the final results may take several months. It is important to maintain realistic expectations and consult with your surgeon for guidance throughout the recovery process.
Frequently Asked Questions
Here are answers to some common questions about breast augmentation surgery:
Q: How long is the recovery period after breast augmentation surgery?
A: The recovery period can vary, but most individuals can expect to resume normal activities within 4-6 weeks. Strenuous exercise and heavy lifting should be avoided for a longer period, as advised by your surgeon.
Q: Will breast augmentation surgery leave noticeable scars?
A: Incision scars are an inevitable part of any surgery. However, with proper care and the use of advanced techniques, incisions are typically well-hidden and fade over time.
Read More About the Steps of How to Apply Makeup.
Q: Can I breastfeed after breast augmentation surgery?
A: In most cases, breast augmentation surgery does not interfere with breastfeeding. However, it is important to discuss your plans for future pregnancies and breastfeeding with your surgeon during the consultation.
Read More About Home Remedies for Fungal Rashes.
Q: Are there any risks or complications associated with breast augmentation surgery?
A: Like any surgical procedure, breast augmentation carries some risks, including infection, bleeding, changes in nipple or breast sensation, implant rupture, and capsular contracture. However, these risks can be minimized by selecting a qualified and experienced plastic surgeon and following all post-operative instructions.
Read More About Avocado Oil for Tanning.
Q: How long will the results of breast augmentation surgery last?
A: Breast augmentation surgery provides long-lasting results; however, it is important to note that breast implants are not lifetime devices. Over time, you may require implant replacement or removal due to natural aging, changes in breast tissue, or personal preferences.
Read More About Fruit with High Protein.
How long does the surgery take for breast implants?
The duration of breast augmentation surgery can vary depending on several factors, including the complexity of the procedure, implant type and size, surgical technique, and the surgeon’s experience. On average, the surgery typically takes between one to three hours. However, it’s important to note that the actual time may be shorter or longer depending on the individual case.
How long is breast augmentation surgery recovery?
The recovery period after breast augmentation surgery can vary from person to person. Most individuals can expect to resume normal activities within 4-6 weeks. However, it’s important to note that everyone heals at their own pace, and the full recovery and final results may take several months. It’s essential to follow your surgeon’s post-operative care instructions and attend all scheduled follow-up appointments for proper monitoring and guidance throughout the recovery process.
Read More About How to Avoid Wedding Stress.
How soon after breast augmentation can I go home?
After breast augmentation surgery, the length of time you stay in the hospital will depend on your specific circumstances and the surgeon’s recommendations. In many cases, breast augmentation is performed on an outpatient basis, allowing you to go home the same day of the surgery. However, some individuals may need to stay in the hospital for a short period of observation. Your surgeon will provide specific instructions regarding post-operative care and when it is safe for you to go home.
Read More About Russian Lips vs Normal Filler.
How painful is breast augmentation?
Pain and discomfort levels can vary from person to person. While breast augmentation surgery does involve some post-operative pain, advancements in surgical techniques and pain management strategies have significantly improved patient comfort. Your surgeon will prescribe appropriate pain medications to help manage any discomfort during the recovery period. It’s important to follow the prescribed pain management regimen and communicate any concerns or pain levels with your surgeon, who can adjust your medication or provide additional guidance to ensure your comfort.
Read More About Gain Weight on Period.
Conclusion
Breast augmentation surgery is a transformative procedure that can enhance the size and shape of the breasts. The duration of the surgery depends on various factors such as complexity, implant type and size, surgical technique, and the surgeon’s experience. By understanding these factors and following proper pre-operative and post-operative care instructions, individuals can have a successful surgery and achieve their desired results. Remember to consult with a qualified plastic surgeon to discuss your specific goals and obtain personalized advice tailored to your needs.
Women Tips
Coconut Oil Bath Benefits: Discover the Secret

Here is your complete guide to coconut oil bath benefits
Introduction to Coconut Oil Bath Benefits
In a fast-paced world, where stress and pollution are constant companions, people are increasingly seeking solace in natural remedies and self-care routines. One such remedy that’s gaining immense popularity is the coconut oil bath. This ancient practice is now being rediscovered for its myriad of benefits. In this comprehensive guide, we’ll delve into the world of coconut oil baths, revealing their wonders and how to harness them for your well-being.
What is Coconut Oil?
Coconut oil is derived from the flesh of coconuts and is renowned for its versatility and health benefits. The most common types of coconut oil are virgin, refined, and fractionated. Each type serves a specific purpose, but for a coconut oil bath, virgin coconut oil is often preferred for its natural properties.
Preparing Your Coconut Oil Bath
To experience the full benefits of a coconut oil bath, it’s essential to get the preparation right. Here’s a step-by-step guide:
Gather Your Supplies:
- Virgin coconut oil
- Warm water
- Essential oils (optional)
Temperature Matters:
- Ensure the water is comfortably warm, not scalding hot.
- Hot water can strip your skin of natural oils.
Mixing the Elixir:
- Add a few tablespoons of virgin coconut oil to your bathwater.
- If you like, mix in a few drops of your favorite essential oil.
Swirl and Soak:
- Swirl the water to disperse the oil evenly.
- Soak for at least 15-20 minutes to let the magic happen.
Skin Benefits of Coconut Oil Bath
Coconut oil is a treasure trove of benefits for your skin. Here’s how it works its wonders:
- Moisturizes and Nourishes: The rich fatty acids in coconut oil act as a natural moisturizer, leaving your skin supple and soft.
- Suitable for All Skin Types: Whether you have dry, oily, or sensitive skin, coconut oil can work wonders.
Skin Types and Recommended Coconut Oil Baths
Skin Type | Recommended Coconut Oil Bath |
---|---|
Dry | Coconut oil + Lavender oil |
Oily | Coconut oil + Tea Tree oil |
Sensitive | Coconut oil + Chamomile oil |
Hair Benefits of Coconut Oil Bath
Don’t let your hair feel left out; a coconut oil bath is equally beneficial for your locks:
- Hair Conditioning: Coconut oil helps in deep conditioning, making your hair more manageable.
- Stimulates Growth: The vitamins and fatty acids in coconut oil promote hair growth.
DIY Coconut Oil Hair Masks
Hair Concern | Coconut Oil Mix |
---|---|
Dry Hair | Coconut oil + Honey |
Dull Hair | Coconut oil + Aloe Vera |
Hair Growth | Coconut oil + Rosemary oil |
Aromatherapy and Relaxation
Beyond the physical benefits, coconut oil baths are excellent for relaxation:
- Stress Reduction: The soothing aroma of coconut oil combined with essential oils reduces stress levels.
- Aromatherapy: Each essential oil has its unique benefits; choose the one that suits your mood.
Essential Oils for Relaxation
Essential Oil | Relaxation Benefit |
---|---|
Lavender | Calming and Sleep-Inducing |
Eucalyptus | Eases Respiratory Discomfort |
Peppermint | Mental Clarity and Energy Boost |
Common Mistakes and Tips
To make the most of your coconut oil bath, avoid these common mistakes and follow these tips:
- Overusing Coconut Oil: Using too much coconut oil can make your bath slippery.
- Using Hot Water: Extremely hot water can negate the moisturizing effects.
- Not Patch Testing: Always perform a patch test to check for allergies before your first coconut oil bath.
Scientific Perspective
For those who seek scientific validation, there’s a growing body of research supporting coconut oil’s benefits. Studies indicate its effectiveness in maintaining skin health and promoting relaxation. For instance, research has shown that coconut oil has antimicrobial and anti-inflammatory properties, making it an excellent choice for skincare.
Coconut Oil Bath Safety
While coconut oil baths offer numerous advantages, it’s important to ensure your safety:
- Allergies: Perform a patch test to ensure you don’t have an allergic reaction.
- Clogged Drains: Use warm water, not hot, to prevent clogged drains.
- Slippery Surfaces: Be cautious as coconut oil can make surfaces slippery.
Best Times to Use Coconut Oil Bath Benefits
Time of Day | Benefits |
---|---|
Morning | – Energizes and prepares you for the day ahead. |
After Exercise | – Soothes tired muscles and helps with post-workout recovery. |
Evening | – Promotes relaxation and better sleep with aromatherapy. |
Self-Care Days | – Enhances your self-care routine, providing a spa-like experience. |
Before Bed | – Moisturizes skin and helps you wind down for a restful sleep. |
Coconut Oil Bath FAQs
Let’s address some frequently asked questions about coconut oil baths:
Frequently Asked Questions
Question | Answer |
---|---|
Is coconut oil bath suitable for all skin types? | Yes, it works well for most skin types. |
How often should I take a coconut oil bath? | 2-3 times a week is a good starting point. |
Can I use any coconut oil for a bath? | Virgin coconut oil is recommended. |
Is it safe to use coconut oil in the hair during a bath? | Yes, it can be beneficial for hair. |
Will a coconut oil bath cause clogged drains? | Use warm water to prevent clogs. |
Is it good to put coconut oil in the bath?
Yes, adding coconut oil to your bath can be a great idea. It moisturizes the skin, leaving it soft and supple. Just ensure that the water isn’t too hot, as extremely hot water can strip your skin of natural oils.
Is coconut oil good for your skin in the shower?
Yes, coconut oil is excellent for skin when used in the shower. It can help lock in moisture and provide hydration, especially if your skin tends to be dry. You can also use it after a shower, as a post-shower moisturizer.
How do you make a coconut oil bath?
- Gather Your Supplies: You’ll need virgin coconut oil, warm water, and optional essential oils.
- Temperature Matters: Make sure the water is comfortably warm, not hot.
- Mixing the Elixir: Add a few tablespoons of virgin coconut oil to your bathwater. You can also add a few drops of essential oil for fragrance.
- Swirl and Soak: Stir the water to evenly disperse the oil and then soak in it for at least 15-20 minutes.
Which oil is best for a bath?
For a bath, virgin coconut oil is an excellent choice. It’s natural, moisturizing, and has a pleasant aroma. However, you can also use other oils like jojoba, almond, or argan depending on your preferences and skin type.
What are the disadvantages of coconut oil on the skin?
While coconut oil has many benefits, it may not be suitable for everyone. Some potential disadvantages include clogged pores, acne exacerbation for some individuals, and the risk of allergies. It’s crucial to perform a patch test before using it extensively.
Read Also: Which Lace is Better for Dark Skin.
How long does it take coconut oil to absorb into the skin?
Coconut oil is typically absorbed into the skin within 15-30 minutes. The absorption time can vary depending on your skin type and the amount of oil applied.
Read Also: Ice Crystals Makeup.
Can bacteria grow in coconut oil?
Coconut oil has natural antimicrobial properties due to its high lauric acid content. This makes it less prone to bacterial growth than some other oils. However, it’s still advisable to store it in a cool, dry place to prevent any potential contamination.
Read Also: What is Nape Detox.
Which is better, coconut oil, or olive oil for the skin?
Both coconut oil and olive oil have their benefits. Coconut oil is excellent for moisturizing, whereas olive oil is rich in antioxidants and can also hydrate the skin. The choice between the two depends on your specific skin needs and personal preferences.
Read Also: December Birthstone Nails.
Is it OK to put coconut oil on my face?
Yes, it’s generally safe to put coconut oil on your face. It can be an effective moisturizer and may have some antibacterial properties. However, be cautious if you have sensitive or acne-prone skin, as it can potentially clog pores for some individuals. It’s advisable to do a patch test first.
Read Also: Black Dress with Lipstick.
Is it okay to put oil in the bath?
Yes, it’s perfectly okay to put oil in the bath. Oils like coconut, jojoba, and almond can enhance your bathing experience by moisturizing the skin and providing a pleasant fragrance. Just be mindful not to use too much oil to prevent slippery surfaces.
Read Also: Can You Swim with Braids.
How do you use oil when bathing?
To use oil when bathing, simply add a few tablespoons of your chosen oil (e.g., coconut, almond, or jojoba) to your bathwater. You can also mix in a few drops of essential oils for added fragrance and benefits. Make sure to disperse the oil evenly in the water before soaking.
Read Also: Brush Hair and Makeup.
Is bathing in oil good?
Bathing in oil can be beneficial for your skin. It helps to lock in moisture, leaving your skin soft and hydrated. Oil baths are particularly soothing and can promote relaxation and aromatherapy, making them a popular self-care practice.
Read Also: Hormone Reset Diet Recipes.
Conclusion
In conclusion, the soothing, natural, and therapeutic effects of a coconut oil bath can’t be overstated. Whether it’s for your skin, hair, or relaxation, this ancient practice provides numerous benefits. By following our comprehensive guide, you can unlock the full potential of a coconut oil bath and take a step towards a healthier, more relaxed you.
Read Also: Nude Envy Lipstick.
This in-depth guide has revealed the wonders of coconut oil baths, their preparation, and the science behind their benefits. Embrace this ancient remedy and experience the transformation in your well-being.
Read Also: Contour Korean.
Women Tips
What is Nape Detox – A Comprehensive Guide

Here is your complete guide to what is nape detox
Introduction to What is Nape Detox
The pursuit of healthy, lustrous hair is a universal aspiration. But often, in our quest for the perfect locks, we overlook a vital area that plays a significant role in maintaining hair health – the nape of our neck. In this comprehensive guide, we’ll delve deep into the world of nape detox to help you understand its importance, benefits, and how to achieve that coveted luscious hair.
Understanding Nape Detox
Nape detox, as the term suggests, involves cleansing and rejuvenating the hair and skin on the nape of your neck. This seemingly small area holds more significance than you might think. Let’s start by understanding why nape detox matters:
- The nape is a sensitive area prone to oil and dirt buildup, which can affect hair growth.
- Neglecting this area can lead to hair problems like breakage and dandruff.
- It can improve blood circulation, stimulating hair follicles for healthier growth.
Nape Detox Benefits
Now that you know why nape detox is important, let’s explore the benefits:
- Enhanced Hair Growth: It can improve blood flow, encouraging hair to grow faster and healthier.
- Reduced Breakage: By cleansing the nape area, you reduce the risk of hair breakage and split ends.
- Dandruff Prevention: It helps in removing dandruff-causing agents, promoting a clean and healthy scalp.
- Softer and Shiny Hair: It can lead to silkier and shinier hair, giving you a gorgeous mane.
- Less Hair Loss: A healthy nape means fewer hair strands on your pillow or in the shower drain.
How to Perform Nape Detox
Now, let’s get hands-on and understand how to perform nape detox:
Gather Your Supplies:
- Shampoo
- Conditioner
- Exfoliating brush
- Natural oils (e.g., coconut, olive oil)
Preparation:
- Wet your nape area with lukewarm water.
- Apply a gentle, sulfate-free shampoo and massage it in.
- Rinse thoroughly.
Exfoliation:
- Use an exfoliating brush or a soft toothbrush to scrub the nape gently.
- Focus on circular motions to remove dead skin and buildup.
- Rinse again.
Nourish:
- Apply natural oils to the nape and massage for a few minutes.
- Leave it on for at least 30 minutes, then rinse with cold water.
Conditioning:
- Apply a hydrating conditioner to the nape.
- Leave it on for a few minutes before rinsing.
Rinse and Dry:
- Rinse thoroughly, ensuring no product remains.
- Gently pat dry with a clean towel.
Nape Detox Products
A key aspect of nape detox is using the right products. Here are some popular choices:
- Coconut Oil: Known for its moisturizing properties.
- Olive Oil: Helps nourish and condition the nape area.
- Sulfate-Free Shampoo: Ideal for a gentle cleanse.
- Exfoliating Brush: Useful for removing dead skin cells.
Nape Detox Product Recommendations
Product | Benefits |
---|---|
Coconut Oil | Deep conditioning and moisture retention. |
Olive Oil | Nourishes the nape area and reduces dryness. |
Sulfate-Free Shampoo | Gentle yet effective cleansing. |
Exfoliating Brush | Helps in removing dead skin cells. |
DIY Nape Detox vs. Professional Services
Aspect | DIY Nape Detox | Professional Services |
---|---|---|
Cost | Affordable and budget-friendly. | Potentially expensive. |
Control | You have full control over the process. | Expert guidance and pampering. |
Results | May take time and practice for optimal results. | Quicker, potentially more noticeable results. |
Convenience | Do it on your schedule. | Appointment-based. |
FAQs
To address common questions, here are some FAQs based on what people also ask:
Frequently Asked Questions
Question | Answer |
---|---|
What is the purpose of nape detox? | Nape detox improves hair health and promotes growth. |
How often should I perform nape detox? | It’s recommended every 2-4 weeks, depending on your needs. |
Can nape detox help with hair growth? | Yes, it can stimulate hair follicles, aiding growth. |
Are there any side effects or risks? | When done correctly, it’s generally safe. |
What products should I use for nape detox? | Use natural oils and a sulfate-free shampoo. |
Is professional nape detox worth it? | It’s a personal choice, but it offers convenience and expertise. |
Can nape detox be done at home? | Yes, you can perform nape detox at home. |
How long does it take to see results? | Results may vary but can be noticeable within a few weeks. |
What are common nape detox mistakes? | Avoid harsh products and excessive scrubbing. |
Is nape detox suitable for all hair types? | Yes, it’s beneficial for all hair types. |
Does napping help with detox?
Napping, while refreshing, isn’t directly related to detoxification. Detox primarily occurs in the liver and kidneys, processes that don’t necessarily get a boost from a nap. However, adequate sleep, including naps, is crucial for overall health and well-being, indirectly supporting your body’s detoxification processes.
What toxins are removed during sleep?
During sleep, your body goes through several essential detoxification processes. Toxins like metabolic waste products, free radicals, and excess neurotransmitters are removed. The glymphatic system, which is more active during sleep, helps clear waste products from the brain, including harmful proteins associated with neurodegenerative diseases.
What should I drink before bed to detox?
A glass of warm water with lemon is a popular choice before bedtime. The warm water aids digestion, while lemon’s vitamin C content may support the liver. Herbal teas like chamomile or peppermint can also help relax and prepare your body for a restful night. However, be cautious with detox teas and consult with a healthcare professional for personalized recommendations.
What removes waste from the brain?
The glymphatic system is responsible for removing waste from the brain. This system becomes more active during sleep, allowing cerebrospinal fluid to flow through the brain tissue and remove toxic waste products, including beta-amyloid, which is linked to conditions like Alzheimer’s disease.
How are most toxins removed from the body?
The body primarily removes toxins through the following processes:
- Liver: Metabolic toxins are processed in the liver and converted into less harmful substances before excretion.
- Kidneys: The kidneys filter toxins and waste products from the bloodstream, which are then excreted in urine.
- Lungs: Gaseous toxins like carbon dioxide are expelled through respiration.
- Skin: Sweating helps eliminate toxins from the body.
- Colon: The colon removes solid waste and toxins through bowel movements.
Read Also: Nails That Go with Blue Dress.
Does sleep clean toxins?
Yes, sleep plays a crucial role in cleaning toxins from the body. The glymphatic system, most active during deep sleep, helps remove waste products from the brain. It’s part of the body’s natural detoxification process, and consistent, quality sleep is vital for overall health and well-being, including detox.
Read Also: Formula 50 Hair Vitamins.
Maintaining Nape Health
It is not a one-time fix; it requires consistent care to maintain the results. Here are some tips for keeping your nape healthy:
- Regularly cleanse and moisturize the area.
- Avoid tight hairstyles that stress the nape.
- Protect it from direct sun exposure.
- Stay hydrated for overall scalp health.
Read Also: Hormone Reset Diet Recipes.
Tips for Maintaining Nape Health
Tip | Importance |
---|---|
Regular Cleansing | Prevents buildup and maintains cleanliness. |
Avoid Tight Hairstyles | Reduces tension and hair damage. |
Sun Protection | Prevents UV damage to the nape area. |
Stay Hydrated | Essential for a healthy scalp. |
Read Also: Orange Lipstick Look.
Nape Detox Success Stories
To inspire your nape detox journey, here are a couple of success stories from individuals who reaped the benefits:
- Samantha’s Story:
- Samantha struggled with hair breakage and dandruff at her nape.
- After consistent nape detox, her hair grew thicker, and dandruff disappeared.
- She now enjoys soft, shiny hair and a boost in self-confidence.
- James’ Journey:
- James used to have dry, brittle hair at his nape.
- Nape detox transformed his hair into a softer, healthier state.
- He noticed less hair loss, especially during showers.
Read Also: How Long Does Tooth Gem Last.
Conclusion
In conclusion, it is a powerful method for achieving healthier, more beautiful hair. By understanding its significance, following the right process, and maintaining good nape health, you can experience remarkable results. Whether you choose the DIY route or opt for professional services, the key is to stay consistent and enjoy the benefits of a clean, revitalized nape.
Read Also: Which Lace is Better for Dark Skin.
So, why wait? Begin your nape detox journey today and unlock the secrets to gorgeous, head-turning hair!
Read Also: Ice Crystals Makeup.
Women Tips
How Long Does Tooth Gem Last: A Comprehensive Guide

Here is your complete guide to how long does tooth gem last
Introduction to How Long Does Tooth Gem Last
Tooth gems have become a popular trend in cosmetic dentistry, offering a unique way to enhance your smile and express your style. But before you embark on this dazzling journey, you might wonder, how long does tooth gem last? In this in-depth guide, we’ll explore every aspect of tooth gems, from what they are to their application process and, most importantly, how to make them last. Get ready to discover the secrets of a sparkling smile!
What Are Tooth Gems?
Before diving into the lifespan of tooth gems, let’s start with the basics.
Tooth gems are small, decorative ornaments made from various materials such as crystals, diamonds, or even gold. They are applied to the surface of your teeth to create a unique and eye-catching dental accessory. These gems come in a variety of designs, allowing you to choose the one that best suits your style.
Tooth Gem Application Process
Curious about how those dazzling gems end up on your teeth? Here’s a step-by-step breakdown of the application process:
- Consultation: Your journey begins with a consultation with a dental professional. During this appointment, you’ll discuss your preferences, select the gem design, and determine the appropriate tooth for placement.
- Tooth Preparation: The selected tooth is cleaned and prepared for the gem application. This may involve light polishing to ensure a clean and smooth surface.
- Adhesive Application: A special dental adhesive, safe for oral use, is applied to the back of the tooth gem.
- Gem Placement: The gem is carefully positioned on the tooth using dental tweezers. Precision is crucial to ensure a secure attachment.
- Curing: A curing light is used to harden the adhesive, ensuring that the gem stays in place.
- Final Inspection: The dentist conducts a final inspection to ensure the gem is securely attached and aligns perfectly with your smile.
Factors Affecting Tooth Gem Longevity
The durability of your tooth gem depends on several factors. Understanding these factors is key to answering the question, how long does tooth gem last?
- Oral Hygiene: Proper oral hygiene practices play a significant role. Regular brushing, flossing, and rinsing help maintain the gem’s longevity.
- Dietary Habits: What you eat and drink matters. Acidic and sugary foods can weaken the adhesive, potentially reducing the lifespan of your tooth gem.
- Quality of Materials: The type and quality of both the gem and the adhesive matter. High-quality materials are likely to last longer.
- Placement: The location of the tooth gem matters too. Gems placed on teeth used for biting may experience more wear and tear.
- Individual Habits: Your habits, such as teeth grinding or nail-biting, can affect the gem’s durability. Consider wearing a nightguard if you grind your teeth.
Now, let’s get to the heart of the matter: how long can you expect tooth gems to last?
How Long Can You Expect Tooth Gems to Last?
Tooth gem longevity varies depending on the factors mentioned earlier. Here’s a general estimate:
- Crystal Tooth Gems: These often last between 6 to 12 months with proper care.
- Diamond Tooth Gems: The durability of diamond tooth gems is impressive, lasting around 2 to 3 years.
- Gold Tooth Gems: Gold tooth gems are the champions in terms of longevity, with an impressive lifespan of 5 to 7 years.
To provide a clearer picture, let’s break it down with a table:
Type of Tooth Gem | Average Lifespan |
---|---|
Crystal | 6-12 months |
Diamond | 2-3 years |
Gold | 5-7 years |
As you can see, the type of tooth gem you choose significantly affects how long it will last. Keep these estimates in mind when deciding on your dental bling.
Maintenance and Care Tips
Now that you know how long your tooth gem can last, let’s delve into how to make it last as long as possible. Here are some maintenance and care tips:
- Oral Hygiene: Brush your teeth at least twice a day with a soft-bristle toothbrush and fluoride toothpaste. Floss daily and use an alcohol-free mouthwash.
- Avoid Hard Foods: Be mindful of your diet. Avoid biting on hard foods like ice, popcorn kernels, or hard candies, which can dislodge the gem.
- Limit Acidic Foods: Acidic foods and beverages, like citrus fruits and sodas, can weaken the adhesive. Consume them in moderation.
- Regular Check-ups: Visit your dentist regularly for check-ups. They can ensure the gem’s integrity and offer maintenance if needed.
- Nightguard: If you grind your teeth at night, consider wearing a nightguard to protect both your teeth and your tooth gem.
By following these tips, you can extend the lifespan of your tooth gem and keep your smile shining.
Real-Life Experiences and Testimonials
Still curious about tooth gems? Let’s hear from those who have experienced them firsthand. Here are some real-life stories and testimonials:
- Sarah, 27: “I’ve had a crystal tooth gem for about a year now, and it’s still as sparkly as ever! Just remember to be gentle with it.”
- Mark, 35: “My diamond tooth gem has been a conversation starter at every party. It’s been three years, and it’s still flawless.”
These stories show that with proper care, tooth gems can last and continue to dazzle.
FAQs About Tooth Gem Longevity
It’s time to address some common questions people have about tooth gem longevity. Here are the answers:
Do tooth gems damage your teeth?
Tooth gems, when applied correctly, should not damage your teeth. They are bonded to the enamel’s surface without causing harm.
Can you eat normally with tooth gems?
Yes, you can eat normally with tooth gems, but it’s essential to be cautious. Avoid biting hard objects and excessive force to prevent dislodging the gem.
Can I remove my tooth gem if I want to?
Yes, tooth gems can be removed by a dental professional without causing damage to your teeth.
Do tooth gems require special maintenance?
Tooth gems require regular oral hygiene practices, but no specialized maintenance is needed. Regular dental check-ups are advisable.
Do tooth gems ever come off?
Yes, tooth gems can come off, but their longevity largely depends on various factors. Properly applied tooth gems should remain securely attached. However, factors such as poor oral hygiene, biting on hard objects, or using abrasive toothpaste can increase the likelihood of them coming off. If your tooth gem does come off, it’s advisable to consult a dental professional for reapplication.
Can you eat after tooth gems?
Yes, you can eat after getting tooth gems. However, it’s important to be mindful of your diet and eating habits. Avoid biting on hard objects like ice or using excessive force when chewing, as this can dislodge the tooth gem. Stick to a regular and gentle eating routine to help maintain the longevity of your tooth gem.
Can you still brush your teeth with tooth gems?
Yes, you can and should continue to brush your teeth with tooth gems. In fact, maintaining proper oral hygiene is essential to keep your tooth gem in good condition. Use a soft-bristle toothbrush and fluoride toothpaste to brush gently around the gem. Be cautious not to brush too vigorously, as this can weaken the adhesive bond.
Read Also: Orange Blue Nails.
How do you get tooth gems to stay?
Tooth gems are attached using a dental adhesive, and their longevity depends on several factors:
- Proper Application: Ensure that a trained dental professional applies the tooth gem correctly. Precise placement and a secure bond are crucial.
- Oral Hygiene: Maintain good oral hygiene practices, including regular brushing, flossing, and rinsing. A clean and healthy tooth surface enhances adhesion.
- Dietary Awareness: Be cautious of your diet. Avoid hard, crunchy foods that can exert excessive force on the gem.
- Avoiding Harmful Habits: Refrain from habits like teeth grinding or biting on non-food objects, which can weaken the adhesive bond.
- Regular Check-ups: Visit your dentist for routine check-ups. They can monitor the condition of your tooth gem and provide maintenance if necessary.
Read Also: Absolute Regain Hair Fibers.
Why do my tooth gems fall off?
Tooth gems can fall off for several reasons:
- Poor Adhesion: If the adhesive used during application is of low quality or applied improperly, the gem may not adhere well.
- Oral Hygiene: Neglecting proper oral care can lead to the weakening of the adhesive bond, causing the gem to come off.
- Dietary Factors: Biting on hard or crunchy foods can put excessive pressure on the gem, potentially causing it to detach.
- Harmful Habits: Habits like teeth grinding or nail-biting can loosen the gem over time.
- Wear and Tear: The location of the gem on your teeth can affect its durability. Gems on teeth used for biting may experience more wear and tear.
Read Also: i Beauty Brushes.
Why aren’t my tooth gems lasting?
If your tooth gems aren’t lasting as long as expected, several factors may be contributing to their reduced lifespan:
- Inadequate Care: Failing to maintain good oral hygiene practices can weaken the adhesive bond and shorten the gem’s lifespan.
- Dietary Choices: A diet high in acidic or sugary foods and beverages can compromise the adhesive and lead to premature gem loss.
- Poor Quality Materials: Low-quality gems or adhesives may not hold up as well as higher-quality options.
- Biting Habits: Habitual biting on hard objects or grinding your teeth can put extra stress on the gem and cause it to detach sooner.
- Lack of Professional Maintenance: Regular check-ups with a dental professional can help identify issues early and ensure the gem remains securely attached.
Read Also: Red Lips with Pink Dress.
Can I change the design or position of my tooth gem?
Yes, you can change the design or position of your tooth gem with the help of a dental professional.
Read Also: Nails That Go with Blue Dress.
Conclusion
In the world of dental aesthetics, tooth gems have emerged as a fashionable way to express your personality and add some sparkle to your smile. While the lifespan of a tooth gem varies based on factors like type, care, and individual habits, they can last anywhere from several months to several years.
Read Also: Formula 50 Hair Vitamins.
To make your tooth gem last as long as possible, follow good oral hygiene practices, watch your diet, and take precautions to avoid excessive force on the gem. With proper care, your tooth gem will continue to shine, giving you that extra bit of dental dazzle you desire.
Read Also: Hormone Reset Diet Recipes.
Remember, the key to a lasting and radiant smile is not just the gem itself but also the care and attention you give it. So, if you’ve been wondering, how long does tooth gem last, the answer is in your hands – take care of your gem, and it will continue to brighten your smile for years to come!
Read Also: Orange Lipstick Look.
-
Beauty Tips10 months ago
What Is Balayage: Your Ultimate Guide Is Here
-
Dreams Interpretation9 months ago
The Meaning of Teeth Falling Out in a Dream: Exploring the Symbolism
-
Diet Tips9 months ago
What Vitamins C Is Good For? The Ultimate Guide
-
Uncategorized9 months ago
Understanding the Five Languages of Love: A Comprehensive Guide
-
Beauty Tips6 months ago
How to Make Clear Skin: Your Comprehensive Guide
-
Beauty Tips6 months ago
Coconut Oil in Face Benefits: Unlocking the Secrets to Radiant Skin
-
Beauty Tips9 months ago
The Surprising Benefit to Coconut Oil: Your Complete Guide
-
Women Tips9 months ago
Are You People Pleaser? Your Complete Guide