Connect with us

Beauty Tips

Russian Lips: Achieve Stunning Lip Volume and Contour

Published

on

russian lips

Here is your complete guide to russian lips

Introduction to Russian Lips

The world of beauty and aesthetics is ever-evolving, and one trend that has gained significant popularity is Russian Lips. These luscious, voluminous lips have captured the attention of individuals seeking to enhance their natural beauty. In this article, we will delve into the concept of Russian Lips, exploring the unique characteristics, benefits, procedure, aftercare, and more. Whether you’re considering lip enhancement or simply curious about this trend, join us on this informative journey to discover the secrets behind Russian Lips. Here is your complete guide to Russian lips.

What are Russian Lips?

Russian Lips are a specific type of lip enhancement technique that focuses on volume and contour. Unlike traditional lip fillers, they provide a more pronounced, yet natural-looking result. The key lies in the use of hyaluronic acid dermal fillers, which are injected strategically to create fuller, well-defined lips. By accentuating the lip shape and adding volume where needed, they can beautifully transform your smile.

Benefits of Russian Lips

The allure of Russian Lips lies in their numerous benefits. Here are some advantages to consider:

  • Enhanced Lip Volume: They offer a significant boost in lip volume, making them ideal for individuals with naturally thin lips or those desiring a plumper pout.
  • Improved Lip Shape: Whether you have asymmetrical lips or wish to refine the shape of your lips, they can help create a more symmetrical and aesthetically pleasing appearance.
  • Youthful Appearance: With age, the lips tend to lose volume and appear thinner. They can reverse this effect, restoring a more youthful look.
  • Long-Lasting Results: The effects of Russian Lips can last anywhere from 6 to 12 months, allowing you to enjoy your enhanced lips for an extended period.
  • Minimal Downtime: Unlike surgical lip procedures, they require little to no downtime. You can resume your daily activities shortly after the treatment.
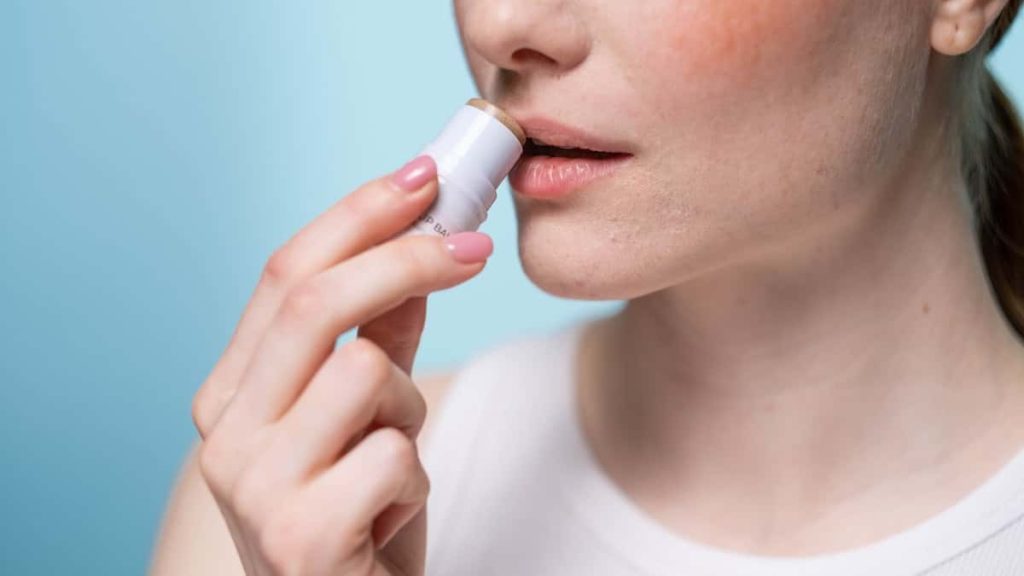
russian lips

Preparing for Russian Lips

Before embarking on your Russian Lips journey, it is essential to adequately prepare. Follow these steps to ensure a successful experience:

  1. Choose a Reputable Practitioner: Research and select a qualified and experienced practitioner who specializes in lip enhancements.
  2. Understanding the Risks: Familiarize yourself with potential risks and complications associated with them, such as allergic reactions or infection.
  3. Manage Expectations: Communicate your desired outcome clearly with your practitioner and discuss realistic expectations for the procedure.
  4. Stay Hydrated: Prior to the treatment, make sure to hydrate yourself adequately by drinking plenty of water.
  5. Avoid Certain Medications: Consult with your practitioner about any medications or supplements you may be taking that could interfere with the procedure.

The Russian Lips Procedure

Now that you’re prepared, let’s explore the step-by-step process of getting Russian Lips:

StepDescription
1.Consultation: You’ll have an initial consultation with your practitioner, where you can discuss your goals and ask any questions you may have.
2.Anesthesia: Topical anesthesia may be applied to the lips to minimize discomfort during the procedure.
3.Injection Technique: The practitioner will use a microcannula or fine needle to inject hyaluronic acid dermal fillers into specific areas of the lips, focusing on volume and contour.
4.Layering Method: Multiple layers of filler may be added gradually to achieve the desired result and enhance the natural appearance of the lips.
5.Post-Treatment Evaluation: Once the injections are complete, your practitioner will evaluate the results and make any necessary adjustments.

Aftercare and Recovery

After your Russian Lips procedure, proper aftercare is crucial to optimize the healing process and maintain the results. Follow these guidelines:

  • Avoid Touching or Massaging: Refrain from touching or massaging your lips immediately after the procedure to avoid any displacement of the fillers.
  • Use Cold Compress: Apply a cold compress to your lips to reduce swelling and minimize any potential bruising.
  • Follow Practitioner’s Instructions: Your practitioner will provide specific instructions for aftercare, including any recommended medications or topical ointments.
  • Protect Your Lips: Shield your lips from extreme temperatures, sunlight, and harsh environments during the recovery period.
  • Schedule Follow-Up Appointments: Book follow-up appointments with your practitioner to monitor your progress and address any concerns.

Cost of Russian Lips

Cost FactorsPrice Range
Geographic Location$500 – $2,000 (varies by region)
Practitioner Experience$600 – $3,000 (based on expertise and reputation)
Amount of Filler Needed$400 – $1,500 (depends on individual requirements)
Additional TreatmentsVaries (e.g., anesthesia, post-treatment care)

Please note that the cost of Russian Lips can vary significantly based on various factors, including the location, the experience of the practitioner, the amount of filler required, and any additional treatments or services included. It is advisable to consult with a practitioner for an accurate estimate tailored to your specific needs.

Time Duration of the Russian Lip Technique

Procedure StepTime Duration
Consultation15-30 minutes
Anesthesia5-10 minutes
Injection Technique20-30 minutes
Post-Treatment Evaluation5-10 minutes

The total time for the Russian Lip technique can range from approximately 45 minutes to 1 hour, depending on individual factors and the practitioner’s technique. It’s important to note that these time durations are estimates and can vary.

Duration of Russian Lips

DurationRange
Results6 to 12 months
MaintenancePeriodic touch-ups may be required

The results of Russian Lips typically last between 6 to 12 months. However, individual factors such as metabolism, lifestyle, and the specific type of filler used can influence the longevity of the results. To maintain the desired lip appearance, periodic touch-ups may be recommended by your practitioner.

Distinguishing Features of the Russian Lip Technique

AspectRussian Lip TechniqueTraditional Lip Enhancement Techniques
FocusEmphasizes volume and contour with hyaluronic acid dermal fillersPrimarily focuses on adding volume to the lips
Desired OutcomeAchieves fuller, well-defined lips with a natural-looking appearanceCan range from subtle enhancement to dramatic plumping
Injection TechniqueUses microcannula or fine needle for precise, layered injectionsUtilizes various injection techniques and tools
Result LongevityLasts approximately 6 to 12 monthsLasts varying durations, depending on the filler used
ReversibilityCan be partially or fully reversed by dissolving hyaluronic acid fillersReversibility depends on the type of filler used
Technique AdaptabilityOffers flexibility to tailor the procedure based on individual needsAllows customization but with a primary focus on volume

The Russian Lip technique differentiates itself by its specific focus on volume and contour using hyaluronic acid dermal fillers. It aims to create fuller, well-defined lips with a natural-looking result. Unlike traditional lip enhancement techniques, the Russian Lip technique utilizes a layered injection approach, offers reversibility options, and allows for customization based on individual needs and desired outcomes.

Frequently Asked Questions (FAQs)

QuestionAnswer
What is the cost of Russian Lips?The cost may vary depending on various factors such as the practitioner’s expertise, geographic location, and the amount of filler required. It is best to consult with your practitioner for an accurate estimate.
Are Russian Lips painful?The procedure can cause mild discomfort, but topical anesthesia is often used to minimize any pain or discomfort during the treatment.
How long do Russian Lips last?The results of Russian Lips typically last between 6 to 12 months. However, individual factors such as metabolism and lifestyle can influence the longevity of the results.
Can Russian Lips be reversed?In some cases, hyaluronic acid fillers can be dissolved using a specific enzyme, offering a reversible option if desired. Consult with your practitioner for further information.
Are Russian Lips safe?When performed by a qualified and experienced practitioner, Russian Lips are considered safe. However, it is essential to understand and discuss the potential risks with your practitioner beforehand.

What is a Russian lip?

They refer to a specific lip enhancement technique that focuses on creating volume and contour using hyaluronic acid dermal fillers. This technique aims to achieve fuller and well-defined lips, providing a natural-looking result.

What is the difference between lips and Russian lips?

The main difference lies in the technique and desired outcome. While “lips” refer to the general anatomical feature, “Russian Lips” specifically refers to a lip enhancement technique that prioritizes volume and contour. They aim to create fuller and more defined lips, whereas the term “lips” is a broader term encompassing natural lips without any specific enhancements.

What is the difference between Russian and linear lips?

They are different lip enhancement techniques. They focus on creating volume and contour using hyaluronic acid fillers, while linear lips refer to a technique that enhances the lip shape by adding definition to the lip border or vermilion border. They provide a fuller appearance, while linear lips emphasize lip shape and definition.

Can anyone get Russian lips?

In general, most individuals can get them. However, it is important to consult with a qualified practitioner to assess if you are a suitable candidate. Factors such as overall health, medical history, and individual lip anatomy will be considered to determine the feasibility of the procedure. It is crucial to have realistic expectations and communicate your goals with your practitioner to ensure a satisfactory outcome.

Read More About Gain Weight on Period.

Russian Lips vs. Other Lip Enhancement Techniques

Russian LipsLip FillersLip ImplantsLip Lifts
Emphasizes volume and contourAdds volume and plumps the lipsEnhances lip volume through surgical implantsElevates the upper lip to create a more youthful appearance
Uses hyaluronic acid dermal fillersUtilizes various types of injectable fillersInvolves surgical insertion of silicone or saline implantsRequires surgical intervention
Provides natural-looking resultsCan create a range of results, from subtle to dramaticOffers a permanent solution for lip enhancementAddresses aging concerns beyond lip volume
Non-permanent, lasts 6-12 monthsNon-permanent, lasts 6-12 monthsPermanent resultsPermanent results
Minimal downtime, non-surgical procedureMinimal downtime, non-surgical procedureRequires surgical interventionRequires surgical intervention

The Risks and Considerations of Russian Lips

While they are generally safe, it’s important to be aware of potential risks and considerations associated with the procedure. These may include:

  • Allergic reactions to hyaluronic acid fillers
  • Infection at the injection site
  • Overfilling or asymmetry
  • Temporary swelling, bruising, or redness

To minimize these risks, it is crucial to choose a qualified practitioner and follow their guidance throughout the process. If you experience any unusual or concerning symptoms, contact your practitioner immediately.

Read More About the Steps of How to Apply Makeup.

Conclusion

Russian Lips have become a popular choice for those seeking enhanced lip volume and contour. By understanding the procedure, benefits, aftercare, and potential risks, you can make an informed decision about pursuing this trend. Remember, the key to achieving beautiful results lies in finding a reputable practitioner and maintaining open communication throughout the process. So why wait? Consult with a professional to discover how they can help you achieve the luscious, captivating smile you desire.

Read More About Home Remedies for Fungal Rashes.

Disclaimer: This article is for informational purposes only and should not be considered medical advice. Consult with a qualified practitioner for personalized recommendations and guidance.


Read More About Avocado Oil for Tanning.

Read More About Fruit with High Protein.

Beauty Tips

Lash Extension Styles: Mastering the Art of Beautiful Eyelashes

Published

on

lash extension styles

Here is your complete guide to lash extension styles

Introduction to Lash Extension Styles

Lash extensions have become a popular beauty trend in recent years, offering a way to enhance the natural beauty of the eyes without the need for daily makeup application. But with so many different lash extension styles to choose from, it can be overwhelming to know which one is right for you. In this article, we’ll explore the different types of lash extension styles, their pros and cons, and how to apply them.

What are Lash Extension Styles?

Lash extension styles refer to the different ways that lash extensions can be applied to enhance the natural beauty of the eyes. From classic to mega volume, there are many different options to choose from, each with its own unique look and benefits.

Why are Lash Extension Styles Important?

They can help to enhance the natural beauty of the eyes, making them look bigger, fuller, and more defined. They can also save time and money on daily makeup application, as well as provide a more natural and long-lasting alternative to false lashes.

Who are Lash Extension Styles for?

They are for anyone who wants to enhance the natural beauty of their eyes, whether for a special occasion or as part of their daily beauty routine. They are suitable for all ages and can be customized to suit individual eye shapes and preferences.

How to Choose the Right Lash Extension Style

Selecting the perfect lash extension style requires careful consideration of several factors, including your face shape, eye shape, and lifestyle preferences. Here’s a step-by-step guide to help you navigate the decision-making process:

Consideration Factors

  • Personal Style: Are you drawn to a natural, understated look, or do you prefer something more dramatic and eye-catching?
  • Occasion: Will you be wearing your lash extensions for everyday wear or a special event?
  • Comfort Level: Are you comfortable with the maintenance requirements associated with certain lash extension styles?

Face Shape Guide

  • Round Face: Angular lash styles, such as cat-eye or elongated lashes, can help elongate the face and create a more balanced appearance.
  • Square Face: Soft, wispy lash styles, like doll or babydoll lashes, can soften the angles of a square face and add femininity.
  • Oval Face: Oval faces are versatile and can pull off various lash styles, so feel free to experiment with different looks.
  • Heart-Shaped Face: Fluttery, tapered lashes that are longest at the outer corners can complement a heart-shaped face by drawing attention to the eyes.

Eye Shape Guide

  • Almond Eyes: Almond-shaped eyes are well-suited to most lash extension, making them the perfect canvas for experimentation.
  • Round Eyes: To elongate round eyes, opt for lashes that are longer in the center and shorter at the inner and outer corners.
  • Hooded Eyes: Focus on lifting the eyes with curled lashes and avoiding styles that are too heavy or dense, which can weigh down the lids.
  • Monolid Eyes: Curled lashes with varying lengths can create the illusion of depth and dimension on monolid eyes.

Lifestyle and Maintenance Considerations

  • Active Lifestyle: If you lead an active lifestyle or enjoy swimming or exercising regularly, opt for a durable lash extension style that can withstand moisture and movement.
  • Maintenance Routine: Consider how much time and effort you’re willing to devote to maintaining your lash extensions. While some styles require minimal upkeep, others may necessitate more frequent touch-ups.

Different Types of Styles

Lash Extension StyleDescription
ClassicSingle lash extension applied per natural lash
VolumeMultiple lash extensions applied per natural lash for a fuller look
HybridCombination of classic and volume lash extensions
Mega VolumeMore than 2-3 lash extensions applied per natural lash for a dramatic look
Russian VolumeThinner lash extensions applied in a fan-like shape for a more natural look
ColoredLash extensions in various colors for a bold and unique look
3D, 4D, 5DIncreased number of lash extensions applied per fan for a fuller look
Baby DollLonger lashes in the center and shorter lashes on the sides for a doe-eyed look
Cat EyeLonger lashes on the outer corners for an almond-shaped look
Kitten EyeSubtle cat eye look for a more natural appearance

Classic Lash Extension Styles

Classic lash extension styles involve the application of a single lash extension to each natural lash. This creates a subtle and natural-looking enhancement to the eyes.

Pros of Classic Lash Extension Styles

  • Natural-looking enhancement
  • Suitable for all eye shapes
  • Low maintenance

Cons

  • May not provide as much volume as other styles
  • Can be more time-consuming to apply

How to Apply Classic Lash Extension Styles

  1. Clean the natural lashes thoroughly
  2. Apply a bonding agent to the natural lash
  3. Place the lash extension onto the natural lash, ensuring it is aligned with the natural growth direction
  4. Allow the bonding agent to dry
  5. Repeat for each natural lash

Volume Lash Extension Styles

Volume lash styles involve the application of multiple lash extensions to each natural lash, creating a fuller and more voluminous look.

Pros of Volume Lash Extension Styles

  • Fuller and more voluminous appearance
  • Customizable to individual preferences
  • Suitable for all eye shapes

Cons

  • May require more maintenance than classic styles
  • Can be more expensive than classic styles

How to Apply Volume Lash Extension Styles

  1. Clean the natural lashes thoroughly
  2. Apply a bonding agent to the natural lash
  3. Place the lash extension fan onto the natural lash, ensuring it is aligned with the natural growth direction
  4. Allow the bonding agent to dry
  5. Repeat for each natural lash

Hybrid Lash Extension Styles

Hybrid lash styles combine the benefits of classic and volume styles, creating a natural-looking enhancement with added volume.

Pros of Hybrid Lash Extension Styles

  • Natural-looking enhancement with added volume
  • Customizable to individual preferences
  • Suitable for all eye shapes

Cons

  • May require more maintenance than classic styles
  • Can be more expensive than classic styles

How to Apply

  1. Clean the natural lashes thoroughly
  2. Apply a bonding agent to the natural lash
  3. Place a combination of single and multiple lash extensions onto the natural lash, ensuring they are aligned with the natural growth direction
  4. Allow the bonding agent to dry
  5. Repeat for each natural lash

Mega Volume Lash Extension Styles

Mega volume lash styles involve the application of more than 2-3 lash extensions to each natural lash, creating a dramatic and voluminous look.

Pros of Mega Volume Lash Extension Styles

  • Dramatic and voluminous appearance
  • Customizable to individual preferences
  • Suitable for special occasions

Cons

  • May require more maintenance than classic styles
  • Can be more expensive than classic styles
  • May not be suitable for everyday wear

How to Apply

  1. Clean the natural lashes thoroughly
  2. Apply a bonding agent to the natural lash
  3. Place a fan of multiple lash extensions onto the natural lash, ensuring it is aligned with the natural growth direction
  4. Allow the bonding agent to dry
  5. Repeat for each natural lash

Russian Volume Lash Extension Styles

Russian volume lash styles involve the application of thinner lash extensions in a fan-like shape, creating a more natural and subtle enhancement.

Pros of Russian Volume Lash Extension Styles

  • More natural and subtle enhancement
  • Customizable to individual preferences
  • Suitable for all eye shapes

Cons

  • May require more maintenance than classic styles
  • Can be more expensive than classic styles

How to Apply

  1. Clean the natural lashes thoroughly
  2. Apply a bonding agent to the natural lash
  3. Place a fan of thinner lash extensions onto the natural lash, ensuring it is aligned with the natural growth direction
  4. Allow the bonding agent to dry
  5. Repeat for each natural lash

Colored Lash Extension Styles

They involve the application of lash extensions in various colors, creating a bold and unique look.

Pros of Colored Lash Extension Styles

  • Bold and unique appearance
  • Customizable to individual preferences
  • Suitable for special occasions

Cons

  • May not be suitable for everyday wear
  • May require more maintenance than classic styles

How to Apply

  1. Clean the natural lashes thoroughly
  2. Apply a bonding agent to the natural lash
  3. Place a lash extension in the desired color onto the natural lash, ensuring it is aligned with the natural growth direction
  4. Allow the bonding agent to dry
  5. Repeat for each natural lash

Cost of Lash Extension Styles

StyleFull SetRefill
Classic$150$75
Hybrid$190$95
Volume$227$113
Mega Volume$345$220

The cost of lash extension varies depending on the style, material, duration, and lash artist’s technique. On average, a full set of classic lash extensions costs around $150, while a full set of Russian volume lashes is more expensive and is usually around $230. Hybrid lashes, which are a combination of classic and volume lashes, typically cost around $190. The cost of lash extensions infills is usually 50-70% of the full set price, and is required every 3-4 weeks to maintain the fresh, fluffy look of lash extensions. The more often you have fill-ins, the less you will pay. It is important to ensure the quality of lash extensions before applying them to your eyes, as health and safety matter the most.

Read Also: Lip Filler Before and After.

FAQs

How Long Do Lash Extension Styles Last?

Lash extension can last anywhere from 2-4 weeks, depending on the individual’s natural lash growth cycle and maintenance.

Read Also: Before and After Microneedling.

Are Lash Extension Styles Safe?

Yes, lash styles are safe when applied by a trained and certified professional. However, it is important to follow proper aftercare instructions to ensure the health and safety of the natural lashes.

Read Also: Brazilian Blowout Before and After.

How Much Do Lash Extension Styles Cost?

The cost of lash extension can vary depending on the type of style, the number of lashes applied, and the location of the salon. On average, classic lash extensioncan range from $100-$200, while volume and mega volume styles can range from $200-$400.

Read Also: Yellow Nail Designs.

Can I Wear Makeup with Lash Extension Styles?

Yes, makeup can be worn with lash extension , but it is important to avoid oil-based products and heavy eyeliners that can break down the bonding agent.

Read Also: Neck Botox.

How Do I Care for My Lash Extension Styles?

Proper care and maintenance are essential for the health and longevity of lash extension. This includes avoiding water and oil-based products for the first 24 hours, brushing the lashes daily, and avoiding rubbing or pulling on the lashes.

Read Also: Pull Ups While Pregnant.

Conclusion

Lash extension styles offer a way to enhance the natural beauty of the eyes, providing a more natural and long-lasting alternative to false lashes. With so many different styles to choose from, it’s important to consider individual preferences and eye shapes when selecting the right style. Proper care and maintenance are also essential for the health and longevity of Lash styles.

Read Also: Thermage Before and After.

Continue Reading

Beauty Tips

Thermage Before and After: Transform Your Look Revealed

Published

on

thermage before and after

Here is your complete guide to thermage before and after

Introduction to Thermage Before and After

If you’re looking for a non-surgical way to tighten your skin, reduce wrinkles, and improve your overall appearance, then you might want to consider Thermage. Thermage is a popular cosmetic treatment that uses radiofrequency energy to stimulate collagen production and improve the texture and tone of your skin. In this article, we’ll take a closer look at Thermage and what you can expect before and after the treatment.

What is Thermage?

Thermage is a non-invasive cosmetic procedure that uses radiofrequency energy to heat the deep layers of your skin, stimulating collagen production and tightening the skin. The treatment is usually performed on the face, neck, and body, and can be used to address a variety of skin concerns, including:

  • Sagging skin
  • Wrinkles and fine lines
  • Cellulite
  • Body contouring

Thermage Before and After: What to Expect

Before the treatment, your doctor will evaluate your skin and discuss your goals and expectations with you. They will also explain the procedure, including the potential risks and benefits, and answer any questions you may have.

During the treatment, your doctor will apply a cooling gel to the area being treated and then use a handheld device to deliver the radiofrequency energy. The device will heat the deep layers of your skin, causing the collagen fibers to contract and stimulating new collagen production.

After the treatment, you may experience some redness, swelling, and mild discomfort, but these side effects usually resolve within a few hours. You can expect to see some results immediately after the treatment, but the full effects will become apparent over time as your body produces new collagen.

Thermage Before and After: Skin Tightening

Thermage is often used to tighten loose or sagging skin on the face and neck. The treatment can help to improve the appearance of jowls, turkey neck, and other signs of aging. Here’s what you can expect in terms of results:

TimeframeResults
Immediately after treatmentTighter, smoother skin
2-6 months after treatmentContinued improvement as new collagen is produced
12 months after treatmentMaximum results

Thermage Before and After: Wrinkle Reduction

Thermage can also be used to reduce the appearance of wrinkles and fine lines on the face and body. The treatment can help to smooth out crow’s feet, forehead lines, and other signs of aging. Here’s what you can expect in terms of results:

TimeframeResults
Immediately after treatmentSmoother, more even skin texture
2-6 months after treatmentContinued improvement as new collagen is produced
12 months after treatmentMaximum results

Thermage Before and After: Cellulite Reduction

Thermage can be used to reduce the appearance of cellulite on the thighs, hips, and buttocks. The treatment can help to smooth out the skin and improve the overall appearance of the area. Here’s what you can expect in terms of results:

TimeframeResults
Immediately after treatmentSmoother, more even skin texture
2-6 months after treatmentContinued improvement as new collagen is produced
12 months after treatmentMaximum results

Thermage Before and After: Body Contouring

Thermage can be used to contour and shape the body, helping to improve the appearance of love handles, saddlebags, and other areas of excess fat. Here’s what you can expect in terms of results:

TimeframeResults
Immediately after treatmentSlimmer, more toned appearance
2-6 months after treatmentContinued improvement as new collagen is produced
12 months after treatmentMaximum results

Side Effects of Thermage Before and After

Tingling

After your Thermage treatment, you might experience some temporary tingling in the treated areas. This sensation is a result of the Thermage device heating your skin’s underlying layers, stimulating collagen production for a skin tightening treatment. To maximize the benefits of Thermage treatment, don’t panic and stop the process. This tingling is temporary and usually subsides within a few hours. Indeed, it’s a positive sign that the treatment is working effectively. Just continue with your normal skincare routine, keeping your skin hydrated and protected from the sun.

Burns and Blisters

While rare, it’s possible that you might experience temporary burns or blisters after your Thermage treatment. These side effects are typically short-lived and resolve on their own. However, if you notice any burns or blisters, apply a prescribed topical cream to soothe and heal the area.

Bumpy Skin

Experiencing a temporary change in your skin’s texture, such as bumpy or lumpy skin, is another possible side effect of Thermage treatment. This is typically a mild and temporary condition, fading away within a few weeks. It’s crucial to not panic or stress over this change in skin texture. This bumpy skin is a result of the heating and cooling cycles of the Thermage treatment, and it’s a sign that your skincare treatment is stimulating collagen production.

Uneven Pigmentation

Transitioning from bumpy skin, uneven pigmentation is another temporary side effect that might pop up post-Thermage treatment. This skin discoloration can result from inflammation caused by the heat energy of the Thermage treatment. But don’t fret, it’s typically temporary and can be managed with the right skincare products. To tackle uneven pigmentation, use a good quality sunscreen. UV damage can exacerbate pigmentation, so ensure you’re applying a broad-spectrum sunscreen daily. If your pigmentation doesn’t improve, consult your dermatologist. They may recommend certain skincare products designed to even out skin tone.

Swelling and Redness

Some redness or swelling may occur, but these side effects subside within a few hours to a few days.

Other Potential Side Effects

Potential side effects may include redness, swelling, blisters, bumps, and rarely, surface irregularities (but these are usually mild).

It’s important to note that the risk of complications with Thermage is very low, and most people experience only mild side effects that resolve on their own within a short amount of time. However, it’s crucial to go to a provider with the right education, experience, and technique to better your chances of receiving excellent results and minimizing the risk of complications.

Thermage FAQs

Here are some of the most common questions people ask about Thermage:

How long does the treatment take?

The treatment typically takes between 30 minutes and two hours, depending on the area being treated.

Is the treatment painful?

Most people find the treatment to be comfortable, but some may experience mild discomfort. Your doctor can use a topical anesthetic to help manage any discomfort.

Read Also: Trap Botox Before and After.

How many treatments will I need?

Most people see significant results after just one treatment, but additional treatments may be recommended for optimal results.

Read Also: Lip Filler Before and After.

Who is a good candidate for Thermage?

Thermage is suitable for most people, but it may not be appropriate for those with certain medical conditions or skin types. Your doctor will evaluate your skin and discuss any potential risks with you.

Read Also: Before and After Microneedling.

How long do the results last?

The results of Thermage can last for several years, but the exact duration will vary from person to person.

Read Also: Brazilian Blowout Before and After.

Conclusion

Thermage is a safe and effective way to tighten loose or sagging skin, reduce wrinkles and fine lines, and improve the overall appearance of your body. With minimal downtime and long-lasting results, it’s no wonder that Thermage has become a popular choice for those looking for a non-surgical alternative to more invasive procedures.

Read Also: Yellow Nail Designs.

If you’re considering Thermage, be sure to consult with a qualified doctor who has experience performing the procedure. They can help you determine if Thermage is right for you and develop a treatment plan that meets your individual needs and goals.

Read Also: Pull Ups While Pregnant.

With Thermage, you can enjoy smoother, more youthful-looking skin and a more confident, radiant appearance. So why wait? Schedule your Thermage consultation today and start your journey to a more beautiful you!

Read Also: Neck Botox.

Continue Reading

Beauty Tips

Neck Botox: The Secret to a Youthful Neck Rejuvenation

Published

on

neck botox

Here is your complete guide to neck botox

Introduction to Neck Botox

In the quest for a youthful appearance, many individuals are turning to innovative cosmetic procedures to address signs of aging, including those that affect the neck area. Neck Botox has emerged as a popular non-surgical solution for reducing wrinkles, improving skin texture, and enhancing overall neck appearance. In this comprehensive guide, we’ll delve into the world of neck Botox, covering everything from how it works to what to expect during the procedure and beyond.

Understanding Neck Botox

Botox, short for botulinum toxin, is a neurotoxic protein produced by the bacterium Clostridium botulinum. When used in cosmetic procedures, it temporarily paralyzes muscles, leading to a smoother appearance of the skin. Botox specifically targets the platysma muscle in the neck area, which is responsible for vertical bands and wrinkles.

How Botox Works on the Neck

  • Botox is injected into specific points along the neck to relax the platysma muscle.
  • By inhibiting muscle contractions, Botox reduces the appearance of neck bands and wrinkles.
  • The treatment is minimally invasive and typically requires no downtime.

Expected Results and Duration

  • Results from Botox injections usually become noticeable within a few days to a week.
  • The effects typically last for three to four months, after which maintenance treatments may be needed.

Importance of neck botox

As we age, our skin loses elasticity and collagen, leading to sagging and wrinkles. The neck is one of the first areas to show signs of aging, making Botox a popular choice for those looking to maintain a youthful appearance.

Statistics on neck botox

According to the American Society of Plastic Surgeons, botox procedures have increased by 22% since 2010.

Benefits of Botox

Reduction of wrinkles and fine lines

Botox can reduce the appearance of wrinkles and fine lines on the neck, including horizontal lines and vertical bands.

Improved neck contour

It can also improve the contour of the neck by tightening the skin and reducing the appearance of sagging.

Prevention of further aging

By reducing the movement of the neck muscles, botox can also prevent further aging and the formation of new wrinkles.

Comparison with other neck rejuvenation treatments

It is a non-surgical alternative to neck lift surgery, which involves making incisions in the neck to remove excess skin and tighten the muscles.

Comparison with Other Neck Rejuvenation Treatments

TreatmentSurgicalDowntimeResultsCost
Neck botoxNoMinimalTemporary$350-$500
Neck liftYes2-4 weeksPermanent$5,000-$10,000
Neck liposuctionYes1-2 weeksPermanent$2,000-$5,000
Neck thread liftNoMinimalTemporary$1,500-$3,000

Candidates for Neck Botox

Age range

It is typically recommended for individuals aged 30 and above, although it can be performed on younger individuals with visible neck wrinkles.

Skin type

It is suitable for all skin types, including dry, oily, and combination skin.

Severity of neck aging

It is most effective for individuals with mild to moderate neck aging, although it can also be used for more severe cases.

Contraindications

Individuals with neuromuscular disorders, pregnant or breastfeeding women, and those with allergies to botulinum toxin should not undergo botox.

Botox Procedure

Pre-treatment preparation

Before undergoing botox, individuals should avoid taking blood thinners, alcohol, and anti-inflammatory medications for at least a week.

Administration of neck botox

It is administered using a small needle, with multiple injections made into the neck muscles.

Post-treatment care

After botox, individuals should avoid touching or rubbing the injection site, and avoid strenuous exercise for at least 24 hours.

Side effects and complications

Common side effects of botox include bruising, swelling, and redness at the injection site. More serious complications, such as difficulty swallowing or breathing, are rare but can occur.

Botox Results

Onset of results

Botox results are typically visible within 3-7 days after the procedure.

Duration of results

Botox results can last up to 4-6 months, although this can vary depending on the individual.

Factors affecting results

Factors that can affect the duration and effectiveness of botox include the individual’s age, skin type, and the severity of their neck aging.

Maintenance of results

To maintain the results of botox, individuals may need to undergo repeat treatments every 4-6 months.

Botox Cost

Average cost

The average cost of Botox is $350-$500 per treatment.

Factors affecting cost

Factors that can affect the cost of botox include the location of the provider, the type of botulinum toxin used, and the number of injections required.

Insurance coverage

It is typically not covered by insurance, as it is considered a cosmetic procedure.

Botox Providers

Qualifications of botox providers

It providers should be licensed and experienced in administering botulinum toxin injections.

Choosing a botox provider

Individuals should choose a botox provider based on their qualifications, experience, and reputation.

Comparison of Botulinum Toxin Types Used

TypeOnset of ResultsDuration of ResultsCost
Botox3-5 days3-4 months$400-$600
Dysport1-2 days3-4 months$400-$600
Xeomin3-5 days3-4 months$400-$600

Comparison with Facial Botox

TreatmentAreaResultsCost
Neck botoxNeckImproved contour and reduced wrinkles$350-$500
Facial botoxForehead, eyes, lipsReduced wrinkles and fine lines$200-$600

Comparison with Neck Lift

TreatmentSurgicalDowntimeResultsCost
Neck botoxNoMinimalTemporary$350-$500
Neck liftYes2-4 weeksPermanent$5,000-$10,000

Comparison with Neck Liposuction

TreatmentSurgicalDowntimeResultsCost
Neck botoxNoMinimalTemporary$350-$500
Neck liposuctionYes1-2 weeksPermanent$2,000-$5,000

Risks and Precautions

Potential Complications

  • While rare, serious risks of Botox injections include allergic reactions and difficulty swallowing or breathing.

Precautionary Measures

  • Choosing a qualified practitioner with extensive experience in Botox injections is essential to minimize risks.
  • Patients should disclose any medical conditions, allergies, or medications to their practitioner before undergoing the procedure.

Read Also: Botox Before and After Eyes.

FAQs Section

What is the difference between neck botox and a neck lift?

It is a non-surgical treatment that involves injecting botulinum toxin into the neck muscles, while a neck lift is a surgical procedure that involves making incisions in the neck to remove excess skin and tighten the muscles.

Read Also: Trap Botox Before and After.

How long does neck botox last?

Botox results can last up to 4-6 months, although this can vary depending on the individual.

Read Also: Lip Filler Before and After.

Is neck botox painful?

It is typically not painful, as a small needle is used to administer the injections. However, some individuals may experience mild discomfort or bruising at the injection site.

Read Also: Before and After Microneedling.

Are there any risks associated with neck botox?

Common side effects of botox include bruising, swelling, and redness at the injection site. More serious complications, such as difficulty swallowing or breathing, are rare but can occur.

Read Also: Brazilian Blowout Before and After.

Can neck botox be combined with other treatments?

Yes, it can be combined with other treatments, such as facial botox, fillers, or laser treatments, for a more comprehensive rejuvenation.

Read Also: Pull Ups While Pregnant.

Conclusion

Neck botox is a popular and effective treatment for reducing the appearance of wrinkles and fine lines on the neck, and improving the contour of the neck. By understanding what botox is, its benefits, candidates, procedure, results, cost, and providers, individuals can make informed decisions about whether botox is right for them. With the right provider and care, botox can help individuals achieve a more youthful and rejuvenated appearance.

Read Also: Yellow Nail Designs.

Continue Reading

Trending