Beauty Tips
How Often Should You Change Your Hair Color? Your Guide
Here is your complete guide to how often hair color
Introduction to How Often Hair Color
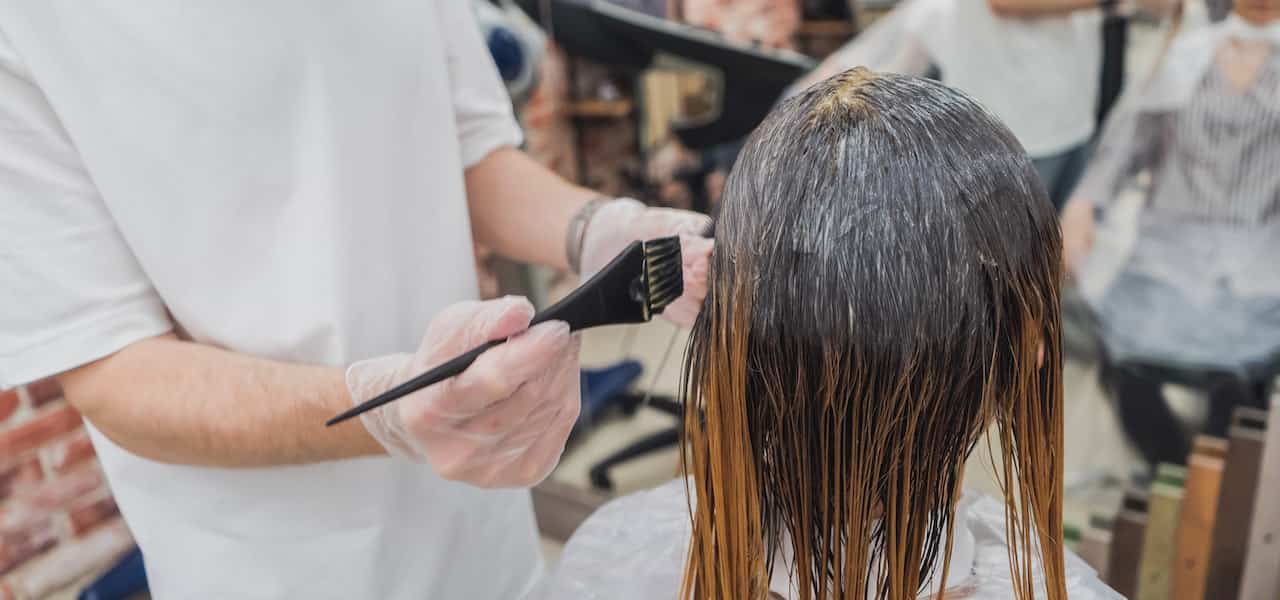
Hair color plays a significant role in personal style, allowing individuals to express themselves and embrace their creativity. However, a common dilemma arises: how often should one change their hair color? This comprehensive guide aims to provide you with the guidance needed to navigate this decision, taking into account various factors and offering practical tips. Whether you’re a hair color enthusiast or a novice looking for a change, this article will help you make informed decisions.
Factors Influencing Hair Color Change Frequency
Before diving into how often you should change your hair color, it’s essential to understand the factors that influence this decision:
Natural Hair Growth Rate and Texture
The rate at which your hair grows plays a crucial role in determining how often you should change your hair color. On average, hair grows about half an inch per month. If you’re aiming for a drastic color change or have fast hair growth, you may need touch-ups more frequently.
Desired Intensity and Shade
The intensity and shade of the hair color you desire impact the frequency of changes. If you opt for vibrant, unconventional colors or intense hues that fade quickly, you may need to refresh your color more often.
Hair Health and Condition
The health and condition of your hair are crucial considerations. Frequent changes can cause damage, especially if your hair is already brittle or dry. It’s important to maintain healthy hair before embarking on regular changes.
Personal Style Preferences
Your personal style preferences and willingness to experiment with different hair colors also play a role. Some individuals prefer consistent hair colors that complement their overall aesthetic, while others enjoy the excitement of frequent changes.
Understanding Hair Color Chemistry
To make informed decisions about changing your hair color, it’s beneficial to grasp the basics chemistry:
Basics of Hair Color Composition
The products consist of three main components: dye molecules, developer, and an alkaline agent. Understanding how these components interact will help you determine the longevity of your desired color.
Different Types of Products and Their Effects
The products come in various forms, including permanent, semi-permanent, and temporary options. Each type has different effects on your hair and requires specific maintenance.
Impact of Hair Porosity on Color Absorption and Longevity
The porosity refers to how easily your hair absorbs and retains moisture and color. Understanding your hair’s porosity will help you choose the right products and techniques to achieve long-lasting color.
Determining Your Ideal Change Frequency
To determine how often you should change your hair color, consider the following factors:
Hair Growth Rate and Root Re-growth
The rate at which your hair grows determines how frequently you’ll need touch-ups to maintain consistent color. If you have noticeable root re-growth within a few weeks, you may need more frequent color changes.
Impact on Hair Health and Damage
Excessive changes can cause damage, including dryness, breakage, and loss of shine. It’s important to strike a balance between your desired color changes and maintaining hair health.
Maintaining Color Intensity and Vibrancy
If you opt for vibrant or unconventional hair colors, regular touch-ups may be necessary to keep the looking fresh and vibrant. Faded color can significantly affect the overall look.
Personal Factors and Lifestyle Considerations
Consider your lifestyle and personal commitments when deciding how often to change your hair color. If you have a busy schedule or prefer low-maintenance options, you may choose colors that require less frequent changes.
Maintenance Tips for Prolonging the Color
To prolong the life of your hair color and minimize the frequency of changes, follow these essential maintenance tips:
Proper Hair Care Routine for Colored Hair
Implement a hair care routine specifically tailored for colored hair. Use color-safe shampoos and conditioners that are sulfate-free and gentle on your hair. Avoid hot water when washing your hair, as it can strip away color and moisture.
Selecting Color-Safe Hair Care Products
Choose hair care products specifically formulated for colored hair. Look for products that contain UV filters to protect your hair from sun damage and color fading. Deep conditioning treatments and leave-in conditioners can also help maintain color vibrancy.
Protecting Hair from UV Rays and Heat Styling
UV rays can cause color fading, so protect your hair by wearing hats or using UV protection sprays when exposed to the sun. Additionally, limit the use of heat styling tools such as flat irons and curling irons, as excessive heat can lead to color degradation.
Incorporating Regular Deep Conditioning Treatments
Deep conditioning treatments provide essential moisture to colored hair, preventing dryness and maintaining color vibrancy. Apply a deep conditioner once a week or as recommended by your stylist to nourish and protect your hair.
Signs It’s Time for a Change
While determining how often to change your hair color depends on personal preferences, several signs indicate it’s time for a change:
Fading and Dullness of Color
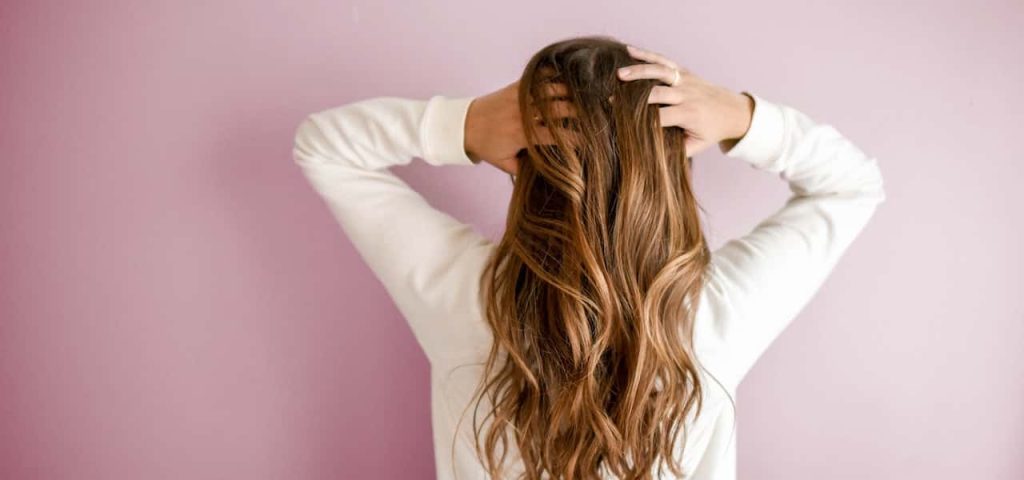
If your hair color has lost its vibrancy and appears dull and lackluster, it’s a clear indication that it’s time for a refresh. Freshening up your hair color will bring back the life and shine to your locks.
Drastic Color Difference between Roots and Lengths
When the contrast between your natural roots and colored lengths becomes noticeable, it’s a sign that you need to address the root re-growth. Schedule a touch-up appointment or consider a color change to achieve a seamless transition.
Changes in Personal Style and Fashion Trends
As fashion trends evolve, you may find yourself drawn to new hair color trends. If you’re itching to try a different shade or embrace a popular color trend, it’s the perfect time for a change.
Desire for a Fresh Look and Reinvention
Sometimes, the urge for change is simply driven by a desire for a fresh look and a new sense of self. Trust your instincts and embrace the opportunity to reinvent yourself through a change.
Recommended Frequency for Changes
Hair Color Change | Frequency |
---|---|
Root touch-ups | Every 4-6 weeks |
Subtle changes | 6-8 weeks |
Semi-permanent | 6-8 weeks |
Temporary colors | 8-12 weeks |
Personal choice | Varies based on preference and desired style |
Low-maintenance | 10-12 weeks |
Popular Trends and Their Longevity
Their trends come and go, each with its own lifespan. Here are a few popular trends and their average duration:
- Pastel Colors: Pastel shades like lavender, pink, and mint green have been popular in recent years. These delicate hues typically last for about 4-6 weeks before they start to fade.
- Balayage and Ombre: These techniques create a natural-looking gradient effect, with darker roots and lighter ends. Balayage and ombre styles can last up to 3-4 months, as the color transition appears more seamless.
- Platinum Blonde: Achieving and maintaining platinum blonde hair requires regular touch-ups, as the color can start to yellow or fade within a few weeks. Expect to refresh your color every 4-6 weeks to maintain the desired shade.
So How Long Should I Wait? Finding the Right Timing
Determining the ideal waiting period between changes depends on various factors such as the type of color treatment, hair health, and personal preference. Generally, it is recommended to wait around 4-6 weeks between color changes. This timeframe allows your hair to recover and minimizes the risk of damage. To ensure the best outcome, consult with a professional stylist who can assess your hair’s condition and provide personalized advice on the appropriate waiting time for your specific needs.
Working With Your Hair, Not Against It
When deciding how often to change your hair color, it’s essential to consider your hair’s natural characteristics and work harmoniously with them. Factors like hair growth rate, texture, and porosity influence the frequency of changes. Understanding these unique traits enables you to make informed decisions, select suitable products, and utilize techniques that minimize damage while maintaining optimal hair health.
Strengthening Your Hair: Tips for Optimal Hair Health
Frequent changes can potentially weaken your hair if not properly cared for. To strengthen your hair and minimize damage, follow these effective tips:
- Opt for sulfate-free and color-safe shampoo and conditioner to nourish and protect your hair.
- Include regular deep conditioning treatments in your hair care routine to replenish moisture and maintain its health.
- Minimize heat styling and always use heat protectant products when using hot tools.
- Shield your hair from harmful UV rays by wearing hats or applying UV protection sprays.
- Consider less damaging alternatives like semi-permanent dyes to reduce over-processing.
- Maintain a balanced diet rich in nutrients, vitamins, and proteins to promote healthy hair growth.
By incorporating these practices, you can strengthen your hair and mitigate the potential damage associated with frequent hair color changes. Prioritizing hair health will lead to vibrant and beautiful locks while embracing your desired style.
Professional Help vs. DIY Change
When contemplating a change, you have the option to consult a professional stylist or embark on a DIY journey. Consider the following factors to make an informed decision:
Benefits of Consulting a Professional Stylist
Professional stylists possess expertise and experience in hair color. They can assess your hair type, offer personalized advice, and execute color changes with precision. Professionals can also minimize the risk of hair damage and ensure desired results.
Cost Considerations for Professional Color Changes
It’s important to factor in the cost of professional color changes, as they typically require salon visits and professional-grade products. Consider your budget and prioritize the investment if you prefer the expertise and convenience offered by professionals.
Risks and Challenges of DIY Change
DIY changes can be cost-effective and give you the freedom to experiment at home. However, they come with potential risks and challenges. Achieving desired results can be challenging, and improper application may lead to uneven color or damage. Consider your comfort level and experience before attempting a DIY color change.
Steps for a Successful DIY Color Change at Home
If you choose the DIY route, follow these steps for a successful color change at home:
- Select a color shade that complements your skin tone and consider your hair’s starting color.
- Read and follow the instructions provided with kit carefully.
- Conduct a patch test to check for any allergic reactions.
- Prepare your hair by shampooing and towel-drying it before applying the color.
- Apply the color evenly, starting from the roots and working your way to the ends.
- Follow the recommended processing time, and rinse and condition your hair afterward.
FAQs
How often is it OK to dye your hair?
The frequency at which you can dye your hair depends on several factors, including your hair’s health, the type of dye used, and the desired outcome. As a general guideline, it is typically recommended to wait at least 4-6 weeks between dyeing sessions. This allows your hair to recover and minimizes the risk of damage. However, if you are using a temporary or semi-permanent dye that is less harsh on the hair, you may be able to dye it more frequently.
Read More About Isolating Lashes.
How often should you color your hair at the salon?
The recommended frequency for coloring your hair at the salon varies depending on your specific needs and goals. If you are making a drastic color change, such as going from dark to light or vice versa, multiple salon visits may be necessary to achieve the desired result. On average, most people visit the salon for hair color touch-ups every 4-6 weeks to maintain their color and cover up any visible roots. However, this can vary based on individual hair growth rate and the specific color treatment used.
Read More About Powerlifting Weight Classes for Women: Everything You Need to Know.
Is it OK to color hair every month?
Coloring your hair every month can be quite frequent and may increase the risk of damage, especially if you are using permanent hair color or bleach. The chemicals in these products can strip the hair of its natural moisture and lead to dryness, breakage, and dullness. It’s generally recommended to give your hair a break between color treatments to allow it to recover and maintain its health. If you must color your hair monthly, consider opting for less damaging options like semi-permanent or demi-permanent dyes, which provide less harsh chemical exposure.
Read More About Volume Lash vs. Classic Lash.
How often should you color your hair to cover gray?
The frequency of coloring your hair to cover gray depends on how quickly your hair grows and how noticeable the gray regrowth becomes. On average, most people choose to touch up their roots and cover gray every 4-6 weeks. However, this can vary depending on personal preference and the contrast between your natural hair color and the gray. Some individuals may prefer to embrace their gray hair and allow it to grow out naturally, while others may choose to color their hair more frequently to maintain a consistent look. It’s essential to find a balance that suits your style and hair health.
Read More About Does Acrylic Nails Hurt?
Conclusion
Changing your hair color can be a fun and transformative experience, but it requires careful consideration to determine how often you should make a change. By understanding the factors that influence change frequency, grasping the basics chemistry, and considering personal factors, you can make informed decisions.
Read More About Why Does Nail Polish Bubble?
Remember to maintain your hair’s health by following a proper hair care routine and selecting color-safe products. Be aware of the signs that indicate it’s time for a change and stay updated on popular trends and their longevity.
Read More About The Ultimate Guide to Curly Hair Protective Hairstyles.
When deciding between professional help and DIY changes, weigh the benefits, costs, and potential risks. If you opt for the DIY route, follow the recommended steps for a successful at-home color change.
Read More About How Long Do Acrylic Nails Last?
Ultimately, embrace the opportunity to express your personal style and reinvent yourself through the exciting world of it. Enjoy the journey of experimentation and self-expression while keeping your hair healthy and vibrant.
Beauty Tips
Brazilian Blowout Before and After: Experience the Hair Revolution!
Here is your complete guide to brazilian blowout before and after
Introduction to Brazilian Blowout Before and After
Brazilian Blowout is a popular hair smoothing treatment that promises to transform your hair, leaving it frizz-free, smooth, and manageable. The treatment involves a special formula that bonds to your hair, sealing in moisture, reducing frizz, and adding shine. This article will explore the process of a Brazilian Blowout, from the preparation to the results, and how it can change your hair for the better.
What is a Brazilian Blowout?
Brazilian Blowout is a hair treatment that uses a special formula to smooth and straighten hair, reducing frizz and adding shine. The process involves blow-drying and flat-ironing the hair, sealing in the formula and creating a protective layer around each strand.
Benefits of Brazilian Blowout Treatment
- Reduced frizz
- Smoother and straighter hair
- Increased shine
- Improved manageability
- Suitable for all hair types
- Long-lasting results
Expected Results Before and After the Treatment
Before the treatment, your hair may be frizzy, unmanageable, and difficult to style. After the treatment, you can expect smooth, straight hair that is easy to style and manage. The results can last up to 12 weeks, depending on your hair type and how well you maintain the treatment.
Before Brazilian Blowout
Before getting a Brazilian Blowout, it’s important to consider the condition of your hair. If your hair is damaged or over-processed, it may not be suitable for the treatment. It’s also important to avoid using any hair products that contain sulfates or alcohol, as these can strip the hair of its natural oils and interfere with the treatment.
Pre-Treatment Preparation and Considerations
- Avoid using hair products that contain sulfates or alcohol
- Do not wash your hair for at least 24 hours before the treatment
- Arrive at the salon with clean, dry hair
- Discuss any concerns or questions with your stylist
Common Concerns and Misconceptions
Some people may be concerned that a Blowout will damage their hair or make it too straight. However, the treatment is designed to be gentle and customizable, so you can choose the level of straightness you want.
Brazilian Blowout Procedure
The procedure involves several steps, including:
- Cleanse: The stylist will cleanse your hair with a special shampoo to remove any buildup and prepare it for the treatment.
- Apply the Formula: The stylist will apply the formula to your hair, section by section.
- Blow-Dry: The stylist will blow-dry your hair, using a round brush to smooth it out.
- Flat-Iron: The stylist will flat-iron your hair, sealing in the formula and creating a protective layer around each strand.
- Rinse: The stylist will rinse out the formula and apply a special conditioner to your hair.
- Style: The stylist will style your hair as desired, using any styling products you prefer.
Duration and Aftercare Instructions
The procedure can take anywhere from 1 to 3 hours, depending on the length and thickness of your hair. After the treatment, it’s important to avoid using any hair products that contain sulfates or alcohol, and to avoid washing your hair for at least 24 hours.
Potential Side Effects and Risks
While Brazilian Blowouts are generally safe, there are some potential side effects and risks to be aware of, including:
- Allergic reactions to the formula
- Damage to the hair if the treatment is not done correctly
- Increased risk of breakage if the hair is not properly cared for after the treatment
After Brazilian Blowout
After a Brazilian Blowout, you can expect smooth, straight hair that is easy to style and manage. The results can last up to 12 weeks, depending on your hair type and how well you maintain the treatment.
Immediate Results Post-Treatment
Immediately after the treatment, your hair will be smooth, straight, and shiny. You can style it as desired, using any styling products you prefer.
Long-Term Effects and Maintenance Tips
To maintain the results, it’s important to:
- Avoid using hair products that contain sulfates or alcohol
- Use a gentle shampoo and conditioner
- Avoid washing your hair too frequently
- Use a heat protectant when using hot tools
- Avoid using tight hair ties or elastics
Styling Options and Versatility
One of the benefits of a Brazilian Blowout is that it allows for a wide range of styling options. You can wear your hair straight, curly, or wavy, and it will still be smooth and manageable.
Brazilian Blowout Before and After: Real Results
To see the real results, it’s helpful to look at before and after photos. Here are some examples of real results:
Before | After |
---|---|
Frizzy, unmanageable hair | Smooth, straight hair |
Difficult to style | Easy to style and manage |
Lack of shine | Increased shine |
Expert Insights on Transformations
Experts agree that Brazilian Blowouts can transform the hair, making it smoother, straighter, and more manageable. The treatment is also customizable, so you can choose the level of straightness you want.
Tips for Maintaining Brazilian Blowout Results
To maintain the results of your Blowout, it’s important to:
- Use a gentle shampoo and conditioner
- Avoid using hair products that contain sulfates or alcohol
- Use a heat protectant when using hot tools
- Avoid washing your hair too frequently
- Use a wide-tooth comb instead of a brush
- Avoid using tight hair ties or elastics
Comparing Brazilian Blowout with Other Treatments
When it comes to hair smoothing treatments, there are several options to choose from. Here’s how a Brazilian Blowout compares to other popular treatments:
Treatment | Benefits | Drawbacks |
---|---|---|
Brazilian Blowout | Smooths and straightens hair, reduces frizz, adds shine, customizable, long-lasting results | Can be expensive, potential side effects and risks |
Keratin Treatment | Repairs and strengthens hair, reduces frizz, adds shine, long-lasting results | Can be expensive, potential side effects and risks, not suitable for all hair types |
Japanese Straightening | Straightens hair permanently, reduces frizz, adds shine | Can be expensive, irreversible, potential side effects and risks, not suitable for all hair types |
Pros and Cons of Brazilian Blowout
Before diving headfirst into the world of Brazilian Blowouts, it’s essential to weigh the pros and cons:
Pros:
- Smooth, frizz-free hair: Say goodbye to pesky flyaways and unruly curls.
- Reduced styling time: With smoother hair, styling becomes a breeze, saving you precious time in the morning.
- Long-lasting results: Depending on your hair type and maintenance routine, it can last anywhere from 8 to 12 weeks.
Cons:
- Formaldehyde concerns: Some solutions may contain formaldehyde, a potentially harmful chemical. However, many salons now offer formaldehyde-free alternatives.
- Cost of maintenance: While the initial investment in a Brazilian Blowout is significant, regular touch-ups are necessary to maintain the results.
FAQs
Here are some frequently asked questions about Brazilian Blowouts:
How long does a Brazilian Blowout last?
The results can last up to 12 weeks, depending on your hair type and how well you maintain the treatment.
Is a Brazilian Blowout safe?
Yes, Brazilian Blowouts are generally safe when done correctly. However, there are some potential side effects and risks to be aware of, including allergic reactions and damage to the hair.
Read Also: Water Activated Eyeliner.
Can I still style my hair after a Brazilian Blowout?
Yes, one of the benefits of a Brazilian Blowout is that it allows for a wide range of styling options. You can wear your hair straight, curly, or wavy, and it will still be smooth and manageable.
Read Also: Botox Before and After Eyes.
How much does a Brazilian Blowout cost?
The cost of a Brazilian Blowout can vary depending on the salon and the length and thickness of your hair. On average, you can expect to pay between $150 and $350.
Read Also: Trap Botox Before and After.
Is a Brazilian Blowout the same as a keratin treatment?
No, a Brazilian Blowout and a keratin treatment are two different hair treatments. A Brazilian Blowout uses a special formula to smooth and straighten the hair, while a keratin treatment uses a protein-based formula to repair and strengthen the hair.
Read Also: Lip Filler Before and After.
Conclusion
A Brazilian Blowout is a popular hair smoothing treatment that can transform your hair, leaving it frizz-free, smooth, and manageable. The treatment involves a special formula that bonds to your hair, sealing in moisture, reducing frizz, and adding shine. By following the pre-treatment preparation and aftercare instructions, you can enjoy long-lasting results and a wide range of styling options.
Read Also: Pull Ups While Pregnant.
If you’re considering a Brazilian Blowout, be sure to choose a reputable salon and stylist, and discuss any concerns or questions you may have. With the right care and maintenance, you can enjoy smooth, straight hair that is easy to style and manage for up to 12 weeks.
Read Also: Before and After Microneedling.
Beauty Tips
Before and After Microneedling: Your Path to Flawless Complexion
Here is your complete guide to before and after microneedling
Introduction to Before and After Microneedling
Microneedling, also known as collagen induction therapy, is a popular cosmetic procedure that involves puncturing the skin with tiny needles to stimulate collagen production and improve the skin’s texture and tone. The results of microneedling can be quite dramatic, with many people reporting smoother, more youthful-looking skin after just a few treatments. However, it’s important to understand the process of microneedling, from the initial consultation to the final results, in order to achieve the best possible outcome. In this article, we’ll explore everything you need to know about before and after microneedling, including what to expect, how to prepare, and how to care for your skin during and after the procedure.
What is Microneedling?
Microneedling, also known as collagen induction therapy, is a minimally invasive cosmetic procedure that involves the use of a device with fine needles to create tiny punctures in the skin’s surface. These micro-injuries stimulate the body’s natural healing response, leading to increased collagen and elastin production, which are essential for healthy, youthful-looking skin.
Types of Microneedling Devices
- Derma Roller: Handheld device with a rolling drum studded with fine needles.
- Microneedling Pen: Automated device with a disposable needle tip that oscillates vertically.
- Microneedling Stamp: Device with a small, stamp-like head containing needles.
Step-by-Step Guide: How to Prepare for Microneedling
Pre-Treatment Instructions
Before undergoing microneedling, it’s crucial to follow specific pre-treatment instructions to ensure the best results and minimize potential side effects. Here are some essential steps to take before your microneedling session:
- Avoid Certain Medications: Refrain from using medications like Accutane, isotretinoin-based oral medications, and topical retinoids for a specified period before the treatment.
- Skin Preparation: Cleanse your skin thoroughly and avoid using any products that may increase skin sensitivity, such as exfoliants, topical antibiotics, or acids, in the days leading up to the procedure.
- Avoid Anti-Inflammatory Medications: Do not take anti-inflammatory medications like ibuprofen, Motrin, or Advil for at least 3 days before your microneedling session, as they can interfere with the skin’s natural healing process.
- Sun Protection: Avoid IPL/Laser procedures, unprotected sun exposure, or sunburn for at least 2 weeks before your microneedling appointment to prevent skin damage.
- Hair Removal: Refrain from waxing, depilatory creams, or electrolysis in the treatment area for 5-7 days before the procedure. If needed, shave the day before the appointment to avoid skin irritation.
Day of Treatment
On the day of your microneedling session, it’s essential to be prepared and know what to expect during the procedure. Here’s a step-by-step guide for the day of your microneedling treatment:
- Skin Cleansing: Ensure your skin is clean and free of any dirt, oils, or makeup. Double-cleanse your skin to remove all traces of products and prepare it for the treatment.
- Numbing Cream Application: If desired, apply a numbing cream to the treatment area to minimize discomfort during the procedure. Leave the cream on for the recommended time and then cleanse the skin thoroughly.
- Device Preparation: Ensure that your microneedling device is charged (if cordless) or near a power source if using it while plugged in. Attach a brand new cartridge to the device.
- Needle Depth Adjustment: Choose the desired needle depth by rotating the dial on your microneedling device. Refer to the depth chart provided by the manufacturer for guidance.
- Serum Application: Apply a hydrating serum, such as Hyaluronic Acid, to lubricate the skin before microneedling. Avoid using Vitamin C, retinol, exfoliants, or brightening ingredients on the day of the treatment.
- Microneedling Procedure: Begin the microneedling process by moving the device over the skin in small areas, following a vertical, horizontal, and diagonal pattern for optimal results.
- Post-Treatment Care: After completing the microneedling session, cleanse the skin with a gentle antiseptic solution to remove any remaining products. Apply a soothing face mask with hydrating ingredients to promote skin recovery.
- Sun Protection: Finish the treatment by applying a high-protection, oil-free sunscreen to protect the skin from sun damage and aid in the healing process.
By following these step-by-step instructions for microneedling preparation and treatment, you can ensure a safe and effective procedure with optimal results.
Preparing for Microneedling
Before undergoing, it’s crucial to prepare your skin to ensure optimal results and minimize the risk of complications. Here’s what you should do:
- Consultation with a Dermatologist: Schedule a consultation with a qualified dermatologist or skincare professional to assess your skin’s condition and determine if it is suitable for you.
- Pre-Procedure Skincare Regimen: Follow a skincare routine recommended by your dermatologist leading up to the procedure, which may include gentle cleansers, moisturizers, and sunscreen.
- Avoid Certain Medications and Products: Discontinue the use of certain medications and skincare products, such as retinoids and exfoliants, as they can increase skin sensitivity and the risk of adverse reactions.
- What to Expect During the Microneedling Appointment: Arrive for your appointment with clean, makeup-free skin. The procedure typically takes about 30 to 60 minutes, depending on the treatment area and the device used.
Before Microneedling Preparation
Before you undergo microneedling, it’s important to have a thorough skin assessment with a qualified skincare professional. This will help determine whether microneedling is the right treatment for your skin concerns, as well as the best type to use.
Skincare Routine
In the weeks leading up to your treatment, it’s important to establish a consistent skincare routine that includes gentle cleansers, moisturizers, and sunscreen. This will help ensure that your skin is in the best possible condition for the procedure and reduce the risk of complications.
Pre-Treatment Instructions
Your skincare professional will provide you with specific pre-treatment instructions, which may include avoiding certain medications or supplements, avoiding sun exposure, and avoiding certain skincare products. It’s important to follow these instructions carefully to ensure the best possible outcome.
What to Expect During the Procedure
During the procedure, a skincare professional will use a device with tiny needles to puncture the skin, creating micro-injuries that stimulate collagen production. The procedure typically takes between 30 minutes and an hour, depending on the size of the treatment area.
Pain Management
While microneedling is generally not considered a painful procedure, some people may experience discomfort or sensitivity. Your skincare professional may use a topical anesthetic to help manage any discomfort.
Post-Procedure Care
After the procedure, it’s important to follow specific post-procedure care instructions, which may include avoiding certain skincare products, avoiding sun exposure, and avoiding strenuous exercise.
Skincare Routine After Microneedling
In the days and weeks following your treatment, it’s important to establish a consistent skincare routine that includes gentle cleansers, moisturizers, and sunscreen. This will help support collagen production and improve the overall health and appearance of your skin.
What to Expect After Microneedling
After microneedling, you can expect some redness and swelling, which should subside within a few days. You may also experience some dryness or flaking, which can be managed with a gentle moisturizer.
How Long Before Results Are Visible
The results are not immediate, but rather gradual. You can expect to see improvements in the texture and tone of your skin over the course of several weeks or months.
How to Maintain Results
To maintain the results, it’s important to continue a consistent skincare routine that includes gentle cleansers, moisturizers, and sunscreen. You may also want to consider regular touch-up treatments to maintain your results.
Before and After Microneedling Results
The results can be quite dramatic, with many people reporting smoother, more youthful-looking skin after just a few treatments. Here are some common issues that can be addressed with microneedling:
- Fine lines and wrinkles
- Acne scars
- Hyperpigmentation
- Uneven skin tone
- Enlarged pores
- Stretch marks
- Cellulite
Before and After Microneedling: What to Expect
It offers both immediate and long-term benefits for the skin. Here’s what you can expect before and after the procedure:
Immediate Effects After Microneedling
- Glowing Skin: Many individuals notice an immediate improvement in skin texture and tone, with a healthy, radiant glow.
- Temporary Redness and Swelling: It’s normal to experience redness and swelling immediately after microneedling, which typically subsides within a few days.
- Increased Absorption of Skincare Products: The micro-channels created during microneedling allow for better penetration of skincare products, enhancing their effectiveness.
Timeline of Post-Procedure Recovery
- Day 1-3: Mild redness and swelling may persist, similar to a sunburn. It’s essential to keep the skin hydrated and protected from the sun during this time.
- Day 4-7: The skin begins to heal, and any redness or swelling gradually subsides. You may start to notice improvements in skin texture and tone.
- Weeks 2-4: Collagen production is stimulated, leading to continued improvement in skin quality. Results become more noticeable over time.
Common Side Effects and How to Manage Them
- Redness: Apply a gentle moisturizer and avoid harsh skincare products that could further irritate the skin.
- Swelling: Use cold compresses or ice packs to reduce swelling and discomfort.
- Dryness: Keep the skin hydrated with a non-comedogenic moisturizer and drink plenty of water to support skin healing.
Comparison of Before and After Microneedling Results
Here are some comparisons of before and after results:
Issue | Before | After |
---|---|---|
Fine lines and wrinkles | Visible | Reduced |
Acne scars | Deep and noticeable | Shallow and less noticeable |
Hyperpigmentation | Dark and uneven | Light and even |
Uneven skin tone | Visible | Reduced |
Enlarged pores | Visible | Reduced |
Stretch marks | Deep and noticeable | Shallow and less noticeable |
Cellulite | Visible | Reduced |
Comparison of Microneedling Devices
Device Type | Description | Advantages | Disadvantages |
---|---|---|---|
Derma Roller | Handheld device with rolling drum | Affordable | Less precise |
Microneedling Pen | Automated device with vertical oscillation | Precise and controlled | Higher cost |
Microneedling Stamp | Device with stamp-like head | Targeted treatment areas | Limited versatility |
Common Side Effects of Microneedling
Side Effect | Description | Management |
---|---|---|
Redness | Temporary skin redness | Apply gentle moisturizer |
Swelling | Mild to moderate swelling | Use cold compresses or ice packs |
Dryness | Skin dryness or tightness | Hydrate with non-comedogenic moisturizer |
FAQs
What is microneedling?
Microneedling, also known as collagen induction therapy, is a cosmetic procedure that involves puncturing the skin with tiny needles to stimulate collagen production and improve the skin’s texture and tone.
How does microneedling work?
It works by creating micro-injuries in the skin, which stimulate collagen production and improve the skin’s texture and tone.
Who is a good candidate for microneedling?
It is a good option for people with a variety of skin concerns, including fine lines and wrinkles, acne scars, hyperpigmentation, uneven skin tone, enlarged pores, stretch marks, and cellulite.
Read Also: Prosa Mascara.
Is microneedling painful?
While it is generally not considered a painful procedure, some people may experience discomfort or sensitivity. Your skincare professional may use a topical anesthetic to help manage any discomfort.
Read Also: Water Activated Eyeliner.
How long does it take to see results?
The results of microneedling are not immediate, but rather gradual. You can expect to see improvements in the texture and tone of your skin over the course of several weeks or months.
Read Also: SkinVive Before and After.
How often should microneedling be done?
The frequency of treatments will depend on your individual skin concerns and the type of microneedling used. Your skincare professional will provide you with specific recommendations.
Read Also: Botox Before and After Eyes.
What are the risks of microneedling?
It is generally considered a safe procedure, but there are some risks, including infection, scarring, and pigmentation changes. It’s important to choose a qualified skincare professional and follow all pre- and post-procedure instructions carefully.
Read Also: Trap Botox Before and After.
Can microneedling be done at home?
While there are at-home microneedling devices available, it’s generally recommended to have the procedure done by a qualified skincare professional to ensure the best possible outcome.
Read Also: Pull Ups While Pregnant.
Conclusion
Microneedling is a popular cosmetic procedure that can have dramatic results for people with a variety of skin concerns. By understanding the process of microneedling, from the initial consultation to the final results, you can ensure the best possible outcome. With the right preparation, care, and maintenance, it can help you achieve smoother, more youthful-looking skin.
Read Also: Lip Filler Before and After.
Beauty Tips
Lip Filler Before and After: Enhance Your Smile
Here is your complete guide to lip filler before and after
Introduction to Lip Filler Before and After
Lip fillers have become increasingly popular in recent years, with more and more people turning to this cosmetic procedure to enhance their lips and boost their confidence. However, before undergoing any cosmetic procedure, it’s essential to do your research and understand what to expect. In this article, we’ll take a closer look at lip fillers, what they are, how they work, and what the results are like. We’ll also explore the costs involved, the recovery process, and the potential risks and side effects. So, let’s dive in and discover everything you need to know about lip fillers before and after.
Understanding Lip Fillers
Before diving into the lip filler before and after transformations, let’s take a closer look at how lip fillers work and the different types available.
Types of Lip Fillers
- Hyaluronic Acid Fillers: The most common type of lip filler, hyaluronic acid fillers provide natural-looking results and are reversible.
- Collagen Fillers: These fillers use collagen, a protein found in the skin, to add volume to the lips.
- Fat Transfer: In this procedure, fat is harvested from another part of the body and injected into the lips for augmentation.
What are Lip Fillers?
Lip fillers, also known as dermal fillers, are a type of cosmetic injection used to add volume and fullness to the lips. They are typically made from hyaluronic acid, a naturally occurring substance found in the body, which helps to keep the skin hydrated and plump.
Lip fillers are administered through a series of injections into the lips, using a fine needle. The procedure is usually quick, taking around 30 minutes to complete. The results are immediate, with the lips appearing fuller and more defined.
How do Lip Fillers Work?
Lip fillers work by adding volume to the lips, which can help to reduce the appearance of fine lines and wrinkles around the mouth. The hyaluronic acid in the filler attracts and retains water, which helps to plump up the lips and give them a more youthful appearance.
The effects of lip fillers typically last between six and twelve months, after which time the body naturally breaks down the hyaluronic acid. Top-ups are usually required to maintain the desired look.
Lip Filler Before and After: Expectations vs. Reality
The journey from consultation to post-procedure recovery involves a series of changes in your lips’ appearance. Let’s break down what you can expect at each stage.
What to Expect Before the Procedure
- Consultation: During your initial consultation, your provider will assess your lips and discuss your goals.
- Preparation: You may be advised to avoid certain medications and supplements that can increase the risk of bleeding.
Immediate Results After Lip Filler Injection
- Immediate Fullness: You’ll notice an immediate increase in lip volume following the injection.
- Swelling: Mild to moderate swelling is common and typically subsides within a few days.
Short-Term Changes in Appearance
- Bruising: Bruising at the injection site is normal and should resolve within a week.
- Sensitivity: Your lips may feel tender or sensitive for a few days post-procedure.
Long-Term Results and Maintenance
- Final Results: It may take a few weeks for the filler to settle completely and reveal the final results.
- Maintenance: Depending on the type of filler used, results can last anywhere from six months to a year or more.
Lip Filler Before and After Results
The results of lip fillers can be quite dramatic, with many people reporting a significant increase in confidence and self-esteem after the procedure. The lips will appear fuller, more defined, and more symmetrical, with a more youthful and refreshed appearance.
Comparison of Lip Filler Before and After
Aspect | Before | After |
---|---|---|
Size of lips | Thin | Fuller |
Shape of lips | Uneven | More defined |
Symmetry of lips | Asymmetrical | Symmetrical |
Overall appearance | Aged | More youthful |
It’s important to note that the results of lip fillers can vary from person to person, depending on a range of factors, including the type of filler used, the skill of the practitioner, and the individual’s natural lip shape and size.
Real Stories: Lip Filler Before and After
To get a better idea of the results that can be achieved with lip fillers, let’s take a look at some real-life examples.
Case Study 1: Sarah
Sarah, a 28-year-old marketing executive, had always been self-conscious about her thin lips. She decided to try lip fillers to add some volume and definition to her lips.
Before the procedure, Sarah’s lips were thin and uneven, with a noticeable asymmetry. After the procedure, her lips were fuller and more defined, with a more symmetrical appearance.
Case Study 2: Tom
Tom, a 35-year-old lawyer, had noticed that his lips had started to thin and wrinkle as he aged. He wanted to restore a more youthful appearance to his lips.Before the procedure, Tom’s lips were thin and wrinkled, with a lack of definition. After the procedure, his lips were plumper and more defined, with a more youthful appearance.
Lip Filler Checklist
Step | Action |
---|---|
1 | Choose a qualified and experienced practitioner |
2 | Discuss your desired results and any concerns |
3 | Follow the pre-procedure instructions |
4 | Undergo the procedure |
5 | Follow the aftercare instructions |
6 | Schedule regular top-ups to maintain the desired look |
Maintaining Lip Filler Results
To maintain the results of lip fillers, it’s essential to take good care of your lips. Here are some tips to help you keep your lips looking their best:
- Keep your lips hydrated by drinking plenty of water and using a good quality lip balm.
- Avoid smoking and exposure to second-hand smoke, as this can dry out the lips and cause premature aging.
- Protect your lips from the sun by using a lip balm with SPF.
- Avoid using harsh lip products, such as matte lipsticks, which can dry out the lips.
- Schedule regular top-ups to maintain the desired look.
Pros and Cons of Lip Filler Before and After
Pros of Lip Fillers | Cons of Lip Fillers |
---|---|
Immediate enhancement to appearance | Cost |
Non-invasive procedure with minimal downtime | Temporary nature of results |
Customizable results tailored to preferences | Potential side effects like swelling, bruising, and discomfort |
Gradual treatment option for building up volume | Unrealistic expectations |
Improved smile appearance | |
Natural-looking results with hyaluronic acid fillers | |
Enhances lip definition and symmetry |
Lip Filler Cost
The cost of lip fillers can vary depending on a range of factors, including the type of filler used, the skill of the practitioner, and the location of the clinic. On average, you can expect to pay between $500 and $2,000 per treatment.
Cost Comparison of Lip Fillers
Filler Type | Average Cost |
---|---|
Hyaluronic Acid | $600 – $800 |
Poly-L-Lactic Acid | $800 – $1,000 |
Calcium Hydroxylapatite | $1,000 – $1,500 |
Polymethylmethacrylate | $1,500 – $2,000 |
It’s important to note that lip fillers are not covered by insurance, as they are considered a cosmetic procedure.
Recovery Process
The recovery process for lip fillers is relatively quick and easy. You can expect some swelling and bruising around the injection site, which can last for a few days. It’s important to avoid touching or rubbing your lips for at least 24 hours after the procedure, as this can cause infection.
Lip Filler Recovery Timeline
Time | Symptoms |
---|---|
24 hours | Swelling and bruising |
48 hours | Redness and tenderness |
72 hours | Itching and numbness |
1 week | Full recovery |
Risks and Side Effects
While lip fillers are generally considered safe, there are some risks and side effects to be aware of. These can include:
- Allergic reactions to the filler
- Infection
- Bleeding
- Bruising
- Swelling
- Asymmetry
- Lumps and bumps
- Scarring
If you experience any of these symptoms, it’s important to contact your practitioner immediately.
FAQs
What is the ideal age for lip fillers?
There is no ideal age for lip fillers, as everyone’s lips and facial structure are different. However, most practitioners recommend waiting until the late teens or early twenties before undergoing the procedure.
Read Also: Prosa Mascara.
How long do lip fillers last?
The effects of lip fillers typically last between six and twelve months, after which time the body naturally breaks down the hyaluronic acid.
Read Also: Water Activated Eyeliner.
Are lip fillers painful?
Most people find lip fillers to be relatively painless, with only mild discomfort during the injections. A topical anesthetic can be applied to the lips to help reduce any pain or discomfort.
Read Also: SkinVive Before and After.
Are lip fillers safe?
Lip fillers are generally considered safe when administered by a qualified and experienced practitioner. However, as with any cosmetic procedure, there are some risks and side effects to be aware of.
Read Also: Botox Before and After Eyes.
Can lip fillers be reversed?
Yes, lip fillers can be reversed using an enzyme called hyaluronidase, which breaks down the hyaluronic acid in the filler.
Read Also: Pull Ups While Pregnant.
Conclusion
Lip fillers can be a great way to enhance the appearance of your lips and boost your confidence. However, it’s essential to do your research and understand what to expect before undergoing the procedure. By choosing a qualified and experienced practitioner, following the aftercare instructions, and being aware of the risks and side effects, you can ensure a safe and successful procedure.
Read Also: Trap Botox Before and After.
-
Beauty Tips1 year ago
What Is Balayage: Your Ultimate Guide Is Here
-
Dreams Interpretation1 year ago
The Meaning of Teeth Falling Out in a Dream: Exploring the Symbolism
-
Diet Tips1 year ago
What Vitamins C Is Good For? The Ultimate Guide
-
Uncategorized1 year ago
Understanding the Five Languages of Love: A Comprehensive Guide
-
Beauty Tips11 months ago
How to Make Clear Skin: Your Comprehensive Guide
-
Beauty Tips11 months ago
Coconut Oil in Face Benefits: Unlocking the Secrets to Radiant Skin
-
Women Tips11 months ago
How Long Breast Augmentation Surgery Take? A Complete Guide
-
Beauty Tips1 year ago
The Surprising Benefit to Coconut Oil: Your Complete Guide