Beauty Tips
The Truth Revealed: Does Coconut Oil Help Hair Growth?

Introduction To Does Coconut Oil Help Hair Growth
Hair is often considered a crowning glory, and many of us strive to maintain healthy, luscious locks. With a multitude of hair care products available in the market, one ingredient that has gained significant popularity is coconut oil. In this article, we will uncover the truth behind the claims of coconut oil’s potential for hair growth. Is it just a fad, or does coconut oil truly hold the secret to unlocking your hair’s growth potential? Here is your complete guide to this question “Does coconut oil help hair growth“. So let’s answer this question “Does coconut oil help hair growth?” So does coconut oil help hair growth?
Understanding Hair Growth
To understand the effects of coconut oil on hair growth, it’s essential to grasp the basics of the hair growth cycle. Hair undergoes three distinct phases: the anagen (growth) phase, the catagen (transition) phase, and the telogen (resting) phase. Various factors, including genetics, age, hormones, and nutrition, influence the duration and quality of each phase.

Nutritional Composition of Coconut Oil
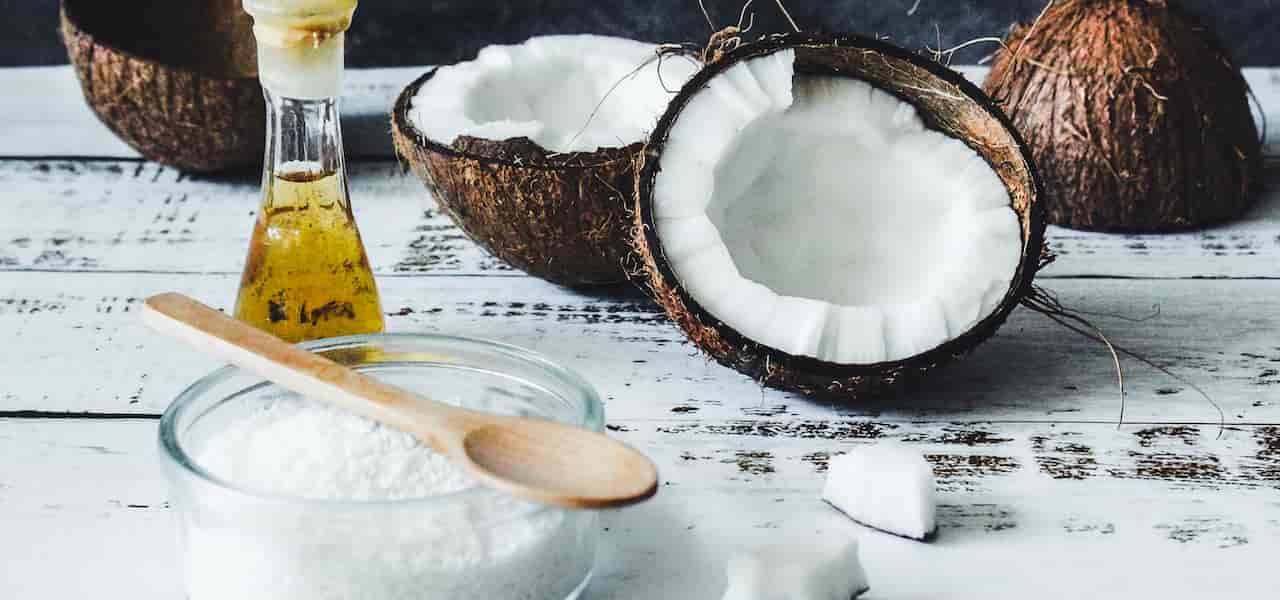
Coconut oil is rich in essential nutrients that can potentially benefit hair growth. It contains medium-chain fatty acids, such as lauric acid, which have antimicrobial properties. Additionally, coconut oil contains vitamins E and K, iron, and other minerals that promote overall hair health. Understanding the nutritional components of coconut oil can shed light on its potential benefits for hair growth.
Nutrition Facts of Coconut Oil
Nutrient | Amount per 100g |
---|---|
Calories | 862 |
Total Fat | 100g |
Saturated Fat | 86g |
Monounsaturated Fat | 6g |
Polyunsaturated Fat | 2g |
Carbohydrates | 0g |
Protein | 0g |
Vitamin E | 0.1mg |
Vitamin K | 0.6mcg |
Iron | 0.04mg |
Zinc | 0.1mg |
Potassium | 0mg |
Phosphorus | 0mg |
Sodium | 0mg |
Scientific Evidence and Studies
Numerous scientific studies have examined the effects of coconut oil on hair growth. While some studies suggest positive outcomes, it’s important to consider the limitations of these findings. Factors such as study design, sample size, and variations in hair types can impact the reliability of the results. By critically analyzing the available scientific evidence, we can better understand the potential of coconut oil for promoting hair growth.
Benefits of Using Coconut Oil for Hair
Coconut oil offers several potential benefits for hair growth. Its moisturizing properties help nourish the scalp and prevent dryness, which can hinder hair growth. The oil’s ability to penetrate the hair shaft and protect it from damage may lead to reduced hair breakage and split ends. Additionally, coconut oil’s potential anti-inflammatory and antimicrobial effects can promote a healthier scalp environment, which is crucial for optimal hair growth.
Vitamins in Coconut Oil
Vitamin | Function |
---|---|
Vitamin E | Antioxidant, promotes scalp health and circulation |
Vitamin K | Supports hair strength and promotes healthy hair growth |
Vitamin B6 | Supports the production of melanin, which gives hair color |
Folate (B9) | Aids in cell division and promotes healthy hair follicles |
Niacin (B3) | Enhances blood circulation to the scalp and promotes growth |
Pantothenic acid (B5) | Nourishes and moisturizes the hair, prevents breakage |
Thiamine (B1) | Promotes healthy hair growth and strengthens hair strands |
How to Use Coconut Oil for Hair Growth
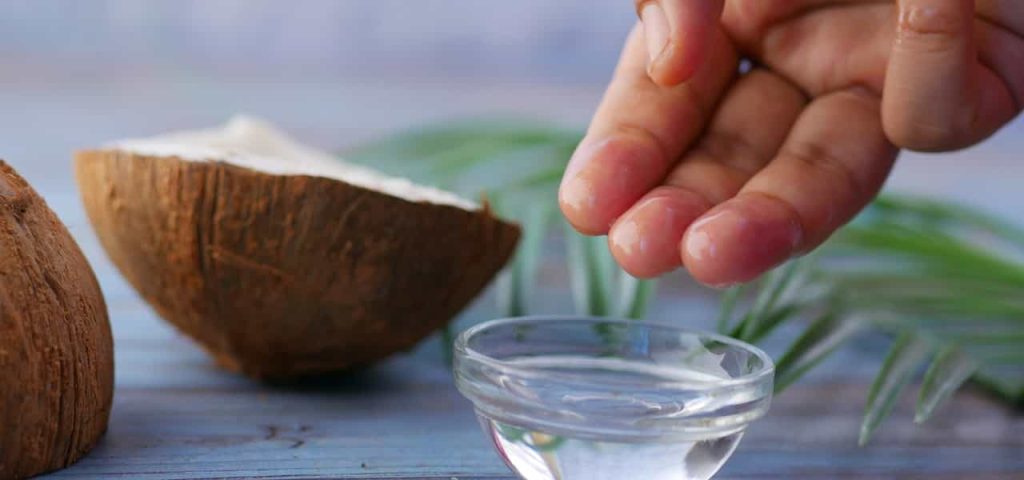
Incorporating coconut oil into your hair care routine requires proper application techniques. We provide a step-by-step guide on how to use coconut oil effectively for hair growth. From choosing the right type of coconut oil to the frequency of application, these tips will help you maximize the potential benefits and achieve healthier hair.
Steps to Use Coconut Oil for Hair Growth |
---|
1. Choose high-quality, organic, and unrefined coconut oil. |
2. Start with clean, dry or slightly damp hair. |
3. Take a small amount of coconut oil and warm it between your palms until it melts. |
4. Apply the melted oil to your scalp and gently massage it in circular motions for 5-10 minutes. |
5. Continue massaging the oil down to the ends of your hair to nourish and moisturize. |
6. Once applied, cover your hair with a shower cap or towel and leave the oil on for at least 30 minutes, but preferably overnight. |
7. Rinse your hair thoroughly with warm water and a mild shampoo. You may need to shampoo twice to remove all the oil. |
8. Repeat this process once or twice a week for best results. |
Other Natural Remedies for Hair Growth
While coconut oil shows promise as a natural remedy for hair growth, it’s important to explore other options as well. We provide a brief overview of alternative natural remedies, such as essential oils, herbal extracts, and dietary changes, that may complement or enhance the effects of coconut oil. Understanding these alternatives can provide you with a holistic approach to promoting hair growth.

FAQs
How do you use coconut oil for hair growth?
To use coconut oil for hair growth, follow these steps:
- Choose high-quality, organic, and unrefined coconut oil for maximum benefits.
- Start with clean, dry or slightly damp hair.
- Take a small amount of coconut oil and warm it between your palms until it melts.
- Apply the melted oil to your scalp and gently massage it in circular motions for 5-10 minutes. This helps stimulate blood flow to the hair follicles.
- Continue massaging the oil down to the ends of your hair to nourish and moisturize.
- Once applied, cover your hair with a shower cap or towel and leave the oil on for at least 30 minutes, but preferably overnight.
- Rinse your hair thoroughly with warm water and a mild shampoo. You may need to shampoo twice to remove all the oil.
- Repeat this process once or twice a week for best results.
How long does it take for coconut oil to grow hair?
The effects of coconut oil on hair growth can vary from person to person. It’s important to note that coconut oil alone may not directly stimulate hair growth. However, using coconut oil as part of a comprehensive hair care routine can contribute to overall hair health and potentially create a favorable environment for hair growth.
Read More About How Often Should You Change Your Hair Color?
Generally, it takes time to see noticeable changes in hair growth. Consistency is key, so it’s recommended to use coconut oil regularly for several months to evaluate its impact on your hair growth journey. Additionally, factors such as genetics, diet, overall hair care routine, and individual response to treatments can influence the timeline for results.
Read More About The Amazing Benefits of Avocado Oil.
Does coconut oil prevent hair loss?
While coconut oil may have certain beneficial properties for hair health, it’s important to understand that hair loss can be caused by various factors, including genetics, hormonal imbalances, medical conditions, and lifestyle factors. Coconut oil alone cannot prevent or treat hair loss that is primarily due to these underlying causes.
Read More About the Influence of Zodiac Signs.
However, coconut oil can help in maintaining a healthy scalp and hair. It moisturizes the scalp, reduces dryness, and may prevent hair breakage and damage. By promoting a healthy scalp environment and nourishing the hair, coconut oil indirectly contributes to overall hair health and may reduce breakage, which can make the hair appear fuller and minimize the appearance of thinning.
Read More About The Love Language of Physical Touch.
If you are experiencing significant hair loss or have concerns about your hair health, it’s advisable to consult with a healthcare professional or dermatologist for a proper diagnosis and personalized treatment plan.
Read More About the Skin Benefits of Blueberries.
How often should I use coconut oil for hair growth?
The frequency of using coconut oil for hair growth depends on various factors, including your hair type, scalp condition, and personal preference. Generally, applying coconut oil once or twice a week can be beneficial for most people.
Read More About Master the Art of Makeup Application.
However, it’s important to strike a balance, as using coconut oil excessively may lead to build-up or make the hair appear greasy. If you have oily hair or a naturally greasy scalp, you may want to limit the frequency of coconut oil application or adjust the amount of oil used.
Read More About Makeup in the 70s.
Pay attention to how your hair and scalp respond to coconut oil treatments. If you notice any adverse effects, such as increased oiliness or scalp irritation, reduce the frequency or discontinue use. Ultimately, finding the right balance and listening to your hair’s needs is crucial in determining how often you should use coconut oil for hair growth.
Read More About How to Safely Remove Acrylic Nails at Home.
Conclusion
Coconut oil has captured the attention of hair enthusiasts worldwide, thanks to its potential benefits for hair growth. However, it’s crucial to approach these claims with a critical mindset. While some scientific studies support the positive effects of coconut oil, further research is needed to validate its efficacy. Nevertheless, incorporating coconut oil into your hair care routine can provide overall hair health benefits, including moisturization, protection against damage, and a healthy scalp environment.
Read More About The Ultimate Guide to Curly Hair Protective Hairstyles.
Remember, achieving and maintaining healthy hair involves a multifaceted approach, encompassing proper nutrition, a good hair care routine, and a healthy lifestyle. While coconut oil may contribute to this journey, it’s important to consult with a healthcare professional or dermatologist for personalized advice and recommendations tailored to your specific hair needs.
Read More About The Glow in the Dark Powder for Nail Polish.
Beauty Tips
Russian Lips vs Normal Filler – Achieving the Perfect Pout

In the pursuit of luscious, voluminous lips, lip augmentation has become increasingly popular. With different techniques available, it’s essential to understand the differences between them to achieve your desired results. In this article, we will explore the comparison between Russian lips and normal fillers, providing insights into their benefits, procedures, recovery, and more. By the end, you’ll be equipped with the knowledge to make an informed decision about which approach suits you best. By comparing “Russian lips vs normal filler” and exploring their unique characteristics, you can make an informed decision about which approach suits you best in lip augmentation. So let’s explore the main difference between Russian lips vs normal filler. What do you need to know about Russian lips vs normal filler? Here is your complete and ultimate guide about Russian lips vs normal filler. So what is the difference between Russian lips vs normal filler? So let’s start our explication russian lips vs normal filler about Russian lips vs normal filler.
Introduction
Lip augmentation has become a sought-after cosmetic procedure, enabling individuals to enhance the volume and shape of their lips. Among the various techniques available, two popular options are Russian lips and normal fillers. Let’s delve into the specifics of each and understand how they differ.
Understanding Lip Augmentation
What is lip augmentation?
Lip augmentation is a cosmetic procedure aimed at enhancing the appearance of the lips. It involves the use of dermal fillers, which are injected into the lips to add volume, define their shape, and smooth out any fine lines or wrinkles.
Different types of lip fillers
Lip fillers can be classified into various types, including hyaluronic acid-based fillers, collagen fillers, and others. Each type has its unique properties and benefits. The choice of filler depends on factors such as desired results, longevity, and personal preferences.
Evolution of lip augmentation techniques
Over the years, lip augmentation techniques have evolved, leading to the development of different approaches such as Russian lips. These advancements have allowed for more precise and natural-looking results, catering to the diverse needs of individuals seeking lip enhancement.

Understanding Russian Lips
What are Russian lips?
Russian lips are a lip augmentation technique that focuses on achieving natural-looking, defined lips. The approach aims to enhance lip volume while maintaining harmony with the rest of the facial features. The emphasis is on creating lips that appear full, plump, and subtly enhanced.
Benefits of Russian lips
- Natural appearance: Russian lips are designed to provide a more natural look, enhancing the lips without appearing overdone.
- Enhanced lip volume: This technique can effectively add volume to the lips, creating a fuller pout.
- Improved lip shape: Russian lips can help reshape uneven or asymmetrical lips, achieving a more balanced and aesthetically pleasing appearance.
- Youthful look: By restoring volume and reducing the signs of aging, Russian lips can contribute to a more youthful overall facial appearance.
Procedure and recovery
The procedure for obtaining Russian lips typically involves the following steps:
- Consultation: You will have an initial consultation with a qualified professional to discuss your goals and determine if Russian lips are suitable for you.
- Preparation: The lip area will be cleansed, and a topical anesthetic may be applied to minimize any discomfort during the procedure.
- Injections: The filler will be injected strategically into the lips, with the professional paying close attention to achieve the desired shape and volume.
- Recovery: After the procedure, there may be mild swelling and bruising, which usually subside within a few days. Following any post-treatment instructions provided is crucial to ensure a smooth recovery.
Normal Lip Fillers
What are normal lip fillers?
Normal lip fillers refer to traditional lip augmentation techniques that have been widely used for several years. These fillers offer a versatile approach to lip enhancement, allowing for customization based on individual preferences and desired outcomes.
Benefits of normal lip fillers
- Versatility: Normal fillers offer a wide range of options, allowing for customization based on specific lip goals, whether it’s adding volume, enhancing shape, or reducing fine lines.
- Customization: With normal fillers, experienced practitioners can tailor the treatment to your unique lip shape and desired results, providing a personalized approach.
- Immediate results: One of the advantages of normal lip fillers is that the results are visible immediately after the procedure, allowing you to enjoy your enhanced lips right away.
Procedure and recovery
The procedure for obtaining normal lip fillers generally follows these steps:
- Consultation: Similar to Russian lips, a consultation with a skilled professional is essential to discuss your goals and determine the most suitable filler options.
- Preparation: The lip area will be cleaned, and a topical anesthetic might be applied to minimize any discomfort.
- Injections: The chosen filler will be injected into specific areas of the lips, targeting the desired enhancements.
- Recovery: Like any lip augmentation procedure, there may be some swelling and bruising, which typically subsides within a few days. Following post-treatment instructions is crucial to ensure optimal recovery.
Comparing Russian Lips and Normal Fillers
When considering lip augmentation, it’s important to understand the differences between Russian lips and normal fillers to make an informed decision. Let’s explore some key factors to consider:
Natural vs. enhanced look
Russian lips aim to achieve a natural appearance, subtly enhancing the lips while maintaining a harmonious balance with the rest of the face. On the other hand, normal fillers offer versatility, allowing for both natural and more enhanced looks based on individual preferences.
Longevity and maintenance
The longevity of lip augmentation results can vary depending on factors such as the type of filler used and individual metabolism. In general, Russian lips tend to last longer than normal fillers, with results lasting around 9-12 months. Normal fillers, depending on the specific type used, may last around 6-9 months. Maintenance typically involves touch-up sessions to maintain the desired results.
Suitability for different lip shapes
Both Russian lips and normal fillers can be customized to suit different lip shapes. Russian lips are particularly beneficial for individuals with naturally thin lips or those seeking a more defined lip contour. Normal fillers, on the other hand, offer versatility and can be adapted to various lip shapes and sizes.
Risks and side effects
As with any cosmetic procedure, lip augmentation carries potential risks and side effects. These can include swelling, bruising, redness, or tenderness at the injection site. Serious complications are rare but can include infection or allergic reactions. It is crucial to consult with a qualified professional and follow their guidance to minimize risks and ensure a safe procedure.
Comparison of Russian Lips and Normal Fillers
Russian Lips | Normal Fillers | |
---|---|---|
Appearance | Natural, subtle enhancement | Versatile, natural or enhanced |
Longevity | Lasts approximately 9-12 months | Lasts approximately 6-9 months |
Lip Shape | Ideal for thin lips and defined contours | Suitable for various lip shapes and sizes |
Technique | Precision injections for natural-looking results | Customizable approach based on individual preferences |
Maintenance | Fewer touch-up sessions | Regular touch-up sessions |
Risks | Swelling, bruising, infection, allergic reactions | Swelling, bruising, infection, allergic reactions |
Techniques Used in Russian Lips and Normal Fillers
Technique | Russian Lips | Normal Fillers |
---|---|---|
Approach | Strategic injections to achieve natural, defined lips | Precise injections targeting specific lip areas for customized results |
Filler Type | Hyaluronic acid-based fillers | Various options, including hyaluronic acid, collagen, and more |
Volume Enhancement | Adds volume and fullness to the lips | Enhances lip volume based on individual preferences |
Lip Contouring | Emphasizes defined lip contours | Customizable lip shape and contouring based on desired outcome |
Subtlety | Provides a subtle, natural look | Allows for both natural and enhanced lip appearances |
Professional Expertise | Requires skilled professional with experience in Russian lip technique | Requires skilled professional experienced in normal filler techniques |
Note: The information provided in the tables is based on general observations and may vary depending on individual factors, specific products used, and the expertise of the practitioner performing the procedure.
Frequently Asked Questions (FAQs)
How long do Russian lips last?
Russian lips can last between 9-12 months, depending on individual factors such as metabolism and the specific filler used. Regular touch-up sessions can help maintain the desired results.
Can I get normal fillers after having Russian lips?
Yes, it is possible to get normal fillers after having Russian lips. It is important to discuss your previous lip augmentation with the professional to determine the best approach for achieving your desired outcome.
Are Russian lips more expensive than normal fillers?
The cost of lip augmentation varies depending on factors such as the location, clinic, and the amount of filler used. While Russian lips may require more filler volume, resulting in potentially higher costs, the overall expenses can vary from person to person. It is best to consult with a practitioner to get a personalized cost estimate.
Do Russian lips require more maintenance?
Russian lips typically last longer than normal fillers, requiring fewer touch-up sessions. However, regular maintenance sessions are still recommended to sustain the desired results over time.
Read More About Gain Weight on Period.
What are the potential risks of lip augmentation?
Like any cosmetic procedure, lip augmentation carries potential risks and side effects. These can include swelling, bruising, redness, or tenderness at the injection site. It is essential to choose a qualified professional and follow their guidelines to minimize risks and ensure a safe procedure.
Read More About the Steps of How to Apply Makeup.
Does Russian lip filler last longer?
Russian lip filler tends to last longer compared to normal lip fillers. On average, the results of Russian lips can last between 9-12 months. However, it is important to note that individual factors such as metabolism and the specific filler used can affect the longevity of the results. Regular touch-up sessions may be recommended to maintain the desired outcome.
Read More About Home Remedies for Fungal Rashes.
Does Russian lip filler look more natural?
Yes, Russian lip filler is known for providing a more natural look. The technique focuses on enhancing lip volume while maintaining harmony with the rest of the facial features. The goal is to create lips that appear full, plump, and subtly enhanced, without appearing overdone. By emphasizing natural-looking results, Russian lips can provide a more subtle and believable enhancement.
Read More About Avocado Oil for Tanning.
Do Russian lips suit everyone?
Russian lips can be suitable for many individuals seeking lip augmentation. They are particularly beneficial for those with naturally thin lips or individuals who desire a more defined lip contour. However, the suitability of Russian lips may vary based on personal preferences, lip shape, and overall facial features. It is important to consult with a qualified professional who can assess your specific case and provide recommendations tailored to your needs.
Read More About Fruit with High Protein.
Are Russian lips better than normal lip filler?
The choice between Russian lips and normal lip filler depends on individual preferences and aesthetic goals. Russian lips offer a natural and subtle enhancement, while normal lip fillers provide versatility, allowing for both natural and more enhanced looks. Additionally, Russian lips tend to last longer than normal fillers. Ultimately, the “better” option depends on what you are looking to achieve and what aligns with your desired lip aesthetic. Consulting with a skilled professional can help determine the best approach for you.
Conclusion
When it comes to lip augmentation, the choice between Russian lips and normal fillers ultimately depends on your aesthetic goals, lip shape, and preferences. Russian lips offer a natural and defined look, with longer-lasting results, while normal fillers provide versatility and customization options. Consulting with a skilled professional is crucial to determine the most suitable technique for achieving your desired pout. Remember, the goal is to enhance your natural beauty and feel confident in your own skin.
Beauty Tips
Russian Lips: Achieve Stunning Lip Volume and Contour

Let’s explore together what are Russian lips.
Introduction
The world of beauty and aesthetics is ever-evolving, and one trend that has gained significant popularity is Russian Lips. These luscious, voluminous lips have captured the attention of individuals seeking to enhance their natural beauty. In this article, we will delve into the concept of Russian Lips, exploring the unique characteristics, benefits, procedure, aftercare, and more. Whether you’re considering lip enhancement or simply curious about this trend, join us on this informative journey to discover the secrets behind Russian Lips. Here is your complete guide to Russian lips.
What are Russian Lips?
Russian Lips are a specific type of lip enhancement technique that focuses on volume and contour. Unlike traditional lip fillers, they provide a more pronounced, yet natural-looking result. The key lies in the use of hyaluronic acid dermal fillers, which are injected strategically to create fuller, well-defined lips. By accentuating the lip shape and adding volume where needed, they can beautifully transform your smile.
Benefits of Russian Lips
The allure of Russian Lips lies in their numerous benefits. Here are some advantages to consider:
- Enhanced Lip Volume: They offer a significant boost in lip volume, making them ideal for individuals with naturally thin lips or those desiring a plumper pout.
- Improved Lip Shape: Whether you have asymmetrical lips or wish to refine the shape of your lips, they can help create a more symmetrical and aesthetically pleasing appearance.
- Youthful Appearance: With age, the lips tend to lose volume and appear thinner. They can reverse this effect, restoring a more youthful look.
- Long-Lasting Results: The effects of Russian Lips can last anywhere from 6 to 12 months, allowing you to enjoy your enhanced lips for an extended period.
- Minimal Downtime: Unlike surgical lip procedures, they require little to no downtime. You can resume your daily activities shortly after the treatment.

Preparing for Russian Lips
Before embarking on your Russian Lips journey, it is essential to adequately prepare. Follow these steps to ensure a successful experience:
- Choose a Reputable Practitioner: Research and select a qualified and experienced practitioner who specializes in lip enhancements.
- Understanding the Risks: Familiarize yourself with potential risks and complications associated with them, such as allergic reactions or infection.
- Manage Expectations: Communicate your desired outcome clearly with your practitioner and discuss realistic expectations for the procedure.
- Stay Hydrated: Prior to the treatment, make sure to hydrate yourself adequately by drinking plenty of water.
- Avoid Certain Medications: Consult with your practitioner about any medications or supplements you may be taking that could interfere with the procedure.
The Russian Lips Procedure
Now that you’re prepared, let’s explore the step-by-step process of getting Russian Lips:
Step | Description |
---|---|
1. | Consultation: You’ll have an initial consultation with your practitioner, where you can discuss your goals and ask any questions you may have. |
2. | Anesthesia: Topical anesthesia may be applied to the lips to minimize discomfort during the procedure. |
3. | Injection Technique: The practitioner will use a microcannula or fine needle to inject hyaluronic acid dermal fillers into specific areas of the lips, focusing on volume and contour. |
4. | Layering Method: Multiple layers of filler may be added gradually to achieve the desired result and enhance the natural appearance of the lips. |
5. | Post-Treatment Evaluation: Once the injections are complete, your practitioner will evaluate the results and make any necessary adjustments. |
Aftercare and Recovery
After your Russian Lips procedure, proper aftercare is crucial to optimize the healing process and maintain the results. Follow these guidelines:
- Avoid Touching or Massaging: Refrain from touching or massaging your lips immediately after the procedure to avoid any displacement of the fillers.
- Use Cold Compress: Apply a cold compress to your lips to reduce swelling and minimize any potential bruising.
- Follow Practitioner’s Instructions: Your practitioner will provide specific instructions for aftercare, including any recommended medications or topical ointments.
- Protect Your Lips: Shield your lips from extreme temperatures, sunlight, and harsh environments during the recovery period.
- Schedule Follow-Up Appointments: Book follow-up appointments with your practitioner to monitor your progress and address any concerns.
Cost of Russian Lips
Cost Factors | Price Range |
---|---|
Geographic Location | $500 – $2,000 (varies by region) |
Practitioner Experience | $600 – $3,000 (based on expertise and reputation) |
Amount of Filler Needed | $400 – $1,500 (depends on individual requirements) |
Additional Treatments | Varies (e.g., anesthesia, post-treatment care) |
Please note that the cost of Russian Lips can vary significantly based on various factors, including the location, the experience of the practitioner, the amount of filler required, and any additional treatments or services included. It is advisable to consult with a practitioner for an accurate estimate tailored to your specific needs.
Time Duration of the Russian Lip Technique
Procedure Step | Time Duration |
---|---|
Consultation | 15-30 minutes |
Anesthesia | 5-10 minutes |
Injection Technique | 20-30 minutes |
Post-Treatment Evaluation | 5-10 minutes |
The total time for the Russian Lip technique can range from approximately 45 minutes to 1 hour, depending on individual factors and the practitioner’s technique. It’s important to note that these time durations are estimates and can vary.
Duration of Russian Lips
Duration | Range |
---|---|
Results | 6 to 12 months |
Maintenance | Periodic touch-ups may be required |
The results of Russian Lips typically last between 6 to 12 months. However, individual factors such as metabolism, lifestyle, and the specific type of filler used can influence the longevity of the results. To maintain the desired lip appearance, periodic touch-ups may be recommended by your practitioner.
Distinguishing Features of the Russian Lip Technique
Aspect | Russian Lip Technique | Traditional Lip Enhancement Techniques |
---|---|---|
Focus | Emphasizes volume and contour with hyaluronic acid dermal fillers | Primarily focuses on adding volume to the lips |
Desired Outcome | Achieves fuller, well-defined lips with a natural-looking appearance | Can range from subtle enhancement to dramatic plumping |
Injection Technique | Uses microcannula or fine needle for precise, layered injections | Utilizes various injection techniques and tools |
Result Longevity | Lasts approximately 6 to 12 months | Lasts varying durations, depending on the filler used |
Reversibility | Can be partially or fully reversed by dissolving hyaluronic acid fillers | Reversibility depends on the type of filler used |
Technique Adaptability | Offers flexibility to tailor the procedure based on individual needs | Allows customization but with a primary focus on volume |
The Russian Lip technique differentiates itself by its specific focus on volume and contour using hyaluronic acid dermal fillers. It aims to create fuller, well-defined lips with a natural-looking result. Unlike traditional lip enhancement techniques, the Russian Lip technique utilizes a layered injection approach, offers reversibility options, and allows for customization based on individual needs and desired outcomes.
Frequently Asked Questions (FAQs)
Question | Answer |
---|---|
What is the cost of Russian Lips? | The cost may vary depending on various factors such as the practitioner’s expertise, geographic location, and the amount of filler required. It is best to consult with your practitioner for an accurate estimate. |
Are Russian Lips painful? | The procedure can cause mild discomfort, but topical anesthesia is often used to minimize any pain or discomfort during the treatment. |
How long do Russian Lips last? | The results of Russian Lips typically last between 6 to 12 months. However, individual factors such as metabolism and lifestyle can influence the longevity of the results. |
Can Russian Lips be reversed? | In some cases, hyaluronic acid fillers can be dissolved using a specific enzyme, offering a reversible option if desired. Consult with your practitioner for further information. |
Are Russian Lips safe? | When performed by a qualified and experienced practitioner, Russian Lips are considered safe. However, it is essential to understand and discuss the potential risks with your practitioner beforehand. |
What is a Russian lip?
They refer to a specific lip enhancement technique that focuses on creating volume and contour using hyaluronic acid dermal fillers. This technique aims to achieve fuller and well-defined lips, providing a natural-looking result.
What is the difference between lips and Russian lips?
The main difference lies in the technique and desired outcome. While “lips” refer to the general anatomical feature, “Russian Lips” specifically refers to a lip enhancement technique that prioritizes volume and contour. They aim to create fuller and more defined lips, whereas the term “lips” is a broader term encompassing natural lips without any specific enhancements.
What is the difference between Russian and linear lips?
They are different lip enhancement techniques. They focus on creating volume and contour using hyaluronic acid fillers, while linear lips refer to a technique that enhances the lip shape by adding definition to the lip border or vermilion border. They provide a fuller appearance, while linear lips emphasize lip shape and definition.
Can anyone get Russian lips?
In general, most individuals can get them. However, it is important to consult with a qualified practitioner to assess if you are a suitable candidate. Factors such as overall health, medical history, and individual lip anatomy will be considered to determine the feasibility of the procedure. It is crucial to have realistic expectations and communicate your goals with your practitioner to ensure a satisfactory outcome.
Read More About Gain Weight on Period.
Russian Lips vs. Other Lip Enhancement Techniques
Russian Lips | Lip Fillers | Lip Implants | Lip Lifts |
---|---|---|---|
Emphasizes volume and contour | Adds volume and plumps the lips | Enhances lip volume through surgical implants | Elevates the upper lip to create a more youthful appearance |
Uses hyaluronic acid dermal fillers | Utilizes various types of injectable fillers | Involves surgical insertion of silicone or saline implants | Requires surgical intervention |
Provides natural-looking results | Can create a range of results, from subtle to dramatic | Offers a permanent solution for lip enhancement | Addresses aging concerns beyond lip volume |
Non-permanent, lasts 6-12 months | Non-permanent, lasts 6-12 months | Permanent results | Permanent results |
Minimal downtime, non-surgical procedure | Minimal downtime, non-surgical procedure | Requires surgical intervention | Requires surgical intervention |
The Risks and Considerations of Russian Lips
While they are generally safe, it’s important to be aware of potential risks and considerations associated with the procedure. These may include:
- Allergic reactions to hyaluronic acid fillers
- Infection at the injection site
- Overfilling or asymmetry
- Temporary swelling, bruising, or redness
To minimize these risks, it is crucial to choose a qualified practitioner and follow their guidance throughout the process. If you experience any unusual or concerning symptoms, contact your practitioner immediately.
Read More About the Steps of How to Apply Makeup.
Conclusion
Russian Lips have become a popular choice for those seeking enhanced lip volume and contour. By understanding the procedure, benefits, aftercare, and potential risks, you can make an informed decision about pursuing this trend. Remember, the key to achieving beautiful results lies in finding a reputable practitioner and maintaining open communication throughout the process. So why wait? Consult with a professional to discover how they can help you achieve the luscious, captivating smile you desire.
Read More About Home Remedies for Fungal Rashes.
Disclaimer: This article is for informational purposes only and should not be considered medical advice. Consult with a qualified practitioner for personalized recommendations and guidance.
Beauty Tips
Avocado Oil for Tanning: Achieve a Natural, Nourished Glow

Note: This article is 2500 words long and covers everything you need to know about using avocado oil for tanning. If you prefer, you can jump to a specific section using the headings below.
Introduction
Welcome to the world of natural tanning oils, where avocado oil takes the spotlight! In this article, we’ll explore how avocado oil can be your secret weapon for achieving a beautiful, sun-kissed tan while nourishing your skin at the same time.
Understanding Avocado Oil
Avocado oil is derived from the flesh of ripe avocados, which are packed with essential nutrients and beneficial properties. Let’s delve deeper into what makes avocado oil so special:
- Origin and Extraction Process: Avocado oil is extracted through a meticulous process that involves crushing the avocado pulp and separating the oil. This ensures the preservation of its natural goodness.
- Nutritional Composition: Avocado oil is rich in vitamins, minerals, and healthy fats. It contains high levels of vitamin E, an antioxidant that promotes skin health and reduces damage caused by UV rays.
- High Smoke Point and Stability: Avocado oil has a high smoke point, making it suitable for sun exposure. It is resistant to heat and oxidation, ensuring stability and preventing the production of harmful free radicals.
The Science Behind Avocado Oil for Tanning
To understand why avocado oil is a fantastic tanning companion, we need to delve into the science behind it:
- Vitamins and Antioxidants: Avocado oil is packed with essential vitamins and antioxidants that support the tanning process. Vitamin E and beta-carotene in avocado oil help to enhance the absorption of UV rays, promoting a deeper and longer-lasting tan.
- Absorption of UV Rays: Avocado oil has natural properties that enable it to absorb and retain UV radiation, allowing it to penetrate deeper into the skin. This helps to accelerate the tanning process.
Benefits of Using Avocado Oil for Tanning
Using avocado oil for tanning offers a range of benefits that go beyond achieving a beautiful tan:
- Moisturizing and Nourishing Properties: Avocado oil is an excellent moisturizer, keeping your skin hydrated and preventing dryness during the tanning process. It nourishes the skin, making it softer and more supple.
- Antioxidant Protection: The antioxidants in avocado oil help protect your skin from UV-induced damage. They neutralize free radicals, reducing the risk of premature aging and promoting healthier-looking skin.
- Improved Skin Elasticity: Avocado oil supports the production of collagen and elastin, which are vital for maintaining skin elasticity. This can lead to a more youthful appearance and reduced signs of aging.
- Soothing Effects for Sunburned Skin: In the unfortunate event of a sunburn, avocado oil can come to the rescue. Its moisturizing and anti-inflammatory properties help to soothe and heal sun-damaged skin.

How to Use Avocado Oil for Tanning
To make the most of avocado oil’s tanning benefits, follow these steps:
- Prepare Your Skin: Exfoliate your skin gently before tanning to remove dead cells and ensure an even application of avocado oil.
- Apply Avocado Oil: Pour a small amount of avocado oil onto your palm and rub it between your hands to warm it up. Apply it to your skin in gentle, circular motions.
- Even Application: Ensure that you apply avocado oil evenly to all exposed areas of your body, including your face. This will help you achieve a seamless, natural-looking tan.
- Sun Exposure: Find a comfortable spot under the sun and allow your skin to absorb the UV rays. Remember to follow sun safety practices, such as wearing sunscreen and limiting your exposure during peak hours.
- Reapplication: Reapply avocado oil every couple of hours, especially if you’ve been swimming or sweating, to maintain the moisturizing and tanning effects.
Tips for Using Avocado Oil for Tanning
Tip | Description |
---|---|
Prepare Your Skin | Exfoliate gently before tanning to remove dead cells and ensure an even application of avocado oil |
Apply Avocado Oil | Warm up a small amount of oil and apply it in gentle, circular motions |
Ensure Even Coverage | Apply avocado oil evenly to all exposed areas, including the face |
Sun Exposure | Find a comfortable spot under the sun and allow your skin to absorb the UV rays |
Reapplication | Reapply avocado oil every couple of hours, especially after swimming or sweating |
Avocado Oil vs. Other Tanning Products
Avocado oil stands out from commercial tanning lotions and sprays due to its natural properties:
- Natural vs. Synthetic: Avocado oil is a natural alternative to synthetic tanning products, which often contain harsh chemicals. By using avocado oil, you can avoid potential skin irritations and allergies.
- Cost-Effectiveness and Eco-Friendliness: Avocado oil is a cost-effective option for tanning, as a little goes a long way. Additionally, it is eco-friendly and sustainable, making it a greener choice for both your skin and the environment.
Avocado Oil vs. Commercial Tanning Products
Comparison | Avocado Oil | Commercial Tanning Products |
---|---|---|
Natural | Derived from avocados, a natural and healthy source | Often contain synthetic chemicals and preservatives |
Cost-Effective | Requires a small amount for application | Can be more expensive and may require more product |
Eco-Friendly | Sustainable and environmentally friendly | May contain ingredients harmful to the environment |
Skin Friendliness | Gentle on the skin, suitable for various skin types | Some products may cause skin irritation or allergies |
Safety and Precautions
While avocado oil is generally safe for most individuals, it’s essential to be aware of potential risks and take necessary precautions:
- Patch Testing: Before using avocado oil for tanning, perform a patch test on a small area of your skin to check for any allergic reactions.
- Sun Protection Measures: Although avocado oil offers some natural sun protection, it’s crucial to complement it with other sun safety practices. Wear protective clothing, use sunscreen, and limit your sun exposure during peak hours.
- Consultation with a Dermatologist: If you have sensitive skin or any underlying skin conditions, it’s advisable to consult with a dermatologist before using avocado oil for tanning.
Benefits of Avocado Oil for the Skin
Below is a table highlighting the various benefits of avocado oil for the skin:
Benefits | Description |
---|---|
Moisturizing and Nourishing | Avocado oil is a rich moisturizer that deeply hydrates the skin, leaving it soft and supple. |
Antioxidant Protection | The antioxidants in avocado oil help combat free radicals and protect the skin from damage. |
Enhances Collagen Production | Avocado oil supports collagen synthesis, promoting skin elasticity and reducing signs of aging. |
Soothes Irritated and Inflamed Skin | The anti-inflammatory properties of avocado oil help calm and soothe skin conditions such as eczema and psoriasis. |
Improves Skin Tone and Texture | Regular use of avocado oil can improve skin tone, texture, and overall complexion. |
Helps Heal Wounds and Scars | Avocado oil possesses wound-healing properties and can aid in the reduction of scars and marks. |
Protects Against Sun Damage | The natural sun protection properties of avocado oil help shield the skin from harmful UV rays. |
Note: Avocado oil offers numerous benefits for the skin, but individual results may vary. It’s always recommended to perform a patch test and consult with a dermatologist before incorporating new products into your skincare routine.

Best Natural Tanning Oils to Protect Your Skin and Give It a Glow
Here is a table showcasing some of the best natural tanning oils that can help protect your skin while giving it a healthy glow:
Natural Tanning Oil | Key Benefits | Recommended Skin Types |
---|---|---|
Avocado Oil | Moisturizes, nourishes, and enhances the tanning process | All skin types, especially dry or sensitive |
Coconut Oil | Hydrates, softens, and promotes an even tan | All skin types |
Olive Oil | Provides antioxidants and helps maintain skin elasticity | All skin types |
Jojoba Oil | Moisturizes, soothes, and helps prolong the tan | All skin types |
Carrot Seed Oil | Enhances the appearance of the tan and provides SPF | All skin types |
Raspberry Seed Oil | Natural SPF protection and antioxidants | All skin types, especially sensitive |
Sunflower Seed Oil | Moisturizes, nourishes, and promotes an even tan | All skin types |
Walnut Oil | Adds a bronzing effect and promotes a deeper tan | All skin types, fair to medium skin tones |
Aloe Vera Gel | Soothes, hydrates, and helps maintain a healthy tan | All skin types |
Note: It’s essential to remember that natural tanning oils may provide minimal sun protection and should not be used as a substitute for sunscreen. Always practice safe sun habits, including wearing appropriate SPF and limiting sun exposure during peak hours.
Frequently Asked Questions
Can avocado oil protect against sunburn?
Avocado oil provides some natural sun protection, but it is not a substitute for sunscreen. It can offer additional hydration and soothing effects for sunburned skin.
Can avocado oil be used on all skin types?
Yes, avocado oil is suitable for all skin types. However, individuals with oily or acne-prone skin may want to use it sparingly and monitor their skin’s reaction.
Is avocado oil safe for use during pregnancy?
Avocado oil is generally considered safe for use during pregnancy. However, it’s always a good idea to consult with your healthcare provider before using any new products during this time.
How long does it take to see results with avocado oil for tanning?
The time it takes to see results may vary depending on individual factors such as skin type and sun exposure. Generally, consistent use of avocado oil over several tanning sessions will lead to gradual and noticeable results.
Can avocado oil be combined with other natural tanning oils?
Yes, avocado oil can be combined with other natural tanning oils like coconut oil or olive oil to enhance their benefits and create a customized tanning blend.
Does avocado oil help you tan?
Yes, avocado oil can help you tan. Avocado oil contains beneficial properties that enhance the tanning process. It has a high concentration of vitamins and antioxidants, such as vitamin E and beta-carotene, which promote the absorption of UV rays into the skin. This can lead to a deeper and more long-lasting tan compared to tanning without any oil. Avocado oil also moisturizes and nourishes the skin, making it softer and more receptive to the tanning process.
What oil makes you tan faster?
While there is no specific oil that can magically make you tan faster, certain oils can help enhance the tanning process. Oils that are rich in vitamins and antioxidants, such as avocado oil, carrot seed oil, and coconut oil, can promote a more efficient absorption of UV rays into the skin, resulting in a quicker tan. However, it’s important to note that the speed of tanning is influenced by various factors including skin type, sun exposure, and individual melanin production.
Read More About Home Remedies for Fungal Rashes.
What oils make you tan better?
Several oils can contribute to a better and more even tan. In addition to avocado oil, oils like coconut oil, olive oil, and almond oil are known for their skin-nourishing properties and ability to moisturize the skin. These oils can help keep the skin hydrated, which is important for achieving an even tan. They also contain natural antioxidants that protect the skin from damage caused by UV rays, allowing for a healthier and more vibrant tan.
Read More About Home Remedies for Pimple on Head.
What oil makes you tan darker?
While no oil can specifically make you tan darker, some oils may enhance the appearance of your tan. Oils that have a natural tint or slight bronzing effect, such as argan oil, jojoba oil, and walnut oil, can create an illusion of a darker tan by adding a subtle, temporary color to the skin. These oils can help intensify the hue of your natural tan, making it appear deeper and more pronounced. However, it’s important to note that the actual darkness of your tan is primarily determined by your skin’s melanin production and sun exposure.
Read More About Carrots for Weight Loss.
Conclusion
Avocado oil is a remarkable natural tanning oil that can help you achieve a beautiful, nourished glow. With its moisturizing properties, antioxidant protection, and ability to enhance the tanning process, avocado oil is a valuable addition to your skincare routine. Embrace the power of nature and enjoy the benefits of avocado oil for a natural, healthy tan.
Remember, always prioritize sun safety and consult with a dermatologist if you have any concerns or specific skin conditions. Happy tanning!
-
Beauty Tips2 months ago
10 Surprising Health Benefits of Coconut Oil You Need to Know
-
Women Tips2 months ago
Are You a People-Pleaser? The Signs and How to Overcome It
-
Women Tips4 months ago
Coffee Maker Clean With Vinegar: How?
-
Family Tips2 months ago
The Best Dog for Family: A Comprehensive Guide
-
Beauty Tips3 months ago
What Is Balayage: Your Ultimate Guide Is Here
-
Zodiac Sign2 months ago
Unlocking the Zodiac: The Best Sign Matches for Every Sun Sign
-
Dreams Interpretation3 months ago
The Meaning of Teeth Falling Out in a Dream: Exploring the Symbolism
-
Diet Tips3 months ago
What Vitamins C Is Good For?