Beauty Tips
Does Acrylic Nails Hurt? Your Complete Guide

Here is your complete guide to does acrylic nails hurt
Introduction to Does Acrylic Nails Hurt
Nail care and maintenance have become an essential part of many people’s beauty routines. Among the various nail enhancement options available, acrylic nails have gained popularity for their durability and versatility. However, a common concern among those considering acrylic nails is whether they hurt or cause discomfort during the application process or while wearing them. In this article, we will delve into the world of acrylic nails, debunk common myths, and provide tips for a pain-free experience. So, if you’re curious about whether acrylic nails are painful, keep reading to learn the truth! Here is your complete guide to does acrylic nails hurt. So let’s start by explaining “does acrylic nails hurt“.
Understanding Acrylic Nails
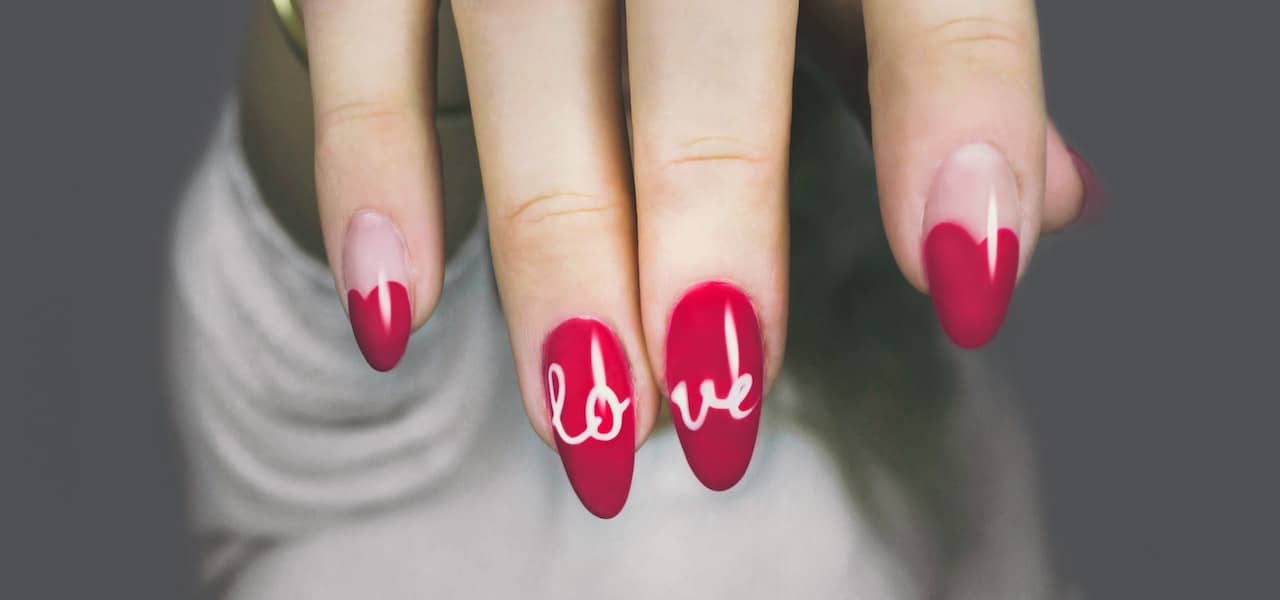
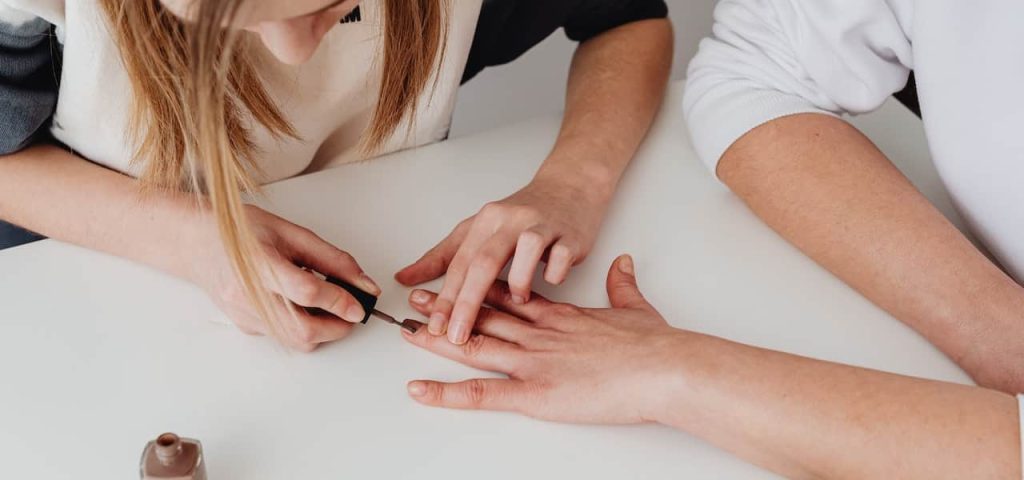
Acrylic nails are artificial nails that are created by combining a liquid monomer with a powdered polymer. The mixture forms a soft dough-like consistency that can be shaped into the desired nail shape and length before hardening when exposed to air. Acrylic nails are applied by a qualified nail technician who uses a brush to apply the mixture onto the natural nails or nail tips, creating a strong and durable extension. The nails are then filed, shaped, and polished to achieve the desired look.
Acrylic nails offer several benefits, which contribute to their popularity. They are known for their durability and resistance to chipping, making them a long-lasting option for those seeking to maintain flawless nails. They are also versatile, allowing for various shapes, lengths, and designs, and can be customized to suit individual preferences. Acrylic nails are commonly used for nail extensions, overlays, and even nail art, providing endless possibilities for creative expression.
Debunking Myths About Acrylic Nails
Despite their popularity, acrylic nails have been associated with some myths that may deter people from trying them. Let’s explore and debunk these common myths:
Myth: Acrylic nails are painful to apply
One of the most prevalent myths about acrylic nails is that the application process is painful. However, the truth is that the application of acrylic nails should not be painful if done correctly by a qualified nail technician. The process usually involves cleaning the natural nails, applying a primer to improve adhesion, and then carefully applying the acrylic mixture onto the nails or nail tips. While some individuals may experience slight discomfort from the strong odor of the products used or the sensation of the wet mixture on their nails, it should not be painful.
It’s essential to choose a reputable nail salon and a qualified nail technician who is trained and experienced in acrylic nail application. A skilled technician will take proper care in applying the acrylic mixture, ensuring that it does not come into contact with the cuticles or skin, which can cause discomfort or pain. Additionally, communicating any preferences or concerns with the nail technician beforehand can help them tailor the application process to your comfort level.
Myth: Acrylic nails cause discomfort and pain
Another myth about acrylic nails is that they can cause discomfort and pain after the application process. While it’s true that some individuals may experience discomfort or pain while wearing acrylic nails, it is often due to improper maintenance, hygiene, or other avoidable factors. When acrylic nails are applied and maintained correctly, they should not cause discomfort or pain.
One common reason for discomfort is when the nails are too long or too thick, putting excessive pressure on the natural nails and causing discomfort or pain. It’s important to communicate your preferences and concerns with the nail technician during the application process to ensure that the length and thickness of the nails are comfortable for you. Regularly filing and shaping the nails as they grow can also help prevent discomfort.
Improper filling or maintenance of acrylic nails can also cause discomfort or pain. If the nails are not filled or maintained properly, the acrylic may lift or separate from the natural nails, causing discomfort or even pain. It’s essential to follow proper maintenance routines, such as keeping the nails clean and dry, avoiding excessive exposure to water, and avoiding using the nails to open objects or perform other strenuous activities that can cause stress on the nails.
Additionally, some individuals may experience sensitivity or allergic reactions to the products used in acrylic nails, such as the liquid monomer or the acrylic powder. If you notice any signs of irritation, redness, or discomfort, it’s important to seek professional advice and have the nails removed to prevent further discomfort or potential complications.
Myth: Acrylic nails damage natural nails
There is a common misconception that acrylic nails damage natural nails. However, when applied and maintained correctly, acrylic nails should not cause any harm to the natural nails. In fact, acrylic nails can actually protect the natural nails from external elements and prevent them from breaking or splitting.
It’s important to choose a qualified nail technician who follows proper application and removal techniques to minimize the risk of damage to the natural nails. Proper removal is crucial, as forcefully peeling or ripping off acrylic nails can cause significant damage to the natural nails, leading to pain, discomfort, and even infection.

What Causes Nails to Feel Sore After Getting Acrylics?
There are several reasons why nails may feel sore after getting acrylics:
Improper Application
If the acrylic nails are applied too thick or too long, it can put pressure on the nail bed, causing soreness or discomfort.
Nail Bed Trauma
During the nail preparation process, which involves filing and buffing of the natural nails, there may be some trauma to the nail bed, leading to soreness.
Allergic Reaction
Some individuals may develop an allergic reaction to the chemicals used in acrylic nails, such as the liquid monomer or powder polymer, which can cause soreness or discomfort.
Inflammation
The application of acrylic nails can sometimes cause inflammation and irritation of the nail bed, resulting in soreness.
How to Prevent Nail Soreness
To prevent nail soreness after getting acrylics, consider the following tips:
Choose a Qualified Nail Technician
Make sure to choose a qualified and experienced nail technician who follows proper application techniques to avoid excessive thickness or length, which can cause pressure on the nail bed.
Communicate Any Discomfort
During the application process, if you experience any discomfort or soreness, communicate with your nail technician immediately to address the issue.
Proper Nail Bed Preparation
Ensure that the natural nails are properly filed and buffed during the preparation process to minimize trauma to the nail bed.
Quality Products
Use high-quality acrylic products that are safe and hypoallergenic to minimize the risk of allergic reactions.
Follow Proper Maintenance
Follow a proper maintenance routine, including regular fills and avoiding harsh chemicals or excessive use of nails, to prevent any damage or soreness.
Is There a Similar, Yet Less Painful Alternative to Acrylics?
Yes, there are alternative options to acrylic nails that may be less painful for some individuals:
- Soft Gel Nails: Soft gel nails are made from a flexible gel that is cured under UV or LED light. They tend to be more flexible and natural-looking compared to acrylic nails and may cause less discomfort or soreness.
- Dip Powder Nails: Dip powder nails involve applying a base coat, dipping the nails in colored powder, and then sealing with a top coat. This process avoids the use of liquid monomer and may be less irritating for some individuals.
- Press-On Nails: Press-on nails are pre-made artificial nails that can be applied and removed at home. They do not require any liquid monomer or UV/LED curing and may be a less painful alternative for those who are sensitive to chemicals or have a low pain tolerance.
Tips for a Pain-Free Acrylic Nail Experience
To ensure a pain-free experience with acrylic nails, here are some helpful tips:
- Choose a reputable nail salon and a qualified nail technician who is experienced in acrylic nail application.
- Communicate your preferences, concerns, and comfort level with the nail technician during the application process, including the length and thickness of the nails.
- Follow proper maintenance routines, such as keeping the nails clean and dry, avoiding excessive exposure to water, and avoiding using the nails to perform strenuous activities.
- Regularly file and shape the nails as they grow to prevent discomfort from overly long or thick nails.
- Avoid forcefully peeling or ripping off acrylic nails, and always follow proper removal techniques by a qualified nail technician.
- If you notice any signs of irritation, redness, or discomfort, seek professional advice promptly to prevent further discomfort or potential complications.
Here’s a table outlining the top ten reasons why you may experience pain on the first day after getting acrylic nails
Rank | Reasons for Pain | Description |
---|---|---|
1 | Improper Nail Bed Preparation | Rough or improper filing and buffing of the natural nails during the preparation process can cause soreness or discomfort. |
2 | Excessive Nail Length | Acrylic nails that are too long can put pressure on the nail bed, leading to pain or soreness. |
3 | Thick Acrylic Application | Acrylic nails that are applied too thick can cause discomfort or pain due to the added pressure on the nails. |
4 | Allergic Reaction | Some individuals may develop an allergic reaction to the chemicals used in acrylic nails, such as the liquid monomer or powder polymer, leading to pain or discomfort. |
5 | Nail Bed Trauma | Rough handling or excessive force during the acrylic nail application process can cause trauma to the nail bed, resulting in soreness or pain. |
6 | Inflammation | The application of acrylic nails can sometimes cause inflammation and irritation of the nail bed, leading to pain or discomfort. |
7 | Sensitivity to Chemicals | Some people may have a higher sensitivity to the chemicals used in acrylic nails, leading to pain or discomfort upon application. |
8 | Pressure from Tight Nail Tips | If the nail tips used for acrylic nails are too tight, it can cause discomfort or pain on the first day after application. |
9 | Improper Curing | If the acrylic nails are not cured properly under the UV or LED lamp, it can result in incomplete curing and potential pain or discomfort. |
10 | Incorrect Nail Shape | Nails that are shaped too aggressively or incorrectly during the acrylic nail application process can cause pain or discomfort on the first day. |
FAQs
Is it Normal for Acrylic Nails to Hurt?
No, it is not normal for acrylic nails to cause pain when properly applied and maintained. Acrylic nails should feel comfortable and not cause any discomfort during or after the application process. If you experience pain or discomfort during the application of acrylic nails, it could be due to improper application techniques, such as using excessive pressure or improper nail preparation. In such cases, it’s important to communicate with your nail technician and address any discomfort immediately to ensure a proper and pain-free experience.
Read More About Should You Wear a Bra to Sleep?
Why Do My Nails Hurt After Acrylic?
If you experience discomfort or pain after getting acrylic nails, it could be due to several reasons. One common reason is that the nails were applied too thick or too long, causing pressure on the nail bed, which can result in pain or discomfort. Another reason could be that the nails were not properly filed and shaped, leading to sharp edges or uneven surfaces that can cause irritation or pain. Additionally, if the nails were applied using improper techniques or low-quality products, it can result in discomfort or pain. In such cases, it’s essential to address the issue with your nail technician and seek appropriate solutions to alleviate the discomfort.
Read More About How Long Do Acrylic Nails Last?
Do Acrylic Nails Hurt to Take Off?
The process of removing acrylic nails should not be painful when done correctly by a qualified nail technician. However, if acrylic nails are forcefully peeled or ripped off, it can cause pain and damage to the natural nails. Proper removal of acrylic nails involves soaking them in acetone or using other professional-grade products to dissolve the acrylic, followed by gentle filing or lifting of the nails. If you experience pain or discomfort during the removal process, it may be a sign that the nails are not being removed properly, and it’s important to seek professional assistance to avoid any potential damage to the natural nails.
Read More About Makeup in the 70s.
Are Acrylics Worse for Your Nails Than Gel?
Both acrylic and gel nails have their pros and cons, and it’s subjective to determine which one is “worse” for your nails as it depends on various factors, including the application and maintenance techniques. However, there are some differences between the two.
Acrylic nails are made by combining a liquid monomer and a powder polymer, which creates a hard and durable layer on the nails when applied and cured. On the other hand, gel nails are created by applying a gel polish that is then cured under a UV or LED light to harden.
Read More About Hair and Makeup Trailers.
Conclusion
In conclusion, acrylic nails, when applied and maintained correctly, should not cause any pain or discomfort. The myths surrounding the pain associated with acrylic nails are often due to improper application, maintenance, or other avoidable factors. By choosing a reputable nail salon, communicating with the nail technician, and following proper maintenance routines, you can have a pain-free experience with acrylic nails.
Read More About Isolating Lashes.
Remember to prioritize the health and comfort of your natural nails by choosing a qualified nail technician, following proper maintenance routines, and seeking professional advice if you notice any signs of discomfort or irritation. With proper care and maintenance, you can enjoy the beauty and durability of acrylic nails without any pain or discomfort. So, go ahead and rock those stunning acrylic nails with confidence!
Read More About Volume Lash vs. Classic Lash.
Read More About Powerlifting Weight Classes for Women: Everything You Need to Know.
Beauty Tips
Black Dress with Black Gloves: Mastering the Chic Fusion

Here is your complete guide to black dress with black gloves
Introduction to Black Dress with Black Gloves
Black dress with black gloves is a timeless and elegant fashion choice that has been a staple in women’s wardrobes for decades. This classic combination exudes sophistication and style, making it perfect for a variety of occasions. Whether you’re attending a formal event, a cocktail party, or a night out on the town, a black dress with black gloves is sure to turn heads and make a lasting impression. In this article, we will explore the various styles, pairings, and accessories that can be used to enhance this iconic look.
The allure of the black dress with black gloves ensemble is undeniable. It’s not just a style choice; it’s a statement, a testament to refined taste and timeless sophistication. In this article, we delve into the historical significance, styling tips, celebrity influences, and much more surrounding this iconic fashion combination.
History and Evolution
The origins of this ensemble can be traced back through cultural and historical influences. From the elegance of Victorian fashion to iconic Hollywood moments, the black dress and gloves have evolved, maintaining their allure through generations.
Styling Tips for the Perfect Ensemble
- Choosing the Right Pairing: The key lies in harmonizing the dress and glove styles, lengths, and textures.
- Accessorizing with Finesse: Complementing this ensemble with shoes, jewelry, and handbags to accentuate the elegance.
- Versatility for All Seasons: Adapting this ensemble to different seasons and occasions effortlessly.
The Elegance of Black Dresses with Black Gloves
The sleek and sophisticated look of black dresses with black gloves has been a fashion favorite for centuries. This classic combination adds a touch of class to any outfit and is perfect for a variety of occasions. Whether you’re attending a formal event, a cocktail party, or a night out on the town, a black dress with black gloves is sure to turn heads and make a lasting impression.
Different Styles of Black Dresses with Black Gloves
When it comes to black dresses with black gloves, there are a variety of styles to choose from. From mini to maxi, silk to velvet, and fitted to flowy, the options are endless. Here are some of the most popular styles of black dresses with black gloves:
Style | Description |
---|---|
Mini | Short and flirty, perfect for a night out on the town |
Maxi | Long and elegant, ideal for a formal event or a black-tie affair |
Silk | Luxurious and sophisticated, perfect for a special occasion |
Velvet | Rich and opulent, great for a winter event or a holiday party |
Fitted | Sleek and sexy, perfect for a night out on the town |
Flowy | Romantic and ethereal, ideal for a summer wedding or a garden party |
Pairing Black Dresses with Black Gloves
When it comes to pairing black dresses with black gloves, there are a few things to keep in mind. First, it’s important to choose the right pair of black gloves to complement your dress. Whether you opt for long opera gloves or short wrist-length gloves, the key is to find a pair that fits well and complements your dress. Additionally, it’s important to consider the impact of different glove styles on the overall look. For example, long opera gloves can add a touch of drama to a simple black dress, while short wrist-length gloves can create a more casual and relaxed look.
Accessorizing Black Dresses with Black Gloves
In addition to the gloves, there are a variety of accessories that can be used to enhance a black dress with black gloves. From statement handbags to layered jewelry, the options are endless. Here are some of the most popular accessories for black dresses with black gloves:
Accessory | Description |
---|---|
Statement Handbag | A bold and eye-catching handbag can add a pop of color to a black dress |
Layered Jewelry | From necklaces to bracelets, layered jewelry can add a touch of glamour |
Statement Belt | A wide patent belt can add some sex appeal to a plain black dress |
Scarf | A silk scarf can add a touch of elegance to a black dress with black gloves |
Hat | A chic hat can add a touch of old Hollywood glamour to a black dress |
Black Dresses with Black Gloves for Different Occasions
Black dresses with black gloves are perfect for a variety of occasions. From formal events to casual outings, the classic combination is sure to turn heads and make a lasting impression. Here are some of the most popular occasions for black dresses with black gloves:
Occasion | Description |
---|---|
Formal Event | A black-tie affair or a gala event is the perfect occasion for a black dress |
Cocktail Party | A night out on the town or a cocktail party is the perfect occasion for a black dress with black gloves |
Casual Outing | Brunch with friends or a day at the museum is the perfect occasion for a black dress with black gloves |
Special Occasion | A wedding or a holiday party is the perfect occasion for a black dress with black gloves |
Celebrities and Red Carpet Glamour
The red carpet has been a stage for this ensemble’s elegance, embraced by icons and celebrities who redefine fashion trends and set the tone for elegance in the spotlight.
Impact on Runways and Fashion Shows
From high fashion runways to designer showcases, this ensemble has left an indelible mark on the world of couture, inspiring collections and influencing the runway narratives.
Exploring Fabric and Texture Choices
- Varied Fabrics: From silk’s luxurious sheen to velvet’s rich texture, choices that define elegance.
- Textures and Patterns: Enhancing the ensemble with intricate details and patterns.
Expressing Personal Style
Customizations and personal touches infuse individualistic interpretations, allowing individuals to embrace this ensemble in a way that reflects their unique style.
Fashion Icons and Inspirations
Icons throughout history have effortlessly carried the elegance of the black dress and gloves, inspiring generations and leaving an indelible mark on fashion’s evolution.
Dress and Glove Pairing Guide
A comprehensive guide showcasing various dress and glove pairings for different occasions.
Dress Style | Glove Length | Texture |
---|---|---|
Little Black Dress | Elbow Length | Satin |
Gown | Opera Length | Lace |
A-line Dress | Wrist Length | Leather |
Seasonal Adaptations and Accessories
Highlighting accessory choices and adaptations for different seasons.
Season | Accessories |
---|---|
Summer | Strappy Heels, Clutch |
Winter | Fur Stole, Boots |
Fall | Scarves, Tights |
Celebrity Influences
Notable celebrities and their iconic moments in the black dress and gloves ensemble.
Celebrity | Iconic Moment |
---|---|
Audrey Hepburn | Breakfast at Tiffany’s |
Rihanna | Met Gala Appearance |
Grace Kelly | Red Carpet Perfection |
Fashion Icon Inspirations
Influential fashion icons and their lasting impact on this ensemble.
Icon | Contribution to Fashion |
---|---|
Coco Chanel | Introduction of the LBD |
Jackie Kennedy | Elegance in Political Scene |
Marilyn Monroe | Sensual Elegance |
Fabric and Texture Varieties
Different fabric and texture choices to enhance the elegance of the ensemble.
Fabric | Texture |
---|---|
Silk | Smooth and Lustrous |
Velvet | Rich and Luxurious |
Lace | Delicate and Intricate |
FAQs: Insights from ‘People Also Ask’ Section
How to Choose the Right Length and Style of Gloves?
Select glove length based on the dress style and occasion. Opera-length for formal gowns and wrist-length for casual dresses.
Read Also: RealHer Metallic Bronze Eyeliner.
Can Black Gloves Be Paired with Any Black Dress?
Absolutely! The key is to match textures and styles for a cohesive look.
Read Also: Eyebrows Redhead.
What Shoes Complement a Black Dress with Black Gloves?
For a formal look, opt for elegant heels, while boots or flats can add a modern twist.
Read Also: Shooting Star Makeup.
Are There Cultural Considerations in Wearing this Ensemble?
While the ensemble carries universal elegance, cultural norms may influence accessories or glove styles.
Read Also: Is Shea Butter Vegan.
Tips for Maintaining the Elegance Throughout the Day/Night?
Choose comfortable glove fabrics, and consider the occasion when deciding on dress length to ensure ease of movement.
Read Also: Candy Made with Stevia.
Conclusion
In conclusion, black dresses with black gloves are a timeless and elegant fashion choice that is perfect for a variety of occasions. Whether you’re attending a formal event, a cocktail party, or a night out on the town, a black dress with black gloves is sure to turn heads and make a lasting impression. With the right pair of gloves and the perfect accessories, you can create a look that is both sophisticated and stylish. So why not embrace this classic combination and rock a black dress with black gloves at your next event?
Read Also: All Natural Room Spray.
Beauty Tips
Is Shea Butter Vegan? A Comprehensive Guide

Here is your complete guide to is shea butter vegan
Introduction to Is Shea Butter Vegan
Shea butter is a hugely popular ingredient in the cosmetics industry. As it is plant-based, it’s also a staple in vegan cosmetics. In this article, we will explore the question, “Is shea butter vegan?” We will delve into the origins of shea butter, its use in cosmetics, and the controversy surrounding its vegan status. We will also discuss the relationship between shea butter and the brand Shea Moisture, and provide a detailed overview of the brand’s offerings. Additionally, we will address common FAQs and provide a list of LSI/NLP keywords related to the topic.
Shea butter is a type of plant-based fat that is extracted from the nuts of the Shea Tree, which is native to West Africa. At room temperature, this fat is solid and is full of fatty acids, vitamins, and minerals. Because of its texture and nutritional profile, shea butter is a popular ingredient for use in medicinal and cosmetic applications, especially lotions and ointments. But is shea butter vegan? In this article, we will explore the vegan status of shea butter and its use in the cosmetics industry.
What is Shea Butter?
Shea butter is a fatty substance extracted from the nuts of the African shea tree, Vitellaria paradoxa, that has several useful properties in skincare and similar applications. It is a popular ingredient in lotions, moisturizers, and other cosmetics due to its emollient properties and ability to help with redness and itching. Shea butter is also known for its high content of fatty acids, vitamins, and minerals, making it a valuable ingredient in skincare products.
Is Shea Butter Vegan?
Yes, it is 100% vegan-friendly. It is simply a fatty substance extracted from the nuts of the African shea tree, and it does not contain any animal-derived ingredients. Therefore, it is suitable for use in vegan cosmetics and skincare products.
Shea Moisture and Veganism
Shea Moisture is a popular brand that offers a range of natural and organic beauty products. While some of their products are vegan-friendly, the brand cannot claim to be entirely vegan, as some of their products contain ingredients derived from animals. It is important to carefully check the ingredients list of Shea Moisture products to determine their vegan status.
Benefits of Shea Butter for Vegans
Shea butter offers a range of benefits for vegans, including its moisturizing and emollient properties, as well as its high content of fatty acids, vitamins, and minerals. Additionally, it is a sustainable and ethical ingredient, making it a popular choice for those who follow a vegan lifestyle.
Alternatives to Shea Butter
While it is a popular ingredient in vegan cosmetics, there are also a range of alternative ingredients that can be used to achieve similar effects. Some common alternatives to shea butter include cocoa butter, mango butter, and avocado butter.
Origins and Production Methods
Shea butter, in its raw form, is inherently plant-based. Extracted from the nuts of the shea tree, the process involves crushing, roasting, grinding, and finally, extracting the oil. The traditional methods predominantly involve manual labor, ensuring its natural essence remains intact.
Ethical Considerations and Animal Welfare
While the primary extraction process is plant-based, concerns may arise regarding the involvement of animals in harvesting or processing. However, the traditional methods of shea butter extraction largely exclude animal exploitation.
Verification Processes for Vegan Certification
To ascertain a product’s vegan status, certifications play a pivotal role. Several organizations provide vegan certifications that scrutinize the entire production chain to ensure no animal-derived ingredients or practices are involved.
Shea Butter Variants and Their Vegan Status
The distinction between unrefined and refined shea butter leads to varied considerations regarding their vegan status.
Unrefined vs. Refined Shea Butter
- Unrefined Shea Butter: Often considered more natural, this variant undergoes minimal processing, retaining its characteristic nutty aroma and yellow hue. Its vegan status remains intact due to the absence of additional additives.
- Refined Shea Butter: The refining process involves filtration, deodorization, and bleaching to eliminate impurities and scent. While the core ingredient remains vegan, additives during refining may raise concerns about its vegan status.
Potential Additives and Ingredients
Some shea butter variants might contain additives or preservatives, potentially sourced from animal by-products. These additional components can compromise its vegan label.
Additives | Potential Sources | Vegan Status |
Vitamin E | Synthetic or derived from soybean oil | Varies based on source |
Fragrances | Synthetic or animal-derived | Check product labeling |
Preservatives | Synthetic or derived from various sources | Depends on specific ingredients |
Read Also: How Long Does Grease Makeup Take to Dry.
FAQ
Is raw shea butter vegan?
Yes, raw shea butter is typically vegan as it undergoes minimal processing, ensuring it retains its natural, plant-based essence.
Read Also: Camping Hairstyles for Curly Hair.
Does shea butter contain animal products?
In its pure form, it is derived solely from the nuts of the shea tree, making it inherently vegan. However, additives or refining processes might introduce non-vegan elements.
Read Also: Maybelline Free Sample.
Can vegans use shea butter?
Yes, many vegans opt for certified vegan shea butter that undergoes stringent assessments to confirm its adherence to vegan principles.
Read Also: RealHer Metallic Bronze Eyeliner.
How to identify vegan shea butter?
Look for products carrying recognized vegan certifications or those explicitly labeled as vegan-friendly to ensure they meet ethical standards.
Read Also: Eyebrows Redhead.
Are all shea butter products cruelty-free?
Not necessarily. While shea butter itself may be vegan-friendly, some products might involve animal testing or include non-vegan additives.
Read Also: Candy Made with Stevia.
Conclusion
In the pursuit of ethical skincare choices, determining the vegan status of shea butter is pivotal. While raw shea butter aligns with vegan principles, nuances exist within refined variants and associated additives, urging consumers to scrutinize product labels and certifications. Embracing certified vegan shea butter encapsulates the essence of ethical beauty practices, nourishing skin while honoring ethical values.
Read Also: Shooting Star Makeup.
Beauty Tips
Eyebrows Redhead: Crafting Your Signature Look

Here is your complete guide to eyebrows redhead
Introduction to Eyebrows Redhead
When it comes to embracing the unique beauty of red hair, attention to eyebrows holds significant importance. The distinct hue of red hair often brings about specific challenges and misconceptions regarding eyebrow styling. Understanding how to enhance and complement red hair through proper eyebrow care is crucial for individuals embracing this stunning hair color.
Redheads, often blessed with fair skin and freckles, possess a genetic rarity that deserves specialized attention when it comes to eyebrow maintenance and styling. Let’s delve into the world of eyebrows for redheads, exploring the best practices, tips, and historical perspectives to celebrate this striking combination of red hair and beautifully shaped eyebrows.
Understanding Red Hair and Eyebrows
Red hair owes its unique appearance to a genetic mutation resulting in higher levels of a pigment called pheomelanin. This pigment is responsible for the distinctive reddish hues in hair, affecting not just the scalp but also body hair, including eyebrows. The characteristics of red hair influence the color and appearance of eyebrows, often resulting in lighter shades.
Genetics play a significant role in determining the color of eyebrows for redheads. While some may have naturally matching eyebrow color, others might experience variations, leading to different shades that need attention when considering eyebrow styling.
Eyebrow Styling for Redheads
Matching Eyebrow Shades to Red Hair
One of the fundamental aspects of eyebrow styling for redheads is matching the eyebrow shade to the tone of red hair. Here’s a quick guide:
- Copper Red Hair: Opt for warmer shades of brown for eyebrows.
- Auburn Red Hair: Light brown or soft shades of red often complement this hair color best.
- Bright Red Hair: Consider using soft blondes or light browns to balance the boldness of the hair color.
Techniques for Enhancing Redhead Eyebrows
- Filling: Use eyebrow pencils or powders to fill in sparse areas, ensuring a natural look.
- Shaping: Seek professional guidance for shaping eyebrows that complement your facial features and red hair.
- Tinting: Consider eyebrow tinting to achieve a more harmonious look between hair and eyebrows.
Tools and Products for Maintenance
Product | Description |
---|---|
Brow Pencil | Precise application for filling sparse areas |
Brow Gel | Sets eyebrows in place, adds definition |
Eyebrow Tint Kit | For those opting for tinting services |
Spoolie Brush | Blends products for a natural finish |
Precision Tweezers | For at-home maintenance and shaping |
Eyebrow Shaping Techniques for Redheads
Technique | Method | Benefits |
---|---|---|
Waxing | Removes hair from the eyebrows, providing a clean and defined shape | Fast, long-lasting results |
Threading | Removes hair by inserting a thin thread into the eyebrow hairs, creating a precise and detailed shape | Affordable, suitable for fine hairs |
Microblading | A semi-permanent treatment that involves tattooing individual hair-like strokes to create a natural-looking shape | Lasts 1-3 years, low maintenance |
Top 10 Eyebrow Styling Tips for Redheads
- Know Your Red: Understand the undertones of your red hair to select the most suitable eyebrow shades.
- Seek Professional Help: Consult a professional eyebrow stylist for personalized advice.
- Natural Look: Embrace a natural-looking eyebrow shape and avoid overly dramatic styles.
- Regular Maintenance: Maintain regular appointments for shaping and grooming eyebrows.
- Use the Right Products: Invest in quality products suitable for redhead eyebrows.
- Brush and Blend: Use a spoolie brush to blend products for a seamless finish.
- Avoid Over-Plucking: Maintain the natural shape of your eyebrows and avoid over-plucking.
- Consider Tinting: Explore eyebrow tinting for a more harmonious look with your red hair.
- Practice Patience: Growing out eyebrows might take time; be patient during the process.
- Confidence is Key: Embrace your natural beauty and carry your redhead eyebrows with confidence.
Redhead Eyebrow Trends Through History
Historically, redhead beauty standards have influenced eyebrow trends. From the Renaissance period to the present day, trends in eyebrow styling have evolved, with redheads often setting unique beauty standards. The emphasis on natural beauty in recent years has seen a resurgence in embracing natural eyebrow shapes and colors among redheads.
Eyebrow Maintenance Schedule for Redheads
Task | Frequency | Tips |
---|---|---|
Plucking/Shaping | Weekly | Use the right tools, such as tweezers or waxing strips |
Trimming | Monthly | Keep an eye on eyebrow growth and adjust as needed |
Tinting/Dyeing | Every 2-3 months | Choose a suitable eyebrow dye or tint for your hair color |
Enhancing Redhead Eyebrows: Step-by-Step Guide
When it comes to perfecting the art of styling eyebrows for redheads, a step-by-step approach can make all the difference. Let’s delve into a comprehensive guide designed specifically for individuals with red hair, ensuring perfectly groomed and flattering eyebrows that beautifully complement your natural fiery locks.
Step 1: Determine Your Red Hair Shade
Understanding the unique tone of your red hair is crucial in selecting the most suitable eyebrow shades that harmonize with your overall look.
Red Hair Shade | Recommended Eyebrow Shades |
---|---|
Copper Red | Warmer shades of brown |
Auburn Red | Light brown or soft red tones |
Bright Red | Soft blondes or light browns |
Step 2: Gather the Right Tools and Products
Having the appropriate tools and products ensures a seamless eyebrow grooming routine tailored for redheads.
Tool | Description |
---|---|
Brow Pencil | Precise application for filling sparse areas |
Brow Gel | Sets eyebrows in place, adds definition |
Eyebrow Tint Kit | For tinting services |
Spoolie Brush | Blends products for a natural finish |
Precision Tweezers | For at-home maintenance and shaping |
Step 3: Shaping and Filling Techniques
Shaping Your Redhead Eyebrows
- Seek professional guidance for shaping eyebrows that enhance your facial features and complement your red hair color.
Filling Sparse Areas
- Use an eyebrow pencil or powder in a shade close to your hair color to fill in any sparse areas for a natural look.
Step 4: Tinting for a Harmonious Look
Consider eyebrow tinting to achieve a more unified and balanced appearance between your red hair and eyebrows.
Step 5: Blending and Final Touches
Use a spoolie brush to blend products for a seamless finish and ensure your eyebrows look natural yet groomed.
This step-by-step guide caters specifically to the needs of redheads, assisting in choosing the right shades, utilizing appropriate tools, and mastering techniques for stunning eyebrow styling. Embrace your natural beauty and let your redhead eyebrows become a symbol of your individuality and charm.
FAQs About Redhead Eyebrows
Can redheads have different eyebrow colors naturally?
Yes, variations in eyebrow color among redheads are natural. While some might have eyebrows that match their hair color, others might have slightly different shades.
What eyebrow products work best for red hair?
Products like eyebrow pencils, gels, and tints in softer shades of brown or blonde are ideal for complementing red hair.
Read Also: How to Cover Tyndall Effect with Makeup.
How can I shape my eyebrows to complement my red hair?
Seek professional guidance to shape eyebrows that complement your facial features and the unique tone of your red hair.
Read Also: How Long Does Grease Makeup Take to Dry.
Is eyebrow tinting a good option for redheads?
Eyebrow tinting can be an excellent option for redheads to achieve a more harmonious look between their hair and eyebrows.
Read Also: Camping Hairstyles for Curly Hair.
Are there specific eyebrow styles that suit redheads better?
Natural-looking eyebrow styles that enhance the natural features without overpowering the face often suit redheads best.
Read Also: Maybelline Free Sample.
Conclusion
As we conclude this exploration into the world of eyebrows for redheads, it becomes evident that the unique combination of red hair and eyebrows deserves thoughtful attention and care. Understanding the nuances of red hair genetics, selecting suitable eyebrow shades, mastering eyebrow styling techniques, and embracing natural beauty trends are pivotal in enhancing the overall appearance of individuals with red hair.
Read Also: Candy Made with Stevia.
Remember, the key lies in celebrating the natural uniqueness of red hair and eyebrows. With the right techniques, products, and confidence, redheads can embrace their striking features and showcase their beauty to the world. Whether it’s matching eyebrow shades, following historical trends, or seeking personalized guidance, the journey to beautifully styled redhead eyebrows is an empowering and rewarding one.
Read Also: RealHer Metallic Bronze Eyeliner.
-
Beauty Tips10 months ago
What Is Balayage: Your Ultimate Guide Is Here
-
Dreams Interpretation9 months ago
The Meaning of Teeth Falling Out in a Dream: Exploring the Symbolism
-
Diet Tips9 months ago
What Vitamins C Is Good For? The Ultimate Guide
-
Uncategorized9 months ago
Understanding the Five Languages of Love: A Comprehensive Guide
-
Beauty Tips6 months ago
How to Make Clear Skin: Your Comprehensive Guide
-
Women Tips6 months ago
How Long Breast Augmentation Surgery Take? A Complete Guide
-
Beauty Tips6 months ago
Coconut Oil in Face Benefits: Unlocking the Secrets to Radiant Skin
-
Beauty Tips9 months ago
The Surprising Benefit to Coconut Oil: Your Complete Guide