Connect with us

Beauty Tips

Bright Nail Ideas for Summer: Get Inspired and Rock Your Style

Published

on

bright nail ideas for summer

Here is your complete guide to bright nail ideas for summer

Introduction To Bright Nail Ideas for Summer

Summer is the perfect time to let your creativity shine, and what better way to do it than through your nails? Bright nail ideas for summer are all about embracing vibrant colors, playful designs, and unique styles. Whether you’re lounging by the pool, attending beach parties, or simply enjoying the sunny weather, having eye-catching nails can elevate your summer look. In this article, we will explore the top bright nail ideas for summer that will make you stand out from the crowd. Get ready to unleash your inner nail artist and dive into the world of stunning summer manicures!

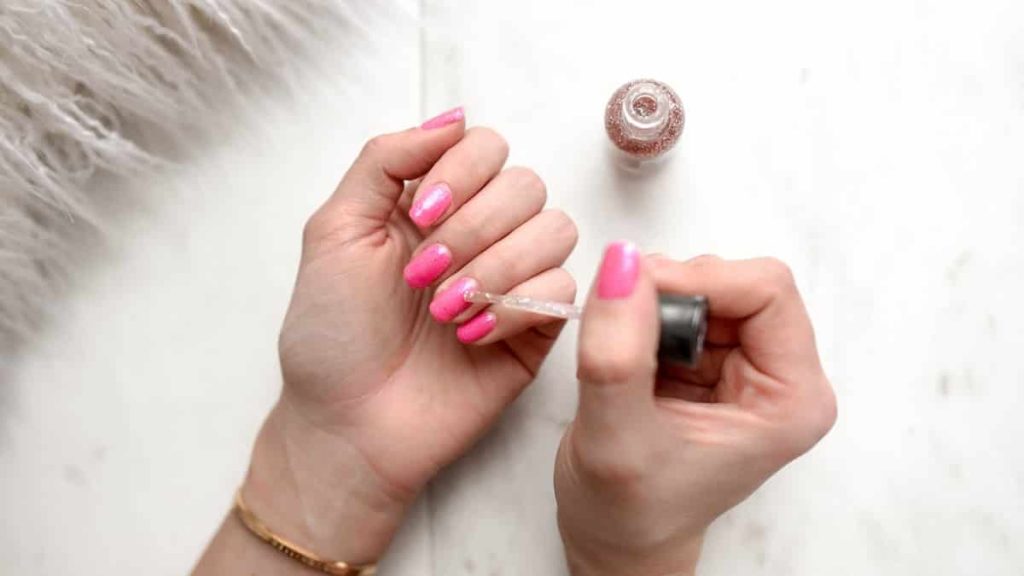
How to Apply Bright Nail Ideas for Summer: Step-by-Step Guide

Step 1: Prepare Your Nails

  • Start by removing any existing nail polish using a nail polish remover.
  • Trim and shape your nails to your desired length and style.
  • Gently push back your cuticles using a cuticle pusher or orange stick.

Step 2: Apply a Base Coat

  • Apply a thin layer of base coat to each nail. This helps to protect your nails and provides a smooth surface for the nail polish to adhere to.

Step 3: Choose Your Bright Nail Design

  • Decide on the specific bright nail idea you want to apply for the summer. It could be neon nail art, tropical-themed designs, or any other vibrant inspiration you prefer.

Step 4: Select Your Colors

  • Choose the bright nail polish colors that match your chosen design. Consider using a variety of shades to create a dynamic and eye-catching look.

Step 5: Apply the Base Color

  • Apply a coat of the base color to each nail. This will serve as the foundation for your design. Allow it to dry completely before proceeding.

Step 6: Create the Design

  • Use thin nail art brushes, dotting tools, or nail stamps to create your desired design. Follow the specific techniques and patterns associated with your chosen bright nail idea.

Step 7: Add Accents and Details

  • Enhance your design by adding accents and details such as rhinestones, glitter, or nail art decals. These extra touches can make your bright nail idea more intricate and appealing.

Step 8: Allow the Design to Dry

  • Give your nails ample time to dry completely. Patience is key to prevent smudging or ruining the design.

Step 9: Apply a Top Coat

  • Apply a layer of top coat to seal and protect your bright nail design. This will also provide a glossy finish and help extend the longevity of your manicure.

Step 10: Clean Up Any Excess

  • Use a small brush or cotton swab dipped in nail polish remover to clean up any stray nail polish around the cuticles for a clean and polished look.

By following these step-by-step instructions, you can easily apply bright nail ideas for summer and enjoy vibrant and stylish nails throughout the season. Remember to have fun and let your creativity shine!

Neon Delights: Embrace the Vibrancy

bright nail ideas for summer

When it comes to bright nail ideas for summer, neon colors take center stage. These eye-catching shades instantly add a playful and energetic vibe to your nails. Here are a few neon nail designs to consider:

  • Neon French Tips: Give the classic French manicure a modern twist by using neon colors for the tips.
  • Gradient Neon Nails: Create a stunning gradient effect by blending different neon shades from light to dark.
  • Neon Geometric Patterns: Experiment with bold geometric shapes and lines in neon colors for a striking look.

To achieve these designs, follow these simple steps:

  1. Start with a clear base coat to protect your nails.
  2. Apply a white polish as a base for the neon colors to pop.
  3. Use thin nail art brushes or striping tape to create the desired patterns.
  4. Apply the neon polishes carefully, allowing each layer to dry before moving on to the next.
  5. Finish with a glossy top coat for a polished and long-lasting look.

Tropical Paradise: Nails that Mimic the Tropics

Bring the tropical vibes to your fingertips with tropical-themed nail art. From palm trees and flamingos to pineapples and vibrant floral designs, the options are endless. Here are some ideas to inspire your tropical nail art:

Nail DesignDescription
Palm Tree ParadisePaint palm trees against a sunset backdrop for a tropical paradise feel.
Flamingo FrenzyAdd cute flamingos to your nails for a touch of whimsy and fun.
Pineapple PartyIncorporate pineapples into your design for a tropical twist.
Exotic Floral DelightEmbrace bold and colorful tropical flowers for a vibrant and joyful look.

To create your tropical-inspired manicure, follow these steps:

  1. Apply a clear base coat to protect your nails.
  2. Choose a tropical color palette, including shades of green, blue, yellow, and pink.
  3. Use thin nail art brushes or nail stamps to create the desired tropical designs.
  4. Add accents like glitter or rhinestones for extra sparkle and dimension.
  5. Seal your design with a glossy top coat for a long-lasting finish.
bright nail ideas for summer

Sun-Kissed Ombre: Gradual Color Transitions

Ombre nails are a popular choice for summer, allowing you to create a seamless transition of colors on your nails. To achieve a sun-kissed ombre look, follow these steps:

  1. Start with a clear base coat to protect your nails.
  2. Choose two or more complementary colors that evoke the feeling of summer, such as orange and pink or blue and purple.
  3. Apply the lightest color as the base and let it dry completely.
  4. Use a makeup sponge to create the ombre effect. Apply the two colors onto the sponge and gently dab it onto your nails, blending the colors together.
  5. Repeat the process, adding more layers to intensify the gradient effect.
  6. Finish with a glossy top coat to seal the design and add shine.
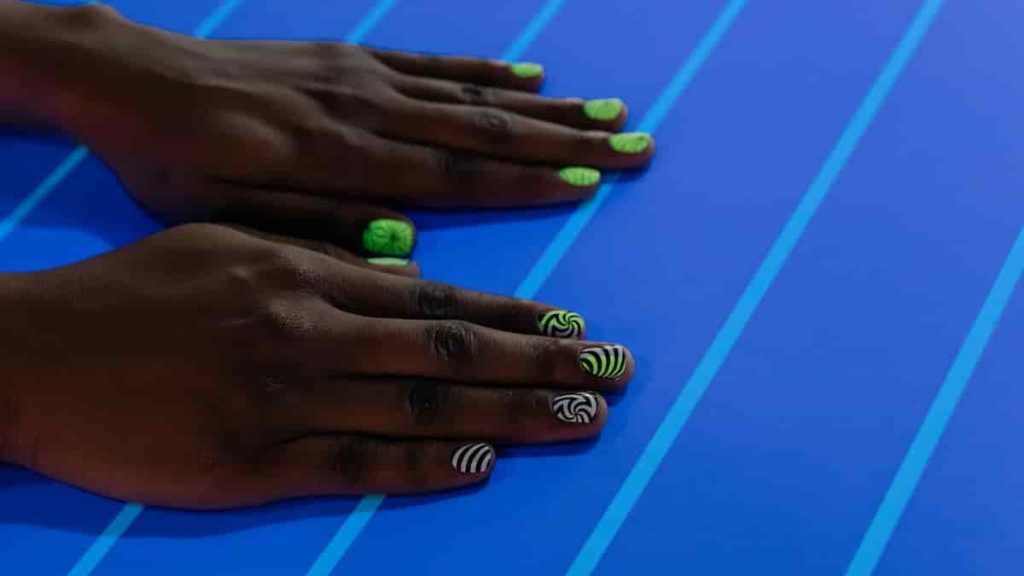
Fruit-Inspired Fun: Get Refreshing

Fruit-themed nail art is a delightful way to celebrate summer. Let’s explore some refreshing fruit-inspired nail designs:

Nail DesignDescription
Watermelon DelightPaint your nails with a watermelon-inspired pattern, complete with seeds and a juicy red and green design.
Lemonade TwistCreate a lemon-inspired manicure with yellow nails and lemon slice accents.
Strawberry FieldsEmbrace strawberries by incorporating the vibrant red hue and adding green leaves for a fresh look.
Orange ZestPaint your nails in a zesty orange color and add cute orange slices as accents.

To create your fruit-inspired nails, follow these simple steps:

  1. Apply a clear base coat to protect your nails.
  2. Choose colors that match the fruit you want to recreate.
  3. Use thin nail art brushes or nail stamps to create the desired fruit designs.
  4. Add small details like seeds, leaves, or slices to enhance the realism.
  5. Seal your design with a glossy top coat for a juicy and long-lasting finish.

Pastel Dreams: Soft and Subtle Shades

If you prefer a more subdued and elegant look, pastel nail colors are perfect for you. These soft and subtle shades are ideal for any occasion. Here are some pastel nail ideas for summer:

Nail DesignDescription
Delicate FloralsPaint delicate flowers in pastel hues for a feminine and romantic look.
Cloudy SkyCreate a dreamy look by blending shades of light blue and white, reminiscent of a sunny sky.
Lavender SerenityEmbrace the soothing vibes of lavender by painting your nails in this calming shade.
Minty FreshOpt for a refreshing mint green shade for a cool and breezy summer feel.

To achieve a pastel-inspired manicure, follow these steps:

  1. Apply a clear base coat to protect your nails.
  2. Choose a selection of pastel colors that complement each other.
  3. Paint each nail with your chosen pastel shade or create a gradient effect using multiple colors.
  4. Add delicate details like flowers or clouds using thin nail art brushes or stamps.
  5. Seal your design with a glossy top coat to enhance the pastel shades and increase durability.
bright nail ideas for summer

Tie-Dye Delight

Create a tie-dye effect on your nails with vibrant colors for a fun and bohemian-inspired look. Here’s how you can achieve it:

  1. Start with a white or light-colored base coat to make the colors pop.
  2. Choose a few bright nail polish colors of your choice.
  3. Apply small dots or patches of different colors randomly on each nail.
  4. Use a thin nail art brush or a toothpick to swirl and blend the colors together, creating a tie-dye effect.
  5. Allow the design to dry, and finish with a glossy top coat to seal and protect the design.

Colorful Stripes

Paint bold and colorful stripes on your nails for a playful and vibrant summer look. Follow these steps:

  1. Apply a base coat and let it dry.
  2. Choose a variety of bright nail polish colors.
  3. Use striping tape or thin nail art brushes to create straight and clean stripes on your nails.
  4. Apply each color between the stripes, allowing them to dry before moving on to the next one.
  5. Once the design is complete, carefully remove the striping tape, and finish with a top coat to enhance the colors and add shine.

Rainbow Gradient

Create a beautiful rainbow gradient effect on your nails using a range of bright colors. Here’s how you can achieve it:

  1. Apply a white or light-colored base coat.
  2. Choose a set of vibrant nail polish colors, preferably in rainbow order (red, orange, yellow, green, blue, and purple).
  3. Starting with the red color, apply a small amount near the cuticle area of the nail.
  4. Use a makeup sponge or a small sponge applicator to gently dab and blend the colors together, creating a gradient effect from one color to the next.
  5. Repeat this process with each color, ensuring to blend them seamlessly.
  6. Clean up any excess polish around the cuticles using a brush dipped in nail polish remover.
  7. Apply a top coat to smooth out the gradient and protect the design.

Pop Art Inspired

Channel your inner artist by recreating famous pop art designs on your nails. Here’s how you can achieve a pop art-inspired look:

  1. Apply a base coat and let it dry.
  2. Choose bright and contrasting nail polish colors that resemble the vibrant pop art style.
  3. Use thin nail art brushes or dotting tools to create bold lines, dots, and shapes on your nails.
  4. Experiment with iconic pop art motifs, such as comic book-style speech bubbles, polka dots, or Andy Warhol-inspired repetitive patterns.
  5. Allow the design to dry, and finish with a glossy top coat to seal and protect the pop art design.

Remember to have fun and get creative with these bright nail ideas for summer. Customize the designs to your liking and experiment with different color combinations to express your unique style.

Read Also: Aquapeeling.

Frequently Asked Questions (FAQs)

What are the popular nail trends for summer?

Some popular nail trends for summer include neon colors, tropical-themed nail art, ombre designs, and fruit-inspired manicures.

Read Also: The Nutrition Facts of a Peanut Butter and Jelly Sandwich.

How to create bright nail designs?

To create bright nail designs, start with a clear base coat, choose vibrant colors, and incorporate fun patterns or accents using thin nail art brushes or stamps.

Read Also: How to Tighten Eyelid Skin Without Surgery.

Where can I find summer nail art inspiration?

You can find summer nail art inspiration on social media platforms like Instagram and Pinterest, as well as in beauty magazines or by searching for online nail art tutorials.

Read Also: Makeup on Pink Dress.

Are there any tips for long-lasting summer nail polish?

To make your summer nail polish last longer, ensure your nails are clean and dry before applying polish, use a quality base coat and top coat, and avoid exposing your nails to excessive heat or chemicals.

Read Also: How to Take off Makeup after Spray Tan.

What is the bright nail color for summer?

The bright nail color for summer can vary depending on personal preference and current trends. However, some popular bright nail colors for summer include vibrant shades such as neon pink, electric yellow, coral orange, and turquoise blue. These colors evoke a sense of energy and playfulness, perfect for embracing the sunny and lively atmosphere of summer.

Read Also: Valentine Eyeshadow Palette.

What is the trendy nail color for summer 2023?

While the specific trends for summer 2023 may evolve and change, some anticipated trendy nail colors for the season include:

  1. Sunny Lemon: A cheerful and vibrant yellow shade that captures the essence of summer.
  2. Serene Seafoam: A soft and calming greenish-blue hue reminiscent of ocean waves.
  3. Punchy Papaya: A juicy and tropical orange shade that adds a burst of energy to your nails.
  4. Lively Lilac: A delicate and pastel purple tone that exudes femininity and elegance.
  5. Radiant Coral: A warm and lively coral shade that complements various skin tones.

These colors are expected to be popular choices in the upcoming summer season, reflecting the desire for bright and refreshing hues.

Read Also: Hair Nutrition for Women.

What bright nails go with everything?

When it comes to finding bright nails that go with everything, neutral or versatile shades are your best bet. Here are a few options:

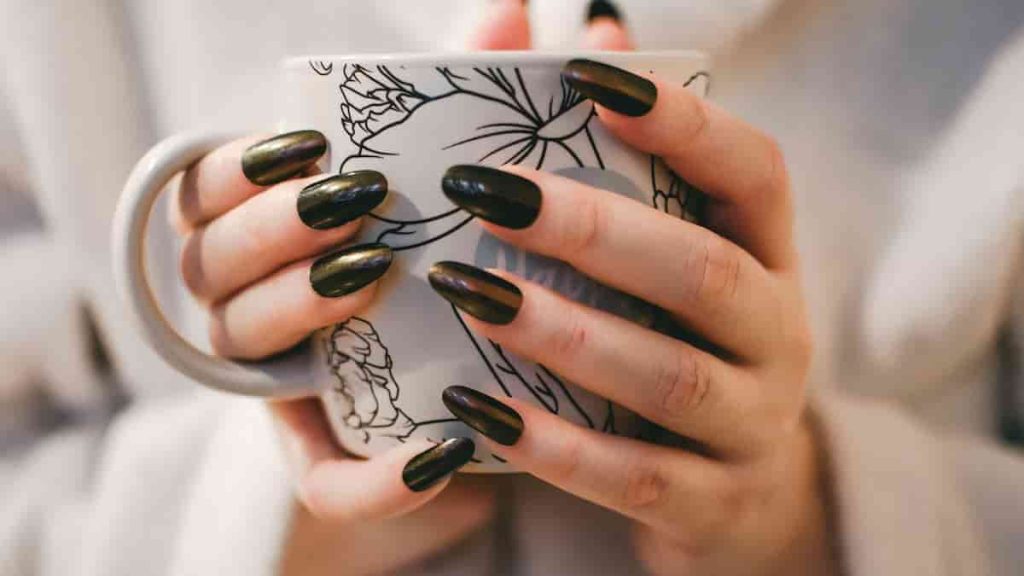
  1. Classic Red: A timeless and bold choice that pairs well with any outfit, from casual to formal.
  2. Nude Beige: A neutral shade that provides a sophisticated and understated look, suitable for any occasion.
  3. Soft Pink: A delicate and feminine color that adds a touch of elegance to your nails without overpowering your overall style.
  4. Bright White: A clean and fresh option that complements any outfit and creates a chic and modern look.
  5. Pale Peach: A subtle and warm shade that adds a soft pop of color, blending effortlessly with various outfits.

These versatile bright nails can effortlessly complement your wardrobe, ensuring they go with everything.

Read Also: Peachy Bronzer.

What is trending for summer nails?

The nail trends for summer are ever-evolving, but some current and anticipated trends for summer nails include:

  1. Minimalist Nail Art: Embracing simple and clean designs with subtle accents, such as negative space, delicate lines, or minimalist patterns.
  2. Abstract Designs: Playing with abstract shapes, geometric patterns, and artistic strokes for a modern and edgy look.
  3. Foil and Metallic Accents: Incorporating foil or metallic finishes to add a touch of glamour and shine to your nails.
  4. Pastel Palette: Opting for soft and delicate pastel shades, offering a serene and dreamy aesthetic for the summer.
  5. Mix and Match: Experimenting with different colors, textures, and patterns on each nail, creating a playful and eclectic vibe.

These trends highlight the creativity and versatility of summer nail art, allowing you to express your unique style and stay up to date with the latest fashion-forward looks.

Read Also: Blonde Chunky Hair.

Why are bright colors suitable for summer nails?

Bright colors are suitable for summer nails because they reflect the energetic and vibrant atmosphere of the season, adding a playful and joyful touch to your overall look.

Read Also: White Nails with Diamonds.

Conclusion

Summer is the time to let your nails shine with bright and vibrant designs. From neon delights to tropical inspirations, there are endless possibilities to explore. Whether you prefer bold and daring looks or soft and subtle pastels, there’s a summer nail idea for everyone. So, grab your favorite colors, unleash your creativity, and let your nails become your canvas. Remember, the most important thing is to have fun and embrace your personal style. Get ready to turn heads and make a statement with your bright nail ideas for summer!

Read Also: Ampoule for Hair Treatment.

Continue Reading
Click to comment

Leave a Reply

Your email address will not be published. Required fields are marked *

Beauty Tips

Skincare for Sensitive Skin Mastery: Unlock Your Glow

Published

on

skincare for sensitive skin

Here is your complete guide to skincare for sensitive skin

Introduction to Skincare for Sensitive Skin

Having sensitive skin can be a frustrating and challenging experience, but with the right approach, you can achieve a healthy, glowing complexion. In this comprehensive guide, we’ll delve into the intricacies of skincare for sensitive skin, providing you with the knowledge and tools to navigate the world of skincare with confidence.

Sensitive skin is a common condition that affects a significant portion of the population. It’s characterized by a heightened reaction to various environmental factors, skincare products, and even certain foods. Individuals with sensitive skin often experience redness, irritation, dryness, and even breakouts, making it crucial to adopt a tailored skincare routine that caters to their unique needs.

In this article, we’ll explore the underlying causes of sensitive skin, the importance of understanding your skin type, and the essential steps to building a skincare routine for sensitive skin that will leave your complexion radiant and healthy. We’ll also dive into the ingredients to avoid, the best products to incorporate, and lifestyle tips to support your skin’s well-being.

Understanding Sensitive Skin

Sensitive skin is a complex condition that can be influenced by a variety of factors, including genetics, environmental stressors, and the use of harsh or unsuitable skincare products. To better understand your sensitive skin, let’s explore the key characteristics and potential causes.

Characteristics of Sensitive Skin

Individuals with sensitive skin often experience the following symptoms:

  • Redness and flushing
  • Stinging or burning sensation
  • Dryness and flakiness
  • Increased sensitivity to environmental factors like wind, cold, or heat
  • Reactivity to certain skincare ingredients or products

Causes of Sensitive Skin

The causes of sensitive skin can be multifaceted, but some of the most common factors include:

  • Genetics: Some people are simply predisposed to having more reactive and delicate skin.
  • Environmental factors: Exposure to pollution, harsh weather conditions, and UV radiation can contribute to skin sensitivity.
  • Skincare products: The use of harsh, drying, or irritating ingredients in skincare products can disrupt the skin’s natural barrier and lead to sensitivity.
  • Underlying skin conditions: Conditions like rosacea, eczema, or dermatitis can also manifest as sensitive skin.

Understanding the unique characteristics and potential causes of your sensitive skin is the first step in developing an effective skincare routine.

Building a Skincare Routine for Sensitive Skin

Crafting a skincare routine for sensitive skin requires a delicate balance of gentle, nourishing ingredients and a thoughtful approach to each step. Let’s explore the key components of a sensitive skin routine.

Cleansing

When it comes to sensitive skin, the cleansing step is crucial. Opt for gentle cleansers that are free of harsh surfactants, fragrances, and alcohol. These ingredients can strip the skin of its natural oils, leading to further irritation and dryness.

Look for cleansers that contain soothing ingredients like:

  • Ceramides
  • Glycerin
  • Aloe vera
  • Chamomile
  • Oatmeal

Avoid cleansers with the following ingredients:

  • Sodium lauryl sulfate (SLS)
  • Alcohol
  • Fragrances
  • Essential oils

Moisturizing

Proper hydration is essential for sensitive skin. Choose moisturizers that are fragrance-free, non-comedogenic, and formulated with calming, nourishing ingredients.

Some moisturizing ingredients to look for include:

  • Hyaluronic acid
  • Ceramides
  • Glycerin
  • Squalane
  • Niacinamide

Steer clear of moisturizers containing the following:

  • Alcohol
  • Fragrances
  • Essential oils
  • Retinoids

Sun Protection

Protecting your sensitive skin from the harmful effects of UV radiation is crucial. Sunscreens for sensitive skin should be mineral-based, fragrance-free, and non-comedogenic.

Look for sunscreens containing:

  • Zinc oxide
  • Titanium dioxide

Avoid sunscreens with:

  • Chemical filters (oxybenzone, avobenzone)
  • Fragrances
  • Alcohol

Treatment Products

Incorporating targeted treatment products can help address specific concerns for sensitive skin. However, it’s essential to introduce new products slowly and with caution to avoid further irritation.

Some treatment products to consider include:

  • Serums with calming ingredients like centella, green tea, or cica
  • Facial oils rich in nourishing fatty acids
  • Gentle exfoliants with lactic acid or enzymatic formulas

Avoid treatment products with the following:

  • Retinoids
  • AHAs (glycolic acid, lactic acid)
  • Fragrances
  • Essential oils

Ingredients to Avoid for Sensitive Skin

When it comes to skincare for sensitive skin, it’s crucial to be mindful of the ingredients in your products. Certain ingredients can trigger irritation, inflammation, and further sensitivity. Let’s explore the common culprits to steer clear of.

Fragrances

Synthetic fragrances are a leading cause of skin sensitivity. They can irritate the skin, leading to redness, itching, and even allergic reactions. Opt for fragrance-free products whenever possible.

Alcohol

Alcohol-based products can be drying and disruptive to the skin’s natural barrier, exacerbating sensitivity. Avoid toners, astringents, and cleansers that contain alcohol.

Harsh Chemicals

Ingredients like sodium lauryl sulfate (SLS)parabens, and formaldehyde-releasing preservatives can be harsh and irritating for sensitive skin.

Essential Oils

While natural, essential oils can be potent and potentially irritating for sensitive skin. Steer clear of products containing essential oils like peppermint, citrus, or eucalyptus.

Retinoids

Retinoids, such as retinol and tretinoin, can be too potent for sensitive skin. They can cause dryness, peeling, and increased sensitivity to the sun.

By being mindful of these irritating ingredients, you can ensure that your skincare routine for sensitive skin is tailored to your unique needs, promoting a healthy, radiant complexion.

Best Skincare Products for Sensitive Skin

Navigating the vast array of skincare products for sensitive skin can be overwhelming, but fear not! We’ve curated a selection of top-recommended products that cater to the specific needs of sensitive skin.

Cleansers

ProductKey Features
CeraVe Hydrating Facial Cleanser– Fragrance-free
– Contains ceramides and hyaluronic acid
– Gentle, non-irritating formula
La Roche-Posay Toleriane Hydrating Gentle Cleanser– Fragrance-free
– Formulated with thermal spring water
– Suitable for dry to sensitive skin
Cetaphil Daily Facial Cleanser– Fragrance-free
– Gentle, non-irritating formula
– Suitable for all skin types, including sensitive

Moisturizers

ProductKey Features
Vanicream Moisturizing Cream– Fragrance-free
– Contains ceramides and glycerin
– Suitable for very dry, sensitive skin
CeraVe Moisturizing Cream– Fragrance-free
– Contains ceramides and hyaluronic acid
– Helps restore the skin’s natural barrier
Av̬ne Tolerance Extreme EmulsionРFragrance-free
РFormulated with Av̬ne thermal spring water
– Soothing and calming for sensitive skin

Sunscreens

ProductKey Features
EltaMD UV Clear Broad-Spectrum SPF 46– Mineral-based formula
– Contains niacinamide and hyaluronic acid
– Non-comedogenic and fragrance-free
La Roche-Posay Anthelios Mineral Sunscreen SPF 50– Mineral-based formula
– Contains antioxidants and soothing ingredients
– Suitable for sensitive and acne-prone skin
Neutrogena Sensitive Skin Mineral Sunscreen SPF 50– Mineral-based formula
– Fragrance-free and non-comedogenic
– Gentle and suitable for sensitive skin

Treatment Products

ProductKey Features
The Ordinary Niacinamide 10% + Zinc 1%– Helps reduce the appearance of blemishes
– Calms and soothes the skin
– Fragrance-free and suitable for sensitive skin
Drunk Elephant Protini Polypeptide Cream– Contains a blend of signal peptides and growth factors
– Helps improve skin’s appearance and texture
– Fragrance-free and non-irritating
SkinCeuticals Phyto Corrective Gel– Formulated with botanical extracts like cucumber and thyme
– Helps soothe and calm sensitive skin
– Fragrance-free and non-comedogenic

By incorporating these sensitive skin-friendly products into your routine, you can address your specific concerns while maintaining a healthy, balanced complexion.

Lifestyle Tips for Sensitive Skin

While a tailored skincare routine is essential, your overall lifestyle and habits can also have a significant impact on the health and appearance of sensitive skin. Let’s explore some key lifestyle tips to support your skin’s well-being.

Diet and Hydration

Maintaining a balanced, nutrient-rich diet and staying hydrated can have a positive effect on sensitive skin. Incorporate foods rich in antioxidants, healthy fats, and anti-inflammatory properties, such as:

  • Omega-3-rich foods (salmon, walnuts, chia seeds)
  • Fruits and vegetables (berries, leafy greens, bell peppers)
  • Probiotic-rich foods (yogurt, kefir, fermented vegetables)

Staying hydrated by drinking plenty of water can also help support the skin’s natural barrier and reduce inflammation.

Stress Management

Chronic stress can take a toll on the skin, exacerbating sensitivity and leading to various skin concerns. Incorporate stress-reducing practices into your daily routine, such as:

  • Meditation or mindfulness exercises
  • Gentle exercise like yoga or walking
  • Engaging in relaxing hobbies or activities

By managing stress, you can help calm the skin and promote a healthier, more resilient complexion.

Adequate Sleep

Getting enough quality sleep is crucial for skin health. Aim for 7-9 hours of sleep each night to allow your skin to regenerate and repair itself, which can help reduce sensitivity and improve overall skin appearance.

By incorporating these lifestyle tips into your routine, you can provide additional support for your sensitive skin, complementing your tailored skincare routine for optimal results.

Best Brands and Products for Skincare for Sensitive Skin

Best Brands

BrandDescription
BentonOffers gentle and soothing skincare products suitable for sensitive skin.
By WishtrendProvides effective and calming skincare solutions specifically designed for sensitive skin.
COSRXKnown for a range of products formulated without harsh ingredients, ideal for sensitive skin.
IsntreeOffers gentle and nourishing skincare options tailored to the needs of sensitive skin.
La Roche-PosayProvides dermatologist-recommended products that are gentle and suitable for sensitive skin.

Best Products

ProductDescription
Vanicream Daily Facial Moisturizer With Ceramides and Hyaluronic AcidProvides hydration and soothing for sensitive skin.
The Original MakeUp EraserA gentle makeup remover suitable for sensitive skin.
BeamCream Smoothing Body Moisturizer by Ole HenriksenA body moisturizer that calms and hydrates sensitive skin.
Alpha Beta Daily Cleanser by Dr. Dennis Gross SkincareA gentle exfoliating cleanser that prevents pore buildup without damaging the skin barrier.
Bakuchiol Lightweight Cream by HerbivoreA lightweight, alcohol-free moisturizer suitable for sensitive and blemish-prone skin.

FAQs – People Also Ask

What are the best ingredients for sensitive skin?

The best ingredients for sensitive skin are those that are gentle, nourishing, and calming. Some of the top ingredients to look for include:

  • Ceramides
  • Glycerin
  • Hyaluronic acid
  • Niacinamide
  • Squalane
  • Centella asiatica
  • Green tea
  • Aloe vera

These ingredients help to soothe, hydrate, and strengthen the skin’s natural barrier, reducing sensitivity and irritation.

Can sensitive skin be cured?

While sensitive skin cannot be “cured” per se, it can be effectively managed and improved through the right skincare routine and lifestyle adjustments. By identifying and avoiding triggers, using gentle and nourishing products, and supporting the skin’s overall health, you can significantly reduce the symptoms of sensitive skin and achieve a more resilient, healthy complexion.

Read Also: Summer Shampoo.

How to soothe sensitive skin reactions?

If you experience a sensitive skin reaction, such as redness, irritation, or stinging, there are several steps you can take to soothe the skin:

  • Cleanse with a gentle, fragrance-free cleanser
  • Apply a cool, damp cloth to the affected area to help reduce inflammation
  • Use a fragrance-free, hypoallergenic moisturizer to hydrate and calm the skin
  • Avoid any additional skincare products or makeup until the reaction subsides
  • Protect the skin from further irritation by staying out of the sun and using a mineral-based sunscreen

With the right approach, you can help your sensitive skin recover and return to a healthy, balanced state.

Read Also: lip lift before and after.

Is natural skincare better for sensitive skin?

While natural skincare products can be a good option for sensitive skin, it’s important to note that “natural” does not always mean “non-irritating.” Some natural ingredients, such as essential oils or certain plant extracts, can still be potential triggers for sensitive skin.

The key is to look for natural, gentle, and non-irritating ingredients that are specifically formulated for sensitive skin. Avoid products with a long list of unfamiliar or potentially irritating natural ingredients. Instead, focus on simple, minimalist formulas that contain soothing, nourishing, and non-reactive ingredients.

Read Also: lip lift before and after.

How to build a skincare routine for sensitive skin?

Building a skincare routine for sensitive skin involves a thoughtful and gradual approach. Start with the following steps:

  1. Cleanse with a gentle, fragrance-free cleanser to remove impurities without stripping the skin.
  2. Moisturize with a fragrance-free, non-comedogenic moisturizer that contains hydrating and calming ingredients.
  3. Protect your skin with a mineral-based, fragrance-free sunscreen to shield it from harmful UV rays.
  4. Gradually introduce treatment products, such as serums or facial oils, that are specifically formulated for sensitive skin.
  5. Listen to your skin and make adjustments as needed, removing any products that cause irritation or discomfort.

By building a tailored, gentle skincare routine, you can effectively address the unique needs of your sensitive skin and achieve a healthy, radiant complexion.

Read Also: lip lift before and after.

Conclusion

Navigating the world of skincare for sensitive skin can be a journey, but with the right knowledge and approach, you can unlock the secrets to a radiant, healthy complexion. Remember to be mindful of the ingredients in your products, build a gentle, nourishing routine, and incorporate lifestyle habits that support your skin’s well-being.

Read Also: Pull Ups While Pregnant.

By following the tips and recommendations outlined in this comprehensive guide, you’ll be well on your way to achieving the glowing, resilient skin you deserve. Embrace your sensitive skin and embark on a journey of self-care and skin empowerment.

Read Also: Emface Before and After.

Continue Reading

Beauty Tips

Emface Before and After: Embrace Magic through Transformation

Published

on

Here is your complete guide to emface before and after

Introduction to Emface Before and After

In the ever-evolving world of aesthetic treatments, a new and innovative solution has been capturing the attention of those seeking to enhance their facial appearance. Emface, a cutting-edge technology that combines high-intensity focused electromagnetic (HIFEM) energy with radiofrequency (RF) technology, has been making waves in the beauty industry, promising remarkable Emface before and after results.

As the demand for non-invasive facial rejuvenation continues to grow, Emface has emerged as a game-changer, offering a unique approach to improving facial contours, reducing wrinkles, and achieving an overall more youthful and radiant complexion. In this comprehensive article, we’ll delve into the world of Emface, exploring its working mechanism, the treatment process, and the transformative Emface before and after results that have been captivating individuals across the globe.

What is Emface?

Emface is a revolutionary facial treatment that harnesses the power of HIFEM and RF technologies to stimulate muscle contractions and improve skin appearance. Unlike traditional cosmetic procedures, Emface is a non-invasive solution that targets the underlying facial muscles, triggering a series of contractions that lead to visible improvements in facial contours and skin texture.

The Emface technology works by delivering high-intensity focused electromagnetic energy to the targeted facial areas, causing the muscles to undergo intense contractions. This muscle stimulation not only helps to tone and tighten the facial features but also promotes the production of collagen, a crucial protein responsible for maintaining skin elasticity and youthfulness.

In addition to the HIFEM component, Emface also utilizes radiofrequency (RF) technology to further enhance the treatment’s effectiveness. The RF energy heats the deeper layers of the skin, stimulating the production of new collagen and improving overall skin quality.

Emface Procedure: Step-by-Step

The Emface treatment process is designed to be comfortable and efficient, with minimal downtime for the patient. Here’s a step-by-step overview of the Emface procedure:

  1. Consultation: Before the treatment, patients will undergo a consultation with a qualified healthcare professional, who will assess their facial concerns and determine if Emface is the most suitable solution.
  1. Preparation: The treatment area is thoroughly cleaned, and any necessary markings are made to ensure precise targeting of the desired facial regions.
  2. Treatment: During the Emface procedure, the patient will recline comfortably while the healthcare provider gently applies the Emface applicator to the targeted areas. The device then delivers the HIFEM and RF energy, causing the facial muscles to contract and the skin to heat up.
  3. Duration: A typical Emface treatment session lasts approximately 20-30 minutes, depending on the specific areas being addressed.
  4. Post-Treatment Care: After the procedure, patients may experience mild redness or tingling sensations, which typically subside within a few hours. No significant downtime is required, and patients can resume their normal daily activities immediately.
  1. Treatment Plan: Most patients require a series of 4-6 Emface treatments, scheduled approximately one week apart, to achieve optimal results.

To better understand the treatment process, let’s take a look at the following table:

StepDescription
ConsultationAssessment of facial concerns and suitability for Emface treatment
PreparationCleaning and marking of the treatment area
TreatmentDelivery of HIFEM and RF energy to stimulate muscle contractions and skin heating
DurationApproximately 20-30 minutes per session
Post-Treatment CareMild redness or tingling, no significant downtime
Treatment Plan4-6 sessions scheduled one week apart for optimal results

Emface Before and After: Real-Life Transformations

The true power of Emface can be seen in the remarkable before and after results that patients have experienced. By stimulating the facial muscles and promoting collagen production, Emface has the ability to:

  • Improve Facial Contours: It can help to tighten and tone the facial muscles, leading to a more defined and sculpted appearance.
  • Reduce Wrinkles and Fine Lines: The treatment’s ability to stimulate collagen production helps to smooth out wrinkles and fine lines, resulting in a more youthful and rejuvenated complexion.
  • Enhance Skin Texture and Radiance: It can improve overall skin quality, leaving it smoother, more even-toned, and with a healthy, radiant glow.

Let’s take a closer look at some real-life before and after transformations:

BeforeAfter
Emface BeforeEmface After
This patient’s facial contours appear more defined, with a noticeable reduction in wrinkles and fine lines around the eyes and forehead.The patient’s skin appears smoother, more radiant, and with a more youthful, rejuvenated appearance.
BeforeAfter
Emface BeforeEmface After
The patient’s jawline and neck area appear more toned and sculpted, with a more defined and contoured appearance.The patient’s skin texture has improved, with a reduction in sagging and a more lifted, rejuvenated look.

These before and after showcase the remarkable transformative power of this innovative facial treatment. Patients have reported feeling more confident, youthful, and satisfied with their appearance after undergoing the procedure.

Emface vs. Other Facial Treatments

As the demand for non-invasive facial rejuvenation continues to grow, Emface has emerged as a unique and compelling alternative to traditional cosmetic procedures. Let’s compare to some other popular facial treatments:

Emface vs. Alternative Solutions

TreatmentKey FeaturesDurationResultsCustomization
EmfaceImmediate lifting effects, full results in 12 weeks, improves facial contours and youthful appearance20 minutes per session, 4-6 sessions recommendedLasting results up to a year, natural-looking improvements in wrinkles and fine linesLimited customization, focuses on facial muscles and skin tightening
UltherapyGradual results over several months, lasting up to three years, improved facial contours and youthful appearanceResults may vary, multiple sessions requiredLong-lasting results, gradual improvement in facial contoursVaries, may require multiple sessions for optimal results
BotoxRestores facial contours, reduces wrinkles, improves sagging skinQuick procedure, maintenance sessions every 3-4 monthsTemporary results, requires ongoing maintenanceLimited customization, focuses on specific areas of the face
V FaceLifts and tightens jawline and cheeks, reduces wrinkles, improves skin tone and texture40-45 minutes per session, customizable treatmentsTargeted results, stronger contractions, asymmetry correctionHighly customizable, tailored to individual needs
ThermageMitigates aging signs, diminishes wrinkles and sagging skin, enhances facial contours45 minutes to 1.5 hours per session, multiple sessions recommendedCorrects skin laxity, improves skin tone and textureLimited customization, focuses on deeper skin layers

As this table illustrates, Emface stands out from traditional facial treatments by offering a unique combination of benefits. Unlike Botox or fillers, which primarily address specific wrinkles or volume loss, it takes a more holistic approach, targeting the underlying facial muscles and skin quality to deliver comprehensive and long-lasting results.

Furthermore, it boasts a significantly shorter recovery period compared to many other facial treatments, allowing patients to resume their normal routines with minimal disruption.

Cost Comparison: Emface vs. Alternative Solutions

TreatmentCost per SessionTotal Treatment Cost
Emface$1,250$5,000 (4 sessions + 1 maintenance session every 6-12 months)
Ultherapy$3,000 – $5,000$3,000 – $15,000 (multiple sessions may be required)
Botox$300 – $600 per area$900 – $1,800 (every 3-4 months for maintenance)
V Face$500 – $1,000$2,000 – $4,000 (4 sessions)
Thermage$3,000 – $5,000$3,000 – $15,000 (multiple sessions may be required)

As the table shows, Emface is generally more expensive than some alternative solutions like Botox, but it offers a more comprehensive and long-lasting approach to facial rejuvenation. The total treatment cost for Emface, including the initial 4 sessions and a maintenance session every 6-12 months, can range from $5,000 to $7,500.

In comparison, treatments like Ultherapy and Thermage, which also use radiofrequency technology, can have a higher overall cost due to the need for multiple sessions to achieve the desired results. Botox, while more affordable per session, requires ongoing maintenance treatments every 3-4 months to maintain the effects.

The V Face treatment, which combines both HIFEM and RF technologies like Emface, falls in the middle range in terms of cost, with a total treatment plan typically costing between $2,000 and $4,000.

It’s important to note that the actual cost of these treatments may vary depending on the location, the healthcare provider’s experience, and any additional fees or discounts that may be available. Patients should always consult with a qualified professional to discuss the specific costs and payment options for their desired treatment.

Frequently Asked Questions (FAQs)

As Emface continues to gain popularity, patients often have questions about the treatment. Here are some of the most frequently asked questions:

Who is an ideal candidate for Emface?

  • It is suitable for individuals of various ages who are looking to improve the appearance of their facial features, reduce wrinkles, and enhance overall skin quality.
  • The treatment is particularly beneficial for those who are starting to notice signs of aging, such as sagging skin, loss of facial volume, and the development of fine lines and wrinkles.

Read Also: Summer Nails with Glitter.

How long do the Emface results last?

  • The results from Emface can last for several months, with many patients reporting continued improvements in their facial appearance for up to a year or more.
  • To maintain the results, most patients require a series of follow-up treatments, typically scheduled every 6-12 months.

Read Also: Summerween Nails.

Is Emface safe?

  • It is considered a safe and well-tolerated treatment, as it is non-invasive and does not involve any incisions or injections.
  • The treatment has been extensively studied and approved for use, with a low risk of side effects or complications.

Read Also: Dip Nails Summer.

How much does Emface cost?

  • The cost can vary depending on the location, the healthcare provider performing the treatment, and the number of sessions required.
  • On average, the cost of a single treatment can range from $500 to $1,000, with a full treatment plan typically costing between $2,000 and $5,000.

Read Also: Summer Shampoo.

Does Emface hurt?

  • Most patients report that the treatment is relatively comfortable, with only mild sensations of muscle contractions and skin heating during the procedure.
  • Any discomfort experienced is typically minimal and well-tolerated, with no significant pain or downtime.

By addressing these frequently asked questions, we hope to provide you with a comprehensive understanding of the Emface treatment and its potential benefits.

Read Also: Juicy Fruit Perfume.

Conclusion

In the ever-evolving world of aesthetic treatments, Emface has emerged as a game-changer, offering a unique and innovative approach to facial rejuvenation. By harnessing the power of HIFEM and RF technologies, Emface is able to stimulate the underlying facial muscles, promote collagen production, and deliver remarkable Emface before and after results.

Read Also: Dark Cherry Lip.

Whether you’re seeking to improve facial contours, reduce wrinkles, or enhance overall skin quality, it may be the solution you’ve been searching for. With its non-invasive nature, minimal downtime, and long-lasting results, this cutting-edge treatment has the potential to transform the way we approach facial aesthetics.

Read Also: Pull Ups While Pregnant.

If you’re intrigued by the transformative power of Emface, we encourage you to consult with a qualified healthcare professional to learn more about this innovative treatment and determine if it’s the right choice for you. Unlock the secrets to a more youthful, radiant, and confident appearance with Emface.

Read Also: lip lift before and after.

Continue Reading

Beauty Tips

lip lift before and after: Appreciating the Stunning Results

Published

on

lip lift before and after

Here is your complete guide to lip lift before and after

Introduction to lip lift before and after

Are you curious about the transformative power of a lip lift? Preparing to embark on your own cosmetic journey? Look no further! In this comprehensive guide, we’ll delve into the world of lip lift before and after results, uncovering the secrets to achieving the perfect pout.

Lip lifts have become an increasingly popular procedure, offering a way to enhance the appearance of the lips and create a more youthful, rejuvenated look. Whether you’re seeking to address concerns like a gummy smile, thin lips, or age-related changes, understanding the lip lift before and after process is crucial to setting realistic expectations and achieving your desired outcome.

In this article, we’ll explore the ins and outs of lip lift surgery, from the different techniques to the recovery process and potential risks. We’ll also dive into real-life lip lift before and after case studies, providing you with a glimpse into the transformative power of this procedure. By the end of this journey, you’ll be equipped with the knowledge to make an informed decision about whether a lip lift is the right choice for you.

What is a Lip Lift?

A lip lift is a surgical procedure that aims to enhance the appearance of the upper lip by reducing the distance between the nose and the upper lip. This procedure can be particularly beneficial for individuals who feel their upper lip appears too long or who have a gummy smile, as it can help create a more balanced and youthful facial appearance.

There are several different types of lip lift techniques, each with its own unique approach and benefits:

Bullhorn Lip Lift

The Bullhorn lip lift is a popular technique that targets the central portion of the upper lip, lifting and shortening it to create a more defined and prominent pout.

Gull-Wing Lip Lift

The Gull-Wing lip lift focuses on lifting the corners of the mouth, helping to create a more upturned and youthful appearance.

Corner Lip Lift

The Corner lip lift is designed to address concerns with the corners of the mouth, such as downturned or drooping lips, by lifting and reshaping this area.

Regardless of the specific technique, the goal of a lip lift is to enhance the overall appearance of the lips, creating a more balanced and harmonious facial aesthetic.

Types of Lip Lifts

Type of Lip LiftDescription
Bullhorn Lip LiftLifts the central portion of the upper lip
Gull-Wing Lip LiftLifts the corners of the mouth
Corner Lip LiftTargets the corners of the mouth

Lip Lift Before and After: What to Expect

When it comes to before and after results, it’s important to have realistic expectations. While this procedure can produce stunning transformations, the extent of the changes will depend on various factors, including the individual’s facial anatomy, the specific technique used, and the skill of the surgeon.

Realistic Expectations

It’s crucial to understand that lip lift before and after results can vary significantly from person to person. Some individuals may experience a more dramatic change, while others may see a more subtle improvement. The key is to work closely with your surgeon to discuss your goals and ensure that you have a clear understanding of what the procedure can and cannot achieve.

Factors Affecting Results

Several factors can influence the before and after outcome, including:

  • Facial anatomy: The shape and proportions of your face can play a significant role in the final results.
  • Skin elasticity: Individuals with more youthful, elastic skin tend to experience better results.
  • Surgeon’s expertise: The skill and experience of the surgeon performing the procedure can greatly impact the outcome.
  • Healing process: The way your body heals and responds to the surgery can affect the final appearance.

By understanding these factors, you can set realistic expectations and work with your surgeon to achieve the best possible lip lift before and after results.

Before and After: Case Studies

To better understand the transformative power of lip lift surgery, let’s explore some real-life lip lift before and after case studies.

Case Study 1: Addressing a Gummy Smile

Sarah, a 35-year-old woman, had always been self-conscious about her gummy smile. After researching her options, she decided to undergo a Bullhorn lip lift procedure. The results were remarkable, as the surgery effectively reduced the distance between her nose and upper lip, creating a more balanced and aesthetically pleasing appearance.

Case Study 2: Enhancing Lip Volume

John, a 45-year-old man, felt that his lips had become thinner and less defined over the years. He opted for a Gull-Wing lip lift, which lifted the corners of his mouth and added subtle volume to his upper lip.

Case Study 3: Correcting Downturned Lips

Emily, a 55-year-old woman, had been struggling with downturned lips that made her appear perpetually unhappy. She underwent a Corner lip lift procedure, which successfully lifted the corners of her mouth and restored a more natural, uplifted expression.

These case studies demonstrate the transformative power of lip lift surgery, highlighting the diverse range of concerns that can be addressed through this procedure. By reviewing these lip lift before and after examples, you can gain a better understanding of the potential outcomes and set realistic expectations for your own cosmetic journey.

Lip Lift Before and After: Recovery Process

Undergoing a lip lift procedure is a significant decision, and it’s essential to be well-informed about the recovery process. While the specific timeline may vary depending on the individual and the surgical technique used, there are some general guidelines to keep in mind.

Post-Operative Care

Immediately after the surgery, you can expect some swelling, bruising, and discomfort in the treated area. Your surgeon will provide you with detailed instructions on how to care for the incision site, including the use of cold compresses and the application of ointments or medications to promote healing.

Healing Timeline

The recovery process typically takes several weeks, with the majority of the swelling and bruising subsiding within the first 7-10 days. However, it’s important to note that the final results may not be fully visible for several months, as the lips continue to settle and the incision lines fade.

Tips for a Smooth Recovery

To ensure a smooth recovery and optimal before and after results, it’s crucial to follow your surgeon’s instructions closely. This may include:

  • Avoiding strenuous activities and exercise for the first few weeks
  • Maintaining a soft, liquid diet to minimize stress on the lips
  • Practicing good oral hygiene and keeping the incision site clean
  • Applying sunscreen to the treated area to prevent discoloration
  • Attending all follow-up appointments to monitor the healing process

By prioritizing your recovery and following your surgeon’s guidance, you can increase your chances of achieving the desired lip lift before and after outcome.

Lip Lift Before and After: Risks and Complications

While lip lift surgery is generally considered a safe and effective procedure, it’s important to be aware of the potential risks and complications that may arise. Understanding these factors can help you make an informed decision and work with your surgeon to minimize any potential issues.

Potential Risks

Some of the potential risks associated with lip lift surgery include:

  • Infection at the incision site
  • Scarring or poor wound healing
  • Asymmetry or uneven results
  • Numbness or loss of sensation in the lips
  • Excessive swelling or bruising
  • Dissatisfaction with the final results

Potential Risks of Lip Lift Surgery

RiskDescription
InfectionBacterial or viral infection at the incision site
ScarringVisible or raised scarring from the incision
AsymmetryUneven or unbalanced results
NumbnessLoss of sensation or feeling in the lips
DissatisfactionUnhappiness with the final aesthetic outcome

Minimizing Complications

To minimize the risk of complications, it’s crucial to choose a board-certified plastic surgeon with extensive experience in performing lip lift procedures. Additionally, following your surgeon’s pre-and post-operative instructions closely can help reduce the likelihood of issues.

Long-term Results

While lip lift surgery can produce long-lasting results, it’s important to note that the aging process and other factors may eventually lead to changes in the appearance of the lips over time. Maintaining good skin health and considering touch-up procedures can help extend the longevity of your before and after results.

By understanding the potential risks and taking proactive steps to minimize complications, you can increase your chances of achieving a successful lip lift before and after outcome.

Before and After: Cost and Consultation

The cost of the procedure can vary depending on several factors, including the surgeon’s experience, the geographic location, and the specific techniques used. It’s important to keep in mind that the cost of the surgery is just one aspect to consider, as the expertise and qualifications of the surgeon should be the primary focus.

Consultation Process

During the initial consultation, your surgeon will thoroughly evaluate your facial anatomy, discuss your goals and concerns, and provide you with a personalized treatment plan. This is an essential step in the before and after process, as it allows you to work closely with your surgeon to ensure that you achieve the desired outcome.

Pricing Factors

Some of the key factors that can influence the cost of the procedure include:

  • Surgeon’s fees
  • Anesthesia and facility fees
  • Geographic location
  • Complexity of the procedure
  • Additional treatments or procedures

Pricing Factors for Lip Lift Procedures

FactorDescription
Surgeon’s FeesThe cost charged by the plastic surgeon
Anesthesia and Facility FeesFees for the anesthesia provider and surgical facility
Geographic LocationVariations in costs based on the region
Complexity of ProcedureMore complex techniques may incur higher fees
Additional TreatmentsThe cost of any complementary procedures

Financing Options

If the cost of a lip lift is a concern, many plastic surgery practices offer financing options or payment plans to help make the procedure more accessible. It’s important to discuss these options with your surgeon during the consultation process.

By understanding the cost and consultation process, you can make an informed decision and take the first step towards achieving your desired before and after results.

Lip Lift Before and After: Comparing Different Techniques

When it comes to the procedures, there are several different techniques to consider, each with its own unique advantages and considerations. Understanding the differences between these approaches can help you make an informed decision about the best course of action for your individual needs.

Surgical vs. Non-Surgical Options

The procedures can be divided into two main categories: surgical and non-surgical. Surgical lip lifts involve making incisions and physically altering the structure of the lips, while non-surgical options, such as dermal fillers or Botox, aim to achieve similar results through less invasive means.

Lip Lift vs. Lip Fillers

While both lip surgery and lip fillers can enhance the appearance of the lips, they work in different ways. the procedures focus on reshaping and repositioning the lips, while lip fillers add volume and plumpness. The choice between the two will depend on your specific goals and the advice of your surgeon.

Choosing the Right Procedure for You

When deciding between the various lip lift techniques or comparing to other cosmetic options, it’s essential to work closely with your surgeon. They will be able to evaluate your facial anatomy, understand your desired outcome, and recommend the most suitable approach to achieve your before and after goals.

By exploring the different techniques and comparing them to other cosmetic options, you can make an informed decision and take the first step towards achieving your desired look.

Lip Lift Before and After: Maintenance and Longevity

Achieving the perfect before and after results is just the beginning of your journey. Maintaining the longevity of your results and enhancing their appearance over time requires a dedicated approach to aftercare and ongoing maintenance.

Aftercare Tips

Following your procedure, your surgeon will provide you with detailed instructions on how to care for the treated area. This may include:

  • Keeping the incision site clean and protected
  • Applying ointments or medications as directed
  • Avoiding strenuous activities and exercise
  • Practicing good oral hygiene
  • Protecting the lips from sun exposure

Results Maintenance

To help maintain the long-term results of your lip lift, it’s important to follow a consistent skincare routine and consider touch-up procedures as needed. This may include:

  • Using sun protection to prevent discoloration and premature aging
  • Incorporating moisturizing and nourishing products into your daily regimen
  • Considering periodic touch-up procedures, such as dermal fillers or Botox, to enhance the appearance of the lips

Enhancing Longevity of Results

While the results are generally long-lasting, there are steps you can take to help extend the longevity of your transformation:

  • Maintaining a healthy lifestyle, including a balanced diet and regular exercise
  • Avoiding habits that can accelerate the aging process, such as smoking or excessive sun exposure
  • Attending regular follow-up appointments with your surgeon to monitor the results and address any concerns

By prioritizing aftercare, maintaining a consistent skincare routine, and making lifestyle choices that support the longevity of your before and after results, you can enjoy the benefits of your transformation for years to come.

Lip Lift Before and After: Frequently Asked Questions

As you consider a lip lift procedure, you may have a variety of questions and concerns. To help address these, we’ve compiled a list of frequently asked questions and their corresponding answers.

What is the recovery time for a lip lift surgery?

The recovery time for this procedure can vary, but typically, patients can expect to experience swelling and bruising for the first 7-10 days. The majority of the visible healing process takes place within the first few weeks, but it may take several months for the final results to fully emerge.

Are lip lift results permanent?

The results are generally considered long-lasting, but they are not entirely permanent. Over time, the aging process and other factors may lead to changes in the appearance of the lips. However, with proper care and maintenance, the results can be enjoyed for many years.

Read Also: Desire Pheromone Perfume.

How soon can I see results after a lip lift procedure?

Patients can typically see initial results within the first few weeks following a the procedure, as the swelling and bruising begin to subside. However, the final, optimal results may not be fully visible for several months, as the lips continue to settle and the incision lines fade.

Read Also: Summer Nails with Glitter.

Can a lip lift be combined with other cosmetic procedures?

Yes, it can often be combined with other cosmetic procedures, such as dermal fillers, Botox, or even a facelift, to achieve a more comprehensive facial rejuvenation. Your surgeon will be able to advise you on the best course of action based on your individual needs and goals.

Read Also: Summerween Nails.

What are the common risks associated with lip lift surgery?

Some of the potential risks associated with surgery include infection, scarring, asymmetry, numbness, and dissatisfaction with the final results. However, these risks can be minimized by choosing an experienced, board-certified plastic surgeon and following their pre- and post-operative instructions closely.

Read Also: Dip Nails Summer.

By addressing these frequently asked questions, we hope to provide you with a better understanding of the before and after process and help you make an informed decision about whether this procedure is right for you.

Read Also: Summer Shampoo.

Conclusion

Embarking on a lip lift journey can be a transformative experience, offering the opportunity to enhance your appearance and boost your confidence. By understanding the lip lift before and after process, exploring real-life case studies, and familiarizing yourself with the recovery, risks, and maintenance requirements, you can make an informed decision and take the first step towards achieving your desired look.

Read Also: Juicy Fruit Perfume.

Remember, the key to a successful lip lift outcome lies in working closely with an experienced, board-certified plastic surgeon who can guide you through the process and help you achieve the best possible results. With the right approach and a commitment to your recovery, you can unlock the power of a lip lift and unveil a more confident, rejuvenated version of yourself.

Read Also: Pull Ups While Pregnant.

So, are you ready to explore the world of before and after transformations? Take the first step towards your desired look and schedule a consultation with a trusted plastic surgeon today.

Read Also: Dark Cherry Lip.

Continue Reading

Trending