Beauty Tips
Easy Vacation Hairstyles: Top Picks
Here is your complete guide to easy vacation hairstyles
Introduction to Easy Vacation Hairstyles
Are you planning a vacation and wondering how to keep your hair looking great without spending hours in front of the mirror? Whether you’re going to the beach, exploring a new city, or simply relaxing, you want to look your best without sacrificing your precious time. In this article, we’ll share some easy vacation hairstyles that will help you achieve a flawless look with minimal effort. From braids and buns to DIY styles and maintenance tips, we’ve got you covered.
When it comes to vacation hairstyles, the key is to keep it simple and low-maintenance. You don’t want to spend hours styling your hair when you could be out exploring or relaxing. At the same time, you want to look your best and feel confident. That’s where easy vacation hairstyles come in. These styles are quick, simple, and versatile, allowing you to enjoy your vacation without worrying about your hair.
Top 10 Easy Vacation Hairstyles
1. Beach Waves
Create those coveted beach waves effortlessly, giving your hair a relaxed, vacation-ready look.
- How-To: Divide damp hair into sections, twist, and let it air dry or use a curling wand.
- Products: Sea salt spray, texturizing mousse.
- Ideal for: A day at the beach or casual outings.
Hairstyle | Benefits | Difficulty Level | Ideal Hair Length |
---|---|---|---|
Beach Waves | Effortless, Relaxed | Easy | Medium to Long |
2. Messy Bun
This classic, easy-to-do hairstyle is perfect for hot and humid weather.
- How-To: Gather hair into a loose ponytail, twist, and wrap around the base to create a bun.
- Variations: High or low bun, messy or sleek finish.
- Suitable For: Any casual occasion during your vacation.
3. Braided Headband
Create a stylish headband using your own hair, adding a touch of elegance to your look.
- How-To: Braid a section of hair and pin it across your head like a headband.
- Enhancements: Add flowers or accessories for a personalized touch.
- Perfect For: A dinner date or exploring a city.
4. Ponytail with a Twist
Elevate a simple ponytail with a twist or braid for a chic vacation look.
- How-To: Braid a small section of hair and incorporate it into your ponytail.
- Recommended For: Active vacation days or hiking trips.
5. Half-Up Half-Down Style
This versatile style is suitable for various occasions during your vacation.
- How-To: Simply section off the top half of your hair and secure it.
- Ideal for: Sightseeing or a casual evening out.
6. Low Maintenance Curls
Achieve natural-looking curls with minimal effort.
- Techniques: Use overnight methods for easy curls.
- Products: Anti-frizz serum, curl-defining cream.
- Suitable For: Any vacation setting.
Hairstyle | Benefits | Difficulty Level | Ideal Hair Length |
---|---|---|---|
Low Maintenance Curls | Natural, Effortless | Easy | Short to Long |
7. Sleek High Bun
Perfect for keeping your hair off your neck during hot weather.
- Styling Tips: Use a hair gel or serum for a sleek finish.
- For: Humid climates or beach days.
8. Twisty Top Knot
A stylish variation of the classic top knot.
- Steps: Twist sections of hair before forming the knot.
- Enhancements: Add hair accessories for a trendy vibe.
- Great For: Outdoor activities or a night out.
9. Fishtail Braid
Elegant and intricate, this braid is ideal for a sophisticated vacation look.
- How-To: Learn to create a fishtail braid with easy steps.
- Add-Ons: Embellish with ribbons or beads for a vacation-ready style.
- Recommended For: Special occasions or a beach wedding.
10. Easy Chignon
A timeless and classy hairstyle suitable for any vacation scenario.
- Quick Steps: Gather hair into a low bun and secure with pins.
- Adaptations: Adjust for different hair textures and lengths.
- Perfect Choice For: Exploring cultural sites or a romantic dinner.
Quick Comparison of the Top 10 Easy Vacation Hairstyles
Hairstyle | Benefits | Difficulty Level | Ideal Hair Length |
---|---|---|---|
Beach Waves | Effortless, Relaxed | Easy | Medium to Long |
Messy Bun | Quick, Casual | Easy | Short to Long |
Braided Headband | Stylish, Chic | Moderate | Medium to Long |
Ponytail Twist | Active, Chic | Easy | Medium to Long |
Half-Up Half-Down | Versatile, Casual | Easy | Short to Long |
Low Maintenance Curls | Natural, Effortless | Easy | Short to Long |
Sleek High Bun | Polished, Sleek | Easy | Medium to Long |
Twisty Top Knot | Trendy, Stylish | Moderate | Medium to Long |
Fishtail Braid | Elegant, Sophisticated | Moderate | Medium to Long |
Easy Chignon | Timeless, Classy | Easy | Medium to Long |
Simple and Easy Hairstyles Ideas for Girls
Before we dive into specific vacation hairstyles, let’s take a look at some simple and easy hairstyles that can work for any occasion. According to Only Women Stuff1, some of the best simple hairstyles for girls include:
- Ponytails
- Braids
- Buns
- Half-up, half-down styles
- Top knots
These styles are easy to do and can be adapted to suit your hair type and length. They’re also versatile, so you can wear them for a variety of occasions.
Quick and Easy Hairstyles for Vacation
Now that we’ve covered some basic hairstyles, let’s move on to specific vacation hairstyles that are quick and easy to do. These styles are perfect for when you’re on the go and don’t have a lot of time to spend on your hair.
Ponytails, Buns, and Knots
Ponytails, buns, and knots are some of the easiest and most versatile vacation hairstyles. They can be dressed up or down, depending on the occasion, and they work for a variety of hair types and lengths. Here are some specific styles to try:
- Messy bun: This is a great option for when you want a casual, effortless look. Simply gather your hair into a high ponytail, twist it into a bun, and secure it with bobby pins. Pull out a few strands to create a messy, undone look.
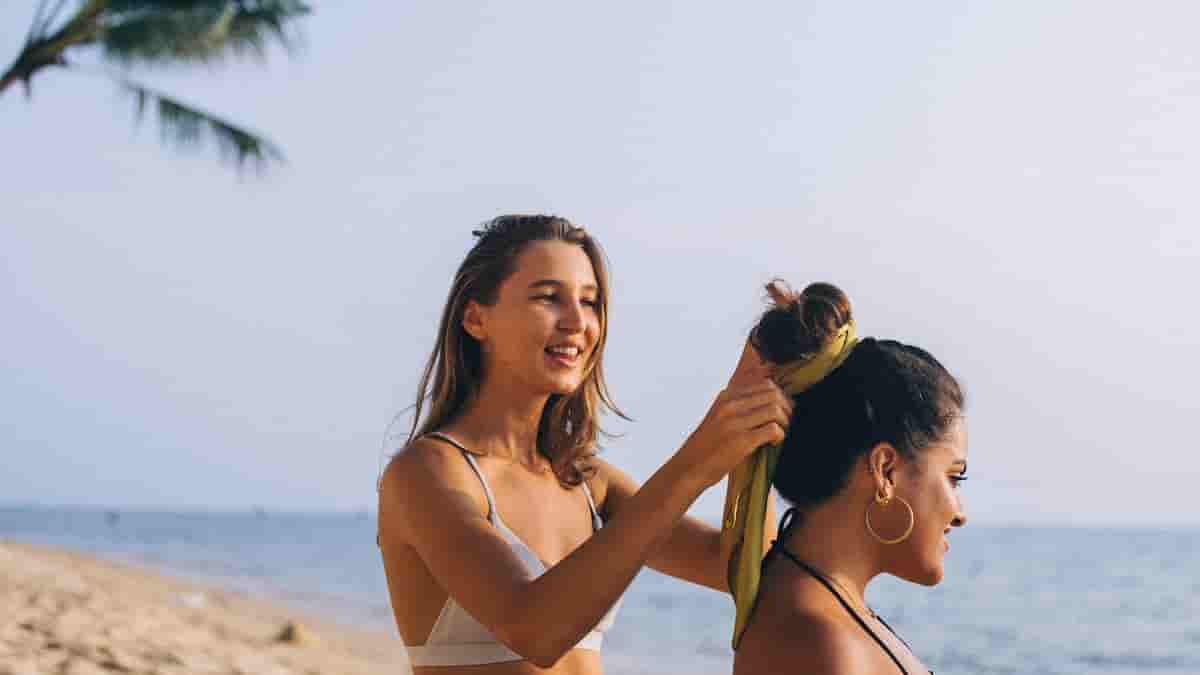
- Top knot: This is another easy and stylish option. Gather your hair into a high ponytail, twist it into a knot, and secure it with bobby pins. You can also add a headband or scarf for a pop of color.
- Braided ponytail: For a more polished look, try a braided ponytail. Braid a section of hair on one side of your head, then gather all of your hair into a low ponytail. Secure with an elastic band and wrap a strand of hair around the band to hide it.
Check out the table below for more ideas:
Style | Hair Type | Time Required |
---|---|---|
Messy bun | All | 5 minutes |
Top knot | All | 5 minutes |
Braided ponytail | Medium to long | 10 minutes |
Braided Styles
Braids are another great option for vacation hairstyles. They’re low-maintenance, stylish, and can be worn for a variety of activities. Here are some specific styles to try:
- French braid: This is a classic style that works for any occasion. Start at the top of your head and braid your hair all the way down to the ends. Secure with an elastic band and pull out a few strands to create a messy look.
- Box braids: These are a great option if you want a protective style that will last for several weeks. They’re also versatile, so you can wear them in a variety of ways.
- Cornrows: These are another protective style that works well for vacation. They’re low-maintenance and can be worn for a variety of activities.
Check out the table below for more ideas:
Style | Hair Type | Time Required |
---|---|---|
French braid | Medium to long | 10 minutes |
Box braids | All | 2-4 hours |
Cornrows | All | 2-4 hours |
Specialized Hairstyles for Different Vacation Activities
Depending on the type of vacation you’re taking, you may need specialized hairstyles that can withstand different activities. Here are some specific styles to try:
Beach and Water Activities
If you’re going to the beach or spending time in the water, you’ll need hairstyles that can withstand the elements. Here are some specific styles to try:
- Beach waves: This is a classic beach hairstyle that’s easy to do. Simply braid your hair into several sections, then undo the braids and scrunch your hair to create waves.
- Double French fishtail braids: This is a more intricate style that looks great and keeps your hair out of your face. Start with two French fishtail braids on either side of your head, then join them together at the back.
Check out the table below for more ideas:
Style | Hair Type | Time Required |
---|---|---|
Beach waves | All | 10 minutes |
Double French fishtail braids | Medium to long | 30 minutes |
Adventure and Eco-Touring
If you’re going on an adventure or eco-touring vacation, you’ll need hairstyles that can withstand the elements and keep your hair out of your face. Here are some specific styles to try:
- Crochet braids: This is a protective style that’s great for outdoor activities. It’s low-maintenance and can last for several weeks.
- Cornrows with extensions: This is another protective style that works well for outdoor activities. It’s low-maintenance and can be worn in a variety of ways.
Check out the table below for more ideas:
Style | Hair Type | Time Required |
---|---|---|
Crochet braids | All | 2-4 hours |
Cornrows with extensions | All | 2-4 hours |
Tips and Products for Managing Curly Hair on Vacation
If you have curly hair, you know how challenging it can be to manage it on vacation. Here are some tips and products to help you keep your curls looking great:
- Use a leave-in conditioner to keep your curls hydrated.
- Use a diffuser attachment on your hair dryer to dry your curls without causing frizz.
- Use a satin or silk pillowcase to prevent frizz while you sleep.
Check out the table below for more ideas:
Product | Purpose |
---|---|
Leave-in conditioner | Hydrates curls |
Diffuser attachment | Dries curls without frizz |
Satin or silk pillowcase | Prevents frizz while sleeping |
Essential Products and Tools for Vacation Hairstyles
Here is a list of essential products and tools for vacation hairstyles, including their respective brands and approximate prices:
Product | Price (Approx.) |
---|---|
Gel, mousse, styling cream | $5-$20 each |
Conditioner, shampoo, shower cap, clips (to section hair) | $5-$20 each |
Combs, brushes | $5-$20 each |
Essential oils (if you DIY your products or are an essential oil aficionado) | $5-$20 each |
Bonnet, durag, satin scarf or pillowcase | $10-$40 |
Weave (for braids, wigs, or sew-ins) | $50-$200 |
Flexi rods, bobby pins, hair ties, headbands | $5-$20 each |
Headscarves | $5-$20 each |
Leave-in conditioner | $10-$30 |
Diffuser attachment | $10-$30 |
Satin or silk pillowcase | $10-$30 |
Please note that prices are approximate and may vary depending on the brand and retailer. It’s essential to choose products and tools that suit your hair type and needs. Additionally, consider packing travel-sized versions of your hair care products to save space and weight during your vacation123.
FAQs
Here are some common questions about easy vacation hairstyles:
What are the best vacation hairstyles for short hair?
Short hair can be styled in a variety of ways, including pixie cuts, low fades, and messy buns. These styles are low-maintenance and easy to do.
Read Also: Medium Brown Eyebrows.
How can I make my vacation hairstyles last all day?
Use hairspray to set the style and carry extra bobby pins or hair ties for touch-ups.
Read Also: Apples of Cheeks.
What are the best hairstyles for different hair textures during a vacation?
Messy buns and low maintenance curls work well for various hair textures.
Read Also: How to Remove Makeup from Car Interior.
Are there heatless hairstyles suitable for vacations?
Yes, styles like braided headbands or twisty top knots can be done without heat.
Read Also: Eyelid Concealer.
How do I maintain my hairstyles in different weather conditions?
Use suitable products like anti-frizz serum in humid climates and hairspray for windy conditions.
Read Also: How Often to Touch Up Highlights.
Can I add accessories to elevate simple vacation hairstyles?
Absolutely! Hair accessories like ribbons or beads can enhance your look effortlessly.
Read Also: Butt Blasting.
Conclusion
With these easy vacation hairstyles, you can spend less time worrying about your hair and more time enjoying your trip. Experiment with these styles and discover the perfect look for every vacation moment. Embrace simplicity and style on your next getaway!
Read Also: What Color Lipstick to Wear with a Black Dress.
Beauty Tips
Skincare for Sensitive Skin Mastery: Unlock Your Glow
Here is your complete guide to skincare for sensitive skin
Introduction to Skincare for Sensitive Skin
Having sensitive skin can be a frustrating and challenging experience, but with the right approach, you can achieve a healthy, glowing complexion. In this comprehensive guide, we’ll delve into the intricacies of skincare for sensitive skin, providing you with the knowledge and tools to navigate the world of skincare with confidence.
Sensitive skin is a common condition that affects a significant portion of the population. It’s characterized by a heightened reaction to various environmental factors, skincare products, and even certain foods. Individuals with sensitive skin often experience redness, irritation, dryness, and even breakouts, making it crucial to adopt a tailored skincare routine that caters to their unique needs.
In this article, we’ll explore the underlying causes of sensitive skin, the importance of understanding your skin type, and the essential steps to building a skincare routine for sensitive skin that will leave your complexion radiant and healthy. We’ll also dive into the ingredients to avoid, the best products to incorporate, and lifestyle tips to support your skin’s well-being.
Understanding Sensitive Skin
Sensitive skin is a complex condition that can be influenced by a variety of factors, including genetics, environmental stressors, and the use of harsh or unsuitable skincare products. To better understand your sensitive skin, let’s explore the key characteristics and potential causes.
Characteristics of Sensitive Skin
Individuals with sensitive skin often experience the following symptoms:
- Redness and flushing
- Stinging or burning sensation
- Dryness and flakiness
- Increased sensitivity to environmental factors like wind, cold, or heat
- Reactivity to certain skincare ingredients or products
Causes of Sensitive Skin
The causes of sensitive skin can be multifaceted, but some of the most common factors include:
- Genetics: Some people are simply predisposed to having more reactive and delicate skin.
- Environmental factors: Exposure to pollution, harsh weather conditions, and UV radiation can contribute to skin sensitivity.
- Skincare products: The use of harsh, drying, or irritating ingredients in skincare products can disrupt the skin’s natural barrier and lead to sensitivity.
- Underlying skin conditions: Conditions like rosacea, eczema, or dermatitis can also manifest as sensitive skin.
Understanding the unique characteristics and potential causes of your sensitive skin is the first step in developing an effective skincare routine.
Building a Skincare Routine for Sensitive Skin
Crafting a skincare routine for sensitive skin requires a delicate balance of gentle, nourishing ingredients and a thoughtful approach to each step. Let’s explore the key components of a sensitive skin routine.
Cleansing
When it comes to sensitive skin, the cleansing step is crucial. Opt for gentle cleansers that are free of harsh surfactants, fragrances, and alcohol. These ingredients can strip the skin of its natural oils, leading to further irritation and dryness.
Look for cleansers that contain soothing ingredients like:
- Ceramides
- Glycerin
- Aloe vera
- Chamomile
- Oatmeal
Avoid cleansers with the following ingredients:
- Sodium lauryl sulfate (SLS)
- Alcohol
- Fragrances
- Essential oils
Moisturizing
Proper hydration is essential for sensitive skin. Choose moisturizers that are fragrance-free, non-comedogenic, and formulated with calming, nourishing ingredients.
Some moisturizing ingredients to look for include:
- Hyaluronic acid
- Ceramides
- Glycerin
- Squalane
- Niacinamide
Steer clear of moisturizers containing the following:
- Alcohol
- Fragrances
- Essential oils
- Retinoids
Sun Protection
Protecting your sensitive skin from the harmful effects of UV radiation is crucial. Sunscreens for sensitive skin should be mineral-based, fragrance-free, and non-comedogenic.
Look for sunscreens containing:
- Zinc oxide
- Titanium dioxide
Avoid sunscreens with:
- Chemical filters (oxybenzone, avobenzone)
- Fragrances
- Alcohol
Treatment Products
Incorporating targeted treatment products can help address specific concerns for sensitive skin. However, it’s essential to introduce new products slowly and with caution to avoid further irritation.
Some treatment products to consider include:
- Serums with calming ingredients like centella, green tea, or cica
- Facial oils rich in nourishing fatty acids
- Gentle exfoliants with lactic acid or enzymatic formulas
Avoid treatment products with the following:
- Retinoids
- AHAs (glycolic acid, lactic acid)
- Fragrances
- Essential oils
Ingredients to Avoid for Sensitive Skin
When it comes to skincare for sensitive skin, it’s crucial to be mindful of the ingredients in your products. Certain ingredients can trigger irritation, inflammation, and further sensitivity. Let’s explore the common culprits to steer clear of.
Fragrances
Synthetic fragrances are a leading cause of skin sensitivity. They can irritate the skin, leading to redness, itching, and even allergic reactions. Opt for fragrance-free products whenever possible.
Alcohol
Alcohol-based products can be drying and disruptive to the skin’s natural barrier, exacerbating sensitivity. Avoid toners, astringents, and cleansers that contain alcohol.
Harsh Chemicals
Ingredients like sodium lauryl sulfate (SLS), parabens, and formaldehyde-releasing preservatives can be harsh and irritating for sensitive skin.
Essential Oils
While natural, essential oils can be potent and potentially irritating for sensitive skin. Steer clear of products containing essential oils like peppermint, citrus, or eucalyptus.
Retinoids
Retinoids, such as retinol and tretinoin, can be too potent for sensitive skin. They can cause dryness, peeling, and increased sensitivity to the sun.
By being mindful of these irritating ingredients, you can ensure that your skincare routine for sensitive skin is tailored to your unique needs, promoting a healthy, radiant complexion.
Best Skincare Products for Sensitive Skin
Navigating the vast array of skincare products for sensitive skin can be overwhelming, but fear not! We’ve curated a selection of top-recommended products that cater to the specific needs of sensitive skin.
Cleansers
Product | Key Features |
---|---|
CeraVe Hydrating Facial Cleanser | – Fragrance-free – Contains ceramides and hyaluronic acid – Gentle, non-irritating formula |
La Roche-Posay Toleriane Hydrating Gentle Cleanser | – Fragrance-free – Formulated with thermal spring water – Suitable for dry to sensitive skin |
Cetaphil Daily Facial Cleanser | – Fragrance-free – Gentle, non-irritating formula – Suitable for all skin types, including sensitive |
Moisturizers
Product | Key Features |
---|---|
Vanicream Moisturizing Cream | – Fragrance-free – Contains ceramides and glycerin – Suitable for very dry, sensitive skin |
CeraVe Moisturizing Cream | – Fragrance-free – Contains ceramides and hyaluronic acid – Helps restore the skin’s natural barrier |
Avène Tolerance Extreme Emulsion | – Fragrance-free – Formulated with Avène thermal spring water – Soothing and calming for sensitive skin |
Sunscreens
Product | Key Features |
---|---|
EltaMD UV Clear Broad-Spectrum SPF 46 | – Mineral-based formula – Contains niacinamide and hyaluronic acid – Non-comedogenic and fragrance-free |
La Roche-Posay Anthelios Mineral Sunscreen SPF 50 | – Mineral-based formula – Contains antioxidants and soothing ingredients – Suitable for sensitive and acne-prone skin |
Neutrogena Sensitive Skin Mineral Sunscreen SPF 50 | – Mineral-based formula – Fragrance-free and non-comedogenic – Gentle and suitable for sensitive skin |
Treatment Products
Product | Key Features |
---|---|
The Ordinary Niacinamide 10% + Zinc 1% | – Helps reduce the appearance of blemishes – Calms and soothes the skin – Fragrance-free and suitable for sensitive skin |
Drunk Elephant Protini Polypeptide Cream | – Contains a blend of signal peptides and growth factors – Helps improve skin’s appearance and texture – Fragrance-free and non-irritating |
SkinCeuticals Phyto Corrective Gel | – Formulated with botanical extracts like cucumber and thyme – Helps soothe and calm sensitive skin – Fragrance-free and non-comedogenic |
By incorporating these sensitive skin-friendly products into your routine, you can address your specific concerns while maintaining a healthy, balanced complexion.
Lifestyle Tips for Sensitive Skin
While a tailored skincare routine is essential, your overall lifestyle and habits can also have a significant impact on the health and appearance of sensitive skin. Let’s explore some key lifestyle tips to support your skin’s well-being.
Diet and Hydration
Maintaining a balanced, nutrient-rich diet and staying hydrated can have a positive effect on sensitive skin. Incorporate foods rich in antioxidants, healthy fats, and anti-inflammatory properties, such as:
- Omega-3-rich foods (salmon, walnuts, chia seeds)
- Fruits and vegetables (berries, leafy greens, bell peppers)
- Probiotic-rich foods (yogurt, kefir, fermented vegetables)
Staying hydrated by drinking plenty of water can also help support the skin’s natural barrier and reduce inflammation.
Stress Management
Chronic stress can take a toll on the skin, exacerbating sensitivity and leading to various skin concerns. Incorporate stress-reducing practices into your daily routine, such as:
- Meditation or mindfulness exercises
- Gentle exercise like yoga or walking
- Engaging in relaxing hobbies or activities
By managing stress, you can help calm the skin and promote a healthier, more resilient complexion.
Adequate Sleep
Getting enough quality sleep is crucial for skin health. Aim for 7-9 hours of sleep each night to allow your skin to regenerate and repair itself, which can help reduce sensitivity and improve overall skin appearance.
By incorporating these lifestyle tips into your routine, you can provide additional support for your sensitive skin, complementing your tailored skincare routine for optimal results.
Best Brands and Products for Skincare for Sensitive Skin
Best Brands
Brand | Description |
---|---|
Benton | Offers gentle and soothing skincare products suitable for sensitive skin. |
By Wishtrend | Provides effective and calming skincare solutions specifically designed for sensitive skin. |
COSRX | Known for a range of products formulated without harsh ingredients, ideal for sensitive skin. |
Isntree | Offers gentle and nourishing skincare options tailored to the needs of sensitive skin. |
La Roche-Posay | Provides dermatologist-recommended products that are gentle and suitable for sensitive skin. |
Best Products
Product | Description |
---|---|
Vanicream Daily Facial Moisturizer With Ceramides and Hyaluronic Acid | Provides hydration and soothing for sensitive skin. |
The Original MakeUp Eraser | A gentle makeup remover suitable for sensitive skin. |
BeamCream Smoothing Body Moisturizer by Ole Henriksen | A body moisturizer that calms and hydrates sensitive skin. |
Alpha Beta Daily Cleanser by Dr. Dennis Gross Skincare | A gentle exfoliating cleanser that prevents pore buildup without damaging the skin barrier. |
Bakuchiol Lightweight Cream by Herbivore | A lightweight, alcohol-free moisturizer suitable for sensitive and blemish-prone skin. |
FAQs – People Also Ask
What are the best ingredients for sensitive skin?
The best ingredients for sensitive skin are those that are gentle, nourishing, and calming. Some of the top ingredients to look for include:
- Ceramides
- Glycerin
- Hyaluronic acid
- Niacinamide
- Squalane
- Centella asiatica
- Green tea
- Aloe vera
These ingredients help to soothe, hydrate, and strengthen the skin’s natural barrier, reducing sensitivity and irritation.
Can sensitive skin be cured?
While sensitive skin cannot be “cured” per se, it can be effectively managed and improved through the right skincare routine and lifestyle adjustments. By identifying and avoiding triggers, using gentle and nourishing products, and supporting the skin’s overall health, you can significantly reduce the symptoms of sensitive skin and achieve a more resilient, healthy complexion.
Read Also: Summer Shampoo.
How to soothe sensitive skin reactions?
If you experience a sensitive skin reaction, such as redness, irritation, or stinging, there are several steps you can take to soothe the skin:
- Cleanse with a gentle, fragrance-free cleanser
- Apply a cool, damp cloth to the affected area to help reduce inflammation
- Use a fragrance-free, hypoallergenic moisturizer to hydrate and calm the skin
- Avoid any additional skincare products or makeup until the reaction subsides
- Protect the skin from further irritation by staying out of the sun and using a mineral-based sunscreen
With the right approach, you can help your sensitive skin recover and return to a healthy, balanced state.
Read Also: lip lift before and after.
Is natural skincare better for sensitive skin?
While natural skincare products can be a good option for sensitive skin, it’s important to note that “natural” does not always mean “non-irritating.” Some natural ingredients, such as essential oils or certain plant extracts, can still be potential triggers for sensitive skin.
The key is to look for natural, gentle, and non-irritating ingredients that are specifically formulated for sensitive skin. Avoid products with a long list of unfamiliar or potentially irritating natural ingredients. Instead, focus on simple, minimalist formulas that contain soothing, nourishing, and non-reactive ingredients.
Read Also: lip lift before and after.
How to build a skincare routine for sensitive skin?
Building a skincare routine for sensitive skin involves a thoughtful and gradual approach. Start with the following steps:
- Cleanse with a gentle, fragrance-free cleanser to remove impurities without stripping the skin.
- Moisturize with a fragrance-free, non-comedogenic moisturizer that contains hydrating and calming ingredients.
- Protect your skin with a mineral-based, fragrance-free sunscreen to shield it from harmful UV rays.
- Gradually introduce treatment products, such as serums or facial oils, that are specifically formulated for sensitive skin.
- Listen to your skin and make adjustments as needed, removing any products that cause irritation or discomfort.
By building a tailored, gentle skincare routine, you can effectively address the unique needs of your sensitive skin and achieve a healthy, radiant complexion.
Read Also: lip lift before and after.
Conclusion
Navigating the world of skincare for sensitive skin can be a journey, but with the right knowledge and approach, you can unlock the secrets to a radiant, healthy complexion. Remember to be mindful of the ingredients in your products, build a gentle, nourishing routine, and incorporate lifestyle habits that support your skin’s well-being.
Read Also: Pull Ups While Pregnant.
By following the tips and recommendations outlined in this comprehensive guide, you’ll be well on your way to achieving the glowing, resilient skin you deserve. Embrace your sensitive skin and embark on a journey of self-care and skin empowerment.
Read Also: Emface Before and After.
Beauty Tips
Emface Before and After: Embrace Magic through Transformation
Here is your complete guide to emface before and after
Introduction to Emface Before and After
In the ever-evolving world of aesthetic treatments, a new and innovative solution has been capturing the attention of those seeking to enhance their facial appearance. Emface, a cutting-edge technology that combines high-intensity focused electromagnetic (HIFEM) energy with radiofrequency (RF) technology, has been making waves in the beauty industry, promising remarkable Emface before and after results.
As the demand for non-invasive facial rejuvenation continues to grow, Emface has emerged as a game-changer, offering a unique approach to improving facial contours, reducing wrinkles, and achieving an overall more youthful and radiant complexion. In this comprehensive article, we’ll delve into the world of Emface, exploring its working mechanism, the treatment process, and the transformative Emface before and after results that have been captivating individuals across the globe.
What is Emface?
Emface is a revolutionary facial treatment that harnesses the power of HIFEM and RF technologies to stimulate muscle contractions and improve skin appearance. Unlike traditional cosmetic procedures, Emface is a non-invasive solution that targets the underlying facial muscles, triggering a series of contractions that lead to visible improvements in facial contours and skin texture.
The Emface technology works by delivering high-intensity focused electromagnetic energy to the targeted facial areas, causing the muscles to undergo intense contractions. This muscle stimulation not only helps to tone and tighten the facial features but also promotes the production of collagen, a crucial protein responsible for maintaining skin elasticity and youthfulness.
In addition to the HIFEM component, Emface also utilizes radiofrequency (RF) technology to further enhance the treatment’s effectiveness. The RF energy heats the deeper layers of the skin, stimulating the production of new collagen and improving overall skin quality.
Emface Procedure: Step-by-Step
The Emface treatment process is designed to be comfortable and efficient, with minimal downtime for the patient. Here’s a step-by-step overview of the Emface procedure:
- Consultation: Before the treatment, patients will undergo a consultation with a qualified healthcare professional, who will assess their facial concerns and determine if Emface is the most suitable solution.
- Preparation: The treatment area is thoroughly cleaned, and any necessary markings are made to ensure precise targeting of the desired facial regions.
- Treatment: During the Emface procedure, the patient will recline comfortably while the healthcare provider gently applies the Emface applicator to the targeted areas. The device then delivers the HIFEM and RF energy, causing the facial muscles to contract and the skin to heat up.
- Duration: A typical Emface treatment session lasts approximately 20-30 minutes, depending on the specific areas being addressed.
- Post-Treatment Care: After the procedure, patients may experience mild redness or tingling sensations, which typically subside within a few hours. No significant downtime is required, and patients can resume their normal daily activities immediately.
- Treatment Plan: Most patients require a series of 4-6 Emface treatments, scheduled approximately one week apart, to achieve optimal results.
To better understand the treatment process, let’s take a look at the following table:
Step | Description |
---|---|
Consultation | Assessment of facial concerns and suitability for Emface treatment |
Preparation | Cleaning and marking of the treatment area |
Treatment | Delivery of HIFEM and RF energy to stimulate muscle contractions and skin heating |
Duration | Approximately 20-30 minutes per session |
Post-Treatment Care | Mild redness or tingling, no significant downtime |
Treatment Plan | 4-6 sessions scheduled one week apart for optimal results |
Emface Before and After: Real-Life Transformations
The true power of Emface can be seen in the remarkable before and after results that patients have experienced. By stimulating the facial muscles and promoting collagen production, Emface has the ability to:
- Improve Facial Contours:Â It can help to tighten and tone the facial muscles, leading to a more defined and sculpted appearance.
- Reduce Wrinkles and Fine Lines: The treatment’s ability to stimulate collagen production helps to smooth out wrinkles and fine lines, resulting in a more youthful and rejuvenated complexion.
- Enhance Skin Texture and Radiance:Â It can improve overall skin quality, leaving it smoother, more even-toned, and with a healthy, radiant glow.
Let’s take a closer look at some real-life before and after transformations:
Before | After |
---|---|
Emface Before | Emface After |
This patient’s facial contours appear more defined, with a noticeable reduction in wrinkles and fine lines around the eyes and forehead. | The patient’s skin appears smoother, more radiant, and with a more youthful, rejuvenated appearance. |
Before | After |
---|---|
Emface Before | Emface After |
The patient’s jawline and neck area appear more toned and sculpted, with a more defined and contoured appearance. | The patient’s skin texture has improved, with a reduction in sagging and a more lifted, rejuvenated look. |
These before and after showcase the remarkable transformative power of this innovative facial treatment. Patients have reported feeling more confident, youthful, and satisfied with their appearance after undergoing the procedure.
Emface vs. Other Facial Treatments
As the demand for non-invasive facial rejuvenation continues to grow, Emface has emerged as a unique and compelling alternative to traditional cosmetic procedures. Let’s compare to some other popular facial treatments:
Emface vs. Alternative Solutions
Treatment | Key Features | Duration | Results | Customization |
---|---|---|---|---|
Emface | Immediate lifting effects, full results in 12 weeks, improves facial contours and youthful appearance | 20 minutes per session, 4-6 sessions recommended | Lasting results up to a year, natural-looking improvements in wrinkles and fine lines | Limited customization, focuses on facial muscles and skin tightening |
Ultherapy | Gradual results over several months, lasting up to three years, improved facial contours and youthful appearance | Results may vary, multiple sessions required | Long-lasting results, gradual improvement in facial contours | Varies, may require multiple sessions for optimal results |
Botox | Restores facial contours, reduces wrinkles, improves sagging skin | Quick procedure, maintenance sessions every 3-4 months | Temporary results, requires ongoing maintenance | Limited customization, focuses on specific areas of the face |
V Face | Lifts and tightens jawline and cheeks, reduces wrinkles, improves skin tone and texture | 40-45 minutes per session, customizable treatments | Targeted results, stronger contractions, asymmetry correction | Highly customizable, tailored to individual needs |
Thermage | Mitigates aging signs, diminishes wrinkles and sagging skin, enhances facial contours | 45 minutes to 1.5 hours per session, multiple sessions recommended | Corrects skin laxity, improves skin tone and texture | Limited customization, focuses on deeper skin layers |
As this table illustrates, Emface stands out from traditional facial treatments by offering a unique combination of benefits. Unlike Botox or fillers, which primarily address specific wrinkles or volume loss, it takes a more holistic approach, targeting the underlying facial muscles and skin quality to deliver comprehensive and long-lasting results.
Furthermore, it boasts a significantly shorter recovery period compared to many other facial treatments, allowing patients to resume their normal routines with minimal disruption.
Cost Comparison: Emface vs. Alternative Solutions
Treatment | Cost per Session | Total Treatment Cost |
---|---|---|
Emface | $1,250 | $5,000 (4 sessions + 1 maintenance session every 6-12 months) |
Ultherapy | $3,000 – $5,000 | $3,000 – $15,000 (multiple sessions may be required) |
Botox | $300 – $600 per area | $900 – $1,800 (every 3-4 months for maintenance) |
V Face | $500 – $1,000 | $2,000 – $4,000 (4 sessions) |
Thermage | $3,000 – $5,000 | $3,000 – $15,000 (multiple sessions may be required) |
As the table shows, Emface is generally more expensive than some alternative solutions like Botox, but it offers a more comprehensive and long-lasting approach to facial rejuvenation. The total treatment cost for Emface, including the initial 4 sessions and a maintenance session every 6-12 months, can range from $5,000 to $7,500.
In comparison, treatments like Ultherapy and Thermage, which also use radiofrequency technology, can have a higher overall cost due to the need for multiple sessions to achieve the desired results. Botox, while more affordable per session, requires ongoing maintenance treatments every 3-4 months to maintain the effects.
The V Face treatment, which combines both HIFEM and RF technologies like Emface, falls in the middle range in terms of cost, with a total treatment plan typically costing between $2,000 and $4,000.
It’s important to note that the actual cost of these treatments may vary depending on the location, the healthcare provider’s experience, and any additional fees or discounts that may be available. Patients should always consult with a qualified professional to discuss the specific costs and payment options for their desired treatment.
Frequently Asked Questions (FAQs)
As Emface continues to gain popularity, patients often have questions about the treatment. Here are some of the most frequently asked questions:
Who is an ideal candidate for Emface?
- It is suitable for individuals of various ages who are looking to improve the appearance of their facial features, reduce wrinkles, and enhance overall skin quality.
- The treatment is particularly beneficial for those who are starting to notice signs of aging, such as sagging skin, loss of facial volume, and the development of fine lines and wrinkles.
Read Also: Summer Nails with Glitter.
How long do the Emface results last?
- The results from Emface can last for several months, with many patients reporting continued improvements in their facial appearance for up to a year or more.
- To maintain the results, most patients require a series of follow-up treatments, typically scheduled every 6-12 months.
Read Also: Summerween Nails.
Is Emface safe?
- It is considered a safe and well-tolerated treatment, as it is non-invasive and does not involve any incisions or injections.
- The treatment has been extensively studied and approved for use, with a low risk of side effects or complications.
Read Also: Dip Nails Summer.
How much does Emface cost?
- The cost can vary depending on the location, the healthcare provider performing the treatment, and the number of sessions required.
- On average, the cost of a single treatment can range from $500 to $1,000, with a full treatment plan typically costing between $2,000 and $5,000.
Read Also: Summer Shampoo.
Does Emface hurt?
- Most patients report that the treatment is relatively comfortable, with only mild sensations of muscle contractions and skin heating during the procedure.
- Any discomfort experienced is typically minimal and well-tolerated, with no significant pain or downtime.
By addressing these frequently asked questions, we hope to provide you with a comprehensive understanding of the Emface treatment and its potential benefits.
Read Also: Juicy Fruit Perfume.
Conclusion
In the ever-evolving world of aesthetic treatments, Emface has emerged as a game-changer, offering a unique and innovative approach to facial rejuvenation. By harnessing the power of HIFEM and RF technologies, Emface is able to stimulate the underlying facial muscles, promote collagen production, and deliver remarkable Emface before and after results.
Read Also: Dark Cherry Lip.
Whether you’re seeking to improve facial contours, reduce wrinkles, or enhance overall skin quality, it may be the solution you’ve been searching for. With its non-invasive nature, minimal downtime, and long-lasting results, this cutting-edge treatment has the potential to transform the way we approach facial aesthetics.
Read Also: Pull Ups While Pregnant.
If you’re intrigued by the transformative power of Emface, we encourage you to consult with a qualified healthcare professional to learn more about this innovative treatment and determine if it’s the right choice for you. Unlock the secrets to a more youthful, radiant, and confident appearance with Emface.
Read Also: lip lift before and after.
Beauty Tips
lip lift before and after: Appreciating the Stunning Results
Here is your complete guide to lip lift before and after
Introduction to lip lift before and after
Are you curious about the transformative power of a lip lift? Preparing to embark on your own cosmetic journey? Look no further! In this comprehensive guide, we’ll delve into the world of lip lift before and after results, uncovering the secrets to achieving the perfect pout.
Lip lifts have become an increasingly popular procedure, offering a way to enhance the appearance of the lips and create a more youthful, rejuvenated look. Whether you’re seeking to address concerns like a gummy smile, thin lips, or age-related changes, understanding the lip lift before and after process is crucial to setting realistic expectations and achieving your desired outcome.
In this article, we’ll explore the ins and outs of lip lift surgery, from the different techniques to the recovery process and potential risks. We’ll also dive into real-life lip lift before and after case studies, providing you with a glimpse into the transformative power of this procedure. By the end of this journey, you’ll be equipped with the knowledge to make an informed decision about whether a lip lift is the right choice for you.
What is a Lip Lift?
A lip lift is a surgical procedure that aims to enhance the appearance of the upper lip by reducing the distance between the nose and the upper lip. This procedure can be particularly beneficial for individuals who feel their upper lip appears too long or who have a gummy smile, as it can help create a more balanced and youthful facial appearance.
There are several different types of lip lift techniques, each with its own unique approach and benefits:
Bullhorn Lip Lift
The Bullhorn lip lift is a popular technique that targets the central portion of the upper lip, lifting and shortening it to create a more defined and prominent pout.
Gull-Wing Lip Lift
The Gull-Wing lip lift focuses on lifting the corners of the mouth, helping to create a more upturned and youthful appearance.
Corner Lip Lift
The Corner lip lift is designed to address concerns with the corners of the mouth, such as downturned or drooping lips, by lifting and reshaping this area.
Regardless of the specific technique, the goal of a lip lift is to enhance the overall appearance of the lips, creating a more balanced and harmonious facial aesthetic.
Types of Lip Lifts
Type of Lip Lift | Description |
---|---|
Bullhorn Lip Lift | Lifts the central portion of the upper lip |
Gull-Wing Lip Lift | Lifts the corners of the mouth |
Corner Lip Lift | Targets the corners of the mouth |
Lip Lift Before and After: What to Expect
When it comes to before and after results, it’s important to have realistic expectations. While this procedure can produce stunning transformations, the extent of the changes will depend on various factors, including the individual’s facial anatomy, the specific technique used, and the skill of the surgeon.
Realistic Expectations
It’s crucial to understand that lip lift before and after results can vary significantly from person to person. Some individuals may experience a more dramatic change, while others may see a more subtle improvement. The key is to work closely with your surgeon to discuss your goals and ensure that you have a clear understanding of what the procedure can and cannot achieve.
Factors Affecting Results
Several factors can influence the before and after outcome, including:
- Facial anatomy: The shape and proportions of your face can play a significant role in the final results.
- Skin elasticity: Individuals with more youthful, elastic skin tend to experience better results.
- Surgeon’s expertise: The skill and experience of the surgeon performing the procedure can greatly impact the outcome.
- Healing process: The way your body heals and responds to the surgery can affect the final appearance.
By understanding these factors, you can set realistic expectations and work with your surgeon to achieve the best possible lip lift before and after results.
Before and After: Case Studies
To better understand the transformative power of lip lift surgery, let’s explore some real-life lip lift before and after case studies.
Case Study 1: Addressing a Gummy Smile
Sarah, a 35-year-old woman, had always been self-conscious about her gummy smile. After researching her options, she decided to undergo a Bullhorn lip lift procedure. The results were remarkable, as the surgery effectively reduced the distance between her nose and upper lip, creating a more balanced and aesthetically pleasing appearance.
Case Study 2: Enhancing Lip Volume
John, a 45-year-old man, felt that his lips had become thinner and less defined over the years. He opted for a Gull-Wing lip lift, which lifted the corners of his mouth and added subtle volume to his upper lip.
Case Study 3: Correcting Downturned Lips
Emily, a 55-year-old woman, had been struggling with downturned lips that made her appear perpetually unhappy. She underwent a Corner lip lift procedure, which successfully lifted the corners of her mouth and restored a more natural, uplifted expression.
These case studies demonstrate the transformative power of lip lift surgery, highlighting the diverse range of concerns that can be addressed through this procedure. By reviewing these lip lift before and after examples, you can gain a better understanding of the potential outcomes and set realistic expectations for your own cosmetic journey.
Lip Lift Before and After: Recovery Process
Undergoing a lip lift procedure is a significant decision, and it’s essential to be well-informed about the recovery process. While the specific timeline may vary depending on the individual and the surgical technique used, there are some general guidelines to keep in mind.
Post-Operative Care
Immediately after the surgery, you can expect some swelling, bruising, and discomfort in the treated area. Your surgeon will provide you with detailed instructions on how to care for the incision site, including the use of cold compresses and the application of ointments or medications to promote healing.
Healing Timeline
The recovery process typically takes several weeks, with the majority of the swelling and bruising subsiding within the first 7-10 days. However, it’s important to note that the final results may not be fully visible for several months, as the lips continue to settle and the incision lines fade.
Tips for a Smooth Recovery
To ensure a smooth recovery and optimal before and after results, it’s crucial to follow your surgeon’s instructions closely. This may include:
- Avoiding strenuous activities and exercise for the first few weeks
- Maintaining a soft, liquid diet to minimize stress on the lips
- Practicing good oral hygiene and keeping the incision site clean
- Applying sunscreen to the treated area to prevent discoloration
- Attending all follow-up appointments to monitor the healing process
By prioritizing your recovery and following your surgeon’s guidance, you can increase your chances of achieving the desired lip lift before and after outcome.
Lip Lift Before and After: Risks and Complications
While lip lift surgery is generally considered a safe and effective procedure, it’s important to be aware of the potential risks and complications that may arise. Understanding these factors can help you make an informed decision and work with your surgeon to minimize any potential issues.
Potential Risks
Some of the potential risks associated with lip lift surgery include:
- Infection at the incision site
- Scarring or poor wound healing
- Asymmetry or uneven results
- Numbness or loss of sensation in the lips
- Excessive swelling or bruising
- Dissatisfaction with the final results
Potential Risks of Lip Lift Surgery
Risk | Description |
---|---|
Infection | Bacterial or viral infection at the incision site |
Scarring | Visible or raised scarring from the incision |
Asymmetry | Uneven or unbalanced results |
Numbness | Loss of sensation or feeling in the lips |
Dissatisfaction | Unhappiness with the final aesthetic outcome |
Minimizing Complications
To minimize the risk of complications, it’s crucial to choose a board-certified plastic surgeon with extensive experience in performing lip lift procedures. Additionally, following your surgeon’s pre-and post-operative instructions closely can help reduce the likelihood of issues.
Long-term Results
While lip lift surgery can produce long-lasting results, it’s important to note that the aging process and other factors may eventually lead to changes in the appearance of the lips over time. Maintaining good skin health and considering touch-up procedures can help extend the longevity of your before and after results.
By understanding the potential risks and taking proactive steps to minimize complications, you can increase your chances of achieving a successful lip lift before and after outcome.
Before and After: Cost and Consultation
The cost of the procedure can vary depending on several factors, including the surgeon’s experience, the geographic location, and the specific techniques used. It’s important to keep in mind that the cost of the surgery is just one aspect to consider, as the expertise and qualifications of the surgeon should be the primary focus.
Consultation Process
During the initial consultation, your surgeon will thoroughly evaluate your facial anatomy, discuss your goals and concerns, and provide you with a personalized treatment plan. This is an essential step in the before and after process, as it allows you to work closely with your surgeon to ensure that you achieve the desired outcome.
Pricing Factors
Some of the key factors that can influence the cost of the procedure include:
- Surgeon’s fees
- Anesthesia and facility fees
- Geographic location
- Complexity of the procedure
- Additional treatments or procedures
Pricing Factors for Lip Lift Procedures
Factor | Description |
---|---|
Surgeon’s Fees | The cost charged by the plastic surgeon |
Anesthesia and Facility Fees | Fees for the anesthesia provider and surgical facility |
Geographic Location | Variations in costs based on the region |
Complexity of Procedure | More complex techniques may incur higher fees |
Additional Treatments | The cost of any complementary procedures |
Financing Options
If the cost of a lip lift is a concern, many plastic surgery practices offer financing options or payment plans to help make the procedure more accessible. It’s important to discuss these options with your surgeon during the consultation process.
By understanding the cost and consultation process, you can make an informed decision and take the first step towards achieving your desired before and after results.
Lip Lift Before and After: Comparing Different Techniques
When it comes to the procedures, there are several different techniques to consider, each with its own unique advantages and considerations. Understanding the differences between these approaches can help you make an informed decision about the best course of action for your individual needs.
Surgical vs. Non-Surgical Options
The procedures can be divided into two main categories: surgical and non-surgical. Surgical lip lifts involve making incisions and physically altering the structure of the lips, while non-surgical options, such as dermal fillers or Botox, aim to achieve similar results through less invasive means.
Lip Lift vs. Lip Fillers
While both lip surgery and lip fillers can enhance the appearance of the lips, they work in different ways. the procedures focus on reshaping and repositioning the lips, while lip fillers add volume and plumpness. The choice between the two will depend on your specific goals and the advice of your surgeon.
Choosing the Right Procedure for You
When deciding between the various lip lift techniques or comparing to other cosmetic options, it’s essential to work closely with your surgeon. They will be able to evaluate your facial anatomy, understand your desired outcome, and recommend the most suitable approach to achieve your before and after goals.
By exploring the different techniques and comparing them to other cosmetic options, you can make an informed decision and take the first step towards achieving your desired look.
Lip Lift Before and After: Maintenance and Longevity
Achieving the perfect before and after results is just the beginning of your journey. Maintaining the longevity of your results and enhancing their appearance over time requires a dedicated approach to aftercare and ongoing maintenance.
Aftercare Tips
Following your procedure, your surgeon will provide you with detailed instructions on how to care for the treated area. This may include:
- Keeping the incision site clean and protected
- Applying ointments or medications as directed
- Avoiding strenuous activities and exercise
- Practicing good oral hygiene
- Protecting the lips from sun exposure
Results Maintenance
To help maintain the long-term results of your lip lift, it’s important to follow a consistent skincare routine and consider touch-up procedures as needed. This may include:
- Using sun protection to prevent discoloration and premature aging
- Incorporating moisturizing and nourishing products into your daily regimen
- Considering periodic touch-up procedures, such as dermal fillers or Botox, to enhance the appearance of the lips
Enhancing Longevity of Results
While the results are generally long-lasting, there are steps you can take to help extend the longevity of your transformation:
- Maintaining a healthy lifestyle, including a balanced diet and regular exercise
- Avoiding habits that can accelerate the aging process, such as smoking or excessive sun exposure
- Attending regular follow-up appointments with your surgeon to monitor the results and address any concerns
By prioritizing aftercare, maintaining a consistent skincare routine, and making lifestyle choices that support the longevity of your before and after results, you can enjoy the benefits of your transformation for years to come.
Lip Lift Before and After: Frequently Asked Questions
As you consider a lip lift procedure, you may have a variety of questions and concerns. To help address these, we’ve compiled a list of frequently asked questions and their corresponding answers.
What is the recovery time for a lip lift surgery?
The recovery time for this procedure can vary, but typically, patients can expect to experience swelling and bruising for the first 7-10 days. The majority of the visible healing process takes place within the first few weeks, but it may take several months for the final results to fully emerge.
Are lip lift results permanent?
The results are generally considered long-lasting, but they are not entirely permanent. Over time, the aging process and other factors may lead to changes in the appearance of the lips. However, with proper care and maintenance, the results can be enjoyed for many years.
Read Also: Desire Pheromone Perfume.
How soon can I see results after a lip lift procedure?
Patients can typically see initial results within the first few weeks following a the procedure, as the swelling and bruising begin to subside. However, the final, optimal results may not be fully visible for several months, as the lips continue to settle and the incision lines fade.
Read Also: Summer Nails with Glitter.
Can a lip lift be combined with other cosmetic procedures?
Yes, it can often be combined with other cosmetic procedures, such as dermal fillers, Botox, or even a facelift, to achieve a more comprehensive facial rejuvenation. Your surgeon will be able to advise you on the best course of action based on your individual needs and goals.
Read Also: Summerween Nails.
What are the common risks associated with lip lift surgery?
Some of the potential risks associated with surgery include infection, scarring, asymmetry, numbness, and dissatisfaction with the final results. However, these risks can be minimized by choosing an experienced, board-certified plastic surgeon and following their pre- and post-operative instructions closely.
Read Also: Dip Nails Summer.
By addressing these frequently asked questions, we hope to provide you with a better understanding of the before and after process and help you make an informed decision about whether this procedure is right for you.
Read Also: Summer Shampoo.
Conclusion
Embarking on a lip lift journey can be a transformative experience, offering the opportunity to enhance your appearance and boost your confidence. By understanding the lip lift before and after process, exploring real-life case studies, and familiarizing yourself with the recovery, risks, and maintenance requirements, you can make an informed decision and take the first step towards achieving your desired look.
Read Also: Juicy Fruit Perfume.
Remember, the key to a successful lip lift outcome lies in working closely with an experienced, board-certified plastic surgeon who can guide you through the process and help you achieve the best possible results. With the right approach and a commitment to your recovery, you can unlock the power of a lip lift and unveil a more confident, rejuvenated version of yourself.
Read Also: Pull Ups While Pregnant.
So, are you ready to explore the world of before and after transformations? Take the first step towards your desired look and schedule a consultation with a trusted plastic surgeon today.
Read Also: Dark Cherry Lip.
-
Beauty Tips1 year ago
What Is Balayage: Your Ultimate Guide Is Here
-
Dreams Interpretation1 year ago
The Meaning of Teeth Falling Out in a Dream: Exploring the Symbolism
-
Diet Tips1 year ago
What Vitamins C Is Good For? The Ultimate Guide
-
Uncategorized1 year ago
Understanding the Five Languages of Love: A Comprehensive Guide
-
Beauty Tips12 months ago
How to Make Clear Skin: Your Comprehensive Guide
-
Beauty Tips12 months ago
Coconut Oil in Face Benefits: Unlocking the Secrets to Radiant Skin
-
Women Tips12 months ago
How Long Breast Augmentation Surgery Take? A Complete Guide
-
Beauty Tips1 year ago
The Surprising Benefit to Coconut Oil: Your Complete Guide