Connect with us

Beauty Tips

How to Make Clear Skin: Your Comprehensive Guide

Published

on

how to make clear skin

Here is your complete guide to How to Make Clear Skin

Introduction to How to Make Clear Skin
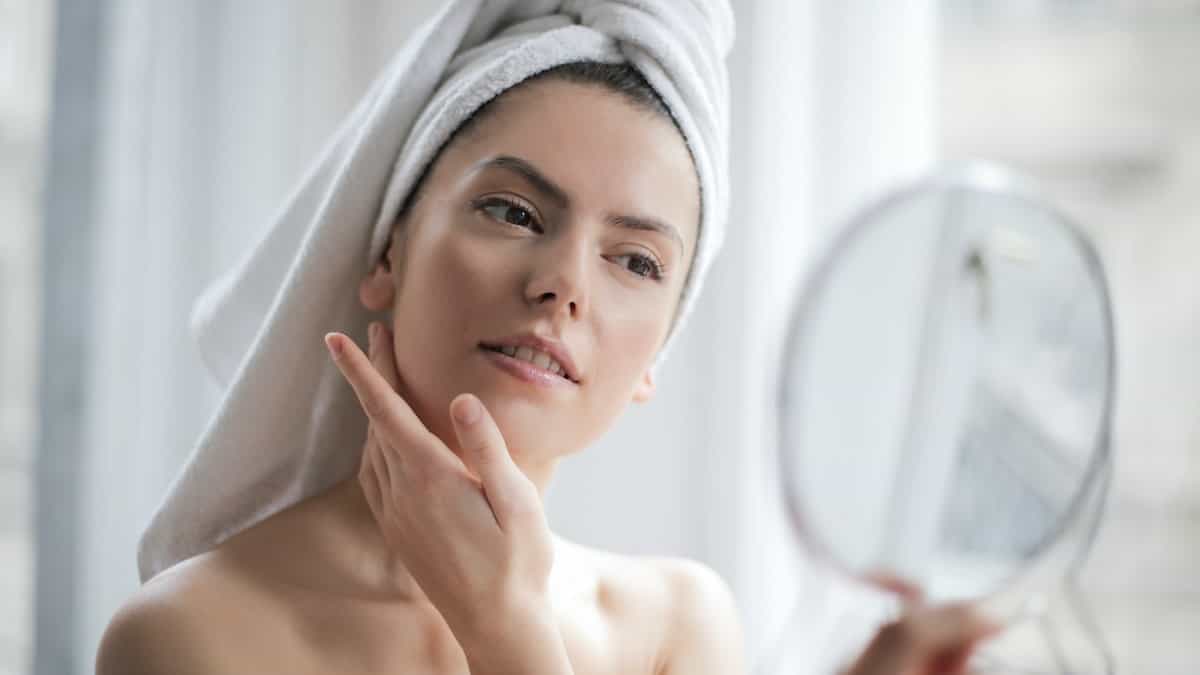
The pursuit of clear skin is a universal desire. We all crave that healthy, radiant complexion that boosts our confidence and makes us feel our best. In this guide, we will delve into the depths of skincare knowledge to help you achieve your goal of clear, blemish-free skin. We will explore various aspects, from understanding your skin type and common skin concerns to developing an effective skincare routine and adopting healthy lifestyle habits.

Understanding Your Skin

Skin Types

To effectively care for your skin, it’s crucial to understand your skin type. Dry skin, oily skin, combination skin, and normal skin each require specific approaches. Here’s a breakdown of the characteristics and needs of each skin type:

Skin TypeCharacteristicsSkincare Needs
Dry SkinLack of moisture, roughness, tightnessIntense hydration, gentle cleansing
Oily SkinExcess sebum production, shine, enlarged poresOil control, regular cleansing and exfoliation
Combination SkinOily T-zone, dry cheeksBalanced hydration, targeted skincare for different areas
Normal SkinWell-balanced, minimal concernsHydration maintenance, general skincare routine

Common Skin Concerns

Skin concerns like acne, hyperpigmentation, and fine lines can affect people of all ages. Let’s explore these concerns and their treatment options:

  • Acne: Acne is a common skin condition characterized by pimples, blackheads, and whiteheads. It can be treated with topical treatments, professional treatments, and lifestyle changes.
  • Hyperpigmentation: Hyperpigmentation refers to dark spots or patches on the skin caused by excess melanin production. Treatments include topical lightening agents, chemical peels, and laser therapy.
  • Fine Lines and Wrinkles: Fine lines and wrinkles are signs of aging caused by reduced collagen and elastin production. They can be managed with topical anti-aging products, dermal fillers, and microneedling.
how to make clear skin

Developing a Skincare Routine

A consistent skincare routine is the foundation for achieving clear, healthy skin. Let’s break it down into key steps:

Cleansing

Cleansing your skin is essential for removing dirt, oil, and impurities. Follow these steps for effective cleansing:

  1. Start with a gentle cleanser suitable for your skin type.
  2. Massage the cleanser onto damp skin in circular motions.
  3. Rinse thoroughly with lukewarm water.

Exfoliation

Exfoliation helps remove dead skin cells and unclog pores, revealing fresh, smooth skin. Here’s how to exfoliate properly:

  • Choose an exfoliant suited for your skin type, such as chemical exfoliants or gentle physical exfoliants.
  • Apply the exfoliant in gentle circular motions, avoiding the delicate eye area.
  • Rinse thoroughly and follow up with moisturizer.

Moisturizing

Moisturizing is vital for hydrating the skin and maintaining its barrier function. Follow these tips for effective moisturizing:

  • Select a moisturizer tailored to your skin type and concerns.
  • Apply moisturizer to clean skin, focusing on dry areas.
  • Gently massage the moisturizer in upward motions for better absorption.

Sun Protection

Protecting your skin from harmful UV rays is crucial for maintaining its health and preventing premature aging. Follow these steps for adequate sun protection:

  • Choose a broad-spectrum sunscreen with an SPF of 30 or higher.
  • Apply sunscreen generously to all exposed areas, including the face, neck, and hands.
  • Reapply sunscreen every two hours, especially when outdoors.

Skincare Routine Summary

StepPurposeTips and Techniques
CleansingRemove dirt and impuritiesUse a gentle cleanser suitable for your skin type
ExfoliationRemove dead skin cellsChoose a suitable exfoliant and use gentle circular motions
MoisturizingHydrate and protect the skinSelect a moisturizer tailored to your skin type
Sun ProtectionProtect against UV damageApply sunscreen with SPF 30 or higher, reapply every two hours

Healthy Lifestyle Habits for Clear Skin

Achieving clear skin requires more than just a skincare routine. Your lifestyle habits play a significant role. Here are some essential habits to adopt:

Nutrition and Diet

Eating a balanced diet can contribute to overall skin health. Consider the following:

  • Incorporate antioxidant-rich foods like berries, leafy greens, and nuts into your diet.
  • Stay hydrated by drinking plenty of water throughout the day.

Exercise and Stress Management

Regular exercise and stress management techniques can positively impact your skin:

  • Engage in regular physical activity to improve blood circulation and promote a healthy complexion.
  • Practice stress management techniques such as yoga, meditation, or deep breathing to reduce stress-related skin issues.

Skin-Friendly Foods

FoodBenefits
BerriesHigh in antioxidants and vitamins
Leafy greensRich in vitamins and minerals
NutsProvide essential fatty acids and antioxidants
WaterHydrates the skin and flushes out toxins

Home Remedies and Natural Treatments

Nature offers a plethora of ingredients with potent skincare properties. Consider incorporating these natural remedies into your routine:

  • DIY Face Masks: Create masks using ingredients like honey, yogurt, and turmeric to nourish and soothe the skin.
  • Natural Ingredients for Clear Skin: Look for ingredients like tea tree oil, aloe vera, and witch hazel known for their antibacterial and soothing properties.

Natural Ingredients for Clear Skin

IngredientBenefits
HoneyMoisturizing and antibacterial properties
YogurtExfoliating and soothing properties
TurmericAnti-inflammatory and brightening effects
Tea Tree OilAntimicrobial and acne-fighting properties
Aloe VeraSoothing and hydrating properties
Witch HazelAstringent and anti-inflammatory effects

Professional Treatments and Skincare Tips

When over-the-counter products aren’t sufficient, professional treatments can provide the extra boost your skin needs:

  • Dermatologist Consultation: Consult a dermatologist for personalized advice and targeted treatments.
  • Professional Treatments for Clear Skin: Explore treatments like chemical peels, microdermabrasion, and laser therapy for more advanced skincare needs.

Professional Treatments for Clear Skin

TreatmentBenefits
Chemical PeelsExfoliates and improves skin texture
MicrodermabrasionRemoves dead skin cells and promotes cell renewal
Laser TherapyTargets specific skin concerns like acne scars or hyperpigmentation
Dermal FillersSmooths out fine lines and wrinkles
MicroneedlingStimulates collagen production and improves skin texture

Lifestyle Dos and Don’ts for Clear Skin

To maintain clear skin, certain lifestyle habits should be embraced, while others should be avoided:

Dos for Clear Skin

  • Practice good hygiene: Cleanse your face twice a day, change your pillowcases regularly, and avoid touching your face with unwashed hands.
  • Stay consistent with your skincare routine: Consistency is key for optimal results.
  • Protect your skin from environmental factors: Wear a hat, sunglasses, and protective clothing when exposed to the sun or harsh weather conditions.

Don’ts for Clear Skin

  • Avoid excessive sun exposure: Prolonged sun exposure can lead to skin damage and premature aging.
  • Don’t pick or pop pimples: This can cause inflammation, scarring, and potential infections.
  • Limit consumption of sugary and processed foods: These foods can contribute to acne and skin inflammation.

Read More About Fruit with High Protein.

Frequently Asked Questions (FAQs)

How do I get clear healthy skin?

Achieving clear, healthy skin requires consistent care and adopting a few key habits. Here are some tips to help you on your journey to clear skin:

  • Follow a regular skincare routine that includes cleansing, exfoliating, moisturizing, and protecting your skin from the sun.
  • Choose skincare products suitable for your skin type and concerns.
  • Maintain a healthy lifestyle by eating a balanced diet, staying hydrated, getting enough sleep, and managing stress.
  • Avoid harsh or abrasive skincare products that can irritate your skin.
  • Keep your hands clean and avoid touching your face frequently.
  • Be patient and give your skincare routine time to show results, as it may take weeks or even months to see significant improvements in your skin.

Read More About Russian Lips vs Normal Filler.

How can I clear my skin overnight?

While it’s not realistic to expect overnight results, you can take steps to improve the appearance of your skin and promote its healing overnight. Here are some tips:

  • Cleanse your face thoroughly before bed to remove dirt, oil, and makeup.
  • Apply a targeted treatment such as spot treatment or overnight acne treatment to address specific concerns.
  • Use a gentle, hydrating moisturizer to keep your skin hydrated.
  • Sleep on a clean pillowcase to avoid transferring dirt and oil to your face.
  • Create a calming bedtime routine to reduce stress and promote quality sleep, as good sleep is essential for skin repair and rejuvenation.

Remember, long-term dedication to a consistent skincare routine is key to achieving clear, healthy skin.

Read More About Gain Weight on Period.

How can I clear my acne skin?

Dealing with acne can be frustrating, but with the right approach, you can effectively clear your skin. Here are some tips to help with acne-prone skin:

  • Cleanse your face twice a day with a gentle cleanser suitable for acne-prone skin.
  • Use non-comedogenic and oil-free skincare products to prevent clogged pores.
  • Avoid picking or squeezing pimples, as it can lead to scarring and spread bacteria.
  • Incorporate acne-fighting ingredients such as benzoyl peroxide or salicylic acid into your skincare routine.
  • Maintain a healthy lifestyle by eating a balanced diet, exercising regularly, and managing stress.
  • Consider consulting a dermatologist for personalized advice and prescription treatments if over-the-counter products aren’t providing sufficient results.

Remember, treating acne requires patience and consistency, as it may take time to see improvements.

Read More About How Much Do 800cc Silicone Implants Weigh?

How can I clear my skin in 7 days?

While achieving significant improvements in your skin within a week is unlikely, you can take steps to promote a healthier complexion. Here are some tips for a week-long skincare boost:

  • Cleanse your face twice a day using a gentle cleanser.
  • Exfoliate your skin two to three times during the week to remove dead skin cells and unclog pores.
  • Hydrate your skin with a moisturizer suitable for your skin type.
  • Protect your skin from the sun by wearing sunscreen every day.
  • Avoid wearing heavy makeup and opt for lighter, breathable formulas.
  • Drink plenty of water to stay hydrated and promote healthy skin.
  • Get sufficient sleep to allow your skin to repair and rejuvenate.
  • Maintain a healthy diet by incorporating fruits, vegetables, and foods rich in antioxidants.

While you may not achieve completely clear skin in just one week, following these steps can help improve your skin’s appearance and lay the foundation for ongoing skincare success.

Read More About How Long Does Breast Augmentation Surgery Take?

Conclusion

Achieving clear skin is within your reach with the right knowledge and consistent effort. By understanding your skin, adopting a proper skincare routine, embracing healthy lifestyle habits, and seeking professional guidance when needed, you can unlock the secret to radiant, blemish-free skin. Remember, clear skin takes time and patience, but the results will be worth it. Start your journey to clear skin today and let your natural beauty shine.

Remember, each individual’s skin is unique, and it’s always advisable to consult a dermatologist for personalized advice and recommendations.

Read More About Coconut Oil in Face Benefits.

Read More About How to Avoid Wedding Stress.

Read More About Russian Lips.

Beauty Tips

Glitter Lipstick Pink: Top Brands to Try

Published

on

glitter lipstick pink

Here is your complete guide to glitter lipstick pink

Introduction to Glitter Lipstick Pink

In the ever-evolving world of beauty, one trend has consistently captured the hearts and lips of makeup enthusiasts: glitter lipstick pink. This enchanting fusion of shimmering pigments and a vibrant, feminine hue has become a staple in many makeup routines, offering a touch of glamour and playfulness to any look. Whether you’re attending a special event, going out with friends, or simply wanting to add a little extra sparkle to your day, glitter lipstick pink is the perfect choice to make your pout pop.

In this comprehensive guide, we’ll delve into the world of glitter lipstick pink, exploring its definition, the different types of glitters used, and the benefits it offers. We’ll also provide valuable insights on how to choose the right glitter lipstick pink for your unique features, as well as step-by-step instructions on application and maintenance. Additionally, we’ll explore the latest trends in the glitter lipstick pink realm, and even share a simple recipe for creating your own custom blend at home.

So, let’s embark on a journey to discover the captivating allure of glitter lipstick pink and unlock the secrets to achieving a show-stopping pout that will have everyone mesmerized.

What is Glitter Lipstick Pink?

Glitter lipstick pink is a captivating cosmetic product that combines the rich, creamy texture of a traditional lipstick with the dazzling sparkle of fine glitter particles. This unique blend creates a multidimensional and eye-catching effect on the lips, adding a touch of glamour and playfulness to any makeup look.

The glitter used in these lipsticks can come in a variety of forms, from fine, shimmery particles to larger, chunky flecks that catch the light. Some glitter lipstick pink formulas even feature holographic or iridescent glitters, which can create a mesmerizing, multi-colored effect on the lips. The lipstick base itself is typically a vibrant, pink hue, ranging from soft, pastel tones to bold, fuchsia shades.

The combination of the creamy lipstick and the sparkling glitter not only enhances the overall appearance of the lips but also offers long-lasting wear and a comfortable, hydrating feel. Glitter lipstick pink is a versatile product that can be worn for a variety of occasions, from a night out on the town to a casual daytime look.

How to Choose the Right Glitter Lipstick Pink 

Selecting the perfect glitter lipstick pink can be a daunting task, as there are numerous shades and formulas to choose from. However, by considering a few key factors, you can find the glitter lipstick pink that will perfectly complement your unique features and personal style.

Skin Tone and Undertone

One of the most important factors to consider when choosing a glitter lipstick pink is your skin tone and undertone. Different shades of glitter lipstick pink can have varying degrees of flattery depending on these characteristics. To determine your skin tone and undertone, you can use the following table:

Skin ToneUndertoneRecommended Glitter Lipstick Pink Shades
FairCoolSoft pinks, baby pinks, light fuchsias
FairWarmPeachy pinks, coral pinks, rose pinks
MediumCoolBright fuchsias, deep pinks, plum pinks
MediumWarmCoral pinks, peach pinks, warm-toned fuchsias
OliveNeutralMauve pinks, dusty pinks, rose pinks
TanWarmCoral pinks, peach pinks, warm-toned fuchsias
DeepCoolPlum pinks, deep fuchsias, berry pinks
DeepWarmBrick reds, deep coral pinks, burgundy pinks

Occasion and Personal Style

In addition to skin tone and undertone, it’s essential to consider the occasion and your personal style when selecting a glitter lipstick pink. For a bold, night-out look, you might opt for a vibrant, high-impact glitter lipstick pink. For a more subtle, everyday look, a softer, more sheer glitter lipstick pink might be the perfect choice.

Texture and Finish

Finally, pay attention to the texture and finish of the glitter lipstick pink formula. Some formulas may have a creamier, more emollient feel, while others may be more lightweight and satin-like. Additionally, the size and density of the glitter particles can affect the overall appearance, from a subtle shimmer to a full-on glittery pout.

By taking the time to consider these factors, you can find the glitter pink that will make your lips shine with confidence and style.

Best Brands for Glitter Lipstick Pink

BrandProductPrice
Fenty BeautySummaTime Icon Semi-Matte Refillable Lipstick in Miss Candy Venom$34.99
GucciRouge à Lèvres Mat lipstick in Love Before Breakfast$42
Estée LauderPure Color Matte Lipstick in Rebellious Rose$32
PradaMonochrome Soft Matte Lipstick in Candy$38
Lisa EldridgeTrue Velvet Lip Colour in Velvet Petal$36
Nyx CosmeticsGlitter Goals Lipstick$8.99
Wet n WildMegalast Liquid Catsuit Metallic Lipstick$4.99
MilaniAmore Matte Metallic Lip Crème$8.99
Elf CosmeticsMetallic Flare Lipstick$4
ColourpopLux Gloss$8

This table showcases some of the best brands offering glitter lipstick products, along with their respective prices in US dollars. The high-end brands like Fenty Beauty, Gucci, and Estée Lauder offer premium formulas and shades at a higher cost, while more affordable options from Nyx Cosmetics, Wet n Wild, and Elf Cosmetics provide accessible alternatives for those on a budget.

Best Outfits and Accessories for Glitter Lipstick Pink

Casual Daytime Looks

For a subtle, everyday look, pair glitter pink with a casual outfit like:

  • Jeans and a white t-shirt
  • A sundress with sandals
  • Shorts and a tank top

Accessorize with simple jewelry like stud earrings or a delicate necklace to keep the focus on your sparkling lips.

Night-Out Looks

When going out for a night on the town, lipstick pink can be the star of the show. Pair it with:

  • A little black dress and heels
  • A sequined top and skinny jeans
  • A jumpsuit or romper

Add some statement earrings or a bold necklace to complete the look.

Special Occasion Attire

For weddings, parties, or other formal events, glitter lipstick can add a touch of glamour to your outfit. Pair it with:

  • A floor-length gown
  • A cocktail dress with heels
  • A suit or dress pants with a blouse

Accessorize with a clutch, a bracelet, or a bold ring to elevate your look.

Best Events for Wearing Glitter Lipstick Pink

Concerts and Music Festivals

Glitter lipstick pink is perfect for adding some sparkle to your festival look. Pair it with:

  • Crop tops and high-waisted shorts
  • Graphic tees and ripped jeans
  • Boho-inspired dresses and sandals

Don’t forget to bring a compact for touch-ups throughout the day.

Birthday Parties and Celebrations

Whether it’s your own birthday or a friend’s, glitter $pink can help you celebrate in style. Pair it with:

  • A fun, printed dress
  • A romper and heels
  • Palazzo pants and a camisole

Accessorize with statement earrings or a bold bracelet to complete your look.

Nights Out with Friends

When you’re out with your besties, $lipstick pink can help you shine. Pair it with:

  • A crop top and high-waisted skirt
  • Leather pants and a tank top
  • A jumpsuit with heels

Add some fun, glittery accessories like a statement ring or a sparkly clutch to tie your look together.Remember, the key to rocking glitter pink is to have fun and express your personal style. Don’t be afraid to experiment with different outfits and accessories to find what makes you feel confident and fabulous.

Application and Maintenance

Achieving a flawless application and long-lasting wear with glitter lipstick requires a bit of preparation and attention to detail. Follow these steps for the perfect pout:

Lip Preparation

  1. Start by exfoliating your lips to remove any dry, flaky skin. This will create a smooth, even canvas for the glitter lipstick to adhere to.
  2. Apply a hydrating lip balm or primer to nourish and condition your lips, ensuring a comfortable and long-lasting wear.
  3. Blot your lips with a tissue to remove any excess moisture, leaving them slightly damp but not overly wet.

Application Technique

  1. Begin by lining your lips with a matching glitter pink lip liner or a nude liner to help define and shape your pout.
  2. Apply the glitter lipstick directly from the bullet, starting in the center of your lips and working outward.
  3. Use a lip brush for a more precise and even application, especially around the edges.
  1. Blot your lips with a tissue to remove any excess product and help the glitter pink set.
  2. For added dimension, apply a small amount of the glitter lipstick to the center of your bottom lip and blend outward.

Maintenance and Longevity

  1. Carry a compact glitter pink with you for touch-ups throughout the day.
  2. Blot your lips with a tissue periodically to remove any excess oil or moisture, which can cause the glitter to migrate.
  1. Reapply the glitter lipstick as needed, focusing on the center of your lips to maintain the vibrant, glossy finish.
  2. Use a lip liner to help define and maintain the shape of your lips, especially as the glitter pink wears off.
  3. Avoid eating or drinking oily or acidic foods and beverages, as they can break down the glitter lipstick pink formula.

By following these steps, you can achieve a stunning, long-lasting glitter lipstick pink look that will have all eyes on your pout.

Pros and Cons of Glitter Lipstick Pink

Pros

  • Adds a touch of glamour and sparkle to any makeup look 
  • Can create a mesmerizing, multi-dimensional effect on the lips 
  • Offers long-lasting wear and a comfortable, hydrating feel 
  • Versatile for a variety of occasions, from casual to formal 
  • Allows for self-expression and creativity with different glitter types and shades 

Cons

  • Glitter particles can be difficult to remove completely 
  • Some formulas may contain low-quality or abrasive glitters that can cause irritation 
  • Glitter can migrate and transfer throughout the day, requiring frequent touch-ups 
  • Chunky or heavy glitters may not be suitable for everyday wear 
  • Requires extra preparation and maintenance compared to traditional lipsticks 

Glitter Lipstick Pink Trends

The world of glitter lipstick is constantly evolving, with new and innovative trends emerging to captivate beauty enthusiasts. Let’s explore some of the latest and most exciting developments in this sparkling realm:

Ombre Effect

One of the hottest trends in glitter lipstick is the ombre effect, where the color and glitter intensity gradually transition from the center of the lips to the outer edges. This creates a mesmerizing, multi-dimensional look that can be achieved with a single product or by layering different lipstick pink shades.

Gradient Glitter

Another trend that has been gaining popularity is the gradient glitter effect, where the glitter particles are concentrated at the center of the lips and gradually fade towards the edges. This creates a striking, eye-catching pout that can be customized to suit various skin tones and personal styles.

Double-Ended Lipsticks

For the ultimate in versatility, double-ended glitter pink products have become a must-have in many makeup bags. These lipsticks feature two complementary shades or finishes, allowing you to mix and match for a personalized look or to create a bold, contrasting effect.

Metallic and Holographic Glitters

In addition to traditional glitter, lipstick pink formulas are now incorporating metallic and holographic glitters, which can create a futuristic, otherworldly appearance on the lips. These shimmering, multi-colored particles add an extra layer of dimension and drama to any makeup look.As the glitter lipstick trend continues to evolve, beauty enthusiasts can expect to see even more innovative and captivating formulas and finishes in the years to come.

DIY Glitter Lipstick Pink

If you’re feeling creative and want to customize your own glitter pink, you can easily make your own at home with a few simple ingredients. This DIY glitter lipstick pink recipe allows you to control the color, glitter intensity, and formula to suit your unique preferences.

Ingredients:

  • 1 tsp. of your favorite pink lipstick or lip balm
  • 1/2 tsp. of fine, cosmetic-grade glitter (in your desired color)
  • 1/4 tsp. of coconut oil or shea butter (for added hydration and slip)

Instructions:

  1. Melt the lipstick or lip balm in a double boiler or microwave, being careful not to overheat it.
  2. Once the lipstick or balm is in a liquid state, add the glitter and the coconut oil or shea butter. Stir the mixture thoroughly to ensure an even distribution of the ingredients.
  3. Pour the mixture into a clean, sterilized lipstick tube or small container and allow it to cool and harden completely.
  4. Once the glitter lipstick is set, you can apply it directly to your lips using the lipstick tube or a lip brush.

Tips:

  • Experiment with different glitter sizes and colors to create unique and personalized glitter lipstick pink shades.
  • For a more intense glitter effect, increase the amount of glitter in the recipe.
  • Adjust the amount of coconut oil or shea butter to achieve your desired level of creaminess and hydration.
  • Store your homemade glitter lipstick pink in a cool, dry place to maintain its quality and longevity.

Embrace your creativity and have fun crafting your own custom lipstick pink that perfectly reflects your personal style.

FAQs

Is Glitter Lipstick Pink suitable for everyday wear?

Glitter pink can be worn for everyday occasions, but the level of glitter and intensity of the pink shade should be considered. For a more subtle, everyday look, opt for a glitter pink with a sheer, satin finish and finer glitter particles. Avoid heavy, chunky glitters or bold, neon pinks for a daytime look.

Read Also: Is Summer Fridays Worth It?

How do I remove Glitter Lipstick Pink?

Removing lipstick pink can be a bit more challenging than traditional lipsticks, as the glitter particles can cling to the lips. Start by gently blotting your lips with a tissue to remove any excess product. Then, use a dedicated lip makeup remover or a gentle, oil-based cleanser to dissolve the lipstick. Avoid scrubbing too hard, as this can irritate the delicate lip skin.

Read Also: Face Mask for Summer.

Can Glitter Lipstick Pink cause irritation?

While glitter lipstick is generally safe for most people, some individuals may experience irritation or sensitivity, especially if the formula contains low-quality or abrasive glitter particles. It’s essential to patch test any new glitter pink product before applying it to your entire lips. If you experience any redness, itching, or discomfort, discontinue use and consult a dermatologist.

Read Also: Shampoo for Summer.

How long does Glitter Lipstick Pink last?

The longevity of glitter lipstick can vary depending on the formula, application technique, and individual factors. With proper preparation and maintenance, a high-quality lipstick pink can last for several hours, even through eating and drinking. However, the glitter particles may start to fade or migrate over time. Carry the product with you for touch-ups throughout the day to maintain the vibrant, sparkling effect.

Read Also: Summer Dip Nails.

Can I wear Glitter Lipstick Pink with other makeup?

Absolutely! Glitter lipstick pink can be easily incorporated into a variety of makeup looks. For a more subtle, everyday vibe, pair it with a natural, no-makeup makeup look. For a bold, night-out look, complement the glitter lipstick with a smoky eye or a strong, winged eyeliner. Just be mindful of not overdoing the glitter, as it can become overwhelming if used excessively across the entire face.

Read Also: Red Glitter Lipstick.

By addressing these common questions, you can feel confident in incorporating glitter lipstick pink into your beauty routine and rocking a show-stopping pout with ease.

Read Also: Pull Ups While Pregnant.

Conclusion

In the captivating world of glitter lipstick pink, the possibilities for self-expression and creativity are endless. From bold, high-impact shades to subtle, shimmering hues, this versatile makeup trend has the power to transform your look and boost your confidence with every application.Whether you’re a seasoned glitter lipstick pink enthusiast or just starting to explore this sparkling realm, we hope this comprehensive guide has provided you with the knowledge and inspiration to embrace your inner glamour goddess. So, go forth and let your lips shine, one glitter lipstick pink at a time!

Read Also: Dark Glitter Lipstick.

Continue Reading

Beauty Tips

Summer Dip Nails: Top Colors to Flaunt This Season

Published

on

summer dip nails

Here is your complete guide to summer dip nails

Introduction to Summer Dip Nails

As the warm weather approaches, the beauty world is abuzz with the latest nail trend that’s capturing the hearts of fashion-forward individuals – summer dip nails. These vibrant, eye-catching nails are the perfect way to add a touch of fun and flair to your summer look. Whether you’re looking to experiment with bold colors, intricate designs, or a low-maintenance manicure, summer dip nails offer a unique and versatile solution.

In this comprehensive guide, we’ll dive deep into the world of summer dip nails, exploring the different techniques, popular designs, and the benefits of this captivating nail art. We’ll also provide step-by-step instructions on how to create your own summer dip nails at home, ensuring you can achieve a professional-looking manicure without breaking the bank.

So, let’s embark on a journey to discover the endless possibilities of summer dip nails and how you can incorporate this vibrant trend into your beauty routine.

Understanding Summer Dip Nails: The Basics

Summer dip nails are a unique nail art technique that involves dipping the nails into a colored powder, creating a textured, matte finish. Unlike traditional nail polish, which requires brushing and painting, the dipping process allows for a quick and easy application that’s both durable and long-lasting.

The powder used for summer dip nails is typically a combination of acrylic and pigments, which gives it a vibrant and eye-catching color. The dipping process can be repeated multiple times to achieve the desired depth of color and coverage, allowing for a truly customizable manicure.

One of the key benefits of summer dip nails is their durability. Unlike regular nail polish, which can chip and peel over time, summer dip nails are much more resistant to wear and tear, making them a great option for those with active lifestyles or who want their manicure to last longer.

Exploring the Endless Possibilities of Summer Dip Nail Designs

When it comes to summer dip nails, the design possibilities are truly endless. From bold and vibrant colors to intricate patterns and eye-catching accents, there’s a summer dip nail design to suit every personal style and preference. Let’s dive into some of the most popular and stunning summer dip nail designs:

Solid Color Dip Nails

One of the most classic and versatile summer dip nail designs is the solid color dip. This look involves dipping the nails into a single, vibrant color, creating a bold and eye-catching manicure. Popular summer-inspired colors for this design include:

ColorHex Code
Bright Pink#FF69B4
Tangerine Orange#FFA500
Sunny Yellow#FFFF00
Ocean Blue#1E90FF
Tropical Green#00FF7F

Ombre Dip Nails

For a truly stunning and on-trend look, consider the ombre dip nail design. This technique involves dipping the nails in a gradient of colors, starting with a lighter shade at the cuticle and gradually transitioning to a darker shade at the tip. The result is a beautiful, seamless effect that’s perfect for the warm weather. Some popular ombre color combinations for summer dip nails include:

  • Pink to Fuchsia
  • Peach to Coral
  • Mint to Turquoise
  • Lavender to Purple
  • Sunshine Yellow to Mustard

Glitter Dip Nails

If you’re looking to add a touch of sparkle to your summer nails, consider the glitter dip design. This look involves dipping the nails into a powder that contains fine glitter particles, creating a shimmering and eye-catching effect. Popular glitter colors for summer include:

  • Gold
  • Silver
  • Holographic
  • Rose Gold
  • Multicolored

Nail Art Dip Nails

For the true nail art enthusiasts, summer nails offer the perfect canvas for intricate and creative designs. From abstract patterns and geometric shapes to tropical-inspired motifs and floral accents, the possibilities are truly endless. With the textured finish of the dip powder, these nail art designs can truly shine and stand out.

Mastering the Art of Summer Dip Nails at Home

Creating summer nails at home is a relatively simple process, but it does require some specialized tools and materials. Here’s a step-by-step guide on how to achieve the perfect summer dip nail look in the comfort of your own home:

Supplies Needed:

  • Dip nail powder in your desired color(s)
  • Dip nail activator
  • Nail file and buffer
  • Base coat and top coat
  • Cuticle pusher and nipper
  • Nail primer (optional)

Step-by-Step Instructions:

  1. Prepare Your Nails: Begin by filing and shaping your nails to your desired length and shape. Use a buffer to gently smooth the surface of your nails, removing any ridges or unevenness.
  2. Push Back Cuticles: Use a cuticle pusher to gently push back your cuticles, ensuring a clean and tidy nail bed.
  1. Apply Nail Primer (Optional): If you want to ensure maximum adhesion, apply a thin layer of nail primer to your nails and let it dry completely.
  2. Apply Base Coat: Apply a thin layer of base coat to your nails and let it dry completely.
  3. Dip Nails in Powder: Dip your nails into the dip nail powder, making sure to fully cover the entire nail surface. Gently tap off any excess powder.
  4. Apply Activator: Use the dip nail activator to seal the powder onto your nails. Apply a thin layer and let it dry completely.
  1. Repeat Dipping and Activating: Repeat steps 5 and 6, dipping your nails into the powder and then applying the activator, until you achieve your desired coverage and color depth.
  2. File and Shape: Use a nail file to gently shape and smooth the edges of your nails, removing any excess powder.
  3. Apply Top Coat: Finish with a thin layer of top coat to seal in the dip nail and provide a glossy, long-lasting finish.

Remember to take your time and follow the instructions carefully for the best results. With a little practice, you’ll be creating professional-looking summer dip nails in no time!

The Benefits of Summer Dip Nails

Summer dip nails offer a range of benefits that make them a popular choice for the warm weather. Let’s explore some of the key advantages of this captivating nail trend:

1. Durability

One of the most significant benefits of summer nails is their exceptional durability. Unlike traditional nail polish, which can chip and peel over time, dip nails are much more resistant to wear and tear, making them a great option for those with active lifestyles or who want their manicure to last longer.

2. Customizability

With a wide range of color options and the ability to create intricate designs, summer nails allow for a high degree of customization and self-expression. Whether you’re looking for a bold and vibrant summer look or a more subtle and natural finish, the dipping technique offers endless possibilities to suit your personal style.

3. Low Maintenance

Once the initial application is complete, summer nails require minimal upkeep, as they don’t need to be touched up as frequently as traditional nail polish. This makes them a convenient and hassle-free option, especially during the busy summer months.

4. Versatility

Summer dip nails are a versatile nail trend that can be tailored to suit a variety of occasions and personal preferences. From casual beach days to formal events, these vibrant nails can seamlessly transition between different settings and outfits.

5. Healthier Nails

Compared to traditional nail polish, the dipping process is generally less damaging to the nails. This means that summer nails can be a healthier option, as they don’t contribute to dryness, brittleness, or other nail-related issues.

Frequently Asked Questions about Summer Dip Nails

As the popularity of summer dip nails continues to grow, so do the questions surrounding this captivating nail trend. Let’s address some of the most commonly asked questions:

How long do summer dip nails last?

Summer nails can typically last 2-4 weeks with proper care and maintenance. The longevity of the manicure will depend on factors such as your daily activities, how well you take care of your nails, and the quality of the products used.

Read Also: Lip Filler Side Profile.

Can summer dip nails be removed?

Yes, summer nails can be removed, but it’s important to do so properly to avoid damage to the natural nails. The most common removal method is to soak the nails in acetone until the dip powder lifts off, then file down any remaining product.

Read Also: Round Face Cheek Fillers Before and After.

Are summer dip nails safe for my nails?

When applied and removed correctly, summer nails are generally considered safe for the nails. However, it’s important to use high-quality products and to follow the instructions carefully to avoid any potential damage.

Read Also: Summer Fruit Nail Designs

Can I paint over summer dip nails?

Yes, you can paint over summer nails with traditional nail polish. However, it’s important to first lightly buff the surface of the dip nails to help the polish adhere better.

Read Also: Is Summer Fridays Worth It?

How much do summer dip nails cost?

The cost of summer nails can vary depending on where you get them done and the complexity of the design. On average, a full set of summer nails can range from $30 to $60, with touch-ups costing around $20 to $40.

Read Also: Face Mask for Summer.

Conclusion

Summer dip nails are a captivating and versatile nail trend that offer a unique and eye-catching alternative to traditional nail polish. Whether you’re drawn to bold, solid colors, stunning ombre designs, or intricate nail art, this dipping technique allows you to create a truly customized manicure that’s perfect for the warm weather.

Read Also: Pull Ups While Pregnant.

With their exceptional durability, low maintenance, and potential health benefits, summer dip nails are a must-try for anyone looking to elevate their summer beauty routine. So, what are you waiting for? Dive into the vibrant world of summer nails and create your own stunning summer-inspired manicure.

Read Also: Shampoo for Summer.

Continue Reading

Beauty Tips

Shampoo for Summer: Best for Beach Days

Published

on

shampoo for summer

Here is your complete guide to shampoo for summer

Introduction to Shampoo for Summer

As the summer season approaches, it’s time to start thinking about your hair care routine. The combination of sun exposure, chlorine, and humidity can leave your locks feeling dry, brittle, and dull. Choosing the right shampoo for summer is crucial to maintaining healthy, vibrant hair throughout the warmer months. In this comprehensive guide, we’ll explore the best shampoos for summer, their key features, and how to incorporate them into your summer hair care routine.

We’ll cover the following key topics:

  • The importance of summer-specific shampoo
  • Identifying your hair type and needs
  • Top shampoo ingredients for summer
  • Recommended shampoo products for summer
  • Tips for using shampoo in your summer hair care routine

By the end of this article, you’ll have all the information you need to select the perfect shampoo for summer to keep your hair looking and feeling its best, even in the heat of summer.

The Importance of Summer-Specific Shampoo

During the summer, your hair faces a unique set of challenges that require specialized care. Exposure to the sun’s UV rays can cause color fading and dryness, while chlorine and saltwater can strip away natural oils and leave hair feeling brittle and damaged. Using a regular shampoo during the summer may not be enough to address these issues.

Summer-specific shampoos are formulated with ingredients that nourish, protect, and revitalize hair, helping to counteract the damaging effects of the season. By incorporating a summer shampoo into your routine, you can expect benefits such as:

  • Improved moisture and hydration
  • Enhanced color vibrancy and protection
  • Reduced frizz and increased manageability
  • Strengthened, healthier-looking hair

Investing in the right shampoo for summer can make a significant difference in the overall condition and appearance of your hair.

Identifying Your Hair Type and Needs

Before selecting a summer shampoo, it’s important to understand your hair type and specific needs. Different hair textures and conditions require different formulations to achieve optimal results.

Hair Type

Hair TypeShampoo Recommendation
Straight/Fine HairLook for a lightweight, volumizing shampoo to add body and prevent limp, flat hair.
Wavy/Medium HairOpt for a shampoo that provides moderate hydration and frizz control.
Curly/Coarse HairChoose a nourishing, moisturizing shampoo to keep curls defined and manageable.
Color-Treated HairSeek out a shampoo that is color-safe and helps preserve vibrancy.

Hair Concerns

Hair ConcernShampoo Recommendation
Dry/Damaged HairLook for a shampoo with hydrating and reparative ingredients, such as argan oil or keratin.
Oily/Greasy HairChoose a clarifying shampoo that effectively removes excess oil and buildup.
Frizzy HairSeek out a shampoo with smoothing and anti-humidity properties, like silicones or glycerin.
Thinning/Weak HairOpt for a shampoo that promotes hair growth and strengthens strands.

By identifying your hair type and specific concerns, you can narrow down your shampoo selection and find the perfect product to address your summer hair care needs.

Top Shampoo Ingredients for Summer

When selecting a shampoo for summer, it’s important to look for formulas that contain key ingredients to nourish, protect, and revitalize your hair. Here are some of the top ingredients to look for:

IngredientBenefits
Coconut OilDeeply hydrates and conditions hair, providing moisture and softness.
Aloe VeraSoothes and cools the scalp, while also adding shine and manageability.
Sunscreen AgentsHelp shield hair from UV damage and color fading.
Antioxidants (e.g., Vitamin E, Green Tea)Protect hair from environmental stressors and free radical damage.
SiliconesSmooth the hair cuticle, reducing frizz and adding shine.
Sulfate-Free SurfactantsCleanse gently without stripping natural oils.

By incorporating these key ingredients into your summer shampoo, you can expect benefits such as:

  • Improved moisture and hydration
  • Enhanced color vibrancy and protection
  • Reduced frizz and increased manageability
  • Strengthened, healthier-looking hair

When reading shampoo labels, be sure to look for these beneficial ingredients to ensure you’re selecting a formula that will meet your summer hair care needs.

Hydration Guide

Importance of Hydration for Summer Hair

During the summer months, hair is exposed to a variety of environmental stressors that can lead to dryness, brittleness, and damage. Sun exposure, chlorine, and saltwater can strip away natural oils, leaving hair feeling parched and unmanageable. Using a regular shampoo may not provide enough hydration to counteract these effects, leading to frizz, split ends, and an overall dull appearance.

Key Hydrating Ingredients

To keep your hair hydrated and healthy all summer long, look for a shampoo that contains the following key hydrating ingredients:

  • Coconut oil: Deeply hydrates and conditions hair, providing moisture and softness
  • Aloe vera: Soothes and cools the scalp, while also adding shine and manageability
  • Glycerin: Attracts and retains moisture, helping to keep hair hydrated
  • Panthenol: Penetrates the hair shaft to strengthen and add flexibility
  • Hyaluronic acid: Binds moisture to the hair, providing intense hydration

Recommended Hydrating Shampoos

Some top-recommended hydrating shampoos for summer include:

  • Moroccanoil Hydrating Shampoo: Infused with argan oil and antioxidants to deeply nourish and revive dry, damaged hair
  • Pureology Hydrate Shampoo: Sulfate-free formula with coconut oil and vitamin E to intensely hydrate and protect color-treated hair
  • Ouidad Curl Quencher Moisturizing Shampoo: Contains glycerin and silicones to smooth the cuticle and control frizz in humid conditions

By incorporating a hydrating shampoo into your summer hair care routine and following additional tips like using a pre-shampoo treatment and applying a leave-in conditioner, you can keep your hair feeling soft, smooth, and manageable all season long.

Recommended Shampoo Products for Summer

Based on the key ingredients and hair type/concern considerations, here are some top-recommended shampoo for summer products:

Best for Dry/Damaged Hair

  • Moroccanoil Hydrating Shampoo: Infused with argan oil and antioxidants to deeply nourish and revive dry, damaged hair.
  • Pureology Hydrate Shampoo: Sulfate-free formula with coconut oil and vitamin E to intensely hydrate and protect color-treated hair.

Best for Frizzy Hair

  • Ouidad Curl Quencher Moisturizing Shampoo: Contains glycerin and silicones to smooth the cuticle and control frizz in humid conditions.
  • DevaCurl One Condition Decadence: Sulfate-free, creamy formula that helps define and tame curly, coily hair.

Best for Oily/Greasy Hair

  • Neutrogena Anti-Residue Shampoo: A clarifying formula that effectively removes buildup and excess oil without stripping the hair.
  • Klorane Shampoo with Nettle: Infused with nettle extract to gently cleanse and balance oily scalps.

Best for Color-Treated Hair

  • Biolage ColorLast Shampoo: Sulfate-free formula with UV filters to help preserve color vibrancy and prevent fading.
  • Redken Color Extend Magnetics Shampoo: Strengthens and protects color-treated hair while adding shine and softness.

Best for Thinning/Weak Hair

  • Nioxin System 1 Shampoo: Stimulates the scalp and strengthens thin, fine hair to promote growth and volume.
  • Aveda Invati Advanced Exfoliating Shampoo: Contains salicylic acid and turmeric to gently exfoliate and revitalize the scalp.

When selecting a summer shampoo, be sure to consider your specific hair type and needs to ensure you choose a formula that will provide the best results. Experiment with different products and find the one that works best for your hair.

Tips for Using Shampoo in Your Summer Hair Care Routine

Incorporating a summer-specific shampoo into your hair care routine is just the first step. Here are some additional tips to help you get the most out of your shampoo and maintain healthy, vibrant hair all season long:

  • Adjust your washing frequency: During the summer, you may need to shampoo more or less often depending on your hair type and activity level. Experiment to find the sweet spot that keeps your hair clean and balanced.
  • Use a pre-shampoo treatment: Apply a nourishing hair mask or oil before shampooing to provide an extra boost of hydration and protection.
  • Rinse with cool water: Finish your shampoo routine by rinsing with cool or lukewarm water to help seal the hair cuticle and lock in moisture.
  • Limit heat styling: Minimize the use of hot tools like blow dryers, curling irons, and straighteners, as they can further dry out and damage hair during the summer.
  • Protect hair from sun exposure: Wear a hat or scarf when spending extended time outdoors to shield your hair from harmful UV rays.
  • Incorporate a leave-in conditioner: Apply a lightweight, leave-in conditioner or serum after shampooing to provide ongoing hydration and frizz control.

By following these tips and incorporating a summer-specific shampoo into your routine, you can keep your hair looking and feeling its best, even in the heat and humidity of the summer months.

Best Shampoo Brands for Summer

BrandKey Features
Moroccanoil– Infused with argan oil and antioxidants to deeply nourish and revive dry, damaged hair
– Ideal for color-treated hair
Pureology– Sulfate-free formula with coconut oil and vitamin E to intensely hydrate and protect color-treated hair
Ouidad– Contains glycerin and silicones to smooth the cuticle and control frizz in humid conditions
DevaCurl– Sulfate-free, creamy formula that helps define and tame curly, coily hair
Neutrogena– A clarifying formula that effectively removes buildup and excess oil without stripping the hair
Klorane– Infused with nettle extract to gently cleanse and balance oily scalps
Biolage– Sulfate-free formula with UV filters to help preserve color vibrancy and prevent fading
Redken– Strengthens and protects color-treated hair while adding shine and softness
Nioxin– Stimulates the scalp and strengthens thin, fine hair to promote growth and volume
Aveda– Contains salicylic acid and turmeric to gently exfoliate and revitalize the scalp

The key is to choose a shampoo that addresses your specific hair type and concerns, such as dryness, frizz, color-treated hair, or thinning hair. Look for formulas with beneficial ingredients like coconut oil, aloe vera, sunscreen agents, antioxidants, and silicones to keep your hair healthy and vibrant all summer long.

Color Protection

Importance of Color Protection

During the summer months, hair color is especially vulnerable to fading and damage due to exposure to the sun’s UV rays, chlorine, and saltwater. Using a regular shampoo may not provide enough protection for color-treated hair, leading to dull, brassy tones and premature color loss.

Key Ingredients for Color Protection

To keep your hair color vibrant and healthy all summer long, look for a shampoo that contains the following key ingredients:

  • UV filters: Help shield hair from harmful UV rays that can cause color fading
  • Antioxidants: Protect hair from environmental stressors and free radical damage
  • Sulfate-free surfactants: Cleanse gently without stripping natural oils or color
  • Silicones: Smooth the hair cuticle, adding shine and protecting color

Recommended Color Protection Shampoos

Some top-recommended color protection shampoos for summer include:

  • Biolage ColorLast Shampoo: Sulfate-free formula with UV filters to help preserve color vibrancy and prevent fading
  • Redken Color Extend Magnetics Shampoo: Strengthens and protects color-treated hair while adding shine and softness
  • Truss Professional Miracle Summer Shampoo: Gently cleanses, restores shine, and prevents color fading with a pleasant, refreshing fragrance

By incorporating a color protection shampoo into your summer hair care routine and following additional tips like limiting heat styling and wearing a hat when spending time outdoors, you can keep your hair color looking vibrant and healthy all season long.

FAQs

How often should I wash my hair in the summer?

The frequency of washing can vary depending on your hair type and activity level, but a good rule of thumb is to shampoo every 2-3 days. Oily or active hair may require more frequent washing, while dry or color-treated hair may benefit from less frequent shampooing.

Read Also: Lip Filler Side Profile.

Can I use the same shampoo year-round, or do I need a separate summer formula?

It’s generally recommended to use a summer-specific shampoo during the warmer months to address the unique challenges your hair faces, such as sun exposure, chlorine, and humidity. A year-round shampoo may not provide enough protection and nourishment for your hair during the summer.

Read Also: Labial Filler Injection Before and After.

What are some key ingredients to look for in a summer shampoo?

Some of the top ingredients for summer shampoos include coconut oil, aloe vera, sunscreen agents, antioxidants, and silicones. These ingredients help hydrate, protect, and smooth the hair.

Read Also: Round Face Cheek Fillers Before and After.

Can I use a summer shampoo year-round, or is it only suitable for the summer months?

While summer shampoos are specifically formulated to address the unique challenges of the summer season, many of them can be used year-round. However, if your hair type and needs change significantly during the colder months, you may want to switch to a different shampoo formula that better suits your winter hair care requirements.

Read Also: Summer Fruit Nail Designs

How do I know if a summer shampoo is working for my hair?

Signs that a summer shampoo is working for your hair include:

  • Improved moisture and hydration
  • Reduced frizz and increased manageability
  • Enhanced color vibrancy and protection
  • Stronger, healthier-looking hair
    If you notice these positive changes after incorporating a summer shampoo into your routine, it’s a good indication that you’ve found a formula that works well for your hair type and needs.

Read Also: Is Summer Fridays Worth It?

Conclusion

Choosing the right shampoo for summer is essential for maintaining healthy, vibrant hair throughout the warmer months. By understanding your hair type and needs, selecting shampoos with key beneficial ingredients, and incorporating them into a comprehensive summer hair care routine, you can keep your locks looking and feeling their best, even in the heat and humidity.

Read Also: Pull Ups While Pregnant.

Remember to experiment with different products, adjust your washing frequency as needed, and incorporate additional hair care steps like pre-shampoo treatments and leave-in conditioners. With the right summer shampoo and hair care regimen, you can enjoy beautiful, healthy hair all season long.

Read Also: Face Mask for Summer.

Continue Reading

Trending