Beauty Tips
How Long to Wait to Wash Hair Before Coloring?
how long to wait to wash hair before coloring
Here is your complete guide to How Long to Wait to Wash Hair Before Coloring
Introduction to How Long to Wait to Wash Hair Before Coloring
Having luscious, vibrant hair color is a top priority for many people. Whether you’re looking to cover grays, change up your look, or express your personality, hair coloring can be a fun and exciting process. However, one common question that arises is how long to wait to wash your hair before coloring. In this comprehensive guide, we will delve into the intricacies of this topic and provide you with valuable insights on how to achieve the best results for your hair color. So, let’s dive in! So what you need to know about how long to wait to wash hair before coloring. Here is your complete guide to how long to wait to wash hair before coloring.
Understanding Hair Coloring Process
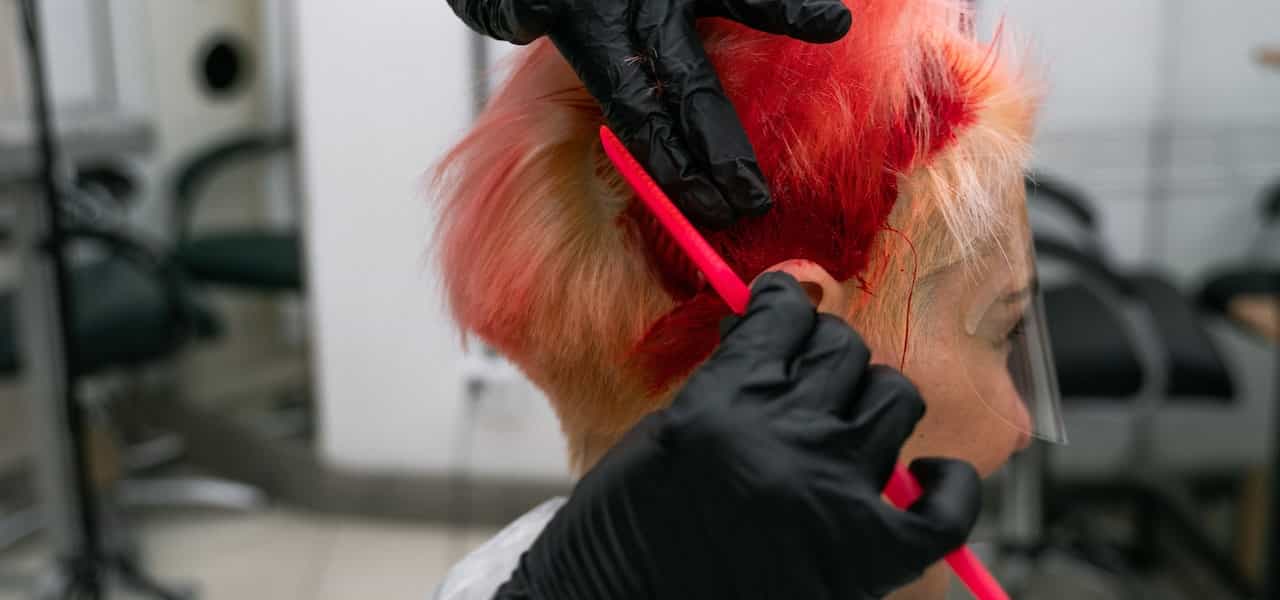
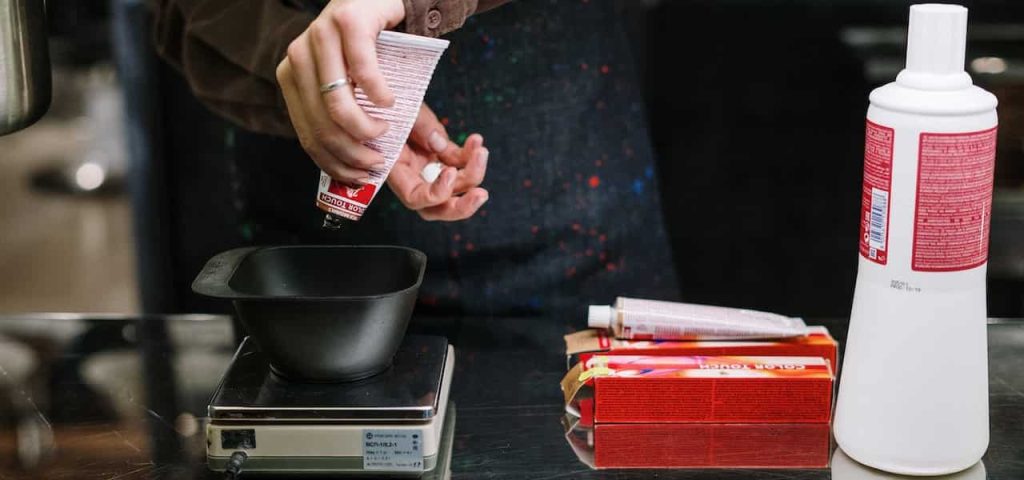
Before we delve into the waiting time, it’s crucial to understand how hair coloring works. Hair color products, such as permanent, semi-permanent, or demi-permanent dyes, use a combination of chemicals to penetrate the hair shaft and alter the color. Factors such as hair type, texture, and porosity can affect how well the color is absorbed. Prepping the hair before coloring is vital as it helps to remove any buildup, ensures even color application, and enhances color absorption.
Why Wait to Wash Hair Before Coloring?
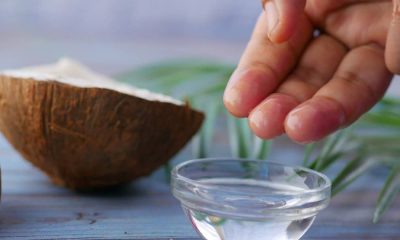
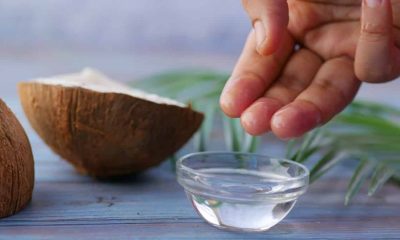
You might be tempted to wash your hair right before coloring to ensure a clean canvas, but it’s essential to resist this urge. Waiting to wash your hair before coloring is crucial as it allows the natural oils on your scalp and hair to act as a protective barrier. These oils help to safeguard your scalp from potential irritation caused by the chemicals in hair color products. Additionally, the oils also help to coat the hair shaft, allowing for better color absorption and more even results. Washing your hair too soon can strip away these oils, resulting in uneven color and a less desirable outcome.
Factors to Consider for Waiting Time
The waiting time before washing your hair before coloring can vary depending on several factors. The type of hair color product you’re using is a crucial consideration. Permanent hair color typically requires a longer waiting time, usually 24 to 48 hours, to allow the color to fully develop and set. Semi-permanent hair color usually requires a shorter waiting time, around 24 hours, as it doesn’t penetrate the hair shaft as deeply. Demi-permanent hair color falls somewhere in between, typically requiring a waiting time of 24 to 48 hours.
It’s essential to carefully read and follow the manufacturer’s instructions and recommendations for the specific hair color product you’re using. Each product may have its unique waiting time, and deviating from these instructions may result in less satisfactory results. The desired color outcome and the condition of your hair also play a role in determining the waiting time. If you have previously colored your hair, you may need to wait longer to ensure the color fully develops and blends seamlessly with the existing color.
General Guidelines for Waiting Time
While the waiting time can vary depending on various factors, some general guidelines can help you determine how long to wait to wash your hair before coloring. For permanent hair color, it’s typically recommended to wait at least 24 to 48 hours after application before washing your hair. For semi-permanent hair color, waiting 24 hours is usually sufficient. Demi-permanent hair color typically requires a waiting time of 24 to 48 hours, as mentioned earlier.
It’s crucial to keep in mind that these are general guidelines and may vary depending on the specific hair color product and instructions. It’s always best to follow the manufacturer’s recommendations and consult with a professional stylist for personalized advice based on your hair type, color, and desired outcome.
Here’s a table outlining some common types of hair coloring:
| Type of Hair Coloring | Description | Pros | Cons |
|---|---|---|---|
| Permanent Hair Color | Provides long-lasting results and covers gray hair completely. | Offers full coverage and can be customized to achieve desired color. | Requires regular touch-ups as new hair growth occurs. Can cause damage to hair due to the use of chemicals. |
| Semi-Permanent Hair Color | Deposits color onto the hair without altering the natural color, gradually fades over time. | Does not require strong chemicals, gentle on the hair. Can be used to enhance natural hair color or add temporary highlights. | Fades relatively quickly and may not cover gray hair completely. May require frequent re-application to maintain desired color. |
| Demi-Permanent Hair Color | Blends natural hair color with the desired color, fades gradually over time. | Less damaging than permanent color, provides more coverage than semi-permanent color. Can be used to darken or lighten hair without drastic changes. | May not provide complete gray coverage. Requires regular touch-ups as new hair growth occurs. |
| Temporary Hair Color | Provides temporary color that can be washed out easily. Can be in the form of sprays, gels, or chalks. | Allows for fun and temporary color changes without commitment. Does not require chemicals or long-term commitment. | Fades quickly and may transfer onto clothing or other surfaces. May not provide intense color or coverage. |
| Highlights/Lowlights | Adds lighter (highlights) or darker (lowlights) strands to create dimension and contrast in the hair. Can be done using various techniques such as foils, balayage, or ombre. | Adds depth and dimension to the hair. Can create a natural or dramatic effect depending on the technique used. | Requires maintenance to touch-up as new hair growth occurs. Can be expensive depending on the salon and technique used. |
Additional Tips and Precautions
To achieve the best results when waiting to wash your hair before coloring, here are some additional tips and precautions to keep in mind:
- Perform a patch test: Before coloring your hair, it’s essential to perform a patch test to ensure that you’re not allergic to the hair color product. Apply a small amount of the product behind your ear or on a small section of your scalp and wait for 24 hours to check for any adverse reactions.
- Avoid using styling products: Prior to coloring your hair, it’s best to avoid using any styling products, such as gels, mousse, or hairspray, as they can create a barrier on your hair and inhibit color absorption.
- Protect your scalp: When applying hair color, make sure to protect your scalp with a barrier cream or petroleum jelly to prevent any potential irritation from the chemicals.
- Follow the instructions carefully: Always read and follow the instructions provided by the hair color product manufacturer carefully. Overexposure or leaving the color on for too long can result in damage to your hair and scalp.
- Use lukewarm water for washing: When it’s finally time to wash your hair after the waiting period, use lukewarm water instead of hot water, as hot water can strip away the color and cause it to fade more quickly.
- Use color-safe shampoo and conditioner: After coloring your hair, it’s important to use color-safe shampoo and conditioner to maintain the vibrancy and longevity of your color. Avoid harsh shampoos that contain sulfates, as they can strip away the color.
True or False
True or False: You can dye your hair whether it’s clean or dirty
True. You can technically dye your hair whether it’s clean or dirty. However, as mentioned earlier, it’s generally recommended to avoid washing your hair immediately before a hair color appointment to allow natural oils to build up on your scalp and hair, which can provide a protective barrier during the coloring process. It’s important to follow the specific instructions provided by the hair color product manufacturer or your stylist for best results.
True or False: Hair color matters
True. Hair color matters when it comes to choosing the right hair color product and achieving desired results. Factors such as your natural hair color, the desired end result, and the condition of your hair can all affect the outcome of your hair coloring process. It’s important to consider factors like skin tone, eye color, and personal style when selecting a hair color to ensure it complements your overall appearance.
True or False: It’s best to skip a wash or two prior to bleaching
True. It’s generally recommended to avoid washing your hair for at least one or two days prior to bleaching. This allows the natural oils on your scalp and hair to build up, providing a protective barrier during the bleaching process. However, it’s important to follow the specific instructions provided by the hair bleaching product manufacturer or your stylist for best results.
Read More About Powerlifting Weight Classes for Women: Everything You Need to Know.
True or False: It’s best to show up to your appointment with wet hair
False. It’s generally not recommended to show up to a hair color appointment with wet hair, unless specifically instructed by your stylist. Wet hair can affect the application process and dilute the hair color, resulting in uneven or less vibrant results. It’s best to follow the specific instructions given by your stylist or the hair color product manufacturer on whether your hair should be wet or dry during the appointment.
Read More About The Best Sign Matches for Every Sun Sign.
FAQs
Is it OK to wash hair one day before coloring?
Yes, it is generally recommended to wash your hair one day before coloring. This allows your natural oils to build up on your scalp and hair, which can provide a protective barrier during the coloring process. However, it’s important to follow the specific instructions provided by the hair color product manufacturer, as some products may have different recommendations.
Read More About The Surprising Benefits of Sleeping on the Floor.
Should you wash your hair before a hair color appointment?
In most cases, it’s best to avoid washing your hair right before a hair color appointment. As mentioned earlier, the natural oils on your scalp and hair can provide a barrier that helps protect your scalp from potential irritation caused by the chemicals in the hair color. Additionally, washing your hair right before the appointment can make it more difficult for the color to adhere properly to the hair strands, potentially affecting the final result. It’s recommended to follow the specific instructions given by your stylist or the hair color product manufacturer on when and how to wash your hair prior to a hair color appointment.
Read More About Home Remedies to Remove Acrylic Nails.
Conclusion
In conclusion, waiting to wash your hair before coloring is an essential step in achieving the best results. The waiting time can vary depending on factors such as the type of hair color product, the condition of your hair, and the desired outcome. Following the manufacturer’s instructions, performing a patch test, and taking necessary precautions can help you achieve a successful hair coloring experience. By keeping these tips in mind, you can enjoy vibrant, long-lasting hair color that enhances your style and confidence. Happy coloring!


Here is your complete guide to summer shampoo
Introduction to Summer Shampoo
As the warm summer months approach, it’s time to start thinking about the unique hair care needs that come with the season. Summer shampoo is a specialized product designed to address the specific challenges faced by hair during the hotter, more humid days. Whether you’re dealing with the drying effects of the sun, the saltiness of the ocean, or the buildup of sweat and product, the right summer shampoo can make all the difference in maintaining healthy, beautiful locks.
In this comprehensive guide, we’ll explore the top 10 summer shampoos on the market, delve into the factors to consider when choosing the perfect one for your hair, and provide expert tips on how to properly use these products for optimal results. We’ll also discuss the benefits of using a summer shampoo, address common questions, and offer DIY recipes for those who prefer a more natural approach to their hair care routine.
Factors to Consider When Choosing a Summer Shampoo
When it comes to selecting the ideal summer shampoo, there are several key factors to take into account:
Hair Type and Texture
Not all hair is created equal, and the same holds true for summer shampoos. Individuals with fine, thin hair may require a gentler formula that won’t weigh down their strands, while those with thick, coarse hair may benefit from a more nourishing and moisturizing shampoo.
Scalp Condition
The scalp can also play a significant role in the selection of a summer shampoo. If you have a dry, flaky scalp, you’ll want to look for a shampoo that addresses this issue, perhaps with the inclusion of soothing and hydrating ingredients.
UV Protection
One of the primary concerns during the summer months is the damaging effects of the sun’s UV rays. A summer shampoo that offers built-in UV protection can help shield your hair from discoloration, dryness, and premature aging.
Hydration and Moisture
The hot, humid weather can quickly strip the natural oils from your hair, leading to dryness and brittleness. A summer shampoo that provides ample hydration and moisture can help counteract these effects, keeping your hair soft, supple, and manageable.
Ingredients to Avoid
When selecting a summer shampoo, it’s also important to be mindful of certain ingredients that may be detrimental during the summer. Sulfates, parabens, and harsh chemicals can further dry out and damage hair, so it’s best to opt for gentler, more nourishing formulas.
Top 10 Summer Shampoos
To help you navigate the vast array of summer shampoo options, we’ve compiled a list of the top 10 products on the market in 2024. Each shampoo is evaluated based on key features, such as hair type suitability, scalp care, UV protection, and hydration.
| Brand | Product Name | Key Features | Price |
|---|---|---|---|
| Aveda | Sun Care Shampoo | – Gentle, sulfate-free formula – Provides UV protection – Hydrates and nourishes hair | $30 |
| Moroccanoil | Hydrating Shampoo | – Infused with argan oil – Deeply moisturizes and conditions – Suitable for all hair types | $26 |
| Ouai | Summer Shampoo | – Lightweight, non-greasy formula – Helps prevent color fading – Adds shine and manageability | $28 |
| Briogeo | Scalp Revival Charcoal + Coconut Oil Micro-Exfoliating Shampoo | – Gently exfoliates the scalp – Helps balance oil production – Infused with soothing ingredients | $42 |
| Bumble and Bumble | Surf Shampoo | – Mimics the effects of saltwater – Adds volume and texture – Helps protect against UV damage | $31 |
| Oribe | Gold Lust Repair & Restore Shampoo | – Luxurious, salon-quality formula – Strengthens and repairs damaged hair – Provides UV protection | $49 |
| DevaCurl | One Condition Decadence | – Sulfate-free, curl-enhancing formula – Deeply hydrates and nourishes curly hair – Helps maintain definition | $22 |
| Verb | Sea Shampoo | – Infused with sea minerals – Adds volume and beach-inspired texture – Helps protect against environmental stressors | $18 |
| Kérastase | Soleil Shampoo | – Formulated for color-treated hair – Provides UV protection and antioxidant benefits – Helps maintain vibrancy and shine | $36 |
| Pureology | Hydrate Shampoo | – Sulfate-free, color-safe formula – Deeply hydrates and nourishes dry hair – Helps prevent color fading | $30 |
How to Properly Use Summer Shampoo
To get the most out of your summer shampoo, it’s important to follow the proper usage guidelines:
Frequency of Washing
- During the summer, it’s generally recommended to wash your hair less frequently, as overwashing can strip the natural oils and lead to dryness.
- Aim to wash your hair 2-3 times per week, or as needed, depending on your hair type and activity level.
Application Techniques
- Gently massage the summer shampoo into your scalp, using your fingertips to work it through the length of your hair.
- Avoid vigorously scrubbing or rubbing, as this can cause further damage and irritation.
- Rinse thoroughly with lukewarm water to ensure all the product is removed.
Rinse and Follow-up Care
- After rinsing, apply a summer-specific conditioner or hair mask to help replenish moisture and protect your hair from the elements.
- Avoid excessive heat styling, and consider air-drying or using a gentle, low-heat setting to minimize further damage.
Benefits of Using Summer Shampoo
Incorporating a summer shampoo into your hair care routine can provide numerous benefits, including:
- UV Protection: Many summer shampoos contain ingredients that help shield your hair from the damaging effects of the sun’s UV rays, preventing discoloration, dryness, and premature aging.
- Hydration and Moisture Balance: These specialized shampoos are formulated to counteract the drying effects of summer weather, helping to maintain the optimal moisture levels in your hair and scalp.
- Damage Repair and Prevention: Summer shampoos often contain nourishing ingredients that can help repair existing damage and prevent further harm caused by environmental stressors.
Tips for Healthy Summer Hair
Maintaining healthy, vibrant hair during the summer months requires a comprehensive approach. In addition to using a summer shampoo, consider the following tips:
- Hydration and Nutrition: Ensure your hair and scalp are well-hydrated by drinking plenty of water and incorporating nourishing, hair-healthy foods into your diet.
- Protection from UV Rays: In addition to using a summer shampoo with UV protection, wear a hat or use a leave-in product with SPF to shield your hair from the sun’s damaging rays.
- Avoiding Overwashing: As mentioned earlier, resist the urge to wash your hair too frequently, as this can strip the natural oils and lead to dryness.
DIY Summer Hair Care Recipes
For those who prefer a more natural approach to their hair care routine, here are some DIY summer hair care recipes to try:
Homemade Hydrating Summer Shampoo
- 1 cup castile soap
- 1/2 cup aloe vera gel
- 2 tablespoons coconut oil
- 10 drops of essential oils (such as lavender or peppermint)
Natural UV Protection Summer Hair Mask
- 1/2 cup coconut oil
- 1/4 cup honey
- 2 tablespoons avocado
- 1 tablespoon carrot seed oil
Refreshing Summer Scalp Cleanser
- 1 cup apple cider vinegar
- 1/2 cup water
- 10 drops of tea tree oil
- 5 drops of peppermint oil
Reviews and Testimonials
Customers and experts alike have praised the effectiveness of the top summer shampoos featured in this guide. Here’s what some have to say:
“Aveda’s Sun Care Shampoo has been a game-changer for my hair during the summer. It keeps my locks hydrated and protected from the sun’s rays, without weighing them down.” – Sarah, 32
“I have thick, coarse hair, and the Moroccanoil Hydrating Shampoo has been a lifesaver. It leaves my hair feeling soft, manageable, and nourished, even in the heat and humidity.” – Michael, 45
“As a hairstylist, I always recommend the Ouai Summer Shampoo to my clients. It’s gentle, yet effective, and helps maintain the vibrancy of color-treated hair.” – Emily, Salon Owner
FAQs about Summer Shampoo
What makes a shampoo suitable for summer?
Summer shampoos are formulated with specific ingredients and properties to address the unique hair care needs during the warmer months, such as UV protection, hydration, and gentle cleansing.
Read Also: Musky Scents for Women.
How often should I wash my hair with summer shampoo?
It’s generally recommended to wash your hair 2-3 times per week with a summer shampoo, as overwashing can strip the natural oils and lead to dryness.
Read Also: Liquid Gold Hair Growth Products.
Can I use regular shampoo in summer?
While you can use a regular shampoo during the summer, a summer-specific formula is often more beneficial, as it is designed to address the unique challenges faced by hair during this season.
Read Also: Desire Pheromone Perfume.
Are there specific ingredients to look for in summer shampoos?
Key ingredients to look for in summer shampoos include UV filters, hydrating and nourishing oils (such as argan or coconut oil), and gentle cleansers that won’t strip the hair.
Read Also: Summer Nails with Glitter.
How does summer shampoo differ from regular shampoo?
Summer shampoos are typically more lightweight, hydrating, and protective against environmental stressors, while regular shampoos may not be as well-suited for the specific needs of hair during the summer months.
Read Also: Summerween Nails.
Conclusion
Maintaining healthy, vibrant hair during the summer months requires a specialized approach, and the right summer shampoo can make all the difference. By considering factors such as hair type, scalp condition, UV protection, and hydration, you can find the perfect summer shampoo to keep your locks looking and feeling their best.
Read Also: Pull Ups While Pregnant.
Remember to use these products as directed, incorporate other summer hair care tips, and don’t be afraid to experiment with DIY recipes. With the right summer shampoo and a little TLC, you can enjoy the warm weather without sacrificing the health and beauty of your hair.
Read Also: Dip Nails Summer.

Here is your complete guide to dip nails summer
Introduction to Dip Nails Summer
As the warm summer months approach, it’s time to start thinking about the perfect nail look to complement the season. One trend that has been taking the beauty world by storm is dip nails. Dip nails, also known as powder nails or SNS nails, offer a long-lasting, durable, and customizable solution for your summer nail needs.
In this comprehensive guide, we’ll explore the benefits of dip nails for summer, how to prepare your nails, the latest trending colors and designs, maintenance tips, and even provide a step-by-step guide for DIY dip nails at home. Whether you’re a seasoned dip nail enthusiast or new to the trend, this article has everything you need to achieve the perfect dip nails summer look.
Benefits of Dip Nails for Summer
Dip nails are quickly becoming a go-to choice for many nail enthusiasts, especially during the summer months. Here are some of the key benefits that make dip nails a great option for the summer season:
- Longevity and Durability: Dip nails are known for their exceptional longevity, often lasting up to 4-6 weeks without chipping or cracking. This makes them an ideal choice for the active summer lifestyle, where your nails are exposed to more wear and tear.
- Resistance to Chips and Cracks: The unique layering process of dip nails creates a strong, chip-resistant finish that can withstand the demands of summer activities, such as swimming, gardening, or outdoor adventures.
- Variety of Colors and Designs: With a wide range of dip nail powder colors and the ability to customize designs, you can easily find the perfect look to match your summer style and mood.
- UV Protection for Nails: Many dip nail powders contain built-in UV protection, which helps to prevent discoloration and damage to your nails during the summer months when they are exposed to more sunlight.
Preparing Your Nails for Dip Nails in Summer
Before you dive into the world of dip nails for summer, it’s essential to properly prepare your nails to ensure the best results and long-lasting wear. Here’s what you need to do:
Nail Care Routine
- Establish a consistent nail care routine, including regular filing, buffing, and cuticle care.
- Ensure your nails are clean, free of any oils or residues, and properly dehydrated before applying the dip nail system.
- Consider using a nail strengthener or growth serum to keep your nails healthy and strong.
Nail Shape and Length
- Decide on the desired nail shape, such as square, oval, or almond, and trim your nails accordingly.
- Opt for a medium nail length, as longer nails may be more prone to lifting or breaking during the summer.
Cuticle Maintenance
- Gently push back and trim your cuticles to create a clean, well-groomed appearance.
- Avoid cutting or tearing the cuticles, as this can lead to irritation and infection.
- Regularly apply a cuticle oil or cream to keep the cuticles hydrated and healthy.
Hydration and Sun Protection
- Moisturize your hands and nails regularly to maintain optimal hydration.
- Use a broad-spectrum sunscreen on your hands and nails to protect them from harmful UV rays.
- Consider wearing gloves or using a hand cream with SPF when engaging in outdoor activities.
By following these preparation steps, you’ll ensure that your dip nails have the best possible foundation for a long-lasting, beautiful summer look.
Trending Dip Nail Colors and Designs for Summer
One of the most exciting aspects of dip nails is the endless possibilities when it comes to color and design. As we transition into the summer months, certain trends are taking the nail world by storm. Let’s explore some of the hottest dip nail colors and designs for the season:
Bright and Bold Colors
| Color | Description |
|---|---|
| Neon Pink | A vibrant, eye-catching shade that screams summer fun. |
| Sunshine Yellow | A cheerful, sunny hue that instantly brightens up any look. |
| Tropical Teal | A deep, rich teal that evokes the calming waters of a tropical paradise. |
| Fiery Orange | A bold, fiery orange that adds a touch of warmth and energy to your nails. |
Pastel Shades
| Color | Description |
|---|---|
| Soft Lavender | A soothing, delicate lavender that exudes a sense of tranquility. |
| Baby Blue | A calming, sky-blue shade that reminds us of clear summer skies. |
| Mint Green | A refreshing, minty green that captures the essence of a summer garden. |
| Peach Blossom | A delicate, peachy hue that adds a touch of femininity to your nails. |
Neon Accents
- Incorporate neon-colored dip powder as an accent or design element to create a bold, eye-catching look.
- Experiment with neon tips, half-moon designs, or abstract patterns for a modern, summer-inspired aesthetic.
Tropical and Floral Designs
- Embrace the vibrant colors and lush foliage of the tropics with palm leaf, pineapple, or hibiscus-inspired nail art.
- Delicate floral designs, such as dainty flowers or watercolor-inspired blooms, can also capture the essence of summer.
Maintenance Tips for Dip Nails in Summer
Maintaining the beauty and longevity of your dip nails during the summer months is crucial. Here are some essential tips to keep your nails looking their best:
Proper Aftercare Routine
- Establish a consistent aftercare routine, including regular nail cleaning, cuticle care, and the use of a nail buffer or file to maintain the smooth surface of your dip nails.
- Avoid using harsh chemicals, such as acetone-based nail polish removers, which can dry out and weaken your nails.
Moisturizing and Hydrating
- Regularly apply a nourishing nail and cuticle oil or cream to keep your nails and the surrounding skin hydrated.
- Consider using a hand cream with SPF to protect your hands and nails from sun damage.
Regular Touch-Ups
- Schedule regular touch-up appointments or plan to do touch-ups at home to address any growth or lifting at the nail bed.
- Keeping up with regular maintenance will help extend the life of your dip nails and ensure a seamless, polished look throughout the summer.
Avoiding Harsh Chemicals
- Steer clear of harsh chemicals, such as chlorine or harsh cleaning products, which can cause premature lifting or chipping of your dip nails.
- If you must expose your nails to these substances, be sure to wear gloves or take other protective measures.
By following these maintenance tips, you can ensure that your dip nails remain in top condition and continue to provide the long-lasting, durable wear you desire throughout the summer season.
Pros and Cons of Dip Nails for Summer
As with any nail treatment, dip nails have their own set of advantages and disadvantages to consider. Let’s take a closer look at the pros and cons of dip nails for the summer:
Pros:
- Durability: Dip nails are known for their exceptional longevity, often lasting up to 4-6 weeks without chipping or cracking.
- Aesthetics: The wide range of color options and customizable designs make dip nails a versatile and visually appealing choice for summer.
- UV Protection: Many dip nail powders contain built-in UV protection, helping to prevent discoloration and damage to your nails during the summer months.
- Convenience: Once applied, dip nails require minimal maintenance, making them a low-effort option for busy summer schedules.
Cons:
- Removal Process: The removal of dip nails can be more time-consuming and potentially damaging to the nails if not done properly.
- Cost: Dip nail services at a salon can be more expensive than traditional nail polish or gel manicures.
- Sensitivity: Some individuals may experience sensitivity or allergic reactions to the chemicals used in the dip nail system.
- Thickness: The layered application of dip nails can result in a thicker nail, which some may find less comfortable or natural-looking.
It’s important to weigh these pros and cons carefully to determine if dip nails are the right choice for your summer nail needs and preferences.
Tips for DIY Dip Nails at Home in Summer
If you’re interested in trying dip nails at home this summer, here are some tips to help you achieve professional-looking results:
Necessary Supplies
- Dip nail powder in your desired color(s)
- Dip nail base and activator liquids
- Nail file, buffer, and cuticle pusher
- Nail primer or dehydrator
- Top coat or sealant
- Protective gloves and a well-ventilated work area
Step-by-Step Guide
- Prepare your nails by filing, buffing, and dehydrating them to ensure a smooth, even surface.
- Apply the dip nail base coat and dip your nails into the colored powder, one by one.
- Gently tap off any excess powder and repeat the dipping process until you achieve your desired opacity.
- Seal the dip nails with the activator liquid and finish with a top coat or sealant.
- Cure the nails under a UV or LED lamp, if required by your dip nail system.
Common Mistakes to Avoid
- Overloading the nails with too much powder, which can lead to a thick, uneven finish.
- Failing to properly dehydrate the nails before application, resulting in poor adhesion.
- Rushing the curing process, which can compromise the longevity and durability of the dip nails.
Recommended Products
To ensure the best results for your DIY dip nails this summer, consider using high-quality products from trusted brands. Some popular and reliable dip nail systems include:
- OPI Powder Perfection
- Kiara Sky Dip Powder
- SNS Nails Dipping Powder
- Revel Nail Dip Powder System
By following these tips and using quality products, you can achieve salon-worthy dip nails in the comfort of your own home, just in time for the summer season.
Professional Dip Nails Services for Summer
If you prefer to have your dip nails done by a professional, there are several factors to consider when choosing a salon or nail technician:
Choosing a Salon
- Look for a salon that specializes in dip nails and has experienced, well-trained technicians.
- Check reviews and ask for recommendations from friends or online sources to ensure a reputable and reliable service.
- Ensure the salon follows strict sanitation and hygiene protocols to maintain a safe and clean environment.
Safety and Hygiene Practices
- Observe the salon’s cleanliness and the technician’s use of proper personal protective equipment (PPE), such as gloves and masks.
- Ensure that all tools and equipment are properly sterilized between clients.
- Ask about the salon’s policies regarding the use of fresh, single-use files and buffers for each client.
Customization Options
- Discuss your desired nail shape, length, and color preferences with the technician to ensure they can accommodate your summer nail goals.
- Inquire about any additional design or embellishment options, such as nail art or glitter accents, to personalize your dip nails.
Pricing and Packages
- Research the pricing for dip nail services in your area, as costs can vary depending on the salon and the complexity of the design.
- Some salons may offer package deals or discounts for regular dip nail maintenance, which can be beneficial during the summer months.
By choosing a reputable and experienced salon for your dip nails this summer, you can ensure a high-quality, long-lasting, and customized nail look that will perfectly complement your summer style.
FAQs about Dip Nails Summer
As you consider incorporating dip nails into your summer beauty routine, you may have some questions. Here are some of the most frequently asked questions about dip nails for the summer:
What are Dip Nails?
Dip nails, also known as powder nails or SNS nails, are a type of nail enhancement that involves dipping the nails into a colored powder to create a long-lasting, durable finish. The process involves several layers of base coat, colored powder, and a sealant to achieve the desired look.
How long do Dip Nails last in Summer?
Dip nails are known for their exceptional longevity, often lasting 4-6 weeks during the summer months. However, the exact wear time can vary depending on factors such as your nail growth, daily activities, and proper maintenance.
Read Also: Jelly Roll Botox.
Can I swim with Dip Nails?
Yes, you can generally swim with dip nails without any issues. The layered application and sealant used in the dip nail process help to protect the nails from water exposure and prevent premature lifting or chipping.
Read Also: Musky Scents for Women.
How to remove Dip Nails at home?
Removing dip nails at home can be a bit more involved than traditional nail polish. The most effective method is to soak the nails in acetone-based nail polish remover for 10-15 minutes, then gently file away the remaining powder. It’s important to take your time and avoid excessive filing to prevent damage to the natural nails.
Read Also: Liquid Gold Hair Growth Products.
Conclusion
As the warm summer months approach, dip nails emerge as the ultimate nail trend to embrace. With their exceptional longevity, chip-resistance, and customizable designs, dip nails offer the perfect solution for your summer nail needs.
Read Also: Desire Pheromone Perfume.
Whether you opt for a bold and bright color palette, soothing pastel shades, or tropical-inspired designs, dip nails can help you achieve the perfect summer nail look. By following the proper preparation and maintenance tips, you can ensure that your dip nails remain in top condition throughout the season.
Read Also: Summer Nails with Glitter.
For those interested in trying dip nails at home, the step-by-step guide and recommended products provided in this article can help you achieve salon-worthy results. And if you prefer the expertise of a professional, the tips for choosing a reputable salon and understanding the customization options will guide you to the perfect dip nails summer experience.
Read Also: Pull Ups While Pregnant.
So, as you embrace the warmth and vibrancy of the summer season, don’t forget to let your nails shine with the stunning and long-lasting beauty of dip nails. Enjoy the confidence and convenience that this trend has to offer, and let your nails be the ultimate summer accessory.
Read Also: Summerween Nails.

Here is your complete guide to summerween nails
Introduction to Summerween Nails
As the warm summer breeze caresses the air, a new and exciting trend has emerged in the world of nail art: Summerween nails. This captivating fusion of summer’s vibrant energy and the eerie allure of Halloween has captured the imagination of beauty enthusiasts worldwide. Summerween nails offers a delightful and unexpected twist on traditional summer nail designs, allowing individuals to express their creativity and individuality in a truly unique way.
The concept of Summerween has been gaining popularity in recent years, as people seek to infuse their summer celebrations with a touch of spooky charm. This playful intersection of summer and Halloween aesthetics has given rise to a growing demand for Summerween nails – a trend that allows individuals to embrace their inner ghoul while still embracing the carefree spirit of the summer season.
In this comprehensive guide, we will delve into the captivating world of Summerween nails, exploring the appeal of this trend, showcasing a diverse array of design ideas, and providing step-by-step techniques to help you create your own spooky-yet-chic nail art. Whether you’re a seasoned nail enthusiast or a newcomer to the world of nail art, this article will inspire you to unleash your inner Summerween spirit and transform your nails into a canvas for your darkly delightful creations.
The Appeal of Summerween Nails
The allure of Summerween nails lies in their ability to blend the vibrant, sun-drenched hues of summer with the eerie, haunting elements of Halloween. This unique fusion allows individuals to express their creativity and individuality in a way that is both playful and unexpected.
One of the primary reasons Summerween nails have become so popular is the inherent contrast they offer. During the summer months, when the world is typically awash in bright, cheerful colors and carefree beach vibes, the introduction of spooky, Halloween-inspired motifs creates a delightful juxtaposition that captures the imagination of nail art enthusiasts.
Moreover, Summerween nails provide a canvas for self-expression and experimentation. By incorporating elements of the supernatural, the macabre, and the whimsical into their nail designs, individuals can showcase their unique personalities and artistic sensibilities. This creative freedom allows for a wide range of design possibilities, from subtle and sophisticated to bold and daring.
Summerween Nail Design Ideas
Unleash your inner Summerween spirit with these captivating nail design ideas:
Spooky and Supernatural Themes
- Ghosts: Incorporate ghostly silhouettes, wispy apparitions, or haunting faces into your nail art.
- Bats: Depict the iconic winged creatures of the night, either in flight or perched on your nails.
- Spiders: Creepy crawlies take center stage with intricate spider web designs or realistic arachnid illustrations.
- Haunted Houses: Transport your nails to a spooky, abandoned mansion with detailed haunted house motifs.
| Spooky and Supernatural Themes | Examples |
|---|---|
| Ghosts | Wispy apparitions, haunting faces, ghostly silhouettes |
| Bats | Winged creatures in flight, perched bats |
| Spiders | Intricate spider webs, realistic arachnid illustrations |
| Haunted Houses | Detailed haunted mansion designs, eerie abandoned homes |
Pumpkin and Jack-o’-Lantern Designs
- Classic Pumpkins: Capture the essence of autumn with vibrant orange pumpkins, complete with carved faces.
- Whimsical Jack-o’-Lanterns: Add a touch of playfulness with quirky, cartoonish jack-o’-lantern designs.
- Pumpkin Patches: Create a miniature pumpkin patch on your nails, complete with vines and leaves.
| Pumpkin and Jack-o’-Lantern Designs | Examples |
|---|---|
| Classic Pumpkins | Vibrant orange pumpkins with carved faces |
| Whimsical Jack-o’-Lanterns | Quirky, cartoonish jack-o’-lantern designs |
| Pumpkin Patches | Miniature pumpkin patches with vines and leaves |
Creepy Crawlies
- Spiders: Showcase your arachnid obsession with intricate spider designs, complete with delicate webs.
- Insects: Bring the outdoors in with realistic depictions of beetles, butterflies, or other creepy crawlies.
- Snakes: Slither into the Summerween spirit with serpentine nail art, complete with scales and forked tongues.
| Creepy Crawlies | Examples |
|---|---|
| Spiders | Intricate spider designs with delicate webs |
| Insects | Realistic depictions of beetles, butterflies, and other creepy crawlies |
| Snakes | Serpentine nail art with scales and forked tongues |
Graveyard and Tombstone Motifs
- Tombstones: Craft miniature gravestones on your nails, complete with eerie epitaphs.
- Grim Reapers: Embrace the macabre with chilling Grim Reaper designs, wielding their scythes.
- Haunted Cemeteries: Transport your nails to a spooky graveyard, complete with mist, bats, and crumbling tombstones.
| Graveyard and Tombstone Motifs | Examples |
|---|---|
| Tombstones | Miniature gravestones with eerie epitaphs |
| Grim Reapers | Chilling Grim Reaper designs wielding scythes |
| Haunted Cemeteries | Spooky graveyard scenes with mist, bats, and crumbling tombstones |
Grim Reaper and Skeleton Designs
- Skeletal Hands: Depict the bony, outstretched fingers of a skeletal hand reaching across your nails.
- Grinning Skulls: Capture the eerie grin of a skull, either as a standalone design or incorporated into a larger motif.
- Skeleton Silhouettes: Showcase the striking silhouette of a skeleton, either in a full-body pose or as a partial design.
| Grim Reaper and Skeleton Designs | Examples |
|---|---|
| Skeletal Hands | Bony, outstretched fingers of a skeletal hand |
| Grinning Skulls | Eerie grinning skull designs |
| Skeleton Silhouettes | Striking skeletal silhouettes, either full-body or partial |
Haunted Forest Themes
- Twisted Trees: Craft gnarled, twisted tree branches that seem to reach out from your nails.
- Glowing Mushrooms: Incorporate bioluminescent mushrooms and other enchanted forest elements into your designs.
- Creepy Critters: Populate your haunted forest with small, sinister creatures, such as owls, bats, or foxes.
How to Achieve Summerween Nail Art: A Step-by-Step Guide
Ready to try your hand at summerween nails? Follow our easy-to-follow guide to create your own spellbinding manicure:
- Prep Your Nails: Start by cleaning and shaping your nails to ensure a smooth canvas for your design.
- Choose Your Colors: Select a palette that captures the essence of both summer and Halloween, from vibrant oranges and greens to deep purples and blacks.
- Get Creative: Let your imagination soar as you experiment with different motifs and patterns, from spooky silhouettes to tropical accents.
- Add Finishing Touches: Complete your summerween nails with a glossy topcoat to seal in your design and ensure long-lasting wear.
Summerween Nail Art Techniques
To bring your Summerween nail designs to life, you’ll need to master a variety of nail art techniques. From classic nail painting to more advanced methods, these tools and skills will help you create your spooky-yet-chic masterpieces.
Nail Painting
- Base Coats: Start with a solid base coat, either in a vibrant summer hue or a dark, moody tone to set the stage for your design.
- Freehand Painting: Use nail polish and fine-tipped brushes to meticulously paint your Summerween motifs directly onto the nail.
- Gradient Effects: Blend colors to create a gradient effect, transitioning from light to dark or vice versa, for a more ethereal, atmospheric look.
Nail Stamping
- Stamping Plates: Utilize specialized stamping plates featuring Summerween-inspired designs, such as ghosts, pumpkins, or spiderwebs.
- Stamping Polishes: Choose high-pigment nail polishes that will transfer clearly from the stamping plate to your nails.
- Stamping Techniques: Master the art of aligning the stamping plate, applying the polish, and transferring the design to your nails.
Decals and Stickers
- Pre-Designed Decals: Opt for pre-made Summerween nail decals featuring spooky motifs, ready to be applied to your nails.
- Customizable Stickers: Create your own Summerween nail art by designing and printing custom stickers to adhere to your nails.
- Placement and Layering: Experiment with different placement and layering techniques to achieve your desired Summerween look.
Nail Foils and Glitters
- Metallic Foils: Incorporate shimmering metallic foils, such as silver or gold, to add a touch of otherworldly elegance to your Summerween designs.
- Holographic Glitters: Embrace the iridescent, prismatic beauty of holographic glitters to create a mesmerizing, supernatural effect.
- Layering and Placement: Play with the placement and layering of foils and glitters to enhance your Summerween nail art.
Nail Art Brushes and Dotting Tools
- Fine-Tipped Brushes: Use delicate, precision brushes to paint intricate details, such as spider webs, skeletal fingers, or haunted house windows.
- Dotting Tools: Create perfectly round dots, eyes, or other circular elements with the help of specialized dotting tools.
- Blending and Shading: Utilize these tools to blend colors, create depth, and add shading to your Summerween nail designs.
By mastering these various nail art techniques, you’ll be able to transform your nails into a canvas for your spooky-yet-chic Summerween creations.
Summerween Nail Care and Maintenance
To ensure your Summerween nails remain in top condition, it’s essential to prioritize proper nail care and maintenance. Follow these tips to keep your nails healthy and your designs long-lasting:
- Nail Prep: Begin by thoroughly cleaning and dehydrating your nails to create a smooth, even surface for your Summerween designs.
- Base Coat Application: Apply a high-quality base coat to protect your natural nails and help your nail polish adhere better.
- Nail Polish Application: Use thin, even coats of nail polish to avoid bubbling or uneven coverage, and allow each layer to fully dry before adding the next.
- Top Coat Protection: Seal in your Summerween design with a durable, long-wearing top coat to prevent chipping and extend the life of your manicure.
- Nail Hydration: Regularly moisturize your nails and cuticles with a nourishing nail oil or cream to keep them healthy and strong.
- Gentle Removal: When it’s time to remove your Summerween nail art, use a non-acetone polish remover and avoid excessive scrubbing to prevent damage.
By following these simple steps, you can ensure your Summerween nails remain in tip-top shape, allowing you to enjoy your spooky-yet-chic designs for longer.
Summerween Nail Art Inspiration and Trends
As the Summerween nail art trend continues to captivate the beauty community, it’s no surprise that social media platforms have become a hub for stunning and innovative designs. From the intricate and detailed to the whimsical and playful, Summerween nails have inspired a wealth of creativity among nail art enthusiasts.
On platforms like Instagram, you’ll find a treasure trove of Summerween nail art inspiration, showcasing the work of talented nail artists and influencers. These visionaries have pushed the boundaries of traditional nail art, incorporating a wide range of techniques and motifs to bring their Summerween visions to life.
Some of the emerging trends in the Summerween nail art community include:
- Glow-in-the-Dark Designs: Incorporating glow-in-the-dark nail polish or pigments to create an otherworldly, luminescent effect.
- 3D Nail Art: Elevating Summerween designs with the addition of 3D elements, such as resin sculptures or textured embellishments.
- Minimalist Spookiness: Embracing a more subtle, understated approach with delicate, monochromatic Summerween motifs.
- Holographic Haunts: Leveraging the mesmerizing properties of holographic nail polish to add a touch of supernatural shimmer to Summerween designs.
- Nail Art Collaborations: Nail artists teaming up to create unique and innovative Summerween nail art collections.
By exploring the wealth of Summerween nail art inspiration on social media, you’ll undoubtedly find the motivation and ideas to unleash your own spooky-yet-chic creativity.
Tips for Long-Lasting Summerween Nails: Keep Your Mani Looking Fresh
Ensure your summerween nails stay looking bewitching for days on end with these helpful tips:
- Seal the Deal: Apply a high-quality topcoat to protect your manicure from chips and fading.
- Stay Hydrated: Keep your nails and cuticles moisturized to prevent dryness and breakage.
- Handle with Care: Avoid activities that may damage your nails, such as excessive typing or household chores.
Summerween Nail Care: Nurturing Your Nails in the Summer Heat
Maintain the health and vitality of your nails with these essential care tips:
- Stay Sun-Safe: Protect your nails from harmful UV rays by applying a sunscreen specifically formulated for nails.
- Stay Hydrated: Drink plenty of water to keep your nails hydrated and strong.
- Invest in Quality Products: Choose nail care products that nourish and strengthen your nails, such as cuticle oils and strengthening treatments.
Summerween Nail Trends: What’s Hot in Nail Art
Stay ahead of the curve with these emerging trends in summerween nail art:
- Ombre Effects: Experiment with gradient effects to create mesmerizing transitions between summer and Halloween hues.
- Texture Play: Add dimension to your manicure with textured finishes like glitter or matte topcoats.
- Intricate Details: Showcase your artistic skills with intricate designs, from delicate lace patterns to elaborate landscapes.
FAQs
What is Summerween nail art?
Summerween nail art is a unique and captivating trend that blends the vibrant, sun-drenched hues of summer with the eerie, haunting elements of Halloween. This fusion allows individuals to express their creativity and individuality in a playful and unexpected way, transforming their nails into a canvas for spooky-yet-chic designs.
How can I create Summerween nail designs at home?
Creating Summerween nail designs at home is entirely possible with the right tools and techniques. You can start by mastering the basics of nail painting, stamping, and the application of nail decals and stickers. Experiment with various Summerween-inspired motifs, such as ghosts, pumpkins, or spiderwebs, and don’t be afraid to get creative with color combinations and layering techniques.
Read Also: Olive Green Dip Nails.
What are some popular Summerween nail art motifs?
Some of the most popular Summerween nail art motifs include:
- Spooky and supernatural themes (ghosts, bats, spiders, haunted houses)
- Pumpkin and jack-o’-lantern designs
- Creepy crawlies (spiders, insects, snakes)
- Graveyard and tombstone motifs
- Grim Reaper and skeleton designs
- Haunted forest themes
Read Also: Jelly Roll Botox.
How do I care for and maintain Summerween nails?
Proper nail care and maintenance are essential for ensuring your Summerween nails remain in top condition. Start by thoroughly preparing your nails, applying a base coat, and using thin, even coats of nail polish. Seal your design with a durable top coat, and regularly moisturize your nails and cuticles to keep them healthy. When it’s time to remove your Summerween nail art, use a non-acetone polish remover and avoid excessive scrubbing to prevent damage.
Read Also: Musky Scents for Women.
Where can I find inspiration for Summerween nail art?
Social media platforms, particularly Instagram, have become a hub for Summerween nail art inspiration. Explore the work of talented nail artists and influencers, who have showcased a wide range of innovative and captivating Summerween designs. You can also stay up-to-date on emerging trends, such as glow-in-the-dark designs, 3D nail art, and holographic haunts, to spark your own creative ideas.
Read Also: Liquid Gold Hair Growth Products.
Conclusion
As the summer sun shines and the air grows warm, the Summerween nail art trend continues to captivate beauty enthusiasts worldwide. This delightful fusion of summer’s vibrant energy and the eerie allure of Halloween offers a unique and unexpected way for individuals to express their creativity and individuality.
Read Also: Desire Pheromone Perfume.
By exploring the diverse array of Summerween nail design ideas, mastering the necessary techniques, and drawing inspiration from the thriving online community, you can unleash your inner spooky side and transform your nails into a canvas for your darkly delightful creations.
Read Also: Pull Ups While Pregnant.
So, embrace the Summerween spirit, let your imagination run wild, and get ready to turn heads with your spooky-yet-chic Summerween nails. The possibilities are endless, and the only limit is your own creativity.
Read Also: Summer Nails with Glitter.

Summer Shampoo Secrets: Unlock Radiant Hair All Season Long!

Dip Nails Summer Designs: Delightful Styles You’ll Love

Summerween Nails: Elevate Your Manicure Game!

What Is Balayage: Your Ultimate Guide Is Here

The Meaning of Teeth Falling Out in a Dream: Exploring the Symbolism

What Vitamins C Is Good For? The Ultimate Guide
-

 Beauty Tips1 year ago
What Is Balayage: Your Ultimate Guide Is Here
-
Dreams Interpretation1 year ago
The Meaning of Teeth Falling Out in a Dream: Exploring the Symbolism
-
Diet Tips1 year ago
What Vitamins C Is Good For? The Ultimate Guide
-
Uncategorized1 year ago
Understanding the Five Languages of Love: A Comprehensive Guide
-
Beauty Tips11 months ago
How to Make Clear Skin: Your Comprehensive Guide
-
Beauty Tips11 months ago
Coconut Oil in Face Benefits: Unlocking the Secrets to Radiant Skin
-
Women Tips11 months ago
How Long Breast Augmentation Surgery Take? A Complete Guide
-
Beauty Tips1 year ago
The Surprising Benefit to Coconut Oil: Your Complete Guide