Beauty Tips
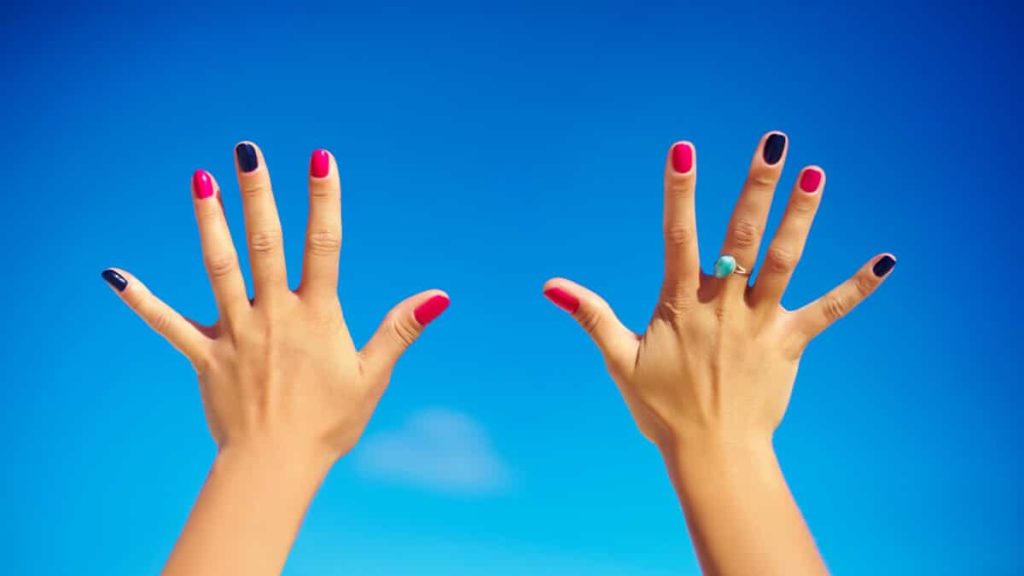
Blue and Pink Nails Ideas: A Creative Guide to Stylish Nail Art
Here is your complete guide to Blue and Pink Nails Ideas
Introduction to Blue and Pink Nails Ideas
Nail art has evolved into a captivating form of self-expression, allowing individuals to showcase their creativity and personality through their fingertips. One of the most captivating trends in recent times is the fusion of Blue and Pink Nails Ideas, where the combination of these two vibrant hues creates a stunning and eye-catching effect. In this comprehensive guide, we’ll explore the versatility of blue and pink shades and delve into the top 10 nail design ideas that have taken over the world of manicure. Whether you’re into minimalist elegance or bold and playful designs, there’s something here for everyone! Here is your complete guide to blue and pink nails ideas. So what are the best blue and pink nails ideas? What are the best outfit ideas with blue and pink nails ideas? So the best blue and pink nails ideas are…
The Versatility of Blue and Pink Nails
Nail art has become more than just a beauty ritual; it’s a canvas for artistic expression. Blue and pink nails offer a wide range of creative possibilities due to the myriad shades and tones available in both colors. These hues can be blended, contrasted, or even used as complementary accents. Here’s why blue and pink nails are a hit among fashion-forward individuals:
- Expression of Individuality: The color combination allows individuals to express their unique style and personality.
- Vibrancy and Energy: Blue and pink are both vibrant and energetic colors that catch the eye and radiate positivity.
- Endless Combinations: From soft pastels to bold neons, the range of blue and pink shades is vast, enabling countless creative combinations.
Top 10 Blue and Pink Nail Design Ideas
Dive into the world of nail art with these captivating blue and pink nail design ideas that have been making waves across social media platforms:
1. Ocean-Inspired Waves
| Design Overview | |
|---|---|
| Concept | Emulate ocean waves using gradient blue and pink shades. |
| Technique | Gradient blending with a sponge for seamless transitions. |
| Occasions | Suitable for both casual and formal events. |
Imagine having the serene beauty of ocean waves right at your fingertips. This nail design captures the essence of the sea with its mesmerizing gradient of blues and pinks. Using a simple sponge technique, you can blend the colors to mimic the soothing movement of waves. This design is versatile, making it perfect for everything from a day at the beach to a night out on the town.
2. Floral Fusion
| Design Overview | |
|---|---|
| Concept | Combine delicate blue and pink flowers for an elegant and feminine look. |
| Details | Add tiny rhinestones to the flower centers for an extra touch of glamour. |
| Popularity | Floral nail art remains a timeless favorite among nail enthusiasts. |
Nothing says elegance quite like a delicate floral pattern on your nails. Combine shades of blue and pink to create intricate flowers that stand out beautifully against the base color. For a touch of luxury, add miniature rhinestones to the center of each flower. Whether you’re attending a wedding or simply want to feel feminine and sophisticated, this design is the way to go.
3. Geometric Balance
| Design Overview | |
|---|---|
| Concept | Achieve a modern and edgy look with geometric patterns in blue and pink. |
| Precision | Clean lines and sharp shapes require careful precision during application. |
| Appeal | Geometric designs offer a bold and trendy aesthetic for confident individuals. |
Geometric nail art brings a modern edge to your fingertips. By combining blue and pink in bold lines and shapes, you create an eye-catching masterpiece that showcases your artistic flair. While the precision required may seem intimidating, the final result is well worth the effort. This design effortlessly transitions from casual gatherings to formal events, making it a versatile addition to your nail art repertoire.
4. Ombre Elegance
| Design Overview | |
|---|---|
| Concept | Transition smoothly from blue to pink for a subtle yet elegant look. |
| Blending | Master the gradient blending technique for a seamless transition. |
| Sophistication | Ombre nails exude sophistication and class without being overly flashy. |
Ombre nails have remained a staple in the world of nail art due to their understated elegance. Create a seamless gradient by blending shades of blue into pink, resulting in a soft and smooth transition between the colors. This design is versatile and suitable for various occasions, providing a touch of sophistication to your overall look. Perfect for those who appreciate subtlety with a touch of creativity.
5. Whimsical Clouds
| Design Overview | |
|---|---|
| Concept | Craft dreamy blue and pink clouds for a playful and youthful look. |
| Pastel Shades | Achieve the dreamy effect with soft pastel blue and pink colors. |
| Youthful Charm | Cloud nail art exudes a sense of innocence and youthful charm. |
Inject a dose of whimsy into your nail art by painting fluffy clouds against a blue and pink backdrop. Utilize pastel shades for a dreamy effect that adds a touch of playfulness to your look. Cloud nail art is perfect for those who want to showcase their carefree and youthful spirit. It’s a design that never fails to put a smile on your face.
6. Marble Magic
| Design Overview | |
|---|---|
| Concept | Embrace the elegance of marbled blue and pink nails. |
| Techniques | Use water marbling or stamping techniques for the effect. |
| Uniqueness | Each marble design is a unique piece of nail art. |
Marble nails are a testament to the creativity and innovation of nail artists. Blend blue and pink shades in intricate patterns, reminiscent of luxurious marbled surfaces. You can achieve this effect using water marbling techniques or stamping tools. What makes marble nail art truly special is that no two designs are alike, allowing you to showcase your individuality.
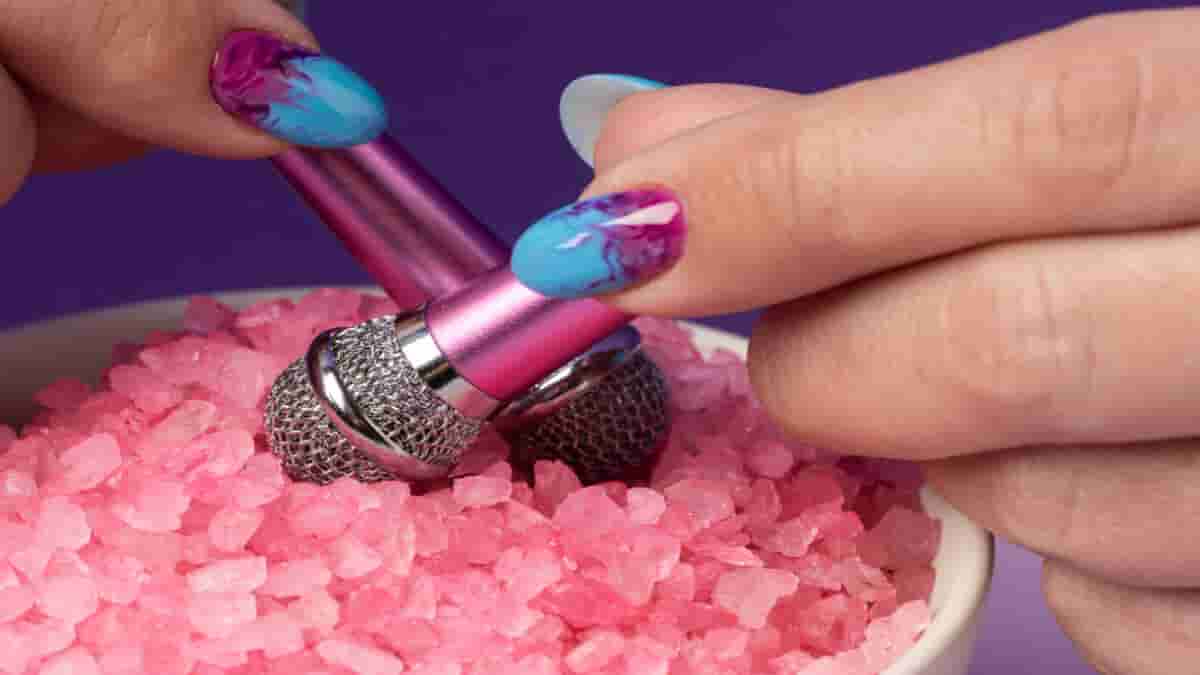
7. Glitter Glam
| Design Overview | |
|---|---|
| Concept | Elevate your look with sparkling blue and pink. |
| Application | Secure glitter using clear polish or gel. |
| Attention-Grabbing | Glitter nails are sure to turn heads and attract attention. |
For those who crave a touch of glamour, glitter nails are the answer. Combine blue and pink glitter to create a dazzling effect that catches the light and captures everyone’s attention. Secure the glitter in place using clear polish or gel for a long-lasting shine. Whether you’re hitting the dance floor or attending a special event, these glittery nails will make you feel like a star.
8. Striped Sophistication
| Design Overview | |
|---|---|
| Concept | Achieve a chic and refined look with alternating stripes. |
| Variety | Experiment with different stripe widths and orientations. |
| Chic Appeal | Striped nails strike the perfect balance between bold and chic. |
Stripes are a timeless pattern that effortlessly adds a touch of sophistication to your nails. Alternate blue and pink stripes to create a visually appealing design that’s both versatile and stylish. You can play around with different stripe widths and orientations to achieve the desired look. Whether you’re dressing up for a formal event or embracing a casual vibe, striped nails offer a versatile option for all occasions.
9. Minimalist Duo
| Design Overview | |
|---|---|
| Concept | Embrace simplicity with minimalist blue and pink accents. |
| Negative Space | Use negative space and clean lines for a modern look. |
| Understated Beauty | Minimalist nails radiate elegance through simplicity. |
Sometimes, less is more. Minimalist nail art showcases the beauty of simplicity by using subtle blue and pink accents against a clean background. Negative space and clean lines are the key elements in achieving this look. Despite its understated nature, minimalist nail art exudes a modern and refined beauty that’s perfect for those who appreciate subtle elegance.
10. Nature’s Harmony
| Design Overview | |
|---|---|
| Concept | Draw inspiration from nature with blue and pink motifs. |
| Elements | Incorporate leaves, waves, or sunset-inspired designs. |
| Tranquility | Nature-themed nails evoke a sense of peace and tranquility. |
If you’re a nature enthusiast, why not bring the beauty of the outdoors to your nails? Capture the harmony of nature with designs inspired by leaves, waves, or even a serene sunset. Blue and pink shades blend seamlessly with these natural motifs, creating a sense of peace and tranquility every time you look at your nails. This design is perfect for those who seek a connection with nature in every aspect of their lives.
Outfit Ideas with Blue and Pink Nails: A Stylish Pairing
Incorporating Your Nail Art into Your Wardrobe
Pairing your nail art with the right outfit can enhance your overall look and create a cohesive style statement. When it comes to blue and pink nails, the key is to find a balance between complementing and contrasting colors. Here are some outfit ideas that perfectly harmonize with your vibrant nail art:
| Nail Design | Outfit Inspiration |
|---|---|
| Ocean Waves | Embrace a flowy maxi dress in shades of blue or pink for a beachy and relaxed vibe. |
| Floral Fusion | Opt for a white or neutral outfit to let your intricate floral nails take center stage. |
| Geometric Style | Pair with a monochromatic outfit to create a chic contrast against your bold nail art. |
| Ombre Elegance | Choose a color-blocked ensemble that incorporates shades transitioning from blue to pink. |
| Whimsical Clouds | Go for pastel-colored clothing that complements the dreamy and playful cloud nail art. |
| Marble Magic | Wear neutral-toned outfits to allow the intricate marble patterns on your nails to stand out. |
| Glitter Glam | Opt for a sleek and simple outfit, letting your glittery nails add a touch of sparkle. |
| Striped Sophistication | Balance your bold striped nails with solid-colored clothing in blue, pink, or white. |
| Minimalist Duo | Embrace a minimalist outfit with clean lines and neutral tones to accentuate the nail design. |
| Nature’s Harmony | Choose earthy and natural tones in your outfit to align with the nature-inspired nail design. |
Accessory Pairings for Blue and Pink Nails
Enhance the coordination of your blue and pink nail art by incorporating accessories that complement your chosen colors:
- Jewelry: Opt for silver or rose gold accessories to harmonize with the blue and pink tones.
- Bags and Shoes: Neutral bags and shoes provide a canvas for your nail art to shine.
- Scarves and Shawls: Choose scarves with hints of blue and pink to tie your whole look together.
Frequently Asked Questions (FAQs)
How can I create blue and pink nail polish at home?
Creating your own nail polish by mixing blue and pink shades is easy. Start with a clear nail polish base and add drops of blue and pink nail polish until you achieve the desired color. Mix thoroughly and test on a spare nail to ensure the shade is perfect.
Read Also: Gain Weight on Period.
Are blue and pink nails suitable for all skin tones?
Yes, blue and pink shades come in a variety of tones that can complement various skin tones. Experiment with different shades to find the ones that best suit your complexion.
Read Also: Makeup for Blue Hair
What are some tips to maintain my blue and pink nail design?
To prolong the life of your nail design, apply a clear topcoat every few days to protect against chipping. Avoid prolonged exposure to water and harsh chemicals, and always wear gloves when doing chores to prevent damage to your nails.
Read Also: Red Sexy Perfume.
Can I combine blue and pink with other colors in my nail art?
Absolutely! Blue and pink are versatile colors that can be combined with other shades like white, gold, or silver for added visual interest and creativity.
Read Also: Nails for Gold Dress.
Do dark blue nails look good?
Dark blue nails can look incredibly stylish and sophisticated. The rich and deep hue of dark blue adds a touch of elegance to your nails. It’s a versatile color that works well with various outfits and occasions, making it a popular choice among nail enthusiasts. Whether you’re going for a classic look or aiming to make a bold statement, dark blue nails can definitely look fantastic.
Read Also: 70’s Nail Styles.
Is Blue a good color for nails?
Absolutely! Blue is a versatile and timeless color that works well for nails. It comes in a variety of shades, from soft pastels to vibrant neons and deep navy blues. Blue nails can convey a sense of calmness, confidence, and style. The key is to choose a shade that complements your skin tone and personal preferences. With the right shade and design, blue nails can be a stunning and fashionable choice.
Read Also: Acrylic Nails Easter Colors.
What to wear with pink nails?
Pink nails offer a wide range of styling possibilities. The color pink is associated with femininity, playfulness, and charm. Depending on the shade of pink you choose, you can create different looks. Soft pastel pinks can complement light and neutral-colored outfits, while vibrant hot pinks can add a pop of color to your ensemble. Pink nails pair well with a variety of outfits, from casual jeans and t-shirts to more formal dresses, allowing you to express your personal style with ease.
Read Also: Bronze Glow Makeup.
What is the blue nail trend?
The blue nail trend encompasses a wide spectrum of blue shades and nail art techniques. It includes everything from classic navy blue nails to trendy pastel blue and vibrant electric blue designs. The trend often incorporates various nail art styles, such as gradients, ombre, geometric patterns, and intricate details like crystals or rhinestones. Blue nails can be customized to match your mood, personality, and the occasion you’re dressing up for. As a versatile and dynamic trend, the blue nail trend allows for endless creativity and self-expression.
Read Also: Can You File Down Acrylic Nails?
How do I achieve a professional look with these nail designs?
Practice makes perfect! Take your time to master techniques like gradient blending, stamping, and applying glitter. Invest in quality nail art tools and polishes for the best results.
Read Also: Can You Swim with Hair Extensions?
Conclusion
Blue and pink nails have taken the world of nail art by storm, offering a captivating canvas for creative expression. From the elegance of floral designs to the playfulness of cloud motifs, there’s a blue and pink nail art idea for every style and occasion. Whether you’re a fan of bold and edgy designs or prefer understated elegance, this guide has provided you with the inspiration and techniques needed to transform your nails into miniature works of art. So go ahead, embrace the world of blue and pink nail art, and let your fingertips become a stunning testament to your personal style!
Read Also: Fishtail Braid Black Hair.

tratamiento labios secos
Introducción a Tratamiento Labios Secos
Los labios secos son un problema común que afecta a muchas personas en todo el mundo. No solo pueden causar incomodidad, sino que también pueden afectar la apariencia estética de nuestra sonrisa. En este artículo, exploraremos en profundidad el tratamiento labios secos, abordando las causas, síntomas, tratamientos efectivos y medidas preventivas. Si alguna vez te has preguntado cómo aliviar la sequedad de tus labios, este artículo es para ti.
La importancia de un tratamiento adecuado para los labios secos no puede subestimarse. No solo se trata de un problema estético; los labios secos pueden ser dolorosos y, en algunos casos, pueden llevar a infecciones. Por eso, es vital entender las razones detrás de esta condición y cómo podemos tratarla de manera efectiva. En este artículo, utilizaremos el término tratamiento labios secos en varias ocasiones para asegurarnos de que encuentres toda la información que necesitas.
Entendiendo los Labios Secos
Causas de los Labios Secos
Los labios secos pueden ser causados por una variedad de factores. Aquí hay algunas de las causas más comunes:
- Factores Ambientales:
- El clima frío y seco puede deshidratar la piel de los labios.
- La exposición al sol sin protección puede causar quemaduras y sequedad.
- Elecciones de Estilo de Vida:
- La deshidratación, a menudo resultado de no beber suficiente agua, es una de las principales causas.
- Fumar puede secar los labios y afectar su salud general.
- Condiciones Médicas:
- Enfermedades como la diabetes pueden afectar la hidratación de la piel.
- Alergias a productos cosméticos o alimentos también pueden causar reacciones que resultan en labios secos.
Fisiología de los Labios
Los labios tienen una estructura única que los hace particularmente susceptibles a la sequedad. A diferencia de otras partes del cuerpo, los labios carecen de glándulas sebáceas, lo que significa que no producen aceites naturales para mantener su hidratación. Además, la piel de los labios es más delgada y sensible, lo que los hace vulnerables a factores externos.
Síntomas de Labios Secos
Identificar los síntomas de los labios secos es el primer paso hacia un tratamiento efectivo. Algunos de los síntomas más comunes incluyen:
- Grietas y Descamación: Los labios pueden comenzar a agrietarse y pelarse, lo que puede ser doloroso.
- Dolor y Malestar: La sequedad puede causar incomodidad constante.
- Cambios en el Color y Textura: Los labios pueden volverse más oscuros o perder su suavidad natural.
Cuándo Buscar Ayuda Médica
Si experimentas síntomas persistentes de labios secos, es importante consultar a un médico. Debes buscar atención profesional si:
- La sequedad no mejora con tratamientos caseros.
- Hay signos de infección, como enrojecimiento o hinchazón.
- Experimentas dolor severo o sangrado.
Tratamientos Efectivos para Labios Secos
Existen múltiples enfoques para el tratamiento labios secos, que van desde remedios caseros hasta opciones profesionales.
Remedios Caseros
Los remedios caseros son una excelente manera de comenzar a tratar los labios secos. Aquí hay algunas estrategias efectivas:
- Hidratación:
- Beber suficiente agua es esencial. Se recomienda al menos 8 vasos al día.
- Exfoliación:
- Exfoliar suavemente los labios puede ayudar a eliminar las células muertas. Puedes usar un cepillo de dientes suave o una mezcla de azúcar y miel.
- Aceites y Mantecas Naturales:
- Aplicar aceites como el aceite de coco o mantecas como la manteca de karité proporciona hidratación profunda.
Productos de Venta Libre
Si los remedios caseros no son suficientes, hay varios productos de venta libre que pueden ayudar:
- Ingredientes a Buscar:
- Manteca de Karité: Hidratante natural que ayuda a suavizar los labios.
- Cera de Abejas: Crea una barrera protectora contra la pérdida de humedad.
- Lanolina: Un emoliente que ayuda a retener la humedad.
| Ingrediente | Beneficios |
|---|---|
| Manteca de Karité | Hidratación profunda |
| Cera de Abejas | Protección contra la deshidratación |
| Lanolina | Retención de humedad |
Los Mejores Productos para el Tratamiento de Labios Secos y Cómo Usarlos
A continuación, se presenta una tabla con algunos de los mejores productos para el tratamiento labios secos, junto con instrucciones sobre cómo utilizarlos para obtener los mejores resultados.
| Producto | Descripción | Cómo Usarlo |
|---|---|---|
| Bálsamo Labial de Manteca de Karité | Hidratante natural que proporciona una barrera protectora. | Aplica una capa generosa en los labios varias veces al día, especialmente antes de salir. |
| Vaselina | Crea una barrera oclusiva que retiene la humedad. | Usa una pequeña cantidad en los labios antes de dormir para una hidratación profunda. |
| Bálsamo Labial con Ácido Hialurónico | Atrae y retiene la humedad, ideal para labios muy secos. | Aplica en los labios limpios y secos, repitiendo cada 4 horas o según sea necesario. |
| Gel de Aloe Vera | Propiedades hidratantes y antiinflamatorias. | Aplica una pequeña cantidad directamente sobre los labios y deja actuar durante 15 minutos antes de enjuagar. |
| Exfoliante Labial Natural | Elimina las células muertas y suaviza la textura de los labios. | Usa una vez a la semana, aplicando suavemente con un cepillo de dientes o una mezcla de azúcar y miel. |
Detalles de Uso de Cada Producto
1. Bálsamo Labial de Manteca de Karité
- Descripción: Este bálsamo es rico en nutrientes y proporciona una hidratación intensa. Ideal para climas fríos y secos.
- Instrucciones: Aplica generosamente en los labios varias veces al día. Es especialmente efectivo antes de salir al aire libre o antes de dormir.
2. Vaselina
- Descripción: La vaselina es un producto clásico que actúa como una barrera para evitar la pérdida de humedad.
- Instrucciones: Usa una pequeña cantidad en los labios antes de acostarte. Esto ayudará a mantener tus labios hidratados durante la noche.
3. Bálsamo Labial con Ácido Hialurónico
- Descripción: Este bálsamo está formulado para atraer y retener la humedad, lo que lo hace perfecto para labios extremadamente secos.
- Instrucciones: Aplica sobre los labios limpios y secos. Repite cada 4 horas o según sea necesario, especialmente después de comer o beber.
4. Gel de Aloe Vera
- Descripción: El gel de aloe vera es conocido por sus propiedades hidratantes y curativas.
- Instrucciones: Aplica una pequeña cantidad directamente sobre los labios. Deja actuar durante 15 minutos y luego enjuaga con agua tibia para mejores resultados.
5. Exfoliante Labial Natural
- Descripción: Un exfoliante suave ayuda a eliminar las células muertas y a suavizar la superficie de los labios.
- Instrucciones: Mezcla azúcar con un poco de miel o aceite de oliva. Aplica suavemente en los labios con movimientos circulares una vez a la semana y enjuaga con agua tibia.
Consejos Adicionales para el Uso de Productos
- Consistencia: La clave para mantener los labios hidratados es la consistencia. Asegúrate de usar estos productos regularmente.
- Evita Ingredientes Irritantes: Al elegir productos, evita aquellos que contengan fragancias o mentol, ya que pueden irritar los labios.
- Almacenamiento: Guarda tus bálsamos labiales en un lugar fresco y seco para mantener su efectividad.
Estos productos y sus usos son esenciales para mantener tus labios hidratados y saludables. Incorporar estos tratamientos en tu rutina diaria puede ayudar a prevenir la sequedad y mantener tus labios en óptimas condiciones.
Los Mejores Consejos para Evitar los Labios Secos
Mantente Hidratado
- Bebe suficiente agua a lo largo del día para mantener tu cuerpo y piel bien hidratados.
- Los alimentos ricos en agua, como frutas y verduras, también pueden ayudar con la hidratación.
Usa Bálsamo Labial Regularmente
- Aplica bálsamo labial varias veces al día, especialmente antes de salir al exterior.
- Busca productos con ingredientes hidratantes como manteca de karité, aceite de coco, vitamina E y cera de abejas.
Protege tus Labios del Sol
- Usa un bálsamo labial con protección solar para evitar daños por los rayos UV.
- La protección solar es importante durante todo el año, no solo en verano.
Exfolia Suavemente
- Exfoliar los labios una vez a la semana ayuda a eliminar la piel muerta y permite una mejor absorción de los productos.
- Puedes usar un cepillo de dientes suave o una mezcla de azúcar y miel para exfoliar.
Evita Hábitos Dañinos
- No te lamas ni muerdas los labios, ya que esto empeora la sequedad.
- Evita productos labiales con ingredientes irritantes como mentol o fragancias.
Aplica Bálsamo Antes de Dormir
Siguiendo estos consejos y adoptando una rutina de cuidado labial, podrás evitar y aliviar los molestos labios secos. Recuerda que la hidratación, la protección solar y los hábitos saludables son clave para mantener unos labios suaves y saludables.
Tratamientos Profesionales
En casos más severos, los tratamientos profesionales pueden ser necesarios:
- Inyecciones de Ácido Hialurónico:
- Estas inyecciones pueden ayudar a restaurar la hidratación y volumen de los labios.
- Tratamientos con Láser:
- Los tratamientos láser pueden mejorar la textura de los labios y aumentar la hidratación.
Medidas Preventivas
La prevención es clave para evitar la sequedad de los labios. Aquí hay algunas recomendaciones:
Rutina Diaria de Cuidado de Labios
- Uso Regular de Bálsamo Labial:
- Aplica bálsamo labial varias veces al día, especialmente antes de salir al aire libre.
- Evitar Hábitos Dañinos:
- Evita lamerte los labios, ya que esto puede empeorar la sequedad.
- No muerdas o rasques los labios.
Consejos de Cuidado Estacional
- Cuidado en Climas Fríos:
- Usa un bálsamo labial con protección solar en invierno.
- Protección contra el Sol:
- Aplica un bálsamo labial con SPF para proteger tus labios de los daños solares.
| Estación | Consejos de Cuidado |
|---|---|
| Invierno | Usa bálsamo labial con SPF |
| Verano | Aplica bálsamo labial con protección solar |
Preguntas Frecuentes Sobre Tratamiento Labios Secos
¿Qué causa que los labios se vuelvan secos y agrietados?
Los labios pueden volverse secos debido a factores ambientales, deshidratación, hábitos poco saludables y condiciones médicas subyacentes.
Leer también: Aqua Blue Fragrance.
¿Cómo puedo prevenir los labios secos?
Mantente hidratado, usa bálsamo labial regularmente y evita lamerte los labios.
Leer también: Brochas Para Mascarillas.
¿Hay alimentos que ayudan con la hidratación de los labios?
Sí, consumir alimentos ricos en agua como frutas y verduras puede ayudar a mantener la hidratación general de tu cuerpo, incluyendo tus labios.
Leer también: Pintalabios Camaleón.
¿Es seguro usar vaselina en los labios?
Sí, la vaselina puede ser efectiva para sellar la humedad, pero asegúrate de no usarla en exceso, ya que puede causar dependencia.
Leer también: Perfilador Labios Waterproof.
¿Cuándo debo consultar a un dermatólogo sobre mis labios secos?
Si los síntomas persisten a pesar de los tratamientos caseros o si hay signos de infección, es recomendable consultar a un dermatólogo.
Leer también: Pull Ups While Pregnant.
Conclusión
Los labios secos son un problema común que puede afectar a cualquiera, pero con los tratamientos adecuados y medidas preventivas, puedes mantener tus labios saludables y bien hidratados. Recuerda que la clave está en la hidratación y el cuidado regular. Si tus labios secos persisten, no dudes en buscar ayuda profesional. ¡Adopta una rutina de cuidado de labios y disfruta de una sonrisa hermosa y saludable! Este artículo proporciona una guía completa sobre el tratamiento labios secos, abordando todos los aspectos relevantes para ayudar a los lectores a entender y manejar esta condición de manera efectiva.
Leer también: Brillo de Labios Transparente Permanente.
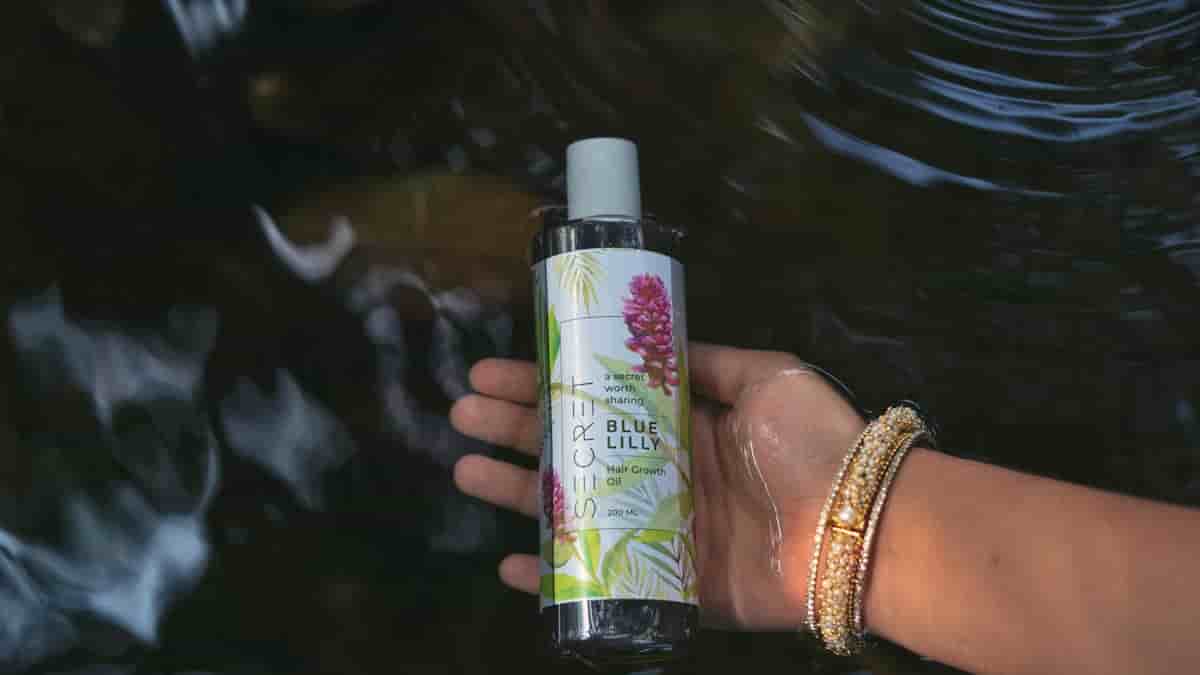
Here is your complete guide to keratin hair growth oil.
Introduction to Keratin Hair Growth Oil
Keratin hair growth oil has become a popular topic in the world of hair care, and for good reason. Keratin, a protein found in hair, plays a crucial role in maintaining its health and appearance. When applied topically, keratin hair growth oil can promote hair growth, strengthen hair, moisturize and nourish it, and even improve its shine and texture. In this article, we will delve into the world of keratin hair growth oil, exploring its benefits, ingredients, and application methods.
Understanding Keratin
Keratin is a protein that is naturally present in hair, skin, and nails. It is responsible for giving hair its strength, elasticity, and resilience. Keratin is particularly important for hair health because it helps to maintain the structure and integrity of the hair shaft. There are several types of keratin, each with its own unique properties and functions. For example, keratin 1 and keratin 10 are found in the outermost layer of the hair shaft, while keratin 2 and keratin 3 are found in the inner layers.
Benefits of Keratin Hair Growth Oil
Using keratin hair growth oil can have numerous benefits for your hair. Here are some of the most significant advantages:
- Promotes Hair Growth: Hair growth oil stimulates hair follicles, promoting healthy hair growth and reducing the likelihood of hair loss.
- Strengthens Hair: Keratin oil helps to strengthen hair, reducing breakage and improving its elasticity.
- Moisturizes and Nourishes: Keratin oil is rich in moisturizing ingredients that help to hydrate and nourish the hair, leaving it soft and supple.
- Improves Shine and Texture: Keratin oil can enhance the overall appearance of hair, leaving it with a healthy shine and smooth texture.
Ingredients in Keratin Hair Growth Oil
Keratin hair growth oil typically contains a blend of natural ingredients that work together to promote hair health. Some common ingredients found in hair growth oil include:
- Argan Oil: Rich in antioxidants and essential fatty acids, argan oil helps to nourish and moisturize the hair.
- Jojoba Oil: Similar to sebum, jojoba oil helps to balance the scalp’s natural oils and promote healthy hair growth.
- Coconut Oil: Coconut oil is rich in lauric acid, which helps to moisturize and nourish the hair.
- Olive Oil: Olive oil is rich in antioxidants and helps to protect the hair from damage.
Benefits of Key Ingredients in Keratin Hair Growth Oil
| Ingredient | Benefit | Source |
|---|---|---|
| Argan Oil | Moisturizes and nourishes hair | Morocco |
| Jojoba Oil | Balances scalp’s natural oils | North America |
| Coconut Oil | Moisturizes and nourishes hair | Southeast Asia |
| Olive Oil | Protects hair from damage | Mediterranean |
Comparison of Keratin Hair Growth Oils
| Brand | Key Ingredients | Price | Customer Rating |
|---|---|---|---|
| Keratin Complex | Keratin, Argan Oil, Jojoba Oil | $20-$30 | 4.5/5 |
| Moroccanoil | Keratin, Argan Oil, Coconut Oil | $30-$40 | 4.8/5 |
| Kerastase | Keratin, Olive Oil, Argan Oil | $40-$50 | 4.7/5 |
How to Use
Using hair growth oil is relatively simple. Here are some tips to help you get the most out of your hair growth oil:
- Application Methods: You can apply hair growth oil to your hair in several ways, including massaging it into your scalp, applying it to the ends of your hair, or using it as a leave-in treatment.
- Frequency of Use: For best results, use hair growth oil 2-3 times a week, depending on your hair type and the specific product you are using.
DIY Keratin Hair Growth Oil Recipes
If you prefer to make your own hair growth oil, here are a few simple recipes to get you started:
- Recipe 1: Mix 1 tablespoon of argan oil with 1 tablespoon of jojoba oil and 1 tablespoon of coconut oil. Apply to your hair and scalp.
- Recipe 2: Mix 1 tablespoon of olive oil with 1 tablespoon of argan oil and 1 tablespoon of jojoba oil. Apply to your hair and scalp.
- Tips for Best Results: When making your own hair growth oil, be sure to store it in a cool, dry place and apply it to your hair within 6 months of making it.
DIY Recipes
| Recipe | Ingredients | Application |
|---|---|---|
| Recipe 1 | Argan Oil, Jojoba Oil, Coconut Oil | Massage into scalp and hair |
| Recipe 2 | Olive Oil, Argan Oil, Jojoba Oil | Apply to hair and scalp |
| Recipe 3 | Coconut Oil, Olive Oil, Argan Oil | Use as a leave-in treatment |
Common Myths
There are several myths surrounding hair growth oil that we should address:
- Myth 1: Hair growth oil is only for people with damaged hair.
- Fact: Hair growth oil can benefit all hair types, from dry and damaged to healthy and strong.
- Myth 2: Hair growth oil is only effective for a short period.
- Fact: When used regularly, hair growth oil can provide long-term benefits for your hair.
How Often Should I Apply Keratin Hair Growth Oil for Best Results?
Recommended Frequency of Application
To maximize the benefits of hair growth oil, it is essential to establish a consistent application routine. Here are the general recommendations for how often to apply hair growth oil:
- 2-3 Times a Week: For most hair types, applying hair growth oil two to three times a week is ideal. This frequency allows the oil to penetrate the hair shaft and scalp effectively, promoting moisture retention and strengthening the hair without overwhelming it.
Application Techniques
Pre-Wash Treatment
- 30 Minutes Before Washing: Apply hair growth oil to your hair and scalp 30 minutes before washing. This method helps protect your hair from the drying effects of shampoo and enhances moisture retention.
Post-Wash Treatment
- After Washing: After washing your hair, apply a small amount of keratin oil to the ends while it is still damp. This technique helps seal in moisture and prevent frizz.
Leave-In Treatment
- Daily Use: For those with particularly dry or damaged hair, using hair growth oil as a leave-in treatment can be beneficial. Apply a small amount to your hair after styling, focusing on the ends to maintain hydration throughout the day.
Benefits of Regular Application
Applying hair growth oil regularly can lead to several improvements in hair health:
- Stronger Hair: Regular use strengthens the hair structure, reducing breakage and split ends.
- Enhanced Moisture: Frequent application helps maintain hydration, making hair softer and more manageable.
- Reduced Frizz: Consistent use can help control frizz and improve the overall appearance of your hair.
- Improved Shine: Regular application of keratin oil can enhance the shine and luster of your hair, giving it a healthier look.
Considerations for Different Hair Types
- Fine Hair: If you have fine hair, consider using hair growth oil once or twice a week to avoid weighing it down.
- Thick or Curly Hair: For thick or curly hair, you may benefit from applying it three times a week or even daily, especially if your hair is prone to dryness.
- Color-Treated Hair: If your hair is color-treated, using hair growth oil two to three times a week can help maintain vibrancy and moisture.
Customer Reviews and Testimonials
Many people have reported positive results from using this hair growth oil. Here are a few testimonials to give you an idea of what to expect:
- “I noticed a significant reduction in hair loss and an improvement in the overall health of my hair after using keratin hair growth oil.”
- “I was amazed at how soft and manageable my hair became after using hair growth oil. It’s now one of my go-to products.”
Customer Reviews
| Review | Hair Type | Results |
|---|---|---|
| “I noticed a significant reduction in hair loss and an improvement in the overall health of my hair after using keratin hair growth oil.” | Dry and damaged | Improved hair health and reduced hair loss |
| “I was amazed at how soft and manageable my hair became after using keratin hair growth oil. It’s now one of my go-to products.” | Healthy and strong | Soft and manageable hair |
Read Also: Strawberry Milk Perfume.
Frequently Asked Questions about Keratin Hair Growth Oil
What is keratin hair growth oil?
Hair growth oil is a topical treatment that contains keratin, a protein found in hair, skin, and nails.
Read Also: Perfume with Sandalwood and Jasmine.
How often should I use keratin hair growth oil?
For best results, use hair growth oil 2-3 times a week.
Read Also: Hair Protein Cream.
Can keratin oil help with hair loss?
Yes, keratin oil can help to stimulate hair growth and reduce hair loss.
Read Also: Peaches and Cream Nails.
Is keratin hair growth oil suitable for all hair types?
Yes, hair growth oil can benefit all hair types, from dry and damaged to healthy and strong.
Read Also: Lymphatic Drainage Cream.
How long does it take to see results?
Results can vary depending on individual hair types and the specific product used. However, most people start to see improvements within 2-3 weeks of regular use.
Read Also: Supplements for Booty Growth.
Conclusion
Keratin hair growth oil is a powerful tool for promoting healthy, strong hair. By understanding the benefits, ingredients, and application methods of hair growth oil, you can unlock the secrets to achieving the hair of your dreams. Whether you choose to use a commercial product or make your own, hair growth oil is a valuable addition to any hair care routine.
Read Also: Brazilian Keratin Oil.
Here is your complete guide to brazilian keratin oil.
Introduction to Brazilian Keratin Oil
If you’re on a quest for silky, smooth, and manageable hair, Brazilian keratin oil might just be the solution you’ve been searching for. This transformative hair treatment has gained immense popularity in recent years, and for good reason. Brazilian keratin oil is a versatile and effective solution that can address a wide range of hair concerns, from taming frizz to repairing damage and enhancing shine.
At its core, Brazilian keratin oil is a potent blend of natural ingredients that work in harmony to nourish and revitalize your locks. Derived from the nutrient-rich Amazon rainforest, this oil is packed with keratin, a protein that is essential for the health and strength of your hair. When applied to the hair, Brazilian keratin oil penetrates deep into the strands, helping to smooth the cuticle, reduce frizz, and impart a stunning, salon-worthy shine.
But their benefits don’t stop there. This versatile hair treatment can also:
- Strengthen and repair damaged hair
- Protect against heat styling and environmental stressors
- Extend the life of color-treated hair
- Improve manageability and ease of styling
- Enhance overall hair health and vitality
Whether you have fine, thick, curly, or straight hair, keratin oil can be a game-changer in your hair care routine. In the following sections, we’ll dive deeper into the different types of keratin oil, explore how to use it effectively and uncover the numerous benefits it can offer for your unique hair type and needs.
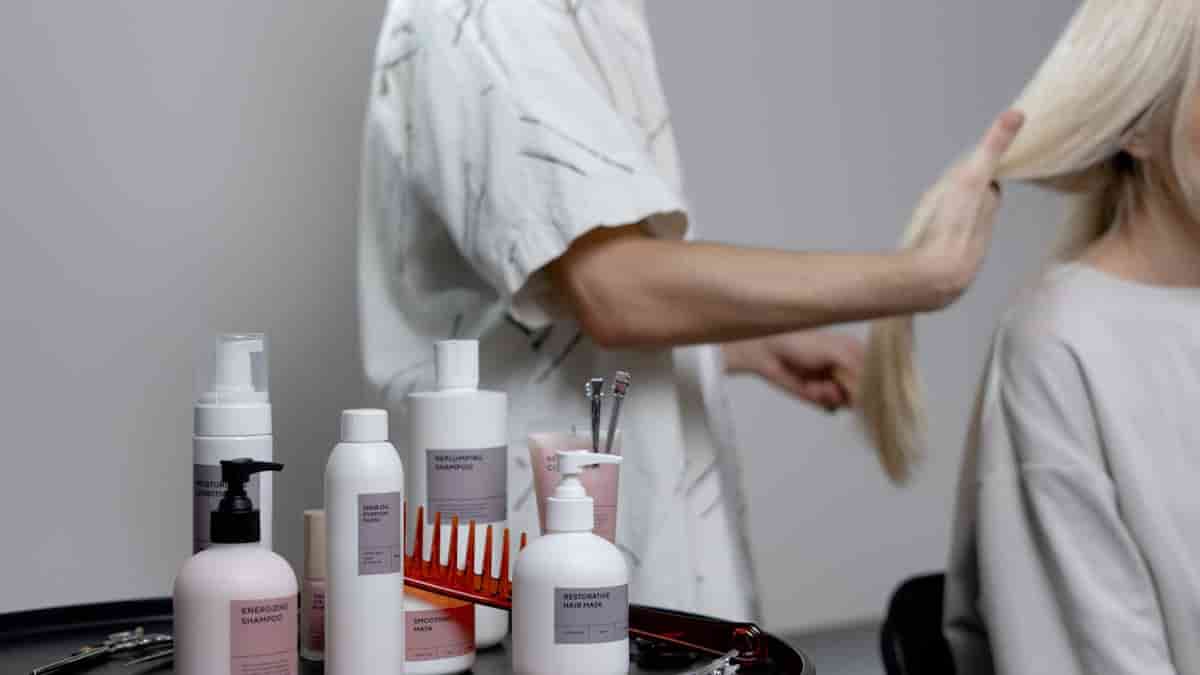
Types of Brazilian Keratin Oil
When it comes to Brazilian keratin oil, there are several different formulations to choose from, each with its own unique features and benefits. Let’s take a closer look at the most popular options:
- Pure Brazilian Keratin Oil: This is the most concentrated form of the oil, offering a potent dose of keratin and other nourishing ingredients to transform your hair.
- Brazilian Keratin Oil Shampoo: Infused with the power of keratin oil, these specialized shampoos gently cleanse your hair while delivering the benefits of keratin deep into the strands.
- Brazilian Keratin Oil Conditioner: Designed to work in tandem with the keratin oil shampoo, these conditioners help to further smooth, strengthen, and hydrate your hair.
- Brazilian Keratin Oil Hair Mask: For an intensive hair treatment, keratin oil hair masks offer a concentrated dose of nourishment to deeply condition and revitalize your locks.
Regardless of which keratin oil product you choose, you can expect to see a noticeable difference in the health and appearance of your hair. Each formulation is carefully crafted to address specific hair concerns and deliver transformative results.
How to Use Brazilian Keratin Oil
Incorporating keratin oil into your hair care routine is a straightforward process, but there are a few key steps to ensure you get the best possible results. Here’s a step-by-step guide to using keratin oil effectively:
Cleanse Your Hair
Start by washing your hair with a keratin oil shampoo, which will gently remove any buildup or impurities while preparing your strands for the treatment.
Apply the Brazilian Keratin Oil
Depending on the length and thickness of your hair, dispense a small amount (usually a few drops) of keratin oil into the palm of your hand. Gently massage the oil into your hair, focusing on the mid-lengths and ends, where it’s needed most.
Distribute Evenly
Use your fingers to evenly distribute the keratin oil throughout your hair, ensuring that every strand is coated and nourished.
Allow Time to Absorb
Let the keratin oil sit on your hair for 5-10 minutes, allowing it to penetrate deep into the strands and work its magic.
Rinse and Style
Rinse the keratin oil out of your hair thoroughly, then style as usual. You may notice an immediate difference in the smoothness and manageability of your hair.
For best results, it’s recommended to use it 1-2 times per week, or as needed to maintain the desired level of frizz control and shine. Remember to adjust the amount of oil you use based on the length and thickness of your hair, and be mindful of any specific instructions or recommendations from the product manufacturer.
Benefits of Brazilian Keratin Oil
The transformative power of Brazilian keratin oil lies in its ability to address a wide range of hair concerns, from taming frizz to repairing damage and enhancing shine. Let’s explore the key benefits of incorporating this versatile hair treatment into your routine:
Smooths and Straightens Hair
The keratin in Brazilian keratin oil helps to smooth the hair cuticle, reducing frizz and flyaways and leaving your locks with a sleek, straight appearance.
Reduces Frizz
It creates a protective barrier around each hair strand, locking in moisture and preventing external factors, such as humidity, from causing frizz and unruly hair.
Adds Shine and Luster
The nourishing ingredients in keratin oil work to improve the overall health and appearance of your hair, imparting a beautiful, glossy shine.
Strengthens and Repairs Damaged Hair
Brazilian keratin oil is rich in proteins and other essential nutrients that help to mend split ends, strengthen weak strands, and revitalize damaged hair.
Protects Against Heat Styling
The protective properties of keratin oil help to shield your hair from the damaging effects of heat styling tools, such as blow dryers, straighteners, and curling irons.
Extends the Life of Hair Color
By sealing the hair cuticle and preventing color from fading, keratin oil can help to prolong the vibrancy and longevity of your hair color.
Suitable for All Hair Types
Whether you have fine, thick, curly, or straight hair, keratin oil can be tailored to your specific needs and hair type, delivering transformative results.
To better understand the impact on different hair types, let’s take a closer look at a comparison table:
| Hair Type | Effectiveness of Brazilian Keratin Oil |
|---|---|
| Fine Hair | Helps to add weight and body, reducing flyaways and improving manageability. |
| Thick Hair | Smooths and tames coarse, unruly strands, leaving hair soft and manageable. |
| Curly Hair | Helps to reduce frizz and enhance curl definition, while adding shine and softness. |
| Straight Hair | Helps to maintain a sleek, straight appearance and prevent static and flyaways. |
| Damaged Hair | Repairs and strengthens strands, improving overall hair health and appearance. |
| Color-Treated Hair | Helps to extend the life of hair color by preventing fading and protecting the cuticle. |
As you can see, it is a versatile and effective solution for a wide range of hair types and concerns, making it a valuable addition to any hair care routine.
Comparison vs Other Hair Treatments
When it comes to achieving smooth, frizz-free, and healthy-looking hair, keratin oil is not the only option available. Let’s take a closer look at how it stacks up against some other popular hair treatments:
| Treatment | Effectiveness | Cost | Convenience |
|---|---|---|---|
| Brazilian Keratin Oil | High | Moderate | Easy to use at home |
| Salon Keratin Treatment | High | High | Requires salon visit |
| Hair Masks | Moderate | Low | Easy to use at home |
| Hair Oils | Moderate | Low | Easy to use at home |
As the table shows, keratin oil offers a high level of effectiveness in addressing a range of hair concerns, while being relatively affordable and easy to use at home. In comparison, salon keratin treatments can be more effective but come with a higher price tag and the need to visit a professional salon.
Cost and Brands
| Brand | Price |
|---|---|
| Natural World | $4.25 – $7.00 |
| Fantasia IC | $59.00 |
| L’ANZA | $38.00 – $81.50 |
| FIT COSMETICS | $7.00 – $12.00 |
FAQs About Brazilian Keratin Oil
As you explore the world of Brazilian keratin oil, you may have a few questions about its use and effectiveness. Here are some of the most commonly asked questions, along with their answers:
Is Brazilian Keratin Oil safe for color-treated hair?
Yes, keratin oil is generally safe for use on color-treated hair. In fact, it can help to extend the life of your hair color by protecting the cuticle and preventing fading.
How often should I use Brazilian Keratin Oil?
For best results, it’s recommended to use keratin oil 1-2 times per week, or as needed to maintain the desired level of frizz control and shine. Adjust the frequency based on your hair type and individual needs.
Can Brazilian Keratin Oil be used on wet or dry hair?
Brazilian keratin oil can be used on both wet and dry hair, depending on your preference and the specific product instructions. Some formulations may work better on damp hair, while others are designed for application on dry hair.
Read Also: Strawberry Milk Perfume.
How long does it take to see results from using Brazilian Keratin Oil?
The results from using keratin oil can be quite rapid, with many users reporting a noticeable difference in the smoothness, manageability, and shine of their hair after just one or two uses. However, for more long-lasting and transformative results, it’s recommended to use keratin oil consistently as part of your regular hair care routine.
Read Also: Perfume with Sandalwood and Jasmine.
Can Brazilian Keratin Oil be used on all hair types?
Yes, keratin oil is suitable for use on all hair types, from fine and straight to thick and curly. The versatility of this hair treatment allows it to be tailored to the specific needs and characteristics of your individual hair.
Read Also: Hair Protein Cream.
Conclusion
In the world of hair care, Brazilian keratin oil stands out as a true game-changer. This transformative hair treatment, derived from the nutrient-rich Amazon rainforest, offers a wealth of benefits that can dramatically improve the health, appearance, and manageability of your locks.
Read Also: Peaches and Cream Nails.
Whether you’re struggling with frizz, damage, or a lack of shine, Brazilian keratin oil has the power to address these concerns and leave your hair looking and feeling its absolute best. By smoothing the hair cuticle, reducing flyaways, and infusing your strands with essential proteins and nutrients, this versatile oil can help you achieve the silky, smooth, and manageable hair you’ve always desired.
Read Also: Supplements for Booty Growth.
But the benefits of keratin oil don’t stop there. This remarkable hair treatment can also protect your hair from the damaging effects of heat styling, extend the life of your hair color, and be tailored to suit a wide range of hair types, from fine and straight to thick and curly.
Read Also: Lymphatic Drainage Cream.

Tratamiento Labios Secos: Tips para Mantener Labios Suaves

Brillo de Labios Transparente Permanente: Tonos Más Populares

Perfilador Labios Waterproof: Guía Completa

What Is Balayage: Your Ultimate Guide Is Here

The Meaning of Teeth Falling Out in a Dream: Exploring the Symbolism

What Vitamins C Is Good For? The Ultimate Guide
-

 Beauty Tips1 year ago
What Is Balayage: Your Ultimate Guide Is Here
-
Dreams Interpretation1 year ago
The Meaning of Teeth Falling Out in a Dream: Exploring the Symbolism
-
Diet Tips1 year ago
What Vitamins C Is Good For? The Ultimate Guide
-
Uncategorized1 year ago
What Are The Five Languages Of Love: Your Complete Guide
-
Beauty Tips1 year ago
How to Make Clear Skin: Your Comprehensive Guide
-
Beauty Tips1 year ago
Coconut Oil in Face Benefits: Unlocking the Secrets to Radiant Skin
-
Beauty Tips1 year ago
The Surprising Benefit to Coconut Oil: Your Complete Guide
-
Women Tips1 year ago
How Long Breast Augmentation Surgery Take? A Complete Guide