Connect with us

Beauty Tips

Olive Oil is Good for Your Hair: How to Use It and Its Benefits

Published

on

olive oil is good for your hair

Here is your ultimate guide to olive oil is good for your hair

Introduction to Olive Oil is Good for Your Hair
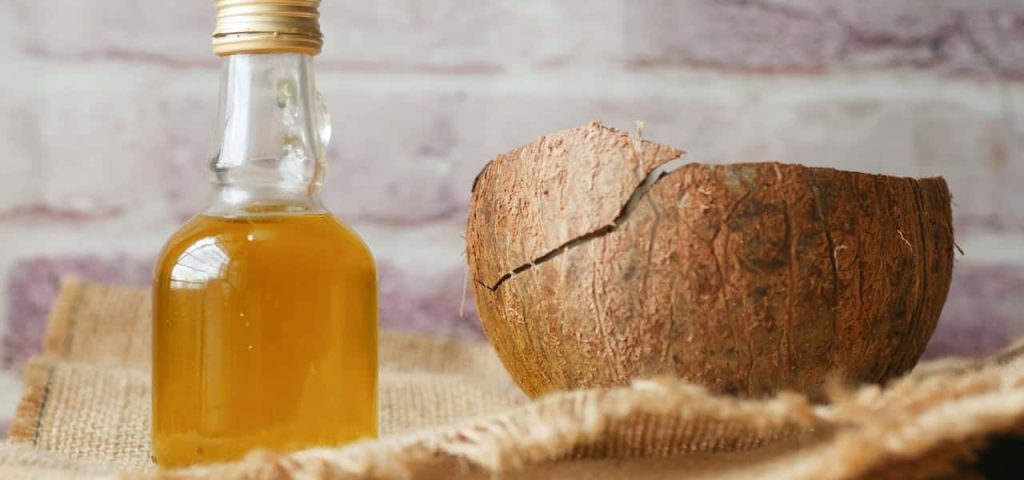
Olive oil is a common kitchen ingredient that has been used for centuries for its health benefits. However, it’s not only good for cooking and health but also for hair. It is packed with nutrients that can benefit your hair, from moisturizing to preventing split ends and promoting hair growth. In this article, we’ll discuss the benefits of olive oil for hair and how to use it effectively.

How to Use Olive Oil for Hair

Using olive oil for hair is simple and easy. Here are the steps to follow:

Measure

Measure the amount of olive oil you need for your hair length and thickness. For short hair, you may need about 1-2 tablespoons of olive oil, while longer hair may require more.

Massage

Warm the olive oil in a bowl, and then apply it to your scalp and hair. Use your fingers to massage the oil into your hair, focusing on the ends.

Rinse

Leave the oil in your hair for at least 30 minutes, or overnight for a deep conditioning treatment. Then, rinse your hair with warm water and shampoo as usual.

Who Should Use Olive Oil?

It is beneficial for all hair types, but it’s especially helpful for those with thick or processed hair, as well as those with split ends.

Thick Hair

Thick hair can be difficult to manage, but olive oil can help. The oil will penetrate the hair shaft and moisturize your hair, leaving it shiny and soft.

Processed Hair

Chemical treatments such as coloring, perming, or relaxing can damage your hair, making it dry and brittle. It can help restore the moisture to your hair, making it soft and shiny.

Split Ends

Split ends are a common problem for many people. It can help prevent split ends by moisturizing the ends of your hair, preventing them from becoming dry and brittle.

Beyond Conditioning

It has many other uses beyond conditioning your hair. Here are a few:

Lice

If you or someone in your family has lice, olive oil can help. Apply olive oil to your hair and scalp and leave it on for several hours. The oil will suffocate the lice, making it easier to remove them from your hair.

Dandruff

Dandruff is a common scalp condition that causes flakes of skin to appear. Olive oil can help reduce dandruff by moisturizing your scalp and preventing dryness.

olive oil is good for your hair: let's explore why it's good

How to Make an Olive Oil Hair Mask

If you want to give your hair a deep conditioning treatment, you can make an olive oil hair mask. Here are a few recipes to try:

Egg, Honey, and Olive Oil Hair Mask

Ingredients:

  • 2 eggs
  • 2 tablespoons of honey
  • 2 tablespoons of olive oil

Instructions:

  1. Beat the eggs in a bowl.
  2. Add the honey and olive oil to the eggs and mix well.
  3. Apply the mixture to your hair and leave it on for 30-60 minutes.
  4. Rinse your hair with warm water and shampoo as usual.

Read More About Pimples vs Cold Sores.

Avocado and Olive Oil Hair Mask

Ingredients:

  • 1 ripe avocado
  • 2 tablespoons of olive oil

Read More About How To Curl Hair?

Instructions:

  1. Mash the avocado in a bowl.
  2. Add the olive oil to the mashed avocado and mix well.
  3. Apply the mixture to your hair and leave it on for 30-60 minutes.
  4. Rinse your hair with warm water and shampoo as usual.

Read More About How Curl Hair Flat Iron?

Tea Tree and Olive Oil Hair Mask

Ingredients:

  • 2-3 drops of tea tree oil
  • 2 tablespoons of olive oil

Read More About How To Get Rid Of Cramps?

Instructions:

  1. Mix the tea tree oil and olive oil in a bowl.
  1. Apply the mixture to your hair and scalp and massage gently.
  2. Cover your hair with a shower cap and leave it on for 30-60 minutes.
  3. Rinse your hair with warm water and shampoo as usual.

Read More About The Surprising Health Benefits of Mangoes.

Safety Tips

While olive oil is generally safe for hair use, it’s important to take some precautions to avoid any potential risks. Here are a few safety tips to keep in mind:

  1. Don’t use too much olive oil, as it can make your hair greasy and difficult to style.
  2. If you have an oily scalp or acne-prone skin, avoid using olive oil on your hair, as it can clog your pores.
  3. Use extra virgin olive oil, as it’s the purest and highest quality.
  4. Always patch test the oil on a small section of your skin to make sure you’re not allergic to it.

Read More About Cucumber Calories.

FAQs

Can we apply olive oil directly to hair?

Yes, it can be applied directly to hair as a natural and effective conditioning treatment. However, it’s important to use the right amount of oil and apply it correctly for best results. Following the recommended instructions for making an olive oil hair mask can help ensure that the oil is properly absorbed into the hair.

Read More About How Much Caffeine is in Green Tea and Why It Matters?

Is olive oil side effects for hair?

It is generally considered safe for hair and doesn’t have any major side effects. However, using too much oil or leaving it on for too long can leave hair feeling greasy or weighed down. Additionally, using heat styling tools immediately after applying olive oil can cause the oil to burn and damage hair. To avoid any potential issues, it’s important to follow proper safety precautions and use olive oil in moderation.

Read More About Thinning Hair vs Fine Hair.

Which oil is best for the hair?

There are several oils that are beneficial for hair, each with its own unique properties and benefits. Some of the most popular and effective oils for hair include:

  • Coconut oil: known for its moisturizing and nourishing properties, coconut oil can help promote hair growth and reduce breakage.
  • Argan oil: rich in antioxidants and vitamins, argan oil can help repair and strengthen hair, as well as tame frizz and flyaways.
  • Jojoba oil: similar in structure to the natural oils produced by the scalp, jojoba oil can help balance the scalp’s oil production and promote healthy hair growth.
  • Castor oil: a thick and viscous oil, castor oil is rich in fatty acids and can help nourish and moisturize dry, damaged hair.
BenefitOlive OilCoconut OilJojoba OilCastor OilArgan Oil
Moisturizes hair✔️✔️✔️✔️✔️
Helps prevent split ends✔️✔️✔️✔️✔️
May help stimulate hair growth✔️✔️✔️✔️✔️
Anti-inflammatory properties✔️✔️✔️✔️✔️
Rich in antioxidants and vitamins✔️✔️✔️✔️
Natural antibacterial properties✔️✔️
Effective in treating dandruff✔️✔️✔️
Reduces protein loss in hair✔️✔️✔️
Light texture✔️✔️✔️
Sweet tropical scent✔️✔️
Helps control frizz✔️✔️✔️
Protects against heat damage✔️✔️

Which is better for hair olive oil or coconut oil?

Both olive oil and coconut oil are great for hair and offer unique benefits. It is rich in antioxidants and vitamin E, which can help nourish and strengthen hair, while coconut oil is known for its moisturizing and anti-bacterial properties.

Read More About Why do I Look so Bad in Douyin Make Up.

Which oil is better for hair will depend on individual hair type and needs. For example, it may be better suited for those with dry or damaged hair, while coconut oil may be better for those with fine or oily hair.

BenefitOlive OilCoconut Oil
Moisturizes hair✔️✔️
Helps prevent split ends✔️✔️
May help stimulate hair growth✔️✔️
Anti-inflammatory properties✔️✔️
Rich in antioxidants and vitamins✔️
Natural antibacterial properties✔️
Effective in treating dandruff✔️
Reduces protein loss in hair✔️
Light texture✔️
Sweet tropical scent✔️

Conclusion

Olive oil is a simple yet effective solution for many hair problems, from moisturizing to preventing split ends and promoting hair growth. It’s easy to use, affordable, and natural. By following the steps outlined in this article, you can make the most of this versatile ingredient and achieve healthy, shiny, and beautiful hair. Just remember to use it in moderation and always patch test before use.

Read More About Do you Cleanse After Removing Make Up in the Middle of the Day?

Read More About Diet Coke vs. Coke Zero: Which Zero Soda Diet Tastes Most Normal?

Continue Reading
Click to comment

Leave a Reply

Your email address will not be published. Required fields are marked *

Beauty Tips

Hunter Green Gel Nail Polish: Indulge in Luxurious Nail Shades

Published

on

hunter green gel nail polish

Here is your complete guide to hunter green gel nail polish

Introduction to Hunter Green Gel Nail Polish

In the ever-evolving world of nail care, hunter green gel nail polish has emerged as a captivating and versatile choice, captivating the hearts of beauty enthusiasts worldwide. This timeless hue, with its rich and sophisticated undertones, has become a staple in the nail care industry, offering a unique blend of elegance and modern flair.

As the popularity of hunter green gel nail polish continues to soar, it’s no wonder that more and more individuals are drawn to its allure. Whether you’re a seasoned nail polish aficionado or a newcomer to the world of gel manicures, this classic color has the power to transform your nails and elevate your overall look. In this comprehensive guide, we’ll delve into the world of hunter green gel nail polish, exploring its key benefits, the art of selection, the intricacies of application, and the secrets to maintaining its long-lasting brilliance.

Understanding Hunter Green Gel Nail Polish

Hunter green gel nail polish is a unique and captivating nail color that has captured the hearts of beauty enthusiasts worldwide. Unlike traditional nail polish, gel-based formulas offer a distinct set of advantages, including exceptional longevity, chip-resistance, and a high-shine finish that can elevate any look.

The composition of hunter green gel nail polish sets it apart from its conventional counterparts. Formulated with a blend of specialized gel-based ingredients, this nail color is designed to provide a long-lasting, glossy, and durable finish that can withstand the rigors of everyday life. The curing process, which involves the use of a UV or LED lamp, is a crucial step in ensuring the proper application and adherence of the gel polish to the nails.

Choosing the Right Hunter Green Gel Nail Polish

When it comes to selecting the perfect hunter green gel nail, there are several factors to consider to ensure a flawless and long-lasting manicure. From brand reputation to formula composition, each element plays a crucial role in the overall quality and performance of the nail color.

To help you navigate the vast array of options, we’ve compiled a comprehensive table comparing the top hunter green gel nail brands, highlighting their key features, price range, and customer ratings:

BrandFormulaFinishPrice RangeCustomer Rating
OPIGel-based, long-lastingGlossy, high-shine$15 – $254.8/5
EssieGel-couture formula, chip-resistantSatin, subtle sheen$12 – $184.6/5
GelishSalon-quality gel, durableGlossy, high-shine$12 – $204.7/5
CND ShellacGel-based, salon-gradeGlossy, high-shine$18 – $254.8/5
Kiara SkyGel-based, long-lastingGlossy, high-shine$10 – $154.5/5

When selecting a hunter green gel nail, it’s essential to consider factors such as the brand’s reputation, the formula’s composition, the desired finish, and the overall value. By carefully evaluating these elements, you can ensure that you choose a high-quality product that will deliver a flawless and long-lasting manicure.

Applying Hunter Green Gel Nail Polish

Mastering the art of applying hunter green gel nail is crucial for achieving a professional-looking manicure that can last for weeks. The process involves several key steps, each of which plays a vital role in ensuring a smooth, even, and durable application.

Nail Preparation

  • Thoroughly clean and file the nails to remove any existing polish or debris.
  • Push back the cuticles gently to create a clean, well-groomed canvas.
  • Buff the nails lightly to create a smooth surface for the gel polish application.

Base Coat Application

  • Apply a thin, even layer of a gel-based base coat to the nails, ensuring complete coverage.
  • Cure the base coat under a UV or LED lamp according to the manufacturer’s instructions.

Color Application

  • Carefully apply a thin, even layer of hunter green gel nail to the nails, starting at the cuticle and working your way towards the tip.
  • Cure the color coat under the UV or LED lamp, following the recommended curing time.
  • Repeat the color application process, if necessary, to achieve the desired opacity and coverage.

Top Coat Application

  • Apply a generous layer of a gel-based top coat to the nails, sealing in the color and providing a glossy, high-shine finish.
  • Cure the top coat under the UV or LED lamp, ensuring a complete and durable seal.

Finishing Touches

  • Gently wipe the nails with a lint-free cloth to remove any tacky residue.
  • Trim and shape the nails as desired, ensuring a polished and well-groomed appearance.

By following these step-by-step instructions and incorporating the proper techniques, you can achieve a flawless hunter green gel nail manicure that will leave your nails looking stunning and long-lasting.

Maintaining Hunter Green Gel Nail Polish

Maintaining the vibrant and glossy appearance of your hunter green gel nail manicure is essential for ensuring its longevity. With the right care and attention, you can extend the life of your gel polish and keep your nails looking their best.

Wear Time and Longevity

One of the primary advantages of hunter green gel nail is its exceptional wear time and longevity. Depending on the brand and formula, a well-applied gel manicure can last anywhere from 2 to 4 weeks, with minimal chipping or fading.

Removal and Reapplication

When it’s time to remove your hunter green gel nail, it’s crucial to use the proper techniques to avoid damage to your natural nails. Acetone-based removers are the most effective, but it’s important to soak the nails and gently file away the gel polish, rather than peeling or picking it off.

To maintain the integrity of your nails, it’s recommended to have your hunter green gel nail removed by a professional at a nail salon. They have the expertise and tools to ensure a gentle and thorough removal process.

Nail Care Routine

Incorporating a regular nail care routine can help you maintain the vibrant and glossy appearance of your hunter green gel nail manicure. This may include:

  • Applying cuticle oil or moisturizer to keep the nails and surrounding skin hydrated.
  • Using a nail buffer to gently smooth and shine the nails between manicures.
  • Avoiding activities that may cause excessive wear or chipping, such as manual labor or household chores.

By following these maintenance tips, you can ensure that your hunter green gel nail manicure remains flawless and long-lasting, allowing you to enjoy the timeless elegance of this captivating nail color.

Read Also: Lash Extension Styles.

FAQs about Hunter Green Gel Nail Polish

How long does hunter green gel nail polish typically last?

The longevity of hunter green gel nail can vary depending on the brand and formula, but a well-applied gel manicure can generally last between 2 to 4 weeks with minimal chipping or fading.

Read Also: Marula Oil for Hair.

Is hunter green gel nail polish suitable for all skin tones?

Yes, hunter green gel nail is a versatile color that can complement a wide range of skin tones. The rich, sophisticated hue of hunter green is particularly flattering on fair, medium, and olive skin tones.

Read Also: Walnut Oil.

How do I remove hunter green gel nail polish properly?

To remove hunter green gel nail, it’s recommended to use an acetone-based remover and soak the nails for 10-15 minutes. Gently file away the gel polish, rather than peeling or picking it off, to avoid damage to the natural nails.

Read Also: What Massage Oils Are Best.

Can I use hunter green gel nail polish for nail art designs?

Absolutely! The bold and rich color of hunter green gel nail makes it an excellent choice for creating intricate nail art designs. Whether you opt for simple geometric patterns or more elaborate floral motifs, this versatile hue can elevate your nail art to new heights.

Read Also: Gua Sha Oil.

How do I maintain the glossy finish of my hunter green gel nail polish manicure?

To maintain the glossy finish of your hunter green gel nail manicure, be sure to apply a high-quality gel-based top coat and cure it properly under a UV or LED lamp. Additionally, using a nail buffer to gently shine the nails between manicures can help preserve the vibrant and glossy appearance.

Read Also: Cheek filler before and after over 50.

Conclusion

In the captivating world of nail care, hunter green gel nail polish has emerged as a true standout, offering a timeless and sophisticated look that can elevate any ensemble. From its rich and captivating hue to its exceptional longevity and high-shine finish, this versatile nail color has captured the hearts of beauty enthusiasts worldwide.

Read Also: Black Facial Peel Mask.

Whether you’re a seasoned gel manicure aficionado or a newcomer to the world of nail care, we hope this comprehensive guide has provided you with the knowledge and confidence to embrace the allure of hunter green gel nail. By understanding the unique properties of this captivating color, mastering the art of application, and maintaining its long-lasting brilliance, you can transform your nails into a true work of art.

Read Also: Pull Ups While Pregnant.

So, why not elevate your nail game and indulge in the timeless elegance of hunter green gel nail polish? Embrace the power of this captivating hue and let it be the finishing touch that elevates your overall look and leaves a lasting impression.

Read Also: Partial Veneers Before and After.

Continue Reading

Beauty Tips

Partial Veneers Before and After: Smile Transformation Wonders

Published

on

partial veneers before and after

Here is your complete guide to partial veneers before and after

Introduction to Partial Veneers Before and After

Are you tired of feeling self-conscious about your smile? Do you wish you could achieve a more polished and confident look without undergoing extensive dental work? If so, partial veneers might be the solution you’ve been searching for. In this comprehensive guide, we’ll explore the world of partial veneers, delving into the before and after transformations that have captivated countless individuals.

They are a game-changing dental treatment that can address a wide range of cosmetic concerns, from discolored and misshapen teeth to gaps and alignment issues. Unlike traditional full veneers, which cover the entire visible surface of the tooth, partial veneers are designed to target specific problem areas, offering a more conservative and cost-effective approach to enhancing your smile.

Throughout this article, we’ll guide you through the partial veneers before and after process, providing you with a detailed understanding of what to expect, from the initial consultation to the stunning results. Get ready to embark on a journey that could forever change the way you view your smile.

What are Partial Veneers?

Partial veneers, also known as “dental veneers” or “composite veneers,” are thin, custom-made shells that are bonded to the front surface of your teeth. These shells are typically made of porcelain or a composite resin material, and they are designed to improve the appearance of your teeth by addressing a variety of cosmetic concerns.

Unlike full veneers, which cover the entire visible surface of the tooth, partial veneers are tailored to address specific problem areas, such as discoloration, chips, cracks, or misshapen teeth. This targeted approach allows for a more conservative and cost-effective solution, making it an attractive option for those seeking to enhance their smile without undergoing extensive dental work.

The primary purpose of partial veneers is to improve the aesthetic appearance of your teeth, but they can also provide some functional benefits, such as protecting weakened or damaged tooth enamel and improving the overall health of your teeth.

Before the Procedure

Before you can undergo the partial veneers procedure, you’ll need to schedule a consultation with your dentist. During this initial appointment, your dentist will thoroughly examine your teeth and discuss your specific concerns and goals.

During the consultation, your dentist will:

  • Assess the condition of your teeth and gums
  • Determine if you are a suitable candidate for partial veneers
  • Discuss the various treatment options available to you
  • Explain the partial veneers procedure in detail
  • Provide an estimate of the cost and timeline for the treatment

It’s important to be honest with your dentist about your dental history, any existing conditions, and your expectations for the outcome. This will help your dentist develop a personalized treatment plan that addresses your unique needs and ensures the best possible results.

During the Procedure

Once you and your dentist have agreed on the treatment plan, the partial veneers procedure can begin. The process typically involves the following steps:

  1. Tooth Preparation: Your dentist will lightly buff the surface of the teeth that will receive the partial veneers. This step is necessary to create a rough surface that will help the veneers adhere securely.
  2. Impression Taking: Your dentist will take an impression of your teeth, which will be used to create the custom-made partial veneers.
  3. Temporary Veneers: In some cases, your dentist may place temporary veneers on your teeth to protect them while the permanent partial veneers are being fabricated.
  1. Veneer Placement: When the partial veneers are ready, your dentist will carefully bond them to the front of your teeth using a special adhesive. They will then trim and polish the veneers to ensure a seamless and natural-looking finish.
  2. Final Adjustments: Your dentist may make minor adjustments to the partial veneers to ensure a comfortable and aesthetically pleasing fit.

The entire veneers procedure typically takes two to three visits, depending on the complexity of your case and the number of teeth being treated.

Aftercare and Recovery

After the partial veneers procedure, it’s important to follow your dentist’s instructions for proper aftercare and recovery. This may include:

  • Avoiding Certain Foods: For the first few days, you may need to avoid hard, crunchy, or sticky foods that could potentially dislodge or damage the new veneers.
  • Maintaining Oral Hygiene: Brushing and flossing your teeth regularly is crucial to keep the veneers and surrounding teeth healthy.
  • Attending Follow-up Appointments: Your dentist will likely schedule one or more follow-up appointments to ensure the veneers are functioning properly and to make any necessary adjustments.
  • Protecting the Veneers: Wearing a nightguard or mouthguard during sleep can help prevent grinding or clenching, which can potentially damage the veneers over time.

It’s important to note that while they are generally durable and long-lasting, they may require occasional maintenance or replacement over time. Your dentist will provide you with specific instructions on how to care for your new veneers and ensure their longevity.

Benefits of Partial Veneers

Partial veneers offer a range of benefits that make them an attractive option for those seeking to enhance their smile:

  1. Aesthetic Improvements: They can dramatically improve the appearance of your teeth, addressing issues such as discoloration, chips, cracks, and misshapen or uneven teeth.
  2. Minimal Tooth Preparation: Unlike full veneers, they require less tooth preparation, preserving more of your natural tooth structure.
  3. Cost-Effective: They are generally more affordable than full veneers, making them a more accessible option for many patients.
  4. Reversible TreatmentPartial veneers can be removed without causing permanent damage to your natural teeth, providing you with more flexibility in the future.
  1. Improved Confidence: By transforming your smile, partial veneers can boost your self-esteem and help you feel more confident in social and professional settings.

Risks and Considerations

While partial veneers are generally a safe and effective dental treatment, there are a few risks and considerations to keep in mind:

  1. Tooth Sensitivity: Some patients may experience temporary tooth sensitivity after the partial veneers procedure, particularly to hot or cold temperatures.
  2. Gum Irritation: The placement of veneers can sometimes cause minor gum irritation, which can be managed with proper oral hygiene and follow-up care.
  3. Chipping or Cracking: Although partial veneers are durable, they can still be susceptible to chipping or cracking, especially if subjected to excessive force or biting on hard objects.
  4. Discoloration: Over time, the veneers may become discolored, particularly if they are not properly maintained or if you consume staining foods and beverages.
  5. Suitability: Not everyone is a suitable candidate for veneers. Your dentist will evaluate your oral health and determine if this treatment is the best option for you.

Cost of Partial Veneers Before and After

Cost AspectBefore Partial VeneersAfter Partial Veneers
Per Tooth Cost$800 – $2,500 per tooth$925 – $2,500 per tooth
Full Mouth Cost$4,800 – $20,000 for 6-8 veneers$5,550 – $20,000 for 6-8 veneers
Insurance CoverageUnlikely to be covered, considered cosmeticUnlikely to be covered, considered cosmetic
Financing OptionsPayment plans available, 0% interestPayment plans available, 0% interest
LongevityN/A5-10 years on average, can last up to 20 years with proper care

The cost can vary significantly depending on factors such as the number of teeth being treated, the materials used (porcelain vs. composite), the dentist’s experience, and the geographic location.

Before getting partial veneers, the per-tooth cost typically ranges from $800 to $2,500. For a full mouth treatment of 6-8 veneers, the total cost can be anywhere from $4,800 to $20,000.After the procedure, the per-tooth cost remains in the $925 to $2,500 range, with a full mouth treatment of 6-8 veneers costing between $5,550 and $20,000.It’s important to note that dental insurance is unlikely to cover the cost, as they are generally considered a cosmetic treatment. However, many dentists offer financing options, including 0% interest payment plans, to help make the treatment more affordable for patients.

Partial veneers are a long-lasting solution, with an average lifespan of 5 to 10 years. With proper care and maintenance, they can even last up to 20 years, making them a worthwhile investment in the long run.

Partial Veneers Before and After: Visual Comparisons

One of the most compelling aspects of partial veneers is the dramatic transformation they can bring to your smile. By carefully selecting the right teeth to receive the veneers, your dentist can create a seamless and natural-looking improvement that can significantly boost your confidence and self-esteem.

To give you a better understanding of the partial veneers before and after results, let’s take a look at some real-life examples:

Example 1: Discolored and Misshapen Teeth

Before: The patient had several discolored and misshapen teeth, which caused them to feel self-conscious about their smile.After: With the application of partial veneers, the patient’s teeth were transformed, becoming brighter, more uniform in shape, and significantly more aesthetically pleasing.

Example 2: Chipped and Uneven Teeth

Before: The patient had several chipped and uneven teeth, which detracted from the overall appearance of their smile.After: They were used to restore the damaged teeth, creating a more symmetrical and harmonious smile.

Example 3: Gaps and Alignment Issues

Before: The patient had noticeable gaps between their teeth, as well as some misalignment, which made them feel self-conscious.After: They were strategically placed to close the gaps and improve the overall alignment of the teeth, resulting in a more polished and confident smile.

These examples showcase the remarkable transformative power of veneers, demonstrating how this innovative dental treatment can address a wide range of cosmetic concerns and deliver stunning results.

FAQs

As you consider partial veneers as a solution for your smile, you may have several questions. Here are some of the most frequently asked questions, along with detailed answers:

How long do partial veneers last?

They are designed to be a long-lasting solution for improving the appearance of your teeth. With proper care and maintenance, they can typically last between 5 to 10 years, and in some cases, even longer. The longevity of your veneers will depend on factors such as your oral hygiene habits, the materials used, and any underlying dental issues.

Are partial veneers reversible?

Yes, they are generally considered a reversible dental treatment. Unlike full veneers, which require the removal of a significant amount of tooth enamel, they can be removed without causing permanent damage to your natural teeth. This makes them a more conservative option for those who may want to explore alternative treatments in the future.

Read Also: Lash Extension Styles.

Do partial veneers stain?

Partial veneers, particularly those made of porcelain, are generally resistant to staining. However, it’s important to maintain good oral hygiene habits, such as regular brushing and flossing, to prevent discoloration. Additionally, avoiding staining foods and beverages, like coffee, tea, and red wine, can help keep your veneers looking their best.

Read Also: Marula Oil for Hair.

Can partial veneers be whitened?

While veneers themselves cannot be whitened, the surrounding natural teeth can be. Your dentist may recommend professional teeth whitening treatments to help brighten the appearance of your smile and create a more uniform look.

Read Also: Walnut Oil.

How much do partial veneers cost?

The cost can vary depending on several factors, including the number of teeth being treated, the materials used, and the location of your dentist. On average, the cost can range from $800 to $2,000 per tooth. It’s important to discuss the specific costs with your dentist during your initial consultation.

Read Also: What Massage Oils Are Best.

It’s important to discuss these risks and considerations with your dentist during your initial consultation to ensure that veneers are the right choice for your specific needs and goals.

Read Also: Gua Sha Oil.

Conclusion

If you’re looking to transform your smile without undergoing extensive dental work, partial veneers may be the solution you’ve been searching for. By addressing specific cosmetic concerns, this innovative treatment can deliver stunning results that can boost your confidence and improve your overall appearance.

Read Also: Cheek filler before and after over 50.

Throughout this comprehensive guide, we’ve explored the world of partial veneers before and after, providing you with a detailed understanding of the procedure, the potential benefits, and the associated risks and considerations. With the help of your trusted dentist, you can embark on a journey towards a more beautiful and confident smile.

Read Also: Pull Ups While Pregnant.

So, what are you waiting for? Take the first step towards your dream smile and schedule a consultation with a qualified dental professional today. Get ready to unveil the transformation and embrace the power of partial veneers.

Read Also: Black Facial Peel Mask.

Continue Reading

Beauty Tips

Black Facial Peel Mask: Discover Clearer Skin

Published

on

black facial peel mask

Here is your complete black facial peel mask

Introduction to Black Facial Peel Mask

In the ever-evolving world of skincare, black facial peel masks have emerged as a game-changer, promising to transform dull, congested complexions into radiant, youthful-looking skin. These innovative products have captured the attention of beauty enthusiasts and skincare aficionados alike, thanks to their ability to deeply cleanse, exfoliate, and rejuvenate the skin.

In this comprehensive guide, we’ll delve into the world of black facial peel masks, exploring their benefits, different types, and how to incorporate them into your skincare routine for optimal results. Whether you’re battling stubborn blackheads, uneven skin tone, or a dull, lackluster complexion, this article will equip you with the knowledge to choose the right black facial peel mask and unlock the path to flawless, glowing skin.

What is a Black Facial Peel Mask?

black facial peel mask is a specialized skincare product that combines the power of deep cleansing and exfoliation to transform the appearance of the skin. These masks are typically formulated with a blend of potent ingredients, such as activated charcoal, volcanic ash, or black mud, which work together to draw out impurities, minimize pores, and reveal a brighter, more radiant complexion.

Unlike traditional face masks that simply sit on the skin’s surface, black facial peel masks are designed to be peeled off, taking with them the accumulated dirt, oil, and dead skin cells that can clog pores and dull the skin’s appearance. This unique peel-off action not only provides a deep cleanse but also helps to refine the skin’s texture and tone, leaving you with a refreshed, rejuvenated glow.

The Benefits of Using a Black Facial Peel Mask

Incorporating a black facial peel mask into your skincare routine can unlock a multitude of benefits for your skin. Here are some of the key advantages:

1. Deep Pore Cleansing and Impurity Removal

One of the primary benefits of using a black facial peel mask is its ability to deeply cleanse the skin, removing impurities, excess oil, and built-up debris that can clog pores and lead to breakouts. The powerful ingredients in these masks, such as activated charcoal and volcanic ash, work to draw out impurities, leaving your skin feeling refreshed and revitalized.

2. Improved Skin Texture and Radiance

Black facial peel masks are renowned for their exfoliating properties, which help to slough off dead skin cells and reveal a brighter, more even complexion. By removing the dull, flaky layer of skin, these masks can improve the overall texture and radiance of your skin, leaving it feeling smoother and more luminous.

3. Reduced Appearance of Blackheads and Whiteheads

Stubborn blackheads and whiteheads can be a frustrating skin concern, but black facial peel masks are designed to target and minimize their appearance. The deep-cleansing action of these masks helps to unclog pores and remove the built-up sebum and dead skin cells that can lead to the formation of blackheads and whiteheads.

4. Minimized Pores and Refined Skin Tone

In addition to their cleansing and exfoliating benefits, black facial peel masks can also help to minimize the appearance of enlarged pores and refine the skin’s overall tone. The tightening and toning properties of the ingredients in these masks work to shrink pores and create a more even, smooth complexion.

5. Enhanced Skin Brightness and Glow

One of the most noticeable benefits of using a black facial peel mask is the immediate boost in skin brightness and radiance. By removing the dull, lifeless layer of skin and promoting cell turnover, these masks can help to reveal a more luminous, glowing complexion that appears healthier and more youthful.

Types of Black Facial Peel Masks

When it comes to black facial peel masks, there are several different types to choose from, each with its own unique blend of ingredients and benefits. Let’s explore the most common varieties:

1. Charcoal-based Black Facial Peel Masks

Charcoal-based black facial peel masks are some of the most popular and widely-used options on the market. These masks are formulated with activated charcoal, a highly porous and absorbent ingredient that can effectively draw out impurities, excess oil, and toxins from the skin. Charcoal-based masks are particularly effective at minimizing the appearance of pores and reducing the occurrence of blackheads and whiteheads.

2. Activated Bamboo Charcoal Black Facial Peel Masks

Similar to their charcoal-based counterparts, activated bamboo charcoal black facial peel masks harness the power of this natural ingredient to deeply cleanse and purify the skin. Bamboo charcoal is known for its ability to penetrate deep into the pores, removing stubborn impurities and leaving the skin feeling refreshed and revitalized.

3. Black Mud/Clay-based Black Facial Peel Masks

Black mud and clay-based black facial peel masks are another popular option, offering a unique blend of detoxifying and nourishing properties. These masks often contain ingredients like bentonite clay, kaolin clay, or black mud, which work to absorb excess oil, minimize pores, and leave the skin feeling soft, smooth, and radiant.

4. Volcanic Ash-infused Black Facial Peel Masks

Volcanic ash-infused black facial peel masks harness the power of this mineral-rich ingredient to provide a deep cleanse and exfoliation. It is known for its ability to draw out impurities, reduce the appearance of blemishes, and leave the skin with a healthy, glowing complexion.

How to Use a Black Facial Peel Mask

Using a black facial peel mask is a simple and straightforward process, but it’s important to follow the instructions carefully to achieve the best results. Here’s a step-by-step guide:

  1. Cleanse Your Skin: Begin by thoroughly cleansing your face to remove any makeup, dirt, or oil that may be present on the skin’s surface. This will help the black facial peel mask to penetrate more effectively.
  2. Apply the Mask: Using a clean, dry face, apply a thin, even layer of the black facial peel mask to your skin, avoiding the delicate eye area. Make sure to apply the mask in an upward and outward motion for optimal coverage.
  1. Allow the Mask to Dry: Depending on the specific product, the black facial peel mask may take anywhere from 10 to 30 minutes to fully dry and harden. During this time, avoid touching or moving your face, as this can disrupt the mask’s effectiveness.
  2. Peel Off the Mask: Once the mask has completely dried, gently peel it off, starting from the edges and working your way towards the center of your face. Be sure to peel the mask off in one continuous motion, rather than pulling it off in sections.
  3. Rinse and Moisturize: After removing the black facial peel mask, rinse your face with cool water to remove any residue. Pat your skin dry and follow up with your preferred moisturizer to hydrate and nourish your complexion.

It’s important to note that the frequency of use for a black facial peel mask can vary depending on your skin type and concerns. As a general guideline, it’s recommended to use a black facial peel mask once or twice a week, but always be sure to follow the instructions provided by the specific product you’re using.

Potential Side Effects and Precautions

While black facial peel masks are generally safe for most skin types, it’s important to be aware of potential side effects and take the necessary precautions to ensure a positive experience. Here are some things to keep in mind:

Skin Irritation or Dryness

Some individuals may experience mild skin irritation or dryness after using a black facial peel mask, particularly if they have sensitive or dry skin. It’s important to perform a patch test before using the mask on your entire face to ensure your skin can tolerate the ingredients.

Importance of Patch Testing

Before incorporating a black facial peel mask into your skincare routine, it’s crucial to perform a patch test on a small area of your skin, such as the inside of your wrist or behind your ear. This will help you identify any potential allergic reactions or sensitivities to the mask’s ingredients.

Considerations for Sensitive or Acne-Prone Skin

If you have sensitive or acne-prone skin, it’s essential to choose a black facial peel mask that is formulated with gentle, non-irritating ingredients. Avoid masks with harsh chemicals or fragrances, as these can exacerbate existing skin concerns.

By being mindful of these potential side effects and taking the necessary precautions, you can safely and effectively incorporate a black facial peel mask into your skincare routine and enjoy its transformative benefits.

The Best Black Facial Peel Masks on the Market

With so many black facial peel masks available, it can be overwhelming to choose the right one for your skin type and concerns. To help you navigate the options, we’ve compiled a list of some of the top-rated and highly recommended products:

ProductKey IngredientsSkin Benefits
Charcoal Peel-Off Mask by BioréActivated charcoal, kaolin clayDeep pore cleansing, blackhead removal, oil control
Bamboo Charcoal Peel-Off Mask by ElizaveccaActivated bamboo charcoal, volcanic ashPurifying, brightening, minimizing pores
Black Mud Peel-Off Mask by FreemanBlack mud, bentonite clay, vitamin CDetoxifying, exfoliating, improving skin texture
Volcanic Ash Peel-Off Mask by InnisfreeVolcanic rock, volcanic ash, green teaClarifying, refining, soothing
Charcoal Detox Peel-Off Mask by CetaphilActivated charcoal, glycerin, niacinamideDeeply cleansing, brightening, reducing blemishes

When choosing a black facial peel mask, consider your specific skin type and concerns, as well as the key ingredients in the product. Look for masks that contain potent, natural ingredients like activated charcoal, volcanic ash, or black mud, as these can provide the most effective and transformative results.

FAQs about Black Facial Peel Masks

What is the difference between a black facial peel mask and a regular face mask?

The primary difference lies in the application and removal process. Black facial peel masks are designed to be peeled off the skin, whereas regular face masks are typically washed off. Peel-off masks provide a deeper cleansing and exfoliating experience, while regular masks focus more on hydration and nourishment.

How often should I use a black facial peel mask?

The recommended frequency for using a black facial peel mask can vary depending on your skin type and concerns. As a general guideline, it’s best to use a black facial peel mask once or twice a week, allowing your skin adequate time to recover and replenish between uses.

Read Also: Lash Extension Styles.

Can black facial peel masks be used on all skin types?

While black facial peel masks can be beneficial for a wide range of skin types, it’s important to choose a formula that is suitable for your specific needs. Individuals with sensitive or acne-prone skin may need to opt for gentler, non-irritating formulas, while those with oily or congested skin can benefit from the deep-cleansing properties of these masks.

Read Also: Marula Oil for Hair.

Are there any specific ingredients to look for in a black facial peel mask?

When selecting a black facial peel mask, look for key ingredients like activated charcoal, volcanic ash, or black mud, as these can provide the most effective cleansing and exfoliating benefits. Additionally, consider masks that contain soothing and nourishing ingredients, such as aloe vera, green tea, or vitamin C, to help balance and revitalize the skin.

Read Also: Walnut Oil.

How long does it take to see results from using a black facial peel mask?

The results from using a black facial peel mask can vary depending on your skin type and the specific product you’re using. Many people report seeing an immediate improvement in skin brightness and radiance after the first use, while more long-term benefits, such as reduced pore size and minimized blemishes, may take a few weeks of consistent use to become fully visible.

Read Also: What Massage Oils Are Best.

Conclusion

Black facial peel masks have emerged as a game-changing addition to the skincare world, offering a powerful and transformative solution for those seeking radiant, flawless skin. By deeply cleansing, exfoliating, and rejuvenating the complexion, these innovative masks can help to address a wide range of skin concerns, from stubborn blackheads and enlarged pores to dull, uneven skin tone.

Read Also: Gua Sha Oil.

Whether you opt for a charcoal-based, bamboo charcoal, black mud, or volcanic ash-infused black facial peel mask, incorporating this skincare hero into your routine can unlock a new level of skin health and luminosity. By following the tips and recommendations outlined in this guide, you’ll be well on your way to achieving the glowing, youthful-looking complexion of your dreams.

Read Also: Pull Ups While Pregnant.

So, what are you waiting for? Embrace the power of black facial peel masks and embark on a journey to radiant, flawless skin today!

Read Also: Cheek filler before and after over 50.

Continue Reading

Trending