Connect with us

Beauty Tips

Pimples vs Cold Sores: Your Complete Guide

Published

on

pimples vs cold sores

Here is your complete guide to pimples vs cold sores

Introduction to Pimples vs Cold Sores

Both pimples and cold sores are skin conditions that can affect the face, but they are caused by different factors and require different treatments. In this blog post, we will compare pimples and cold sores, as well as their causes, symptoms, and treatment options. Here is your complete Guide To pimples vs cold sores.

Pimples vs Cold Sores

Causes:

Clogged pores, which can be caused by excess oil production, dead skin cells, and bacteria, cause pimples. Hormonal changes, stress, and certain medications can also set them off. The herpes simplex virus, on the other hand, causes cold sores (HSV). HSV comes in two varieties: type 1, which is associated with cold sores, and type 2, which is associated with genital herpes. HSV is highly contagious and can be spread through kissing, oral sex, or sharing utensils or lip balm with an infected person.

Read More About What Is Balayage.

Symptoms:

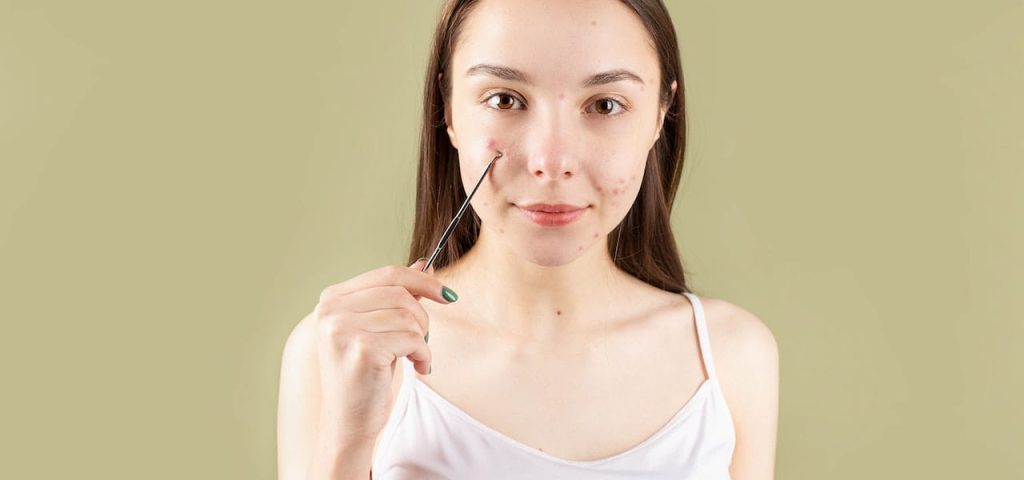
Pimples typically appear on the face as red bumps or whiteheads, particularly around the nose, chin, and forehead. Other symptoms that may accompany them, such as:

  1. Tenderness or pain in the affected area.
  2. Swelling or inflammation in the vicinity of the affected area.
  3. A pus-filled center that has the potential to rupture and release its contents.

Cold sores, on the other hand, typically manifest as small, fluid-filled blisters on or near the lips, though they can also appear on the nose or chin. Other symptoms will accompany them include:

  1. Before the blisters appear, there may be tingling or itching in the affected area.
  2. Swelling and redness in the vicinity of the affected area.
  3. Pain or discomfort in the vicinity of the affected area.
  4. As the blisters begin to heal, they crunch over.

Read More About How To Apply Eye Cream.

Treatment:

The treatment options for pimples and cold sores vary depending on the underlying cause. Treatment options for pimples may include:

  1. Topical treatments, such as benzoyl peroxide, salicylic acid, or retinoids, can help unclog pores and reduce inflammation.
  2. Prescription medications: A doctor may prescribe topical or oral antibiotics to help clear up acne in some cases.
  3. Avoiding triggers such as oily or greasy foods, stress, and certain medications may help to prevent pimple formation.

Read More About How Curl Hair Flat Iron?

Treatment options for cold sores may include:

  • Antiviral creams, such as acyclovir or docosanol, are available over-the-counter (OTC) and can help reduce the duration and severity of cold sores.
  • Prescription medications: A doctor may prescribe antiviral medications such as valacyclovir or famciclovir to help manage the symptoms of cold sores in some cases.
  • Applying a cold, damp cloth to the affected area can help relieve pain and swelling.
  • Pain relievers such as ibuprofen or acetaminophen can help reduce the pain and discomfort associated with cold sores.

Prevention:

Different methods are used to prevent pimples and cold sores. You can avoid pimples by doing the following:

  1. Wash your face twice a day with a gentle cleanser and avoid touching your face with dirty hands.
  2. Picking or squeezing pimples can lead to further inflammation and scarring.
  3. Use non-comedogenic products: Look for skin care and makeup products that are non-comedogenic, which means they will not clog your pores.
  4. Eat a healthy diet: A diet high in fruits, vegetables, and lean protein can help keep your skin in good condition.
pimples vs cold sores: your complete guide
pimples vs cold sores: the difference?

Pimples

Pimples are a very common skin condition that affects millions of people all over the world. They are a type of acne that occurs when oil and dead skin cells clog hair follicles. We will look at the causes, symptoms, and treatment options for pimples in this blog post.

Causes:

Excess oil production, dead skin cells, and bacteria are all factors that contribute to pimples. The following are some common factors that can contribute to the development of pimples:

  • Hormonal changes: Hormonal changes during puberty, menstrual cycles, and pregnancy can increase oil production, leading to pimples.
  • Genetics: Pimples can run in families, suggesting that genetics play a role in their development.
  • Poor skincare: Failing to cleanse your skin properly or using harsh products can contribute to the development of pimples.
  • Diet: Consuming a diet high in sugar and refined carbohydrates can increase insulin levels, which can lead to increased oil production and the development of pimples.

Symptoms:

Pimples typically appear as small, red bumps on the skin. Other symptoms that may accompany them, such as:

  • Whiteheads: Small, raised bumps that are white or yellow in color.
  • Blackheads are small, raised bumps of black or dark color.
  • Papules: Small, raised bumps that are red also tender to the touch.
  • Pustules: Small, raised bumps that are filled with pus.

Pimples can occur anywhere on the body, but are most commonly found on the face, neck, back, and chest.

Treatment:

There are several treatment options available for pimples, including over-the-counter (OTC) creams, prescription medications, and lifestyle changes. These include:

  • OTC creams: These may include topical treatments like benzoyl peroxide, salicylic acid, or retinoids, which can help reduce inflammation and unclog pores.
  • Prescription medications: In some cases, a doctor may prescribe antibiotics or oral contraceptives to help manage the symptoms of pimples.
  • Lifestyle changes: Simple lifestyle changes like eating a healthy diet, drinking plenty of water, and avoiding touching your face can help reduce the frequency and severity of pimples.
  • Professional treatments: Dermatologists may offer professional treatments like chemical peels, microdermabrasion, or laser therapy to help manage severe cases of pimples.

Prevention:

Preventing pimples involves taking steps to reduce oil production and prevent the buildup of dead skin cells. Some tips for preventing pimples include:

  • Use a gentle cleanser to wash your face twice per day.
  • Don’t touch your face or pick at pimples.
  • Use non-comedogenic skincare products that won’t clog pores.
  • Avoid wearing tight-fitting clothing or equipment that can cause friction against the skin.
  • Relaxation techniques such as meditation or yoga can help you reduce stress.
pimples vs cold sores: what is it?

Cold Sores

Cold sores, also known as fever blisters, are a widespread viral infection that affects millions of people around the world. They are caused by the herpes simplex virus (HSV), which is highly contagious and can be transmitted by kissing, oral sex, or sharing utensils or lip balm with an infected person. We will look at the causes, symptoms, and treatment options for cold sores in this blog post.

Causes:

The herpes simplex virus causes cold sores, which can be contracted through close contact with an infected person. Once inside the body, the virus can lay dormant in nerve cells for months or even years before reactivating and causing an outbreak. The following triggers can cause the virus to reactivate and cause a cold sore outbreak:

  • Illness or infection
  • Hormonal changes
  • Stress or fatigue
  • Sun exposure
  • Dental work or other mouth trauma

Symptoms:

Cold sores typically appear as small, fluid-filled blisters on or around the lips, but can also occur on the nose or chin.Other symptoms that may accompany them include:

  • Tingling or itching around the affected area before the blisters appear.
  • Swelling and redness around the affected area.
  • Pain or discomfort around the affected area.
  • Fever or headache in some cases.

As the blisters begin to heal, they may crust over and eventually scab before falling off. Cold sores usually last for 7-10 days, but can sometimes last longer.

Read More About How To Curl Hair?

Treatment:

While there is no cure for cold sores, there are several treatment options available to help manage symptoms and speed up the healing process. These include:

  • Over-the-counter (OTC) creams: These may include antiviral creams like acyclovir or docosanol, which can help reduce the duration and severity of cold sores. They should be applied at the first sign of a cold sore outbreak for best results.
  • Prescription medications: In some cases, a doctor may prescribe antiviral medications like valacyclovir or famciclovir to help manage the symptoms of cold sores. These medications can be taken orally or even applied topically.
  • Cold compresses: Applying a cold, damp cloth to the affected area can help reduce pain and swelling.
  • Pain relief: Over-the-counter pain relievers like ibuprofen or acetaminophen may help reduce pain and discomfort associated with cold sores.

Prevention:

Preventing cold sores involves taking steps to avoid contact with the herpes simplex virus. Some tips for preventing cold sores include:

  1. Avoid close contact with someone who has a cold sore outbreak.
  2. Wash your hands frequently, especially after coming into contact with someone who has a cold sore outbreak.
  3. Avoid sharing utensils, lip balm, or other personal items with someone who has a cold sore outbreak.
  4. Protect your skin from the sun with sunscreen or lip balm with SPF.
  5. Relaxation techniques such as meditation or yoga can help you manage stress.

Conclusion

Cold sores are a common viral infection caused by the herpes simplex virus. While there is no cure for cold sores, there are several treatment options available to help manage symptoms and speed up the healing process. By taking steps to prevent the spread of the virus, you can reduce your risk of developing cold sores in the future.

Pimples are a common skin condition caused by a number of factors such as excessive oil production, dead skin cells, and bacteria. While there are several treatment options available, the most effective way to manage pimples is to prevent them through simple lifestyle changes and proper skincare. You can reduce your risk of developing pimples in the future by taking steps to reduce oil production and prevent the buildup of dead skin cells.

Read More About Women Chest Exercise At Home.

Continue Reading
Click to comment

Leave a Reply

Your email address will not be published. Required fields are marked *

Beauty Tips

Trap Botox Before and After: Unveiling Stunning Transformations

Published

on

trap botox before and after

Here is your complete guide to trap botox before and after

Introduction to Trap Botox Before and After

As we age, lines and wrinkles can form on our faces, making us look older than we feel. For many people, trap botox has emerged as a popular solution to combat these signs of aging. In this article, we will explore what trap botox is, how it works, and what you can expect before and after the procedure.

What is Trap Botox?

Trap botox, also known as masseter botox, is a cosmetic procedure that involves injecting botulinum toxin into the masseter muscle, which is the muscle responsible for chewing. By weakening this muscle, trap botox can help to reduce the appearance of lines and wrinkles in the lower face, particularly around the jawline and chin.

Before Trap Botox: Understanding the Pre-Procedure Stage

Before embarking on your trap botox journey, it’s essential to lay the groundwork for success:

  • Consultation Process: Schedule a consultation with a reputable practitioner specializing in trap botox. Use this opportunity to discuss your goals, concerns, and medical history. Ask questions about the procedure, expected outcomes, and any potential risks.
  • Preparation Tips: Prepare your skin for the procedure by following a diligent skincare routine. Incorporate gentle cleansers, hydrating serums, and SPF protection into your daily regimen. Avoid excessive sun exposure and harsh chemicals that could irritate your skin.
  • Awareness of Risks: While botox is generally safe, it’s crucial to be aware of potential risks and side effects. These may include temporary redness, swelling, or bruising at the injection sites. Your practitioner will provide detailed information and guidance on how to minimize these risks.

How Does Trap Botox Work?

Trap botox works by blocking the signals from the nerve to the muscle, causing the muscle to relax. This relaxation reduces the appearance of lines and wrinkles, giving the face a more youthful and refreshed appearance. The effects of trap botox typically last for three to four months, after which time the muscle will gradually regain its strength and the lines and wrinkles will reappear.

Trap Botox Benefits

BenefitDescription
Reduced appearance of lines and wrinklesSmoother, more youthful appearance
Non-surgical solutionMinimally invasive procedure
Quick and painlessCompleted in a few minutes
Long-lasting resultsEffects last for three to four months
Customizable treatmentDose and number of units can be adjusted
Can be combined with other treatmentsComprehensive rejuvenation of the face

Trap Botox Before and After

Before undergoing botox, it is important to have a consultation with a qualified healthcare professional to discuss your goals and expectations. During this consultation, the professional will evaluate your facial muscles and determine the appropriate dose of botulinum toxin to administer.

The procedure itself is relatively quick and painless, taking only a few minutes to complete. After the injections, you may experience some mild swelling and bruising, but this should resolve within a few days.

Trap Botox Before and After

BeforeAfter
Lines and wrinkles around the jawline and chinSmoother, more youthful appearance
Prominent masseter muscleReduced masseter muscle size
Tension in the jawRelaxed jaw and reduced teeth grinding

Trap Botox Results

The results of botox are typically visible within a week to ten days of the procedure. The full effects can take up to two weeks to appear. The results of botox are not permanent, and touch-up treatments are usually required every three to four months to maintain the desired appearance.

Trap Botox Results

TimeResults
1 weekInitial reduction in lines and wrinkles
2 weeksFull effects visible
3-4 monthsTouch-up treatment required

Trap Botox Side Effects

Trap botox is generally considered safe, but like any medical procedure, there are potential side effects to be aware of. The most common side effects include:

  • Mild swelling and bruising at the injection site
  • Headache
  • Numbness or tingling in the face
  • Weakness in the masseter muscle

Trap Botox Side Effects

Side EffectIncidence
Swelling and bruisingCommon
HeadacheCommon
Numbness or tinglingUncommon
Weakness in the masseter muscleRare

Trap Botox Cost

The cost of botox varies depending on the location, the healthcare professional administering the injections, and the number of units of botulinum toxin required. On average, the cost of botox ranges from $400 to $800 per treatment.

Trap Botox Cost

FactorCost
LocationVaries
Healthcare professionalVaries
Number of unitsVaries
Average cost$400-$800

Is Trap Botox Worth It Before and After?

Trap Botox, also known as TrapTox, is a cosmetic procedure that involves injecting Botox into the trapezius muscle in the upper back and neck area. This treatment has gained popularity due to its transformative effects on the appearance of the neck and shoulders, as well as its potential for pain relief.

Benefits of Trap Botox

Trap Botox offers a range of benefits, both cosmetic and therapeutic. Here are some of the most significant advantages of this treatment:

  • Sleek Neck Contour: Prominent trapezius muscles can give the upper back and neck a bulky appearance, which can be a source of self-consciousness for many individuals. Botox can help achieve a lean neck with a defined angle between the neck and shoulder, giving the appearance of a more slender and sleek neck contour.
  • Pain Relief: Botox can help alleviate symptoms related to muscle tension or pain, particularly in the neck and shoulder area. This can be beneficial for individuals experiencing conditions such as chronic neck pain, tension headaches, or myofascial pain syndrome.
  • Facial Slimming: Botox can also be used for cosmetic concerns to help achieve a longer-looking neck and slimmer shoulders, creating a more proportionate and balanced appearance.

What to Expect Before and After Trap Botox

Before undergoing Botox, it is essential to consult with a qualified healthcare professional who has experience with this treatment. During the consultation, the healthcare provider will evaluate your symptoms and determine if Botox is appropriate for you.

The actual dosage of Botox required for Botox varies based on the degree of muscle tension and the muscle mass. The dose can range from 60 units to 200 units and can only be accurately established during an in-person consultation.

After the Botox procedure, it is essential to follow the healthcare provider’s instructions for aftercare to ensure optimal results. The effects of Botox typically peak within 2-4 weeks after the injections and can last for around 3-6 months, depending on individual factors.

Side Effects and Risks of Trap Botox

Like any medical procedure, Botox carries some potential side effects and risks. Here are some of the most common side effects and risks associated with this treatment:

  • Allergic Reactions: While rare, some individuals may experience allergic reactions to Botox. It is essential to inform your healthcare provider of any known allergies or sensitivities before undergoing treatment.
  • Discomfort During Injections: The process of receiving Botox injections can cause mild discomfort or a brief stinging sensation at the injection site.
  • Potential for Incomplete Pain Relief: While Botox can help relax the trapezius muscle and reduce pain, it may not completely eliminate all pain or address underlying issues contributing to the pain.
  • Alternative Treatment Options: Botox is just one of several treatment options available for trapezius muscle pain. Some individuals may prefer or respond better to alternative therapies such as physical therapy, massage, heat therapy, or oral pain medications.
  • Risk of Incorrect Injection: Proper administration of Botox injections is critical to achieving the desired results and avoiding potential complications. It is essential to receive Botox treatments from a qualified and experienced healthcare professional to minimize the risk of incorrect injection.
  • Potential for Muscle Weakness: While Botox can relax the trapezius muscle, there is a possibility of some muscle weakness in the treated area. This can affect muscle function temporarily and may require careful monitoring during the recovery period.

Choosing a Qualified Healthcare Professional for Trap Botox

When considering Botox, it is crucial to choose a qualified and experienced healthcare professional to perform the procedure. Here are some factors to consider when selecting a healthcare provider for Botox:

  • Experience and Expertise: Look for a healthcare professional who has extensive experience and expertise in performing Botox procedures. This can help ensure optimal results and minimize the risk of complications.
  • Individualized Assessment and Treatment Plan: Choose a healthcare provider who takes the time to conduct a thorough assessment of your symptoms and develops a customized treatment plan tailored to your individual needs and goals.
  • Patient Satisfaction: Look for a healthcare provider with a high patient satisfaction rate and positive patient reviews. This can help ensure that you receive high-quality care and optimal results.

FAQs

Who is a good candidate for trap botox?

Good candidates for botox are individuals who have lines and wrinkles around the jawline and chin, and who are looking for a non-surgical solution to reduce the appearance of these lines and wrinkles.

Read Also: Summer Toe Nail Designs.

How long does trap botox last?

The effects of botox typically last for three to four months, after which time the muscle will gradually regain its strength and the lines and wrinkles will reappear.

Read Also: Prosa Mascara.

Is trap botox painful?

The procedure itself is relatively quick and painless, taking only a few minutes to complete. After the injections, you may experience some mild swelling and bruising, but this should resolve within a few days.

Read Also: Water Activated Eyeliner.

Can trap botox be combined with other treatments?

Yes, botox can be combined with other treatments, such as dermal fillers, to achieve a more comprehensive rejuvenation of the face.

Read Also: SkinVive Before and After.

What are the potential side effects of trap botox?

The most common side effects of botox include mild swelling and bruising, headache, numbness or tingling in the face, and weakness in the masseter muscle.

Read Also: Pull Ups While Pregnant.

Conclusion

Trap botox is a popular and effective solution for reducing the appearance of lines and wrinkles in the lower face. By weakening the masseter muscle, trap botox can help to smooth out the skin and give the face a more youthful and refreshed appearance. If you are considering botox, it is important to consult with a qualified healthcare professional to discuss your goals and expectations, and to ensure that the procedure is safe and appropriate for you.

Read Also: Botox Before and After Eyes.

Continue Reading

Beauty Tips

Botox Before and After Eyes: Unveiling Youthful Transformation

Published

on

botox before and after eyes

Here is your complete guide to botox before and after eyes

Introduction to Botox Before and After Eyes

In the quest for a more youthful appearance, Botox for eyes has become a popular choice for many individuals looking to reduce the signs of aging. This comprehensive guide will take you through everything you need to know about Botox before and after eyes, from understanding the procedure to the expected results and potential risks.

What is Botox for Eyes?

Botox is a neurotoxin that works by temporarily paralyzing muscles, thereby reducing the appearance of wrinkles and fine lines. When used around the eyes, it can target areas such as crow’s feet and forehead lines, providing a smoother and more youthful look.

Understanding Botox Treatment for the Eyes

To appreciate the impact of Botox on the eyes, it’s crucial to grasp how the treatment works and its expected outcomes:

  • Botox targets the underlying muscles responsible for causing wrinkles, particularly the orbicularis oculi muscles around the eyes.
  • Upon injection, Botox temporarily inhibits muscle contractions, smoothing out fine lines and wrinkles.
  • Results typically become noticeable within a few days to a week and can last for three to four months before requiring touch-up injections.

Common Target Areas for Botox Injections Around the Eyes

AreaDescription
Crow’s feetWrinkles extending from the corners of the eyes
Forehead wrinklesHorizontal lines above the eyebrows
Brow furrowsVertical lines between the eyebrows
Under-eye wrinklesFine lines and creases beneath the eyes

How Does Botox Work for Eyes?

  • Botox works by blocking signals from the nerves to the muscles, preventing them from contracting.
  • This relaxation of the muscles helps to smooth out wrinkles and lines around the eyes.
  • The effects of Botox typically last for several months before gradually wearing off.

Best Age for Botox Before and After Eyes

Age RangeSkin ConditionRecommendation
20sFew wrinkles, healthy skinConsider preventative Botox in late 20s or early 30s to prevent wrinkles from developing.
Early 30sInitial signs of wrinklesStart Botox to treat early wrinkles before they become permanent.
Mid to late 30sVisible wrinklesContinue Botox treatments to maintain results and prevent further wrinkles.
40sDeeper lines and wrinklesUse Botox to soften deeper lines around eyes, forehead, and frown lines.
50sPronounced lines and menopause changesUse Botox to reduce the appearance of lines and maintain a refreshed look.
60s and upDesire for rejuvenated skinUse Botox to look fresher and avoid aiming for a significantly younger appearance.

In summary, the best age for Botox before and after eyes depends on individual skin conditions and aesthetic goals. Preventative Botox can be beneficial in the late 20s or early 30s, while those in their 30s and beyond can use Botox to treat and maintain the reduction of wrinkles and lines. It is essential to consult with a professional to determine the best course of action for your unique situation.

Preparing for Botox for Eyes

Before undergoing a treatment for your eyes, it is essential to:

  • Find a qualified injector who specializes in facial aesthetics.
  • Schedule a consultation to discuss your goals and expectations.
  • Follow any pre-treatment instructions provided by your injector to ensure optimal results.

The Botox Procedure for Eyes

The Botox procedure typically involves:

  • The injector marking the targeted areas around the eyes.
  • Administering the injections using a fine needle.
  • The entire procedure usually takes around 15-30 minutes, depending on the areas being treated.

Botox Before and After Eyes

One of the most exciting aspects of Botox treatment is witnessing the transformation from before to after. Here is a comparison table showcasing the typical changes:

Before BotoxAfter Botox
Crow’s feet visibleSmoother eye area
Forehead lines prominentReduced wrinkles
Tired appearanceRefreshed look

How Long Do Botox Results Last for Eyes?

The duration of results for eyes can vary but typically lasts between 3-6 months. Factors such as metabolism, muscle strength, and lifestyle choices can influence how long the effects of Botox last.

Best Tips and Advice for Botox Before and After Eyes

  • Choosing a Qualified Injector
    • Ensure the injector is a medical professional with proper training and experience in administering Botox.
    • Check their credentials, reviews, and before/after photos to assess their expertise.
  • Pre-Treatment Consultation
    • Discuss your goals, expectations, and concerns with the injector.
    • Provide a complete medical history, including any medications, supplements, or medical conditions that may affect the treatment.
  • Preparing for Botox
    • Avoid alcohol, blood thinners, and anti-inflammatory medications for 24-48 hours before the treatment.
    • Do not wear makeup or skincare products on the day of the treatment.
    • Avoid strenuous activities, massages, or facial treatments for 24 hours before the treatment.

Post-Treatment Care

  • Immediate Post-Botox Care
    • Avoid Touching or Massaging the Treated Area
      • Do not touch or massage the treated area for at least 24 hours after the treatment.
    • Stay Upright
      • Avoid lying down for at least four hours following the treatment.
    • Avoid Strenuous Activities
      • Avoid physical activity, especially strenuous exercise, for 24 hours following a treatment.
    • Use Ice Packs
      • Applying ice packs or cold compresses to the treated area can help reduce swelling and bruising.
    • Avoid Excessive Heat or Sun Exposure
      • Direct exposure to heat, such as saunas or hot showers, and prolonged sun exposure should be avoided for at least 24 hours post-treatment.
  • Long-Term Post-Botox Care
    • Avoid Alcohol
      • Avoid alcohol for at least 24 hours after the treatment to prevent bruising or unwanted dissipation.
    • Skip the Accessories (and the Nap)
      • Do not wear hats or visors for at least four hours after having your foreheads treated.
      • Avoid taking aspirin, ibuprofen, vitamin E, and fish oil for 48 hours after the injection.
      • Wait four hours before lying down after Botox.
      • When sleeping at night, elevate your head with extra pillows.
    • The Do’s: After-Botox Skin Care Products
      • Use gentle skincare products and avoid dermabrasion, microdermabrasion, radiofrequency, or lasers for several hours after the injection.
      • Drink lots of water to keep your skin moisturized and enhance the effects of Botox.
      • Protect the skin around your eyes by using hydrating skincare products and wearing sunscreen products.
  • Potential Complications and Seeking Medical Assistance
    • Be aware of potential complications such as allergic reactions, infection, flu-like symptoms, and vision problems.
    • If you experience any concerning symptoms or side effects after your Botox injections, seek medical assistance immediately.

By following these tips and advice for Botox, you can ensure optimal results and maintain your rejuvenated appearance. Always consult with a qualified healthcare professional for personalized guidance and expert advice on post-botox care.

Botox for Eyes Side Effects and Risks

While Botox for eyes is generally safe, there are potential side effects and risks to be aware of:

  • Temporary redness or swelling at the injection site.
  • Rarely, droopy eyelids or double vision may occur.
  • It is crucial to choose a skilled injector to minimize the risk of complications.

Botox for Eyes Cost

The cost of Botox for eyes can vary depending on factors such as the injector’s expertise, location, and the number of units required. On average, the cost ranges from $200 to $600 per treatment session.

FAQs

What is the best age to start getting Botox for eyes?

The ideal age to start Botox varies for each individual but is typically in the late 20s to early 30s.

How often should I get Botox for eyes?

Botox is recommended every 3-6 months to maintain results.

Read Also: Summer Toe Nail Designs.

Is Botox for eyes painful?

Discomfort during the procedure is minimal, with some patients describing it as a slight pinch.

Read Also: Prosa Mascara.

Can Botox for eyes cause droopy eyelids?

While rare, droopy eyelids can occur as a temporary side effect of Botox for eyes.

Read Also: Water Activated Eyeliner.

How much does Botox for eyes cost?

The cost of Botox varies but typically ranges from $200 to $600 per treatment session.

Read Also: Pull Ups While Pregnant.

Conclusion

In conclusion, Botox before and after eyes can be a transformative treatment for achieving a more youthful and refreshed appearance around the eyes. By understanding the procedure, expected results, and potential risks, you can make an informed decision about whether Botox for eyes is right for you. Remember to consult with a qualified injector to ensure safe and effective results.

Read Also: SkinVive Before and After.

Continue Reading

Beauty Tips

SkinVive Before and After: Explore the Power of Transformation

Published

on

skinvive before and after

Here is your complete guide to skinvive before and after

Introduction to SkinVive Before and After

Welcome to our in-depth guide on Skinvive, a skincare brand that has gained popularity for its effective products and impressive results. In this article, we will explore the science behind Skinvive, showcase real-life before and after photos, and provide tips for maximizing your Skinvive experience.

Skinvive is a skincare line that has captured the attention of many for its innovative ingredients and promising results. Before and after photos are essential for understanding the potential benefits of any skincare product, and Skinvive is no exception.

The Science Behind Skinvive

Skinvive’s formulations are based on a deep understanding of skin health and the latest scientific research. The brand’s ingredients include:

  • Vitamin C: A potent antioxidant that brightens the skin and reduces signs of aging
  • Retinol: A form of Vitamin A that stimulates collagen production and improves skin texture
  • Hyaluronic Acid: A humectant that locks in moisture and plumps the skin

These ingredients work together to address common skin concerns, such as fine lines, dullness, and dehydration.

Best Time to Use Skinvive Before and After

Skinvive, a hyaluronic acid-based skin booster, offers subtle yet effective enhancements to improve facial skin smoothness and provide a lasting glow. To make the most of your treatment, timing is crucial. Here’s a detailed explanation of the best time to use Skinvive before and after:

Before Skinvive Treatment

Before your appointment, it’s essential to prepare your skin and yourself for the procedure. Here are some key steps to consider:

  • Review Documents: Make sure to review all documents and forms provided by your provider to understand the treatment fully.
  • Inform Your Provider: Notify your provider about any allergies, medications, or pre-existing conditions to ensure a safe procedure.
  • Hydration: Stay well-hydrated before your appointment to help your skin prepare for the treatment.
  • Arrive Early: Arrive at least 20 minutes early to allow time for numbing the treatment area, ensuring a more comfortable experience.

After Skinvive Treatment

After your appointment, it’s crucial to follow post-treatment care instructions for optimal results. Here’s what to expect and how to care for your skin post-treatment:

  • Resume Daily Activities: You can return to most daily tasks after the treatment, ensuring the treatment area remains clean.
  • Common Side Effects: Expect mild symptoms like redness or bumps, which typically fade within a few days.
  • Avoid Intense Activities: Refrain from intense exercise, sun exposure, and alcohol consumption post-treatment.
  • Long-Term Care: Use a daily, broad-spectrum sunscreen with at least SPF 30 to maintain skin health and enhance treatment results.

Choosing the right time to use before and after treatment is crucial for achieving the best results. By following pre-treatment preparation steps and post-treatment care guidelines, you can enhance the effectiveness of this product and enjoy its benefits for smoother, hydrated, and glowing skin.

How to Use Skinvive for Optimal Results

To get the most out of Skinvive, follow these steps:

  1. Cleanse: Start by cleansing your face with a gentle cleanser to remove dirt and impurities.
  2. Apply Serum: Apply a few drops of Skinvive’s serum to your face and neck, focusing on areas of concern.
  3. Moisturize: Follow up with a moisturizer to lock in hydration and keep your skin soft and supple.
  4. Protect: Don’t forget to apply sunscreen during the day to protect your skin from harmful UV rays.

By incorporating Skinvive into your skincare routine, you can achieve noticeable results.

Expert Tips for Enhancing Your Skinvive Experience

To maximize the benefits, consider the following expert tips:

  • Be Consistent: Consistency is key when it comes to skincare. Use the products daily for the best results.
  • Patience is Key: Skincare results take time. Be patient and give your skin the time it needs to adjust to new products.
  • Stay Hydrated: Drinking plenty of water can help improve your skin’s overall health and appearance.

By following these tips, you can enhance your Skinvive experience and achieve even better results.

Comparing Skinvive with Other Skincare Brands

When it comes to skincare, there are many options to choose from. Skinvive stands out for its:

  • Innovative Ingredients: Skinvive’s formulations are based on the latest scientific research and include potent ingredients like Vitamin C, Retinol, and Hyaluronic Acid.
  • Expert Endorsements: Skincare experts and influencers have praised Skinvive for its transformative results.

However, it’s important to compare it with other skincare brands to make an informed decision. Here are some pros and cons of choosing Skinvive for your skincare routine:

Pros:

  • Effective: Skinvive’s products have been shown to improve skin texture, tone, and overall radiance.
  • Science-Backed: Skinvive’s formulations are based on the latest scientific research.
  • Gentle: Skinvive’s products are designed to be gentle and suitable for all skin types.

Cons:

  • Price: Skinvive’s products are on the pricier side compared to some other skincare brands.
  • Limited Selection: The product range is more limited than some other skincare brands.

By weighing the pros and cons, you can decide if it is the right choice for your skincare needs.

The Future of Skinvive: Innovations and Trends

As skincare technology advances, it is poised to stay at the forefront of innovation. Here are some trends and innovations to look out for:

  • Personalized Skincare: Skincare products tailored to individual skin types and concerns.
  • Sustainable Skincare: Eco-friendly packaging and formulations that are gentle on the environment.
  • Advanced Ingredients: New and innovative ingredients that deliver even better results.

By staying up-to-date with the latest trends and innovations, Skinvive can continue to provide effective skincare solutions.

Is It Really Worth Using Skinvive Before and After?

Evaluating the Value of Treatment

Skinvive, a hyaluronic acid-based skin booster, has gained attention for its ability to improve skin smoothness and provide a lasting glow. When considering whether it is worth using before and after treatment, several factors come into play:

Effectiveness of Skinvive Treatment

  • Subtle Enhancements: It is designed to deliver subtle yet effective enhancements, focusing on improving skin texture and hydration without altering facial structure.
  • Real Results: Before and after photos and patient testimonials demonstrate improvements in skin quality, hydration, and overall radiance.

Longevity and Maintenance

  • Duration of Results: The results typically last up to 6 months with optimal care and touch-ups as needed.
  • Maintenance: Regular touch-ups may be required to maintain desired results, adding to the long-term commitment of using this product.

Comfort and Convenience

  • Minimal Downtime: The treatments are quick, with minimal downtime, allowing patients to resume daily activities almost immediately.
  • Comfort: The injections are superficial and relatively comfortable compared to other procedures like Botox, enhancing the overall treatment experience.

Overall Value and Satisfaction

  • Enhanced Skin Quality: It focuses on improving skin quality, hydration, and texture, offering a natural-looking enhancement that complements one’s features.
  • Versatility: Skinvive’s versatility in addressing various skin concerns across different areas of the body adds to its value as a comprehensive skincare solution.

Comparing the Efficacy of Skinvive Before and After with Other Products

CriteriaSkinvive Before and AfterJuvéderm FillerSculptra TreatmentHyperdiluted Radiesse
Treatment GoalImprove skin tone and texture, add glowFill wrinkles and add volumeStimulate collagen productionHydrate and smooth skin
Active IngredientHyaluronic acid microdropletsHyaluronic acidPoly-L-lactic acidCalcium hydroxylapatite
Injection DepthSuperficial intradermalDermalSubdermalIntradermal
Results DurationUp to six monthsUp to two yearsUp to two yearsUp to six months
ComfortExtremely superficial, minimal discomfortMore uncomfortable than SkinviveLess comfortable than SkinviveSimilar to Skinvive
Side EffectsMild redness, swelling, and bruisingMore side effects than SkinviveSimilar side effects as SkinviveSimilar side effects as Skinvive
Ideal CandidatesAll skin types, seeking skin rejuvenationVolume loss, wrinkles, and facial contouringVolume loss, wrinkles, and facial contouringDryness, dullness, and fine lines
Procedure Time10-15 minutes30-45 minutes30-45 minutes10-15 minutes
DowntimeMinimal, no more than 24-48 hoursMore downtime than SkinviveSimilar downtime as SkinviveSimilar downtime as Skinvive
CostLess per syringe than traditional fillersMore expensive than SkinviveSimilar cost to SkinviveSimilar cost to Skinvive
FDA ApprovalYesYesYesYes

This table compares the efficacy of this product Before and After with other products, specifically Juvéderm Filler, Sculptra Treatment, and Hyperdiluted Radiesse. It stands out for its unique approach to improving skin tone and texture, delivering hyaluronic acid microdroplets just under the skin’s surface. Juvéderm Filler is a more traditional filler, designed to fill wrinkles and add volume. Sculptra Treatment and Hyperdiluted Radiesse are similar in their goal of stimulating collagen production and hydrating the skin, but they use different active ingredients and injection depths.

It is generally more comfortable and has less downtime than Juvéderm Filler, while its cost is lower than traditional fillers. All treatments have FDA approval and are suitable for different candidates based on their specific needs and goals.

FAQs

How long does it take to see results with Skinvive?

Results vary from person to person, but most users report noticeable improvements within 4-6 weeks of consistent use.

Can I use Skinvive if I have sensitive skin?

Yes, Skinvive’s formulations are designed to be gentle and suitable for all skin types, including sensitive skin.

Are there any side effects to using Skinvive?

Skinvive’s products are generally well-tolerated, but some users may experience mild irritation or redness. If this occurs, discontinue use and consult a healthcare professional.

Read Also: Scalp Massage Oil.

Can I use other skincare products with Skinvive?

Yes, it can be used in conjunction with other skincare products. However, it’s important to patch test new products to ensure compatibility.

Read Also: Goth Lipstick.

How often should I use Skinvive products?

The products should be used daily, both in the morning and evening, for optimal results.

Read Also: Summer Toe Nail Designs.

Conclusion

In conclusion, Skinvive’s before and after results speak for themselves. By incorporating Skinvive into your skincare routine, you can achieve noticeable improvements in skin texture, tone, and overall radiance.

Read Also: Prosa Mascara.

Remember to be consistent, patient, and follow expert tips for the best results. By staying informed about skincare trends and innovations, you can make the most of your Skinvive experience.

Read Also: Pull Ups While Pregnant.

Try Skinvive today and join the many satisfied users who have transformed their skin with this innovative brand.

Read Also: Water Activated Eyeliner.

Continue Reading

Trending