Connect with us

MakeUp Tips

Mermaid Makeup Brushes: Unleash Your Inner Sea Siren

Published

on

mermaid makeup brushes

Here is your complete guide to mermaid makeup brushes

Introduction to Mermaid Makeup Brushes

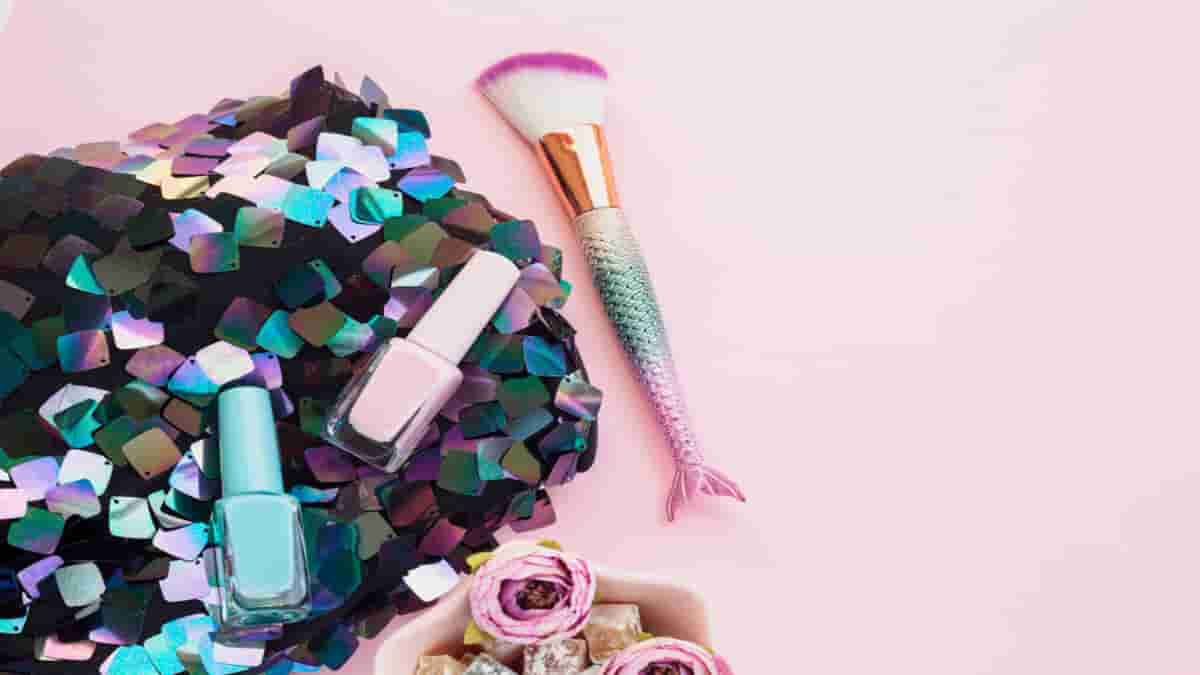
When it comes to makeup, the beauty industry is no stranger to enchanting and whimsical trends. Among the captivating beauty tools that have taken the world by storm are mermaid makeup brushes. These mystical and mesmerizing brushes are inspired by the mythical sea creatures, and their popularity continues to soar among makeup enthusiasts and professionals alike.

In this comprehensive guide, we will dive deep into the enchanting world of mermaid makeup brushes. From their intriguing history to choosing the perfect set, and even their application techniques for special effects, we’ll cover it all. So, let’s embark on a magical journey to explore these dazzling beauty tools!

History of Mermaid Makeup Brushes

Mermaid makeup brushes trace their origins back to the realm of creativity and imagination. Originally a niche product, they emerged from the desire of beauty lovers to bring the allure of mermaids into their makeup routines. These brushes were initially handmade by artisans who crafted the handles to resemble mermaid tails and adorned the bristles with vibrant hues reminiscent of underwater treasures.

Over time, as social media and beauty influencers began showcasing these captivating tools, their popularity surged, making them a sought-after item in every makeup lover’s collection. Today, you can find an array of mermaid makeup brushes in various shapes and sizes, each adding a touch of fantasy to your makeup ritual.

Top 10 Mermaid Makeup Brushes on the Market

Here are the top ten mermaid makeup brushes that have stolen the hearts of beauty enthusiasts worldwide:

Brush NameKey FeaturesCustomer Reviews
Aquatic AllureSoft synthetic bristles for seamless blending“Love the dreamy design!”
Enchanted FinsVersatile set for face and eye applications“Works like a charm!”
Pearl PowderFluffy powder brush for a flawless finish“Makes my skin glow!”
Coral ContourAngled brush for precise contouring“Perfect for sculpting!”
Seafoam ShadowTapered brush for precise eyeshadow blending“Great for smoky eyes!”
Mermaid LinerThin brush for achieving precise eyeliner“Winged liner on point!”
Siren StippleStippling brush for an airbrushed effect“Gives me a flawless base!”
Seashell ShaderFlat brush for packing on eyeshadow“Colors pop with this brush!”
Dolphin DetailSmall brush for intricate detailing“Ideal for tiny designs!”
Oceanic BlushAngled brush for a natural blush application“Blends blush seamlessly!”

How to Use Mermaid Makeup Brushes Effectively

Using mermaid makeup brushes may seem daunting at first, but with a bit of practice, you can achieve stunning results. Here’s a step-by-step guide to get you started:

Foundation Application

  • Use the Aquatic Allure brush to apply foundation in circular motions for a flawless base.
  • The tapered bristles of the Siren Stipple brush are perfect for blending and achieving an airbrushed effect.

Contouring and Highlighting

  • Sculpt your features with the Coral Contour brush using a matte contour shade along your cheekbones and jawline.
  • Apply a radiant highlighter on the high points of your face with the Pearl Powder brush.

Eyeshadow Application

  • Pack eyeshadow onto your lids with the Seashell Shader brush for intense color payoff.
  • Use the Seafoam Shadow brush to blend eyeshadows seamlessly in the crease and outer corners.

Eyeliner and Detailing

  • Create precise eyeliner looks with the Mermaid Liner brush using gel or liquid liners.
  • Add intricate details to your eye makeup or face art with the Dolphin Detail brush.

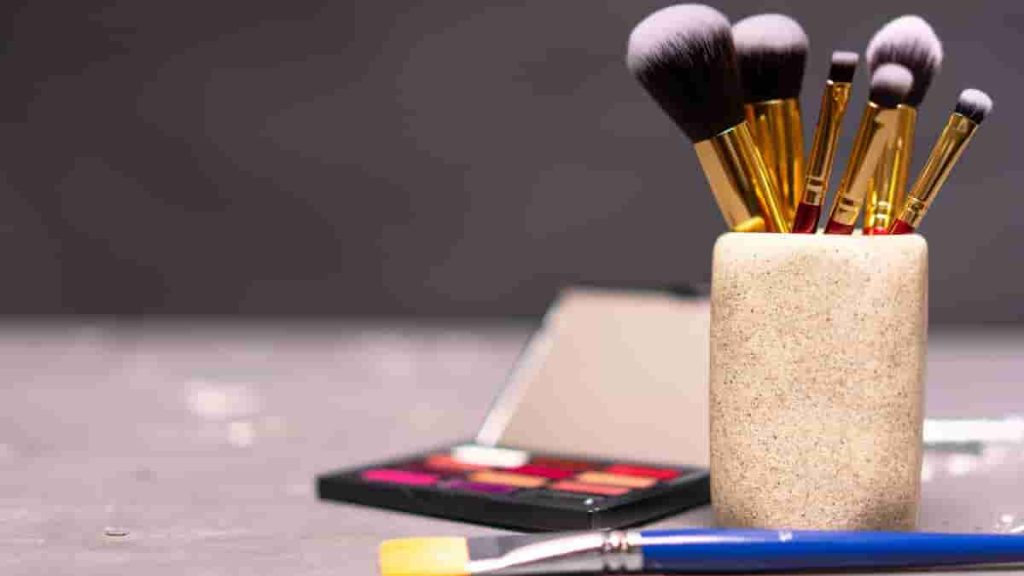
Choosing the Right Mermaid Makeup Brush Set

Selecting the perfect mermaid makeup brush set depends on your preferences and needs. Consider the following factors:

  • Brush Material: Opt for synthetic bristles, which are cruelty-free and work well with both cream and powder products.
  • Brush Size: Choose a set that includes a variety of brush sizes to cater to different makeup applications.
  • Handle Design: Look for ergonomic and comfortable handles, ensuring easy maneuverability during application.

Top Mermaid Makeup Brush Sets

Set NameBrush CountBrush TypesPrice Range
Ocean Fantasy10Foundation, blush, eyeshadow, liner$20 – $30
Enchanted Waters8Powder, contour, blending, eyeshadow$15 – $25
Mermaid Dreams12Foundation, highlighter, eyeshadow$25 – $35
Siren’s Palette6Blending, shader, liner$10 – $15
Sea Nymph Essentials5Powder, blush, eyeshadow, liner$15 – $20

Mermaid Makeup Brushes vs Traditional Makeup Brushes

Mermaid Makeup Brushes vs Traditional Makeup Brushes

While both mermaid makeup brushes and traditional brushes serve the same purpose, they have distinct characteristics:

  • Design: Mermaid brushes feature whimsical, eye-catching designs, whereas traditional brushes have a classic, sleek appearance.
  • Application: Mermaid brushes offer a unique and fun experience, making makeup application feel like an enchanting ritual.
  • Versatility: Traditional brushes come in various shapes and sizes, catering to different makeup techniques, while mermaid brushes often focus on providing multipurpose functionality.

Mermaid Makeup Brushes vs Traditional Makeup Brushes

AspectMermaid Makeup BrushesTraditional Makeup Brushes
DesignCaptivating and whimsicalClassic and sleek
ApplicationFun and enchanting experienceStandard makeup application
VersatilityMultipurpose functionalityVariety of brushes for different techniques

Cleaning and Maintaining Mermaid Makeup Brushes

Proper cleaning and maintenance are essential to ensure the longevity and hygiene of your mermaid makeup brushes. Follow these steps:

  1. Regular Cleaning
    • Wash brushes every two weeks using mild soap or brush cleaner.
    • Gently swirl the bristles in lukewarm water and rinse until the water runs clear.
  2. Drying
    • After cleaning, reshape the bristles and lay the brushes flat to air dry.
    • Avoid using a hairdryer, as the heat can damage the bristles.
  3. Storage
    • Store brushes upright in a container or a brush holder to maintain their shape.
    • Keep them away from moisture to prevent mold growth.

Pros and Cons of Mermaid Makeup Brushes

Pros:

ProsExplanation
Unique and Enchanting DesignThe captivating mermaid-themed design adds a touch of whimsy and magic to your makeup routine.
Versatile ApplicationThese brushes are suitable for various makeup techniques, from foundation to eyeshadow and special effects.
Soft and Fluffy BristlesThe use of high-quality materials ensures gentle application and seamless blending for a flawless finish.
Fun and InspiringThe allure of mermaids sparks creativity, making makeup application an enjoyable and imaginative experience.
Great Gift IdeaMermaid makeup brushes make a delightful and unique gift for makeup enthusiasts and fantasy lovers.

Cons:

ConsExplanation
Higher Price PointMermaid makeup brushes can be more expensive compared to conventional brushes due to their unique design and materials.
Learning CurveBeginners may need some practice to get used to the unconventional shape and technique of these brushes.
Limited Professional UseSome professional makeup artists may prefer traditional brushes for precision and versatility in their work.
Durability ConcernsBrushes made with delicate materials may require careful handling and maintenance to ensure longevity.
Not Suitable for All Makeup StylesWhile mermaid brushes are versatile, certain intricate makeup looks may be better achieved with specialized brushes.

Note: The pros and cons mentioned above are general observations, and individual experiences may vary based on personal preferences and makeup techniques.

Recommended Brush Cleaners

Brush CleanerTypePrice Range
Ocean Breeze CleanserSolid Brush Cleanser$10 – $15
Mermaid Magic SoapLiquid Brush Cleanser$8 – $12
Aquatic Cleanse SpraySpray Brush Cleaner$12 – $18

Mermaid Makeup Brushes for Special Effects

Mermaid makeup brushes offer endless possibilities for creating captivating and artistic makeup looks. Unleash your creativity with these special effects:

  • Mermaid Fantasy Makeup: Use a mix of vibrant eyeshadow colors and the Seashell Shader brush to create whimsical, underwater-inspired eye makeup.
  • Siren Scales: Achieve stunning scales on your face or body using the Dolphin Detail brush and a stencil, paired with shimmery makeup products.
  • Oceanic Ombre Lips: Blend different lipstick shades using the Siren Stipple brush for a mesmerizing ombre effect on your lips.

Makeup Looks Using Mermaid Makeup Brushes

Makeup LookBrush UsedProducts Used
Mermaid Fantasy MakeupSeashell ShaderVarious eyeshadow shades
Siren ScalesDolphin DetailShimmery face and body makeup
Oceanic Ombre LipsSiren StippleTwo lipstick shades

FAQs about Mermaid Makeup Brushes

Here are some frequently asked questions about mermaid makeup brushes:

Are mermaid makeup brushes suitable for beginners?

Yes, mermaid makeup brushes are user-friendly and perfect for beginners due to their versatile and easy-to-use design.

Can I use mermaid brushes for everyday makeup?

Absolutely! Mermaid makeup brushes work well for everyday makeup, as they offer excellent blending capabilities and a touch of magic to your routine.

Are mermaid makeup brushes cruelty-free?

Most mermaid makeup brushes are made with synthetic bristles, making them cruelty-free and suitable for vegans.

How can I clean mermaid makeup brushes without damaging them?

Use a gentle brush cleaner or mild soap, and avoid using excessive force while cleaning to preserve the brush’s integrity.

Read Also: Jelly Lips Tutorial.

Why are Japanese makeup brushes so good?

Japanese makeup brushes are highly regarded for their exceptional quality and craftsmanship. Several factors contribute to their superiority:

  • Materials: Japanese brushes are often made with premium materials like natural animal hair, such as squirrel, goat, or horsehair, which provides excellent softness, durability, and precise application.
  • Artistry: The traditional Japanese brush-making techniques have been perfected over centuries, and artisans take great pride in their craftsmanship, resulting in brushes with impeccable design and functionality.
  • Precision: Japanese brushes are handcrafted with meticulous attention to detail, allowing for precise makeup application, smooth blending, and seamless results.
  • Ergonomics: The ergonomic design of Japanese brushes ensures a comfortable grip and effortless control during makeup application, making them a favorite among makeup artists and beauty enthusiasts worldwide.

Read Also: Gain Weight on Period.

What is the best kind of makeup brush?

The best kind of makeup brush depends on the specific makeup application and individual preferences. Some popular and versatile types include:

  • Kabuki Brush: Ideal for applying powder products like setting powder, bronzer, and blush.
  • Blending Brush: Perfect for blending and diffusing eyeshadows in the crease and outer corners.
  • Foundation Brush: Great for applying liquid or cream foundation for a smooth, even coverage.
  • Angled Brush: Used for precise applications such as contouring, highlighting, and creating winged eyeliner.
  • Fan Brush: Ideal for applying highlighter and removing excess powder.

Ultimately, the best makeup brush is one that suits your needs, provides a flawless application, and aligns with your makeup routine.

Read Also: Korean Cherry Lip.

Why are makeup brushes so expensive?

Several reasons contribute to the higher cost of some makeup brushes:

  • Quality Materials: High-quality makeup brushes often use premium materials, such as natural animal hair or synthetic fibers, which can be more expensive to source.
  • Craftsmanship: Handcrafted brushes, especially those made with traditional techniques, involve skilled artisans and meticulous attention to detail, which can increase the production cost.
  • Durability: Well-made makeup brushes are designed to withstand regular use and maintain their shape and performance over time, making them a long-term investment.
  • Brand Reputation: Some renowned beauty brands establish a reputation for excellence, and their makeup brushes may command a higher price due to brand value and recognition.

However, it’s essential to note that there are also reasonably priced makeup brushes available that offer excellent performance and quality without breaking the bank.

Read Also: PCA Skin Pregnancy Safe.

What is a beauty blender brush?

A beauty blender brush, commonly known as a makeup sponge, is a soft, sponge-like tool designed to apply and blend liquid or cream makeup products, such as foundation, concealer, and cream blush. Unlike traditional makeup brushes, beauty blender brushes have a unique texture and shape, which allows for seamless and streak-free blending.

Read Also: Nude Skin Care.

The most well-known brand of beauty blender brushes is the “Beautyblender,” which comes in various shapes and sizes to cater to different makeup needs. To use a beauty blender brush, you dampen it with water, squeeze out excess moisture, and then bounce or stipple the sponge onto the skin to achieve a flawless and airbrushed finish.

Read Also: Glass Skin Botox Benefits.

Beauty blender brushes have gained immense popularity among makeup enthusiasts and professionals due to their ability to create a smooth and natural-looking base while effortlessly blending makeup products for a radiant complexion.

Read Also: How to Take off Makeup after Spray Tan.

Can I use mermaid brushes for special effects makeup?

Yes, the intricate design of mermaid makeup brushes makes them perfect for special effects, such as face painting and fantasy makeup.

Read Also: Vintage Wedding Makeup.

Conclusion

Embrace your inner sea siren with the enchanting world of mermaid makeup brushes. These captivating beauty tools have swum their way into the hearts of makeup lovers worldwide, offering not only functionality but also a touch of fantasy to your makeup routine. From foundation to special effects, these brushes provide limitless creative possibilities, helping you achieve mesmerizing looks fit for an underwater adventure.

Read Also: Sunnies Face Makeup Bag.

So, dive into the magic of mermaid makeup brushes, explore your imagination, and make every makeup application a fantastical journey! Whether you’re a makeup novice or a seasoned pro, let the allure of mermaids inspire your beauty routine and make a splash in the world of makeup artistry.

Read Also: Pink Dress Makeup Look.

Mermaid makeup brushes are the treasure you’ve been searching for to create looks that are as captivating as the depths of the ocean. Let your creativity flow, and with the flick of a tail, unleash a world of wonder with these enchanting beauty tools!

Read Also: Aquarius Makeup.

Continue Reading
Click to comment

Leave a Reply

Your email address will not be published. Required fields are marked *

MakeUp Tips

i Beauty Brushes: Your Path to Makeup Mastery

Published

on

i beauty brushes

Here is your complete guide to i beauty brushes

Introduction to i Beauty Brushes

In the world of makeup, the right tools can make all the difference. If you’re on a quest for that flawless finish, you’ve likely heard of i beauty brushes. But what are they, and why are they generating so much buzz in the beauty community? In this comprehensive guide, we’ll delve into everything you need to know about these magical brushes, from their basics to the top 10 products on the market. By the end of this article, you’ll be armed with the knowledge and expertise to enhance your makeup game using i beauty brushes.

The Basics of i Beauty Brushes

i Beauty brushes, often referred to as intelligent beauty brushes, are the latest innovation in makeup tools. These brushes are designed to provide a superior application experience, revolutionizing the way you apply your makeup. Here’s what sets them apart:

  • Advanced Technology: i beauty brushes incorporate cutting-edge technology to optimize makeup application. They often feature sensors, microprocessors, and even smartphone connectivity.
  • Precision Design: These brushes come in various shapes and sizes, each tailored to specific makeup applications, ensuring precision and accuracy.
  • Customization: Some i beauty brushes allow you to customize settings to achieve your desired makeup look effortlessly.
  • Quality Materials: They are typically crafted from high-quality materials, ensuring durability and longevity.

i Beauty brushes have gained popularity for their ability to streamline the makeup process, making it easier for both beginners and professionals to achieve stunning results.

How to Choose the Right i Beauty Brushes

With so many options available, selecting the perfect i beauty brushes can be overwhelming. Here are some key considerations to help you make an informed decision:

  • Brush Type: Determine the makeup application you want to focus on, such as foundation, eyeshadow, or contouring. Choose brushes specifically designed for that purpose.
  • Brush Shape: Different brush shapes are optimized for various techniques. For example, flat brushes are great for foundation, while angled brushes excel in contouring.
  • Materials: Look for high-quality, synthetic bristles that are soft on the skin and easy to clean.
  • Customization: If you prefer a personalized makeup experience, opt for brushes with customizable settings.

Use the table below to compare your options:

FeatureWhat to Look For
Brush TypeFoundation, eyeshadow, contour, etc.
Brush ShapeFlat, angled, round, etc.
MaterialsSynthetic, natural, etc.
CustomizationYes/No

Remember that the right i beauty brushes can significantly enhance your makeup application, so choose wisely.

Using i Beauty Brushes Effectively

Now that you have your i beauty brushes in hand, let’s explore how to make the most of them:

  • Prep Your Skin: Start with clean and moisturized skin to ensure a smooth canvas for makeup application.
  • Primer: Apply a makeup primer to create a flawless base for your foundation.
  • Foundation: Use your i beauty brush to apply foundation evenly, starting from the center of your face and blending outwards.
  • Contouring: Utilize the brush’s precision to contour your cheeks and nose for sculpted definition.
  • Eyeshadow: Experiment with different brush heads to achieve various eyeshadow looks.
  • Blending: Blend, blend, blend! This is the key to achieving seamless transitions between colors.
  • Highlighting: Highlight your cheekbones, brow bones, and the tip of your nose for a radiant glow.
  • Finishing Touches: Finish your makeup with setting powder, blush, and lipstick.

i Beauty brushes are designed to simplify these steps and help you achieve a professional makeup look effortlessly.

Maintenance and Cleaning of i Beauty Brushes

Proper care and maintenance are crucial to keep your i beauty brushes in pristine condition. Follow these steps:

  • Regular Cleaning: Clean your brushes at least once a week to prevent the buildup of makeup and bacteria.
  • Mild Cleanser: Use a gentle brush cleanser or mild shampoo to clean the bristles.
  • Avoid Soaking: Be cautious not to soak the brushes as it can damage the electronics in some i beauty brushes.
  • Drying: Allow your brushes to air dry with bristles hanging off the edge of a counter to maintain their shape.

Here’s a handy table with dos and don’ts for cleaning your i beauty brushes:

Cleaning DosCleaning Don’ts
Use a mild cleanserSoak the brushes excessively
Clean bristles gentlyUse hot water
Rinse thoroughlyScrub vigorously
Allow to air dryDry brushes upright

Using i Beauty Brushes: A Step-by-Step Guide

Step 1: Gather Your i Beauty Brushes

Before diving into your makeup routine, ensure you have the appropriate i beauty brushes for the look you want to achieve. Here’s how to get started:

  1. Select the Brushes: Choose the i beauty brushes that are designed for the makeup application you’re planning. Common brush types include foundation brushes, eyeshadow brushes, contour brushes, and more.
  2. Inspect Your Brushes: Examine the condition of your brushes to make sure they are clean and in good shape. Clean them if necessary, as clean brushes provide better makeup application.

Step 2: Prep Your Skin

Before you start applying makeup, it’s essential to prepare your skin for a flawless finish. Follow these steps:

  1. Cleanse: Begin with a gentle cleanser to remove any dirt or oil from your face.
  2. Moisturize: Apply a suitable moisturizer to hydrate your skin and create a smooth canvas for makeup.
  3. Prime: If you use a makeup primer, apply it evenly to help your makeup last longer and create a flawless base.

Step 3: Foundation Application

Applying foundation with your i beauty brush can result in a seamless, airbrushed finish. Here’s how to do it:

  1. Dab Foundation: Place a small amount of foundation on the back of your hand or a palette.
  2. Brush Selection: Choose an i beauty brush suitable for foundation application. These brushes often have flat, dense bristles for even coverage.
  3. Start in the Center: Begin by applying the foundation in the center of your face (nose, cheeks, and chin).
  4. Blend Outwards: Use gentle strokes to blend the foundation outward towards your hairline and jawline. Make sure to blend thoroughly for a natural look.

Step 4: Contouring and Highlighting

They are excellent tools for contouring and highlighting to enhance your facial features. Here’s how to do it effectively:

  1. Choose the Right Brushes: Select brushes specifically designed for contouring and highlighting. These brushes often have angled or tapered bristles.
  2. Contouring: Apply a contour shade slightly darker than your skin tone in the hollows of your cheeks, along your jawline, and on the sides of your nose. Blend well for a sculpted look.
  3. Highlighting: Use a lighter shade or a highlighter to accentuate your cheekbones, brow bone, and the bridge of your nose. Gently blend to avoid harsh lines.

Step 5: Eyeshadow Application

They can help you create stunning eyeshadow looks with precision. Follow these steps:

  1. Primer: Apply an eyeshadow primer to your eyelids to ensure your eyeshadow stays in place.
  2. Choose the Right Brushes: Depending on the eyeshadow effect you want, select brushes with the appropriate shapes and sizes.
  3. Apply Base Color: Use a flat eyeshadow brush to apply a base color to your eyelids. This creates a foundation for your eyeshadow look.
  4. Blend: Use a blending brush to blend different eyeshadow shades into your crease for dimension.
  5. Detail Work: For detailed work, like applying eyeshadow to the lower lash line or inner corner, use a smaller, precise brush.

Step 6: Finishing Touches

Complete your makeup look with these final steps:

  1. Blush: Apply blush to the apples of your cheeks using a i beauty brush designed for blush application.
  2. Setting Powder: Use a large, fluffy brush to set your makeup with translucent setting powder.
  3. Lipstick: Apply your chosen lipstick shade, either directly or with a lip brush for precision.

Read Also: Lipstick Color with Orange Dress.

Step 7: Clean and Store Your Brushes

Properly maintaining your i beauty brushes is crucial for their longevity and hygiene. Here’s what you should do:

  1. Clean Regularly: Clean your brushes regularly, preferably once a week, using a mild brush cleanser or shampoo.
  2. Gentle Cleaning: Be gentle when cleaning to avoid damaging the bristles or electronic components in some brushes.
  3. Air Dry: Let your brushes air dry with the bristles hanging off the edge of a counter to maintain their shape.

With these steps, you can make the most out of your i beauty brushes and achieve flawless makeup looks effortlessly. Remember that practice makes perfect, so don’t be discouraged if it takes some time to master these techniques. Happy makeup-ing!

Read Also: Hormone Reset Diet Recipes.

FAQs About i Beauty Brushes

You’re not alone if you have questions about i beauty brushes. Here are some common queries:

What makes i beauty brushes different from traditional brushes?

They incorporate advanced technology, such as sensors and customizable settings, for a more precise and efficient makeup application.

Read Also: Blonde Hair Under Black Hair.

Can I use i beauty brushes for everyday makeup?

Absolutely! They are designed for both professionals and everyday makeup enthusiasts, making them suitable for any routine.

Read Also: 90s Grunge Lipstick.

Are i beauty brushes easy to clean?

Yes, but it’s essential to follow the manufacturer’s cleaning instructions to avoid damaging the electronic components.

Read Also: Winter Wonderland Theme Nails.

Are there budget-friendly options for i beauty brushes?

Yes, you can find affordable i beauty brushes that offer great performance. Check out the list above for options.

Read Also: Confidence Lipstick.

Do I need to replace my i beauty brushes regularly?

With proper care, they can last for a long time. However, it’s essential to replace them if you notice any wear and tear.

Read Also: Pink Dress Red Lipstick.

Expert Tips and Tricks

For those looking to take their makeup skills to the next level with i beauty brushes, here are some expert tips:

  • Practice: Experiment with different brush heads and settings to find your perfect makeup routine.
  • Clean Regularly: Maintain a consistent cleaning schedule to keep your brushes in top shape.
  • Watch Tutorials: There are numerous online tutorials that can help you master the art of using i beauty brushes.

Read Also: Cinnamon Shade Lipstick Magic.

Conclusion

In conclusion, they are more than just makeup tools; they are a game-changer for your beauty routine. Whether you’re a makeup novice or a seasoned pro, these brushes can elevate your makeup game to new heights. So, choose your i beauty brushes wisely, follow the tips provided, and get ready to slay your makeup looks like never before!

Read Also: Orange Blue Nails.

Remember, the key to mastering i beauty brushes is practice, experimentation, and a little bit of patience. Happy makeup-ing!

Read Also: Absolute Regain Hair Fibers.

Continue Reading

MakeUp Tips

Cinnamon Shade Lipstick Magic: Mesmerizing Makeup Looks

Published

on

cinnamon shade lipstick

Here is your complete guide to cinnamon shade lipstick

Introduction to Cinnamon Shade Lipstick

In the realm of cosmetics, finding the perfect lipstick shade can be as thrilling as a treasure hunt. And, if you’re a beauty enthusiast, you’ve likely stumbled upon the rich, warm, and inviting world of cinnamon shade lipstick. This timeless and versatile lip color has captured the hearts of makeup lovers across the globe. In this comprehensive guide, we’ll delve deep into the world of cinnamon shade lipstick, exploring its origins, helping you choose the perfect shade, and even offering a DIY recipe for the adventurous makeup artist in you.

What is Cinnamon Shade Lipstick?

Cinnamon shade lipstick, as the name suggests, draws inspiration from the warm, earthy tones of cinnamon. This lip color is characterized by its deep and inviting hues, often leaning towards terracotta and rusty reds. It’s a versatile shade that can effortlessly take you from daytime chic to nighttime glam. But what makes it so special?

  • Versatility: Cinnamon shade lipstick complements various skin tones, making it a go-to choice for many.
  • Warmth: The warm undertones of cinnamon shades add a touch of coziness and comfort to your look.
  • Trendy Choice: Cinnamon shade lipstick has been making waves in the beauty industry due to its timeless appeal.

How to Choose the Perfect Cinnamon Shade Lipstick

Choosing the ideal cinnamon shade lipstick involves considering your skin tone and personal preferences.

Skin Tone Matters

Your skin tone plays a pivotal role in selecting the perfect cinnamon shade. Here’s a simple guide:

Skin ToneIdeal Cinnamon Shade
FairLighter cinnamon with pinkish undertones
MediumClassic cinnamon with warm undertones
OliveDeeper cinnamon with terracotta tones
DarkRich cinnamon with a hint of berry

Personal Preferences

Beyond skin tone, personal preferences come into play. Some prefer subtle, natural-looking cinnamon shades for everyday wear, while others opt for bold, statement-making choices.

How to Make Cinnamon Shade Lipstick

Making your own cinnamon shade lipstick can be a fun and creative project. In this step-by-step guide, we’ll walk you through the process of creating your unique cinnamon-inspired lip color.

Materials You’ll Need:

  1. Beeswax: Beeswax provides the base for your lipstick and helps give it structure.
  2. Coconut Oil: Coconut oil adds moisture and a creamy texture to the lipstick.
  3. Cinnamon Powder: The star ingredient that imparts the beautiful cinnamon hue.
  4. Shea Butter: Shea butter contributes to the lipstick’s smoothness and moisturizing properties.
  5. Red Iron Oxide: This natural pigment adds depth and intensity to your lipstick’s color.
  6. Double Boiler: You’ll need a double boiler or a makeshift one to melt your ingredients safely.
  7. Lipstick Mold: Lipstick molds come in various shapes and sizes and are essential for creating the lipstick shape.
  8. Spoon or Stirrer: To mix your ingredients thoroughly.

Step 1: Prepare Your Workspace

Before you start, ensure you have a clean and organized workspace. Lay out all your materials and tools within easy reach.

Step 2: Measure Your Ingredients

  • Measure one part beeswax, one part coconut oil, one part shea butter, and a pinch of cinnamon powder for your base mixture. The exact measurements will depend on how much lipstick you want to make.
  • For color, add red iron oxide sparingly. Start with a small amount and adjust to achieve your desired shade.

Step 3: Melt the Ingredients

  1. Using your double boiler, melt the beeswax, coconut oil, and shea butter together over low heat. Stir gently until everything is fully melted and combined.
  2. Once melted, remove the mixture from the heat source. Allow it to cool slightly.

Step 4: Add the Cinnamon Powder

  1. Gradually add the cinnamon powder to the mixture while stirring continuously. The amount you add will determine the depth of the cinnamon shade.
  2. Continue to stir until the cinnamon powder is evenly distributed, and you achieve the desired shade.

Step 5: Add the Red Iron Oxide

  1. If you want a richer and more intense cinnamon shade, you can add a small amount of red iron oxide at this stage. Start with a tiny pinch and adjust to your liking.
  2. Stir well to fully incorporate the pigment.

Step 6: Pour into the Lipstick Mold

  1. Carefully pour the warm, cinnamon-infused mixture into your lipstick mold.
  2. Fill the mold to your preferred level, ensuring that it’s evenly distributed.

Step 7: Let It Cool

Allow the lipstick to cool and solidify in the mold. This can take a few hours, so be patient.

Step 8: Unmold and Enjoy

Once your homemade cinnamon shade lipstick has fully solidified, gently unmold it by twisting or popping it out of the mold.

Congratulations! You’ve successfully created your own custom cinnamon shade lipstick. Now, you can proudly wear your unique creation and enjoy the warm, inviting tones of cinnamon on your lips.

Top 10 Cinnamon Shade Lipsticks on the Market

To make your shopping easier, here’s a list of the top 10 cinnamon shade lipsticks available:

RankBrandPriceKey Features
1Luxe Lips$20Long-lasting, matte finish
2Spice Kiss$18Vegan and cruelty-free
3Cinnamon Crush$22Hydrating formula
4Terra Tones$19Natural ingredients
5Spiced Elegance$25High-pigment, satin finish
6Autumn Allure$21Transfer-proof, matte texture
7Fiery Spice$23Intense color payoff
8Warm Embrace$20Creamy texture
9Rustic Charm$24Moisturizing formula
10Cinnamon Dreams$22Buildable coverage

Application Tips for Cinnamon Shade Lipstick

Achieving that perfect cinnamon pout requires a bit of finesse. Here are some application tips:

  • Exfoliate: Begin with exfoliated lips for a smoother canvas.
  • Lip Liner: Use a lip liner to define your lips before applying lipstick.
  • Blot and Reapply: For longer wear, blot your lips with tissue and reapply the lipstick.
  • Blending: Consider blending your cinnamon shade with other lipstick colors for a unique look.

Caring for Cinnamon Shade Lips

Maintaining beautifully colored cinnamon lips is a breeze with a little care. Here are some tips:

  • Hydration: Keep your lips moisturized to prevent dryness and flakiness.
  • Lip Scrubs: Exfoliate regularly to remove dead skin cells.
  • Sun Protection: Use lip products with SPF to protect your lips from the sun.

Outfit Ideas to Rock Cinnamon Shade Lipstick

Pairing your cinnamon shade lipstick with the right outfit can elevate your look to a whole new level. Whether you’re going for a casual day out or a glamorous evening event, here are some outfit ideas to help you make the most of your captivating lip color.

Daytime Chic

1. Boho Vibes

  • Cinnamon Shade Lipstick: Opt for a lighter, more natural cinnamon shade.
  • Outfit: Flowy maxi dress with earthy tones, a wide-brimmed hat, and ankle boots.
  • Accessories: Layered necklaces, a fringed bag, and oversized sunglasses.
  • Why It Works: The boho look and cinnamon lips exude effortless, earthy charm.

2. Classic Denim

  • Cinnamon Shade Lipstick: A warm cinnamon with a subtle sheen.
  • Outfit: High-waisted skinny jeans, a white tucked-in blouse, and a denim jacket.
  • Accessories: Brown leather belt, ankle boots, and hoop earrings.
  • Why It Works: The classic denim ensemble complements the warmth of cinnamon beautifully.

Evening Glam

3. Red Carpet Ready

  • Cinnamon Shade Lipstick: A bold and deep cinnamon red.
  • Outfit: A sleek, form-fitting evening gown in a deep red or burgundy shade.
  • Accessories: Statement earrings, a clutch bag, and strappy heels.
  • Why It Works: The bold lipstick and elegant gown create a glamorous, head-turning look.

4. Metallic Elegance

  • Cinnamon Shade Lipstick: A shimmering cinnamon with golden undertones.
  • Outfit: A metallic-finish cocktail dress in gold or bronze.
  • Accessories: Metallic clutch, strappy metallic heels, and a cuff bracelet.
  • Why It Works: The metallic elements enhance the richness of the cinnamon shade.

Casual and Cozy

5. Fall Flannel

  • Cinnamon Shade Lipstick: A cozy and warm cinnamon brown.
  • Outfit: Oversized flannel shirt, distressed jeans, and ankle boots.
  • Accessories: Knit beanie, crossbody bag, and layered bracelets.
  • Why It Works: Cinnamon lips and flannel radiate cozy autumn vibes.

6. Athleisure Chic

  • Cinnamon Shade Lipstick: A muted, athletic-inspired cinnamon.
  • Outfit: High-waisted leggings, a crop top, and a bomber jacket.
  • Accessories: Sneakers, a baseball cap, and a fanny pack.
  • Why It Works: The sporty outfit pairs surprisingly well with the warmth of cinnamon.

Vintage Charm

7. Retro Revival

  • Cinnamon Shade Lipstick: A matte, vintage-inspired cinnamon red.
  • Outfit: A knee-length A-line dress with a cinched waist and a flared skirt.
  • Accessories: Cat-eye sunglasses, kitten heels, and a clutch purse.
  • Why It Works: Cinnamon lips complete the retro, pin-up look.

8. Victorian Elegance

  • Cinnamon Shade Lipstick: A deep, velvety cinnamon plum.
  • Outfit: A high-necked, lace blouse paired with a long, flowing skirt.
  • Accessories: Cameo brooch, lace gloves, and ankle boots.
  • Why It Works: Cinnamon adds a modern twist to a classic Victorian aesthetic.

No matter the occasion, these outfit ideas paired with your stunning cinnamon shade lipstick will make you stand out and embrace the warmth and versatility of this captivating lip color.

FAQs about Cinnamon Shade Lipstick

Is cinnamon shade lipstick suitable for all skin tones?

Yes, cinnamon shade lipstick is versatile and can complement a wide range of skin tones. However, the specific shade within the cinnamon spectrum may vary based on your skin tone.

Read Also: Lipstick Color with Orange Dress.

How do I make cinnamon shade lipstick last longer?

To make your cinnamon shade lipstick last longer, start with a lip primer, apply in thin layers, blot, and reapply. Additionally, avoid oily foods to prevent smudging.

Read Also: Hormone Reset Diet Recipes.

What is the most seductive lipstick color?

The perception of a seductive lipstick color can vary from person to person, as it often depends on individual preferences and skin tones. However, universally, deep and bold shades like deep reds, sultry maroons, and rich burgundies are often considered seductive. These colors can add drama and allure to your look, making them perfect for special occasions or when you want to make a statement.

Read Also: Vampy Lipstick.

Which shade is best for lipstick?

The best lipstick shade for you depends on several factors, including your skin tone, personal style, and the occasion. Here are some general guidelines:

  • Nude Shades: Nude shades are versatile and can be a great choice for a natural look or everyday wear.
  • Reds: Classic reds are timeless and suit a wide range of skin tones. They can be both bold and elegant.
  • Pinks: Pink shades offer a fresh and youthful appearance, making them suitable for various occasions.
  • Berry Tones: Berry shades, like cranberry or raspberry, can add a pop of color while remaining sophisticated.

Ultimately, the “best” shade is the one that makes you feel confident and beautiful.

Read Also: Lipstick for Purple Dress.

Which lipstick colour is best for a natural look?

For a natural look, it’s best to choose lipstick shades that closely resemble your natural lip color. Here are some options:

  • Nude Shades: Nude lipsticks that match your skin tone or are just slightly darker can create a natural, understated look.
  • Soft Pinks: Soft pink shades can mimic the natural flush of your lips and provide a subtle pop of color.
  • Mauves: Mauve shades with neutral undertones offer a natural look while enhancing your lips.

The goal is to enhance your features without making it obvious that you’re wearing lipstick, achieving that effortless “no makeup” makeup look.

Read Also: Bitten Lips Makeup.

What is the best lipstick shades for dark lips?

Choosing lipstick shades for dark lips can be both fun and flattering. Here are some suitable options:

  • Rich Reds: Deep, true reds can create a stunning contrast with dark lips, making them stand out beautifully.
  • Berries: Berry shades, such as plum or blackberry, can complement dark lips and add depth.
  • Warm Browns: Warm brown shades can enhance the natural richness of dark lips and provide a subtle, earthy appeal.

Read Also: Blonde Hair Under Black Hair.

Cinnamon Shade Lipstick in Fashion and Culture

The allure of cinnamon shade lipstick extends beyond cosmetics. This shade has historical and cultural significance, often associated with warmth and comfort. It’s no wonder that it has found its place in fashion trends and pop culture.

  • Historical Significance: Cinnamon has been used in various cultures as a symbol of warmth, spice, and luxury.
  • Fashion Trends: Cinnamon shades have graced fashion runways, becoming a staple in autumn and winter collections.
  • Pop Culture: Celebrities have embraced this shade, making it a must-have in their makeup kits.

Read Also: 90s Grunge Lipstick.

Cinnamon Shade Lipstick DIY

For the creative souls out there, here’s a simple DIY recipe to create your own cinnamon shade lipstick:

Ingredients:

  • Beeswax
  • Coconut oil
  • Cinnamon powder
  • Shea butter
  • Red iron oxide (for color)

Instructions:

  1. Melt beeswax, coconut oil, and shea butter in a double boiler.
  2. Add a pinch of cinnamon powder and red iron oxide for color.
  3. Stir well and pour into a lipstick mold. Allow it to cool.
  4. Your homemade cinnamon shade lipstick is ready to use!

Read Also: Winter Wonderland Theme Nails.

Reviews and User Experiences

Real users have fallen in love with cinnamon shade lipsticks. Here’s what some of them have to say:

  • “I’m in love with Luxe Lips’ cinnamon shade. It’s my go-to for every occasion.” – Sarah
  • “Cinnamon Crush is my daily essential. It keeps my lips hydrated and looks amazing!” – Emma

Read Also: Confidence Lipstick.

Conclusion

Cinnamon shade lipstick is more than just a makeup product; it’s a symbol of warmth, comfort, and timeless beauty. Whether you’re new to this shade or a seasoned enthusiast, you now have the knowledge to make it a staple in your makeup routine. So, go ahead, embrace the warmth of cinnamon, and let your lips do the talking.

Read Also: Pink Dress Red Lipstick.

Continue Reading

MakeUp Tips

Confidence Lipstick: Boost Your Self-Esteem Instantly

Published

on

confidence lipstick

Here is your complete guide to confidence lipstick

Introduction to Confidence Lipstick

In a world where self-confidence reigns supreme, the power of lipstick goes beyond mere aesthetics. It’s a magic wand that can transform not just your look but your entire outlook. Enter the world of “confidence lipstick,” where color and confidence converge to create a powerful impact. In this comprehensive guide, we’ll delve deep into the realm of confidence-boosting lipsticks, exploring the psychology behind them, and revealing the top 10 choices that could be your secret to self-assurance.

The Psychology of Lipstick

Before we dive into the world of confidence-boosting lipsticks, let’s understand the psychology behind the connection between lipstick and self-confidence.

  • Color Psychology: The choice of lipstick color can influence your mood and perception. Bold, vibrant shades often convey confidence and assertiveness.
  • Self-Expression: Lipstick allows you to express your personality and individuality, enhancing your self-image.
  • Enhancing Features: Fuller lips, achieved with the right lipstick application, can boost self-esteem and overall attractiveness.
  • Confidence Booster: Studies suggest that wearing lipstick can have a positive impact on self-esteem and confidence levels.

Characteristics of Confidence Lipstick

What sets confidence-boosting lipsticks apart from the rest? Let’s explore their key characteristics.

  • Long-lasting Formula: These lipsticks are designed to stay put for hours, allowing you to feel confident without frequent touch-ups.
  • Vibrant Color Options: The palette includes bold and empowering shades that can make a statement and enhance your mood.
  • Smudge-Proof and Kiss-Proof: No need to worry about lipstick smudging or transferring, even after that passionate kiss.
  • Hydrating and Nourishing Ingredients: Many confidence lipsticks contain ingredients that keep your lips moisturized and soft.
  • Transfer-Resistant: Say goodbye to lipstick stains on cups and clothes; these lipsticks are formulated to stay where they belong.

How to Choose the Perfect Confidence Lipstick

Choosing the right confidence lipstick is essential. Here are some factors to consider:

  • Skin Tone and Undertone: Your skin’s undertone plays a crucial role in selecting the most flattering lipstick shade.
  • Lipstick Finishes: Decide between matte, satin, or glossy finishes based on your preference and the occasion.
  • Lipstick Shades for Different Occasions: Learn which shades work best for everyday wear, special occasions, or professional settings.
  • Online Tools for Lipstick Shade Matching: Discover helpful online tools that can assist you in finding the perfect shade to boost your confidence.

How to Make Confidence Lipstick

Creating your own confidence-boosting lipstick can be a fun and empowering DIY project. In this step-by-step guide, we will walk you through the process of making your custom confidence lipstick. Get ready to unleash your creativity and enhance your self-esteem with a lipstick shade that’s uniquely yours.

Step 1: Gather Your Ingredients

Before you start, ensure you have all the necessary ingredients and tools:

  • Base Lipstick: You can use an existing lipstick that you love as the base for your custom shade. Choose a lipstick with a texture and finish you prefer.
  • Pigments: You’ll need pigments to add color to your lipstick. These can be in the form of mica powders, eye shadows, or even crayons (for a more experimental approach).
  • Empty Lipstick Container: You can purchase empty lipstick containers online or clean and reuse an old one.
  • Coconut Oil or Beeswax: These ingredients help bind the pigments and provide a smooth texture.
  • Shea Butter: Shea butter adds moisture and creaminess to your lipstick.
  • Essential Oils: For fragrance and added benefits, consider adding a few drops of essential oil, such as lavender or peppermint.
  • Small Spatula or Spoon: You’ll use this to mix the ingredients.
  • Double Boiler or Microwave: Depending on your preference, you can use a double boiler or a microwave to melt and mix your lipstick.

Step 2: Prepare Your Workstation

Set up a clean and clutter-free workspace with good lighting. Lay down some newspaper or a disposable tablecloth to catch any spills or drips.

Step 3: Melt the Base Lipstick

Begin by cutting or scooping out the base lipstick from its container. Place it in a heat-resistant container or the top part of your double boiler.

Step 4: Add Pigments

Now, it’s time to add your chosen pigments. Start with a small amount and gradually add more until you achieve the desired color. Mix well to ensure even distribution.

Step 5: Incorporate Coconut Oil or Beeswax

To achieve the right texture and consistency, add a small amount of coconut oil or beeswax to the mixture. Stir until everything is well combined.

Step 6: Introduce Shea Butter

Shea butter will make your lipstick creamy and moisturizing. Add a teaspoon of shea butter to the mixture and mix thoroughly.

Step 7: Customize the Scent (Optional)

If you’d like your lipstick to have a pleasant fragrance, add a few drops of your chosen essential oil. Mix well to evenly distribute the scent.

Step 8: Pour into the Lipstick Container

Carefully pour the melted lipstick mixture into your empty lipstick container. Use a spatula or spoon to ensure it fills the container evenly.

Step 9: Let It Cool

Allow your homemade confidence lipstick to cool and solidify. You can speed up the process by placing it in the refrigerator for about 30 minutes.

Step 10: Final Touches

Once your lipstick has fully cooled and solidified, it’s ready to use. Apply it like any other lipstick and enjoy the confidence-boosting shade you’ve created.

Step 11: Share Your Creation

Don’t forget to show off your custom confidence lipstick to your friends and family. You might even inspire them to embark on their own lipstick-making journey.

Creating your own confidence lipstick not only allows you to express your unique style but also boosts your self-esteem. Experiment with different pigments, textures, and scents to create a lipstick that truly represents your personality and enhances your confidence.

Applying Confidence Lipstick Like a Pro

The application of confidence lipstick requires finesse. Here’s a step-by-step guide to achieve flawless, long-lasting results:

  • Exfoliate and Moisturize: Begin with smooth, moisturized lips for a flawless finish.
  • Use Lip Primer: Apply a lip primer to create a smooth canvas for lipstick and enhance its staying power.
  • Lip Liner Magic: Outline your lips with a lip liner to prevent feathering and create definition.
  • Even Application: Apply lipstick with a lip brush or directly from the tube, ensuring even coverage.
  • Blot and Reapply: For long-lasting wear, blot with tissue and reapply a second coat.
  • Set with Translucent Powder: Dust a small amount of translucent powder over your lips to lock in the color.

Read Also: Lipstick Color with Orange Dress.

Real-Life Confidence Stories

To truly understand the transformative power of confidence lipstick, let’s hear from individuals who’ve experienced a boost in self-confidence through their lipstick choices:

  • Testimonial 1: “Wearing a vibrant red lipstick makes me feel like I can conquer anything. It’s my secret confidence weapon!”
  • Testimonial 2: “The perfect nude lipstick gives me the confidence to be myself, whether I’m at work or on a date.”
  • Testimonial 3: “I never thought lipstick could make such a difference until I found my go-to shade. It’s like my armor for any challenge.”

Read Also: Hormone Reset Diet Recipes.

Frequently Asked Questions (FAQs)

Here are some common questions about confidence lipstick, answered for your convenience:

What is confidence lipstick, and how does it work?

Confidence lipstick refers to lip colors that are chosen to enhance one’s self-confidence. The right shade can boost mood and self-esteem.

Read Also: Vampy Lipstick.

How can I make my lipstick last longer?

Follow our tips for lipstick application and consider using a lip primer and setting powder for extended wear.

Read Also: Lipstick for Purple Dress.

Can confidence lipstick enhance my overall self-esteem?

Yes, it can. Wearing a lipstick that makes you feel confident can have a positive impact on your self-esteem.

Read Also: Bitten Lips Makeup.

Are there any confidence lipsticks for sensitive skin?

Many brands offer hypoallergenic and sensitive-skin-friendly lipsticks. Look for those with natural ingredients.

Read Also: Blonde Hair Under Black Hair.

Expert Tips and Tricks

Unlock additional beauty insights from makeup artists and beauty professionals:

  • Tip 1: “To make your lips appear fuller, apply a dab of highlighter to the center of your lips after lipstick.”
  • Tip 2: “For a bold and precise application, use a lip brush instead of applying lipstick directly from the tube.”
  • Tip 3: “Experiment with lip shades to match your outfit or mood – it’s a fun way to express yourself.”

Read Also: 90s Grunge Lipstick.

Conclusion

In the world of makeup, confidence lipstick is your ally in the pursuit of self-assuredness. With the right shade and application techniques, you can boost your self-esteem and feel ready to conquer any challenge that comes your way. So, embrace the power of confidence lipstick, and let your beauty shine with every confident smile.

Read Also: Winter Wonderland Theme Nails.

Continue Reading

Trending