Connect with us

MakeUp Tips

Gold Sparkle Lip Gloss: Glossy Elegance

Published

on

gold sparkle lip gloss

Here is your complete guide to gold sparkle lip gloss

Introduction to Gold Sparkle Lip Gloss

Gold sparkle lip gloss has been a timeless favorite in the makeup industry, providing a touch of glamour and sophistication to any look. Its radiant appeal and versatility make it a staple in many makeup collections. In this comprehensive guide, we delve into the depths of gold sparkle lip gloss, exploring its history, ingredients, application techniques, and much more.

Gold sparkle lip gloss, a dazzling essential in the realm of cosmetics, captivates beauty enthusiasts worldwide. Its shimmering allure and transformative properties make it a must-have item in every makeup kit. Let’s embark on a journey through the enchanting world of gold sparkle lip gloss, understanding its origins, benefits, and its current surge in popularity.

History of Gold Sparkle Lip Gloss

The evolution of gold sparkle lip gloss traces back to its inception in the early stages of makeup development. Over time, it evolved from a simple cosmetic to a statement piece in the beauty industry, influencing trends and captivating users with its radiant finish.

Ingredients in Gold Sparkle Lip Gloss

Understanding the composition of gold lip gloss unveils its magic. Commonly infused with nourishing oils, shimmering pigments, and moisturizing agents, this gloss not only enhances beauty but also contributes to lip health.

Common Ingredients in Gold Sparkle Lip Gloss

IngredientPurpose
Jojoba OilMoisturization
MicaShimmering Pigment
Vitamin ENourishment and Hydration
BeeswaxBinding Agent

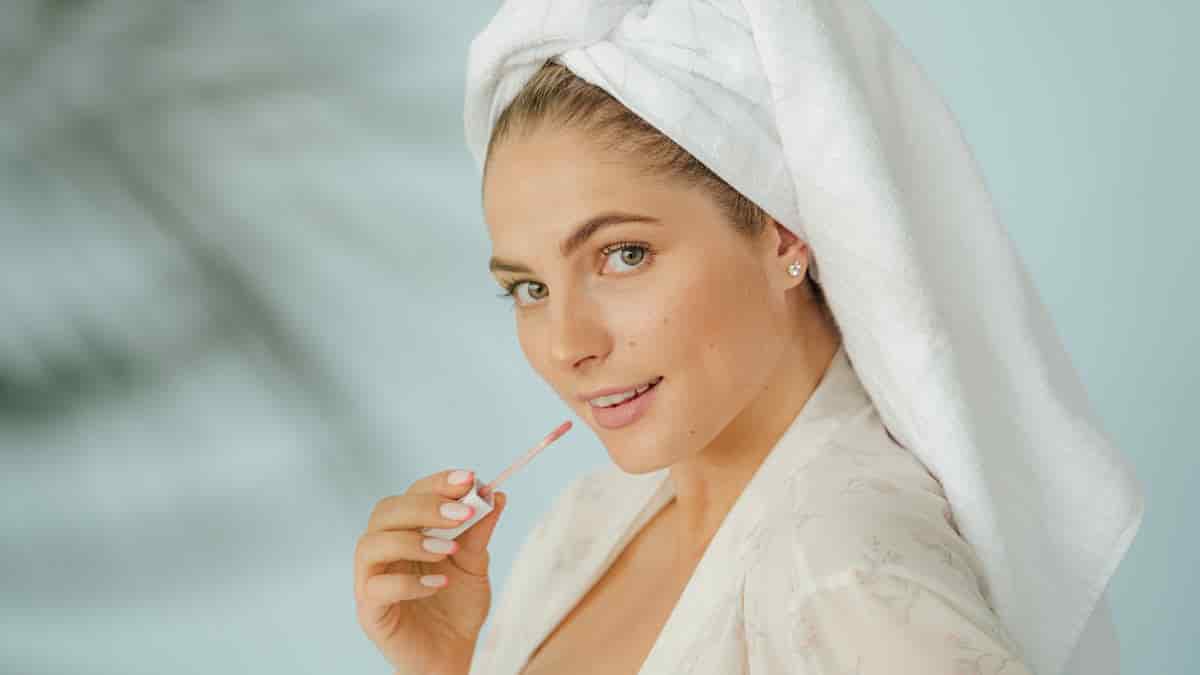
How to Apply Gold Sparkle Lip Gloss

Mastering the application of gold lip gloss is an art. Follow these steps for a flawless and radiant finish.

  • Step 1: Prep Lips – Ensure lips are exfoliated and moisturized.
  • Step 2: Application – Apply a thin layer evenly across the lips.
  • Step 3: Layering – Add more layers for an intensified sparkle effect.

Visual Guide for Applying Gold Sparkle Lip Gloss

StepDescription
Step 1Exfoliate lips using a lip scrub to remove dead skin cells.
Step 2Apply a single layer of gold sparkle lip gloss evenly.
Step 3Layer additional coats for a more pronounced sparkle.

Pros and Cons of Gold Sparkle Lip Gloss

ProsCons
Stunning shimmer effectSticky texture
Long-lasting radianceSlight transfer
Nourishing formulaLimited shade range

Styling Tips and Trends

Styling TipDescription
Mix with Matte LipstickCreate a multidimensional look by layering gold sparkle gloss over matte lipstick.
Center of AttentionApply a dab of gloss to the center of the lips for an instant plumping effect.
Eye-Catching EyelidsUse a small amount on eyelids for a subtle shimmering eye makeup look.
Layer over Lip LinerEnhance lip color and longevity by layering gloss over a matching lip liner.

Comparison with Similar Products

Product FeatureGold Sparkle Lip GlossMetallic Lip GlossGlitter Lip Balm
Shimmer IntensityHighModerateHigh
TextureGlossyMetallicBalm-like
LongevityMediumLong-lastingMedium
ApplicationBrush/ApplicatorTube/ApplicatorPot/Applicator

Comparison of Popular Gold Sparkle Lip Gloss Brands

BrandPrice RangeKey Features
Fenty Beauty$20 – $25Intense sparkle, Hydrating formula
MAC Cosmetics$18 – $22Wide range of shades, Long-lasting shimmer
Pat McGrath$30 – $35Luxurious texture, Bold glittery finish

Best Outfits and Accessories to Pair with Gold Sparkle Lip Gloss

Outfits

Outfit StyleDescription
Evening GownPair with a classic black evening gown for a sophisticated, glamorous look.
Casual ChicElevate a simple jeans-and-top outfit with a touch of sparkle for a chic vibe.
Party DressMatch with a glitzy party dress for a dazzling and festive ensemble.
Business AttireAdd a subtle hint of shimmer to your professional look for a stylish twist.

Accessories

AccessoryDescription
Statement EarringsPair with bold, gold statement earrings to complement the lip gloss.
Clutch or PurseChoose a gold or metallic clutch to harmonize with the gloss.
Delicate NecklacesOpt for delicate gold necklaces to accentuate the shimmer on the lips.
Sparkly Hair AccessoriesIncorporate hairpins or headbands with subtle sparkle for a coordinated look.

Removing Gold Sparkle Lip Gloss

Effective Removal Methods

Removal MethodDescription
Oil-Based CleansersUse an oil-based makeup remover to gently dissolve and wipe off the gloss.
Micellar WaterSoak a cotton pad with micellar water and press it on the lips to lift the gloss.
Lip ScrubGently exfoliate the lips with a lip scrub to remove any remaining shimmer particles.
Petroleum JellyApply a small amount of petroleum jelly to help break down and remove the gloss.

Step-by-Step Removal Process

  1. Apply Remover: Dab a cotton pad with your chosen remover.
  2. Press and Hold: Press the pad onto your lips and hold for a few seconds.
  3. Wipe Off: Gently wipe away the gloss, ensuring complete removal.
  4. Exfoliate (Optional): Use a lip scrub for thorough cleansing and to remove any residue.
  5. Moisturize: Apply lip balm or moisturizer to hydrate the lips after removal.

Following these steps with suitable products will ensure effective removal of gold lip gloss without causing any irritation or dryness to the lips.

Best Tips and Advice for Gold Sparkle Lip Gloss

1. Hydrate Your Lips

Ensure your lips are well-moisturized before applying gold lip gloss. Hydration helps achieve a smooth, even finish.

2. Prep with Primer

Consider using a lip primer to enhance the gloss’s longevity and prevent feathering or bleeding.

3. Layer Strategically

Start with a thin layer for a subtle shimmer and layer more gloss for an intensified sparkle effect.

4. Blot for Longevity

After application, gently blot your lips with a tissue to remove excess gloss and enhance its staying power.

5. Embrace Lip Liner

Using a lip liner that matches your gloss can define your lips and prevent color bleeding.

6. Experiment with Shades

Explore different shades and undertones to find the gold lip gloss that complements your skin tone and style.

7. Focus on Lips

Keep the rest of your makeup subtle when opting for a vibrant gold lip gloss to let your lips take the spotlight.

8. Take Care when Eating/Drinking

Be cautious while eating or drinking to avoid smudging the gloss. Opt for smaller sips and bites when wearing a glossy finish.

9. Touch-Up Technique

Carry your gloss for touch-ups throughout the day, especially after meals or when the shine fades.

10. Remove with Care

Use gentle makeup removers or cleansing oils to effectively remove the gold lip gloss without drying your lips.

These tips and advice will help you make the most of your gold lip gloss, ensuring a dazzling and long-lasting look.

FAQs

What is the most glittery lip gloss?

The most glittery lip glosses often depend on personal preference and the intensity of sparkle desired. However, brands like Fenty Beauty by Rihanna, NYX Cosmetics, and Pat McGrath Labs offer exceptionally glittery options known for their high shine and intense sparkle.

Read Also: Eyeshadow for Pink Dress.

Which brand is best for lip gloss?

Determining the best lip gloss brand varies based on individual preferences, but some highly-rated brands include Fenty Beauty, Glossier, MAC Cosmetics, and Too Faced. These brands are known for their diverse shades, quality formulas, and long-lasting finishes.

Read Also: Audacious Lipstick.

What makes lip gloss sparkle?

Lip gloss sparkles due to the presence of light-reflecting particles or shimmering pigments such as mica or glitter. These particles create a reflective effect when applied to the lips, giving the gloss its sparkle and shine.

Read Also: Before and After Curly Hair Extensions.

What is Ariana Grande’s lip gloss?

Ariana Grande has collaborated with multiple brands for makeup lines, but her personal lip gloss choice may vary. She’s known for her love of glossy lips, often opting for a high-shine finish, possibly using products from her own collections or favoring brands like MAC Cosmetics or Fenty Beauty.

Read Also: Best Lipstick with Black Dress.

Why is lip gloss attractive?

Lip gloss is attractive for several reasons. It enhances the natural beauty of lips by adding shine and dimension, making them appear fuller. The glossy finish also reflects light, giving a youthful and radiant appearance to the face.

Read Also: Castor Oil for Makeup Removal.

Does Dior Lip Glow have glitter?

Dior Lip Glow is known for its natural, sheer tint and a glossy finish without visible glitter particles. While it doesn’t contain glitter, it provides a radiant, subtle shine that enhances the lips’ natural color and moisture.

Read Also: Candy Made with Stevia.

Conclusion

Gold sparkle lip gloss remains an iconic beauty product, offering a blend of radiance, nourishment, and style. Embrace its shimmering charm to elevate your makeup game effortlessly.

Read Also: Foundation Free Sun Cream.

Continue Reading
Click to comment

Leave a Reply

Your email address will not be published. Required fields are marked *

MakeUp Tips

Mascara Wands: Mastering Eye Charm with Essential Tools!

Published

on

mascara wands

Here is your complete guide to mascara wands

Introduction to Mascara Wands

When it comes to achieving luscious, fluttery lashes, the type of mascara wand you use can make all the difference. From defining and lengthening to volumizing and curling, there are a plethora of mascara wands available, each designed to cater to specific lash needs. In this comprehensive guide, we will explore everything you need to know about mascara wands, including the different types, how to choose the right one for your lashes, maintenance tips, and more.

Different Types of Mascara Wands

Mascara wands come in various shapes and sizes, each serving a unique purpose. Understanding the different types can help you achieve your desired lash look. Here are some common mascara wand types:

  • Straight Wands: Ideal for adding length and definition to the lashes1.
  • Curved Wands: Perfect for lifting and curling the lashes1.
  • Tapered Wands: Great for reaching the inner and outer corner lashes1.
  • Ball Wands: Designed to add volume and separation to the lashes1.
  • Hourglass Wands: Suitable for volumizing and coating each lash evenly1.
  • Comb Wands: Perfect for separating and defining the lashes, especially for those with sparse lashes1.
  • Customizable Wands: Wands that allow you to adjust the bristle length and shape for a customized application.

To better understand the different mascara wand types, refer to the table below:

Mascara Wand TypeDescription
Straight WandsIdeal for lengthening and defining the lashes
Curved WandsDesigned to lift and curl the lashes
Tapered WandsGreat for reaching corner lashes
Ball WandsAdds volume and separation to the lashes
Hourglass WandsSuitable for volumizing and coating each lash evenly
Comb WandsPerfect for separating and defining sparse lashes
Customizable WandsAllows for a customized application by adjusting the bristle length and shape

Evolution of Mascara Wands

The history of mascara wands is a testament to beauty innovation. They’ve evolved from simple brushes to sophisticated, purpose-driven tools. Technological advancements have introduced materials that enhance not only application but also the overall lash health.

Mascara Wand Materials and Their Effects

MaterialEffect on Application
SiliconeOffers precise application
NylonAdds volume to lashes
FiberLengthens lashes

Understanding these materials empowers makeup enthusiasts to choose wands tailored to their desired lash effects.

Impact of Wand Design on Application

Different wand shapes cater to various needs:

  • Curved Wands: Perfect for lifting and curling lashes.
  • Ball-shaped Wands: Ideal for reaching smaller lashes and lower lash lines.
  • Comb Wands: Separate and define lashes with precision.

Best Practices for Using Mascara Wands

  • Preparation Tips: Always curl lashes before applying mascara for an extra lift.
  • Application Techniques: Zigzag the wand from roots to tips for even distribution.

Maintenance and Cleaning of Mascara Wands

Regular cleaning isn’t just hygienic—it’s vital for the wand’s longevity and ensures clump-free application. Follow these steps:

  1. Gently wipe excess product with a tissue.
  2. Dip the wand in makeup remover to dissolve remaining mascara.
  3. Rinse with warm water and mild soap.
  4. Air dry the wand thoroughly before use.

How to Choose the Right Mascara Wand

Choosing the right mascara wand is crucial for achieving your desired lash look. Here are some factors to consider when selecting a mascara wand:

  • Eye Shape: Consider your eye shape when choosing a mascara wand. For example, if you have hooded eyes, a curved wand can help lift and open up your eyes.
  • Lash Type: Different mascara wands cater to various lash types. If you have short lashes, a small wand can help coat each lash, while those with long lashes may benefit from a larger wand.
  • Desired Look: The look you want to achieve, whether it’s length, volume, or curl, can determine the type of mascara wand you should choose.
  • Mascara Formula: The formula of the mascara you use can also influence the type of wand you need. For example, a volumizing mascara may pair well with a ball wand, while a lengthening mascara may work best with a straight wand.
  • Wand Size and Material: The size and material of the mascara wand can also impact the application. A smaller wand can provide more precision, while a larger wand can offer more volume. Additionally, silicone wands are ideal for separating lashes, while fiber wands are great for adding volume.

To further illustrate how to choose the right mascara wand, refer to the table below:

FactorConsiderationRecommended Wand Type
Eye ShapeHooded eyes – Curved wandCurved wand
Lash TypeShort lashes – Small wandSmall wand
Desired LookVolume – Ball wandBall wand
Mascara FormulaVolumizing mascara – Ball wandBall wand
Wand SizePrecision – Small wandSmall wand
Wand MaterialSeparation – Silicone wand, Volume – Fiber wandSilicone wand, Fiber wand

Applying Mascara with Mascara Wands: A Step-by-Step Guide

Preparing Your Lashes

  1. Cleanse and Prime
    • Remove any old mascara using makeup remover.
    • Optionally, use an eyelash primer for added volume and length.

Choosing the Right Mascara Wand

  1. Understanding Wand TypesWand TypeEffect on LashesCurvedLifts and curls lashes.CombDefines and separates lashes.Ball-shapedAdds volume and reaches smaller lashes easily.
  2. Selecting Based on Desired Effect
    • Choose a wand that aligns with your desired lash look (volume, length, definition).

Application Techniques

  1. Basic Application StepsStepsDescriptionStart at the BasePlace wand at the base of lashes and wiggle it to coat evenly.Wiggle and SweepWiggle wand while sweeping upward for even distribution.Focus on TipsApply extra product on the tips for added length and definition.Repeat for VolumeLayer mascara for additional volume (if desired).
  2. Tips for PrecisionTipsDescriptionUse the Wand’s CurveUtilize the wand’s shape to reach corner and lower lashes.Control Product ApplicationRemove excess mascara from the wand for precise coating.Avoid ClumpingUse a lash comb to separate lashes if clumping occurs.

Finishing Touches

  1. Clean-Up
    • Use a cotton swab dipped in makeup remover for any smudges or mistakes.
  2. Setting the Look
    • Optional: Apply a clear mascara or lash sealer for a longer-lasting finish.

Maintenance

  1. Proper Storage
    • Close mascara tightly after use to prevent drying out.
  2. Replacing Mascara
    • Replace mascara every 3-6 months for hygiene and optimal performance.

Best Brands of Mascara Wands

BrandDistinctive FeaturesPrice Range
MaybellineCurved wand for voluminous and lengthened lashes.$5 – $10
L’OréalHourglass-shaped wand for precise application and separation.$8 – $12
CoverGirlComb wand design for lash definition and separation.$6 – $9
Benefit CosmeticsBall-shaped wand for reaching smaller lashes and adding volume.$12 – $20
Too FacedSilicone wand with varied bristle lengths for a customized lash look.$15 – $25

Tips from Experts and Makeup Artists

Expert TipMakeup Artist Recommendation
Experiment with various wand types for best fit.“Different wands offer unique effects; explore them.”
Master application techniques for optimal results.“Technique matters as much as the wand itself.”
Invest time in understanding your lash needs.“Know your lashes to choose the right wand.”
Replace mascara wands regularly for hygiene.“Hygiene is crucial; don’t overlook wand replacement.”

Mascara Wand FAQs

What is the best mascara wand for short lashes?

The best mascara wand for short lashes is a small wand that can coat each lash effectively.

Read Also: RealHer Metallic Bronze Eyeliner.

What is the best mascara wand for long lashes?

For long lashes, a larger wand can help add volume and definition to the lashes.

Read Also: Eyebrows Redhead.

What is the best mascara wand for volume?

A ball wand is ideal for adding volume to the lashes, as it can coat each lash with the volumizing mascara formula.

Read Also: Shooting Star Makeup.

What is the best mascara wand for curling?

A curved wand is perfect for curling the lashes and lifting them for a wide-eyed look.

Read Also: Is Shea Butter Vegan.

What is the best mascara wand for separating lashes?

A comb wand is great for separating and defining sparse lashes, as it can comb through each lash for a clump-free look.

Read Also: All Natural Room Spray.

Can I use different mascara wands for different effects?

Yes, you can use different mascara wands to achieve various lash looks. For example, you can use a ball wand for volume and a curved wand for curling.

Read Also: Candy Made with Stevia.

Conclusion

In conclusion, the right mascara wand can elevate your lash game and help you achieve the perfect fluttery lashes. By understanding the different types of mascara wands and how to choose the right one for your lashes, you can enhance your overall makeup look. Whether you’re aiming for length, volume, or curl, there’s a mascara wand out there to cater to your specific needs. Experiment with different mascara wands to find the perfect match for your lashes and elevate your beauty routine.

Read Also: Black Dress with Black Gloves.

Continue Reading

MakeUp Tips

Shooting Star Makeup: Your Guide to Celestial Glamour

Published

on

shooting star makeup

Here is your complete guide to shooting star makeup

Introduction to Shooting Star Makeup

Shooting star makeup has taken the beauty world by storm, offering a mesmerizing way to add celestial charm to your look. From subtle shimmer to bold galactic designs, this trend allows makeup enthusiasts to explore their creativity while embracing the cosmic allure. Let’s dive into the enchanting realm of shooting star makeup and discover how to achieve stellar looks effortlessly.

The allure of shooting star makeup has taken the beauty world by storm, offering a mesmerizing way to express creativity and individuality. This article aims to explore the enchanting world of shooting star makeup, from its inception to practical application, providing a detailed guide for both beginners and seasoned makeup artists.

History of Shooting Star Makeup

The origins of shooting star makeup can be traced back to the fascination with celestial elements and the desire to embody the mystique of the cosmos. This section will delve into the evolution of this trend, highlighting its journey from a niche concept to a mainstream sensation.

How to Create Shooting Star Makeup

  • Preparing Your Canvas: Before diving into the cosmic realm, ensure your skin is prepped and primed. Cleanse, moisturize, and apply a suitable primer to create a smooth base.
  • Choosing the Right Products: Highlighters, glitters, and eyeshadows are the stars of this makeup trend. Opt for highly pigmented and iridescent products to achieve the celestial glow.
  • Step-by-Step Guide to Application Techniques:
    • Apply a base eyeshadow and blend it outwards to create a subtle background.
    • Use a precise brush to apply the highlighter in a shooting star pattern, emphasizing the high points of your face.
    • Layer glitter in a gradient manner to emulate the twinkling effect of stars.
  • Tools and Brushes Required: Precision brushes and makeup sponges are essential for achieving the intricate details of shooting star makeup.

Inspiring Shooting Star Makeup Looks

The versatility of shooting star makeup allows for a spectrum of awe-inspiring looks:

  • Celestial-Inspired Looks: Embrace the ethereal beauty of the cosmos with soft, pastel hues resembling nebulae and galaxies.
  • Galaxy and Nebula Effects: Create bold, vibrant looks using deep blues, purples, and blacks, mimicking the vastness of space.
  • Day-to-Day Wearable Styles: Subtle shimmer and delicate starry accents make for versatile looks suitable for daily wear.

Best Products for Shooting Star Makeup

Selecting the right products is crucial for achieving an impeccable shooting star look. A detailed review of recommended makeup products, accompanied by a table featuring product names, brands, and unique features, will be provided to assist readers in making informed choices.

Recommended Makeup Products for Shooting Star Makeup

Product NameBrandUnique Features
Celestial EyeshadowStellar Cos.Shimmering pigments for a starry effect
Galaxy HighlighterNebula BeautyMulti-dimensional glow for celestial radiance

Long-Lasting Products Comparison

ProductFeaturesLongevity
Setting SprayLocks in makeupAll-day wear
Touch-Up KitPortable, mini productsQuick touch-ups

Comparison of Shooting Star Makeup Brands

BrandProduct NameDescriptionCostStar Status
Surreal MakeupShooting Star EyeshadowMulticolored iridescence, reflects light like crushed diamonds, perfect for superior sparkle.$15.99★★★★☆
Rare BeautyShooting Star HighlighterCreates a celestial glow, long-lasting, suitable for all skin tones.$24.00★★★★★
Fenty BeautyStarlit Hyper-Glitz LipstickIntense shimmer, long-wearing, available in various celestial shades.$19.00★★★★★
Huda BeautyMercury Retrograde Eyeshadow PaletteVersatile palette with celestial shades, highly pigmented, and blendable.$67.00★★★★☆
ColourPopShooting Star Glitter GelUltra-reflective glitter gel, easy to apply, suitable for face and body.$10.00★★★★☆

The star status is based on customer reviews and popularity. The costs are approximate and may vary based on the retailer. These brands offer a range of shooting makeup products, each with its unique features and appeal, catering to diverse preferences and styles.

Tips for Long-Lasting Shooting Star Makeup

  • Setting Techniques: Lock in your cosmic masterpiece with a setting spray to ensure it lasts throughout the day or night.
  • Touch-Up Suggestions: Carry a small touch-up kit including a mini highlighter and glitter for quick touch-ups.
  • Removal and Skincare After Wearing: Gently remove makeup using a makeup remover suitable for glitter, followed by a hydrating skincare routine.

Step-by-Step Application Guide

StepTechnique
1. Prepare CanvasCleanse, moisturize, and apply primer
2. Base EyeshadowApply a neutral base eyeshadow and blend
3. Shooting StarUse a precise brush for star-shaped highlighter strokes
4. Layer GlitterApply glitter in a gradient for a twinkling effect

Read Also: How to Cover Tyndall Effect with Makeup.

Shooting Star Makeup for Different Occasions

Adapting shooting makeup for various occasions adds versatility to this trend. Readers will discover tailored makeup ideas for parties, festivals, and photo shoots, along with suitable color palettes and styles to complement different events.

Read Also: How Long Does Grease Makeup Take to Dry.

DIY Shooting Star Makeup Kits

Creating your DIY kit is a fun and budget-friendly way to explore this trend. Components may include:

  • A versatile highlighter palette with iridescent shades
  • Glitter eyeshadows in various celestial tones
  • Precision brushes and makeup sponges for detailed application

Read Also: Camping Hairstyles for Curly Hair.

FAQs Section

Based on “People Also Ask”

How to achieve a shooting star makeup look?

Follow our step-by-step guide using high-quality highlighters and glitters for a celestial glow.

Read Also: Maybelline Free Sample.

Are there variations of shooting star makeup for different skin tones?

Absolutely! It is versatile and can be adapted to complement various skin tones.

Read Also: RealHer Metallic Bronze Eyeliner.

What tools are essential for creating shooting star makeup?

Precision brushes and makeup sponges are vital for achieving intricate details.

Read Also: Candy Made with Stevia.

Conclusion

In conclusion, shooting star makeup offers a celestial canvas for artistic expression, allowing individuals to embody the enchanting allure of the cosmos through makeup artistry. Embracing this trend opens up a world of creativity and self-expression, inviting everyone to explore the celestial realm through the transformative power of makeup.

Read Also: Eyebrows Redhead.

Continue Reading

MakeUp Tips

RealHer Metallic Bronze Eyeliner: Mastering Eye Makeup

Published

on

realher metallic bronze eyeliner

Here is your complete guide to realher metallic bronze eyeliner

Introduction to Realher Metallic Bronze Eyeliner

Are you looking for a new way to spice up your makeup routine? Look no further than RealHer Metallic Bronze Eyeliner! This creamy, buildable eyeliner is perfect for any eye color and provides a stunning metallic finish that is waterproof and long-lasting on the waterline. In this article, we’ll provide a comprehensive guide on how to use this eyeliner to create a stunning look that will turn heads.

Before we dive into the details, let’s take a moment to discuss the importance of choosing the right eyeliner for different eye colors. Eyeliner can enhance the natural beauty of your eyes and make them pop. RealHer Metallic Bronze Eyeliner is a great choice for any eye color, but it’s especially flattering on brown and hazel eyes. This eyeliner is buildable, which means you can create a subtle or dramatic look depending on your preference. Additionally, its waterproof formula ensures that your makeup will stay put all day long.

Product Description

RealHer Metallic Bronze Eyeliner is a versatile product that can be used to create a variety of looks. Here are some key features of this eyeliner:

  • Creamy, buildable formulation
  • Suitable for any eye color
  • Metallic finish that is waterproof
  • Long-lasting on the waterline

Application Tips

Now that you know the basics of RealHer Metallic Bronze Eyeliner, let’s dive into some application tips. Follow these steps to create a stunning look:

  1. Start by applying eyeshadow primer to your eyelids. This will help your eyeshadow and eyeliner stay in place all day.
  2. Apply your favorite eyeshadow to your eyelids. We recommend using warm, earthy tones to complement the bronze eyeliner.
  3. Take the RealHer Metallic Bronze Eyeliner and draw a thin line along your upper lash line. You can make the line as thick or thin as you like.
  4. Use a dense smudge brush to blend out the color and create wings. This will give your eyes a sultry, smoky look.
  5. Clean up the wing with a Q-tip and makeup remover for a crisp look.
  6. Apply mascara to your lashes to complete the look.

Is It Worth Using RealHer Metallic Bronze Eyeliner?

Overview

It is a versatile product that has garnered attention for its buildable, creamy formulation and stunning metallic finish. It is marketed as suitable for any eye color and is said to be waterproof, making it a long-lasting option for various eye makeup looks.

Customer Reviews

Customer reviews provide valuable insights into the performance and worth of the product. Here’s what some users have to say:

  • A customer from YouFromMe praises the eyeliner’s buildable formulation and its suitability for any eye color, emphasizing its waterproof and long-lasting properties.
  • Allure’s beauty assistant, Talia Gutierrez, reimagines cat eyes as smudged, smoky bronze wings using the RealHer Metallic Bronze Eyeliner, highlighting its creamy texture and the way it complements dark brown eyes.
  • Another customer from Lorde and Belle appreciates the smooth application of the metallic bronze eyeliner, noting that it stays on all day without smudging or rubbing off.

Pricing

RetailerPrice
YouFromMe$12.00
Cosmetics Half Price$6.40 (on sale)
Lorde and Belle$13.60
Kroger$36.00

Comparison of RealHer Metallic Bronze Eyeliner with Other Products

When it comes to choosing the right eyeliner, it’s important to consider various factors such as formulation, color, and price. In this section, we’ll compare Metallic Bronze Eyeliner with other similar products to help you make an informed decision.

RealHer Metallic Bronze Eyeliner vs. Eye Am Resilient Metallic Bronze Eyeliner by Lorde and Belle

Both RealHer Metallic Bronze Eyeliner and Eye Am Resilient Metallic Bronze Eyeliner by Lorde and Belle are creamy, buildable eyeliners that provide a metallic finish. However, there are some differences between the two products:

FeatureRealHer Metallic Bronze EyelinerEye Am Resilient Metallic Bronze Eyeliner by Lorde and Belle
Price$12.00 (YouFromMe)$13.60 (Lorde and Belle)
AvailabilityAvailable at YouFromMe, Cosmetics Half Price, and Lorde and BelleAvailable exclusively at Lorde and Belle
Customer ReviewsPositive reviews for its buildable formulation and waterproof propertiesPositive reviews for its smooth application and long-lasting properties

RealHer Metallic Bronze Eyeliner vs. Other Metallic Bronze Eyeliners

There are several other metallic bronze eyeliners on the market. Here’s how RealHer Metallic Eyeliner compares to some of them:

FeatureRealHer Metallic Bronze EyelinerMaybelline New York Master Precise Ink Metallic Liquid EyelinerNYX Professional Makeup Metallic Glitter Eyeliner
Price$12.00 (YouFromMe)$8.99 (Ulta)$7.50 (Ulta)
FormulationCreamy pencilLiquidLiquid
FinishMetallicMetallicGlitter
Customer ReviewsPositive reviews for its buildable formulation and waterproof propertiesPositive reviews for its precision and long-lasting propertiesPositive reviews for its glittery finish and long-lasting 

Best Tips and Tutorial for RealHer Metallic Bronze Eyeliner

It is a versatile product that can be used to create a variety of looks. Here are some tips and tutorials to help you make the most of this eyeliner:

Tips for Using RealHer Metallic Bronze Eyeliner

  • Start by applying eyeshadow primer to your eyelids. This will help your eyeshadow and eyeliner stay in place all day.
  • Use short strokes to create your line, rather than one continuous line.
  • For a soft and subtle smoky eye, draw a thick line above your upper lash line. With your “Determined To Rise” smudger brush, smudge the line in upwards motions to smoke out the product.
  • To sharpen the pencil, use any non-electrical pencil sharpener on hand.

Tutorial: How to Create a Smoky Bronze Wing

  1. Start by applying eyeshadow primer to your eyelids.
  2. Apply your favorite eyeshadow to your eyelids. We recommend using warm, earthy tones to complement the bronze eyeliner.
  3. Take the Metallic Bronze Eyeliner and draw a thin line along your upper lash line. You can make the line as thick or thin as you like.
  4. Use a dense smudge brush to blend out the color and create wings. This will give your eyes a sultry, smoky look.
  5. Clean up the wing with a Q-tip and makeup remover for a crisp look.
  6. Apply mascara to your lashes to complete the look.

Read Also: Can Dirty Makeup Brushes Cause Acne Breakouts.

FAQs

Is the eyeliner suitable for my eye color?

Yes! It is suitable for any eye color, but it’s especially flattering on brown and hazel eyes.

Read Also: How to Cover Tyndall Effect with Makeup.

How do I create a smoky bronze wing with this eyeliner?

To create a smoky bronze wing, use a dense smudge brush to blend out the color and create wings. Clean up the wing with a Q-tip and makeup remover for a crisp look.

Read Also: How Long Does Grease Makeup Take to Dry.

Is the product waterproof and long-lasting?

Yes! It is waterproof and long-lasting on the waterline.

Read Also: Camping Hairstyles for Curly Hair.

Can I use it for a crisp or soft look?

Yes! It is buildable, which means you can create a subtle or dramatic look depending on your preference.

Read Also: Candy Made with Stevia.

Conclusion

RealHer Metallic Bronze Eyeliner is a versatile product that can be used to create a variety of looks. Its creamy, buildable formula and waterproof finish make it a great choice for any occasion. We hope this guide has been helpful in showing you how to use this eyeliner to create a stunning look. Don’t be afraid to experiment and have fun with your makeup!

Read Also: Maybelline Free Sample.

Continue Reading

Trending