Connect with us

Beauty Tips

Vintage Wedding Makeup: Timeless Beauty for Your Big Day

Published

on

vintage wedding makeup

Here is your complete guide to vintage wedding makeup

Introduction To Vintage Wedding Makeup

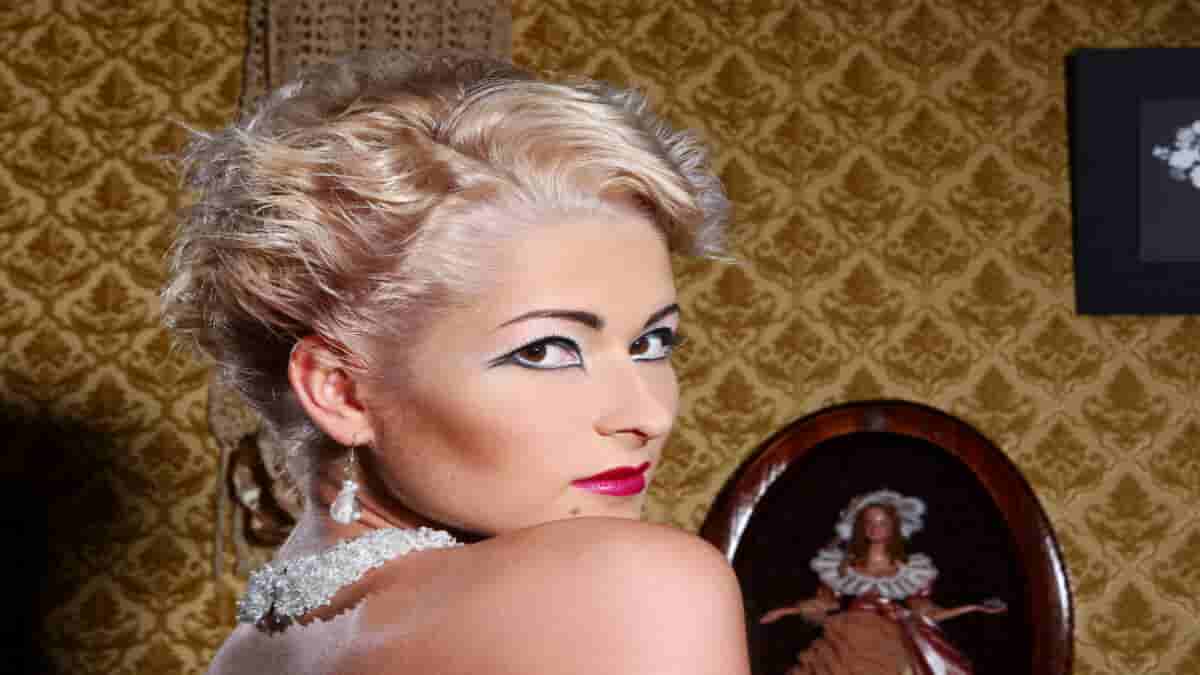
Welcome to the enchanting world of vintage wedding makeup, where timeless elegance and classic beauty take center stage. Vintage-inspired looks have been making a remarkable comeback in recent years, as brides seek to capture the charm and nostalgia of bygone eras on their most special day. In this comprehensive guide, we’ll explore the allure of vintage wedding makeup, how to achieve the perfect look, and tips to ensure you radiate with classic beauty throughout your wedding celebration.

Vintage makeup styles draw inspiration from various decades, including the glamorous 1920s, the sophisticated 1950s, and everything in between. These iconic beauty trends continue to inspire brides, offering a unique way to express personal style while honoring the past. Whether you envision a sultry smoky eye reminiscent of Old Hollywood glamour or a soft, romantic look that exudes elegance, we have you covered.

Understanding Vintage Wedding Makeup

Before we dive into the specifics of vintage wedding makeup, let’s take a moment to appreciate its historical significance. Vintage makeup is more than just a style; it represents a celebration of artistry and femininity from different periods in time. Each era brought its own beauty ideals and makeup trends, and recreating these looks adds a touch of magic to your wedding day.

Preparation is Key: Getting Your Skin Ready

Achieving a flawless vintage look starts with a radiant canvas. Follow these essential skincare steps to ensure your skin is glowing on your big day:

  • Cleansing: Gently cleanse your skin morning and night with a mild, sulfate-free cleanser.
  • Exfoliation: Exfoliate twice a week to remove dead skin cells and reveal a smoother complexion.
  • Moisturizing: Hydrate your skin with a nourishing moisturizer suited for your skin type.
  • Sun Protection: Wear SPF daily to protect your skin from harmful UV rays.

Achieving the Vintage Complexion

The key to vintage makeup is achieving a flawless complexion with a hint of softness. Here’s how to master the art of vintage-inspired foundation:

  • Foundation: Choose a lightweight, dewy-finish foundation that offers buildable coverage.
  • Concealer: Conceal any imperfections with a creamy concealer, and gently blend for a natural look.
  • Contouring and Highlighting: Use a soft bronzer to contour your cheekbones subtly. Highlight the high points of your face with a pearlescent highlighter for a youthful glow.

Captivating Vintage Eyes and Brows

The eyes are the window to the soul, and on your wedding day, you want them to sparkle with vintage charm:

  • Eyeshadow: Select eyeshadow palettes inspired by your chosen vintage era. For a 1920s look, go for smoky grays and glitters. For a 1950s style, opt for soft pastels and neutrals.
  • Eyeliner: Achieve a classic winged look with a waterproof liquid eyeliner for long-lasting results.
  • Mascara: Enhance your lashes with a volumizing mascara for added drama and intensity.
  • Eyebrows: Create perfectly shaped, well-defined brows that complement your vintage makeup. Use a pencil or powder to fill in any sparse areas.

Mesmerizing Vintage Lips

No vintage look is complete without luscious, captivating lips:

  • Lipstick: Choose bold reds for a dramatic 1920s or 1940s look, or soft pinks for a romantic 1950s style.
  • Lip Liner: Outline your lips with a lip liner that matches your lipstick shade to prevent feathering.
  • Long-Lasting: Opt for long-wear lipstick to ensure your lip color stays vibrant throughout the day.
vintage wedding makeup

Bringing It All Together: Vintage Wedding Makeup Look

Now that you have all the pieces, it’s time to assemble your vintage wedding makeup look. Follow these step-by-step instructions to achieve a stunning vintage appearance:

  1. Prepare Your Skin: Start with a clean, moisturized face and apply a primer for a smooth base.
  2. Foundation and Concealer: Even out your skin tone with foundation and conceal any blemishes or dark circles.
  1. Contour and Highlight: Create subtle shadows and add highlights to define your facial features.
  2. Eyeshadow: Apply eyeshadow based on your chosen vintage era. Blend well for a seamless look.
  3. Eyeliner and Mascara: Draw a classic wing with eyeliner and add mascara for voluminous lashes.
  4. Eyebrows: Shape and fill your eyebrows to frame your eyes beautifully.
  5. Lips: Line your lips with a lip liner and fill in with your chosen lipstick shade.
  6. Setting Spray: Finish with a setting spray to ensure your vintage makeup lasts all day and night.

Steps to Achieving the Perfect Vintage Wedding Makeup

Creating the perfect vintage wedding makeup requires attention to detail and a careful selection of products and techniques that embody the elegance and charm of a bygone era. Let’s dive into the essential steps to help you achieve your dream vintage-inspired look on your special day.

Step 1: Prep Your Skin for Radiance

TaskDescription
CleansingStart with a gentle, sulfate-free cleanser to remove impurities and create a fresh canvas.
ExfoliationExfoliate twice a week to promote skin renewal and achieve a smoother complexion.
MoisturizingApply a nourishing moisturizer suited for your skin type to keep your skin hydrated.
Sun ProtectionWear SPF daily to shield your skin from harmful UV rays and prevent sun damage.

Step 2: Create a Flawless Vintage Complexion

TaskDescription
FoundationChoose a lightweight foundation with a dewy finish to achieve a soft, radiant complexion.
ConcealerUse a creamy concealer to cover any imperfections and dark circles for a flawless base.
Contour and HighlightSculpt your facial features with a soft bronzer and add highlights for a youthful, glowing look.

Step 3: Enchanting Vintage Eyes and Brows

TaskDescription
EyeshadowSelect eyeshadow palettes inspired by your chosen vintage era. Blend shades to create a seamless look.
EyelinerCreate a classic winged eyeliner using a waterproof liquid eyeliner for long-lasting, dramatic eyes.
MascaraAdd volume and length to your lashes with a volumizing mascara for captivating, alluring eyes.
EyebrowsShape and fill your eyebrows to complement your vintage makeup and frame your eyes beautifully.

Step 4: Embrace Captivating Vintage Lips

TaskDescription
LipstickChoose bold reds for a dramatic vintage look or soft pinks for a romantic touch, based on your era.
Lip LinerOutline your lips with a matching lip liner to prevent feathering and achieve a polished lip shape.
Long-LastingOpt for a long-wear lipstick to ensure your lip color stays vibrant and perfect throughout the day.

Read Also: Valentine Eyeshadow Palette.

Step 5: Bring It All Together: The Vintage Wedding Look

TaskDescription
Prepare Your SkinStart with a clean, moisturized face and apply a primer for a smooth makeup application.
Foundation and ConcealerEven out your skin tone with foundation and conceal any blemishes or dark circles.
Contour and HighlightSculpt your facial features with contour and highlight to achieve a classic vintage look.
EyeshadowApply eyeshadow based on your chosen vintage era, blending well for a seamless finish.
Eyeliner and MascaraDraw a classic winged eyeliner and add volumizing mascara for alluring, vintage eyes.
EyebrowsShape and fill your eyebrows to frame your eyes beautifully and complete the look.
LipsLine your lips with a lip liner and apply your chosen lipstick shade for captivating vintage lips.
Setting SprayFinish with a setting spray to lock your vintage makeup in place and ensure lasting beauty.

With these meticulous steps and the right products, you’ll achieve the perfect vintage wedding makeup look that not only honors the beauty of the past but also enhances your natural radiance on your special day. Remember to do a makeup trial and work with a professional makeup artist for flawless results that match your desired vintage style.

Read Also: Hair Nutrition for Women.

Secrets to Achieving the Perfect Vintage Wedding Makeup

Vintage wedding makeup holds a certain allure and charm that can make any bride feel like a timeless beauty on her special day. To achieve that enchanting vintage look, there are some secrets and tips that can elevate your makeup to perfection. Let’s unveil these secrets in the table below:

Secret 1: Research and Choose Your Vintage Era

SecretDescription
Research Iconic LooksExplore iconic makeup looks from different vintage eras, such as the 1920s, 1950s, or 1960s.
Identify Your FavoriteChoose a vintage era that resonates with your personal style and complements your wedding theme.
Adapt to Your FeaturesModify the makeup to suit your facial features, enhancing your natural beauty within the vintage style.

Read Also: Blonde Chunky Hair.

Secret 2: Invest in Quality Vintage Makeup Products

SecretDescription
Quality FoundationsInvest in a high-quality, dewy-finish foundation that matches your skin tone and provides good coverage.
Long-Wear LipsticksChoose long-lasting lipsticks in bold reds or soft pinks to keep your lips vibrant throughout the day.
Waterproof EyelinerOpt for a waterproof liquid eyeliner to ensure your winged look stays intact even during emotional moments.
Vintage-Inspired PalettesUse eyeshadow palettes inspired by your chosen vintage era to achieve an authentic, timeless look.

Read Also: White Nails with Diamonds.

Secret 3: Perfect Your Complexion with Contouring

SecretDescription
Subtle ContouringEmploy subtle contouring to define your cheekbones, jawline, and nose for a sculpted vintage-inspired look.
Pearlized HighlighterUse a pearlized highlighter on your cheekbones and brow bone to add a soft glow and youthful radiance.
Blend SeamlesslyBlend your contour and highlight seamlessly to create a natural transition between light and shadow.

Read Also: Ampoule for Hair Treatment.

Secret 4: Accentuate Your Eyes with Timeless Eyeliner

SecretDescription
Classic Winged EyelinerMaster the art of the classic winged eyeliner, adding a touch of drama and vintage glamour to your eyes.
Extend the Outer CornerExtend the eyeliner slightly past the outer corner of your eyes for an elongated, elegant look.
Bold MascaraApply a generous coat of volumizing mascara to achieve lush, voluminous lashes that draw attention to your eyes.

Read Also: How to Tighten Eyelid Skin Without Surgery.

Secret 5: Embrace Vintage Lip Colors

SecretDescription
Bold Reds or Soft PinksChoose lipstick shades like bold reds for a sultry, vintage Hollywood look or soft pinks for a romantic touch.
Lip Liner for DefinitionOutline your lips with a lip liner that matches your lipstick shade to prevent feathering and define your lips.
Matte or Satin FinishOpt for matte or satin finish lipsticks for a timeless, sophisticated look that lasts throughout the day.

Read Also: Color Vibe Hair Dye.

Secret 6: Pay Attention to Detail and Practice

SecretDescription
Practice Makes PerfectPractice your vintage makeup look several times before the big day to ensure confidence and precision.
Attention to EyebrowsShape and fill your eyebrows to frame your eyes beautifully and enhance the overall vintage appeal.
Set with a Setting SprayFinish your vintage makeup with a setting spray to ensure it stays flawless throughout the wedding day.

Read Also: Jelly Lips Tutorial.

Secret 7: Collaborate with a Professional Makeup Artist

SecretDescription
Book a Makeup Trial SessionSchedule a trial with a professional makeup artist specializing in vintage looks to perfect the style.
Share Your Vision and PreferencesCommunicate your desired vintage look, wedding theme, and any specific preferences you may have.
Trust Their ExpertiseTrust your makeup artist’s expertise and let them work their magic to achieve your dream vintage look.

By incorporating these secrets into your makeup preparation, you’ll create a flawless and captivating vintage wedding makeup that not only showcases your beauty but also captures the timeless elegance of the past. Remember, confidence and joy are the ultimate accessories to complete your vintage-inspired look on your special day!

Read Also: Gain Weight on Period.

Frequently Asked Questions (FAQs)

Here are some common questions brides have about vintage wedding makeup:

QuestionAnswer
What era should I choose for my vintage wedding makeup?The era you choose depends on your personal style and the theme of your wedding. The 1920s offer a glamorous, Gatsby-inspired look, while the 1950s exude elegance and grace.
Will vintage makeup work for my modern wedding theme?Absolutely! Vintage makeup can add a unique touch of sophistication to any wedding theme. With the right balance, it blends seamlessly with modern elements.
How can I make sure my vintage makeup lasts all day?Use a long-wear primer and setting spray to lock your makeup in place. Keep a touch-up kit handy for any minor adjustments.
Should I hire a professional makeup artist for my wedding?Hiring a professional with experience in vintage makeup is recommended for flawless results. Schedule a trial session beforehand to discuss your desired look.
Can I customize my vintage makeup to suit my features?Of course! Vintage makeup styles can be adapted to enhance your unique features and complement your natural beauty. Discuss your preferences with your makeup artist.

Read Also: Korean Cherry Lip.

Vintage Wedding Makeup for Different Skin Tones

Each skin tone deserves a personalized touch. Here are some tips to tailor your vintage makeup based on your complexion:

Skin ToneFoundation ShadeEyeshadow PaletteLipstick Color
FairLight beige or pinkSoft pastels and pinksRosy pinks or reds
MediumWarm beige or peachEarth tones and goldsPeachy nudes or reds
DarkRich caramel or bronzeDeep jewel tonesBerries and plums

Read Also: PCA Skin Pregnancy Safe.

Final Touches: Hair, Accessories, and Attire

Your vintage wedding makeup look wouldn’t be complete without the perfect hairstyle, accessories, and attire:

  • Hairstyle: Vintage updos, pin curls, victory rolls, and classic chignons are popular choices. Work with a hairstylist to create a timeless hairdo that complements your makeup.
  • Accessories: Consider vintage-inspired accessories such as pearl necklaces, art deco hairpieces, and elegant gloves to add an authentic touch to your ensemble.
  • Attire: Choose a wedding dress that matches your selected vintage era, such as a chic flapper-style gown or a sophisticated tea-length dress.

Read Also: Nude Skin Care.

Conclusion

Vintage wedding makeup opens the door to a world of timeless beauty, allowing you to channel the elegance of past eras while celebrating your love in the present. With the right techniques, products, and expert guidance, you can achieve a breathtaking vintage look that will make you feel like a true classic beauty on your special day. So, embrace the charm of yesteryears, and let your inner vintage goddess shine brightly as you walk down the aisle. Cheers to a wedding day filled with timeless allure and cherished memories!

Read Also: Glass Skin Botox Benefits.

Read Also: How to Take off Makeup after Spray Tan.

Continue Reading
Click to comment

Leave a Reply

Your email address will not be published. Required fields are marked *

Beauty Tips

Tratamiento Labios Secos: Tips para Mantener Labios Suaves

Published

on

tratamiento labios secos

tratamiento labios secos

Introducción a Tratamiento Labios Secos

Los labios secos son un problema común que afecta a muchas personas en todo el mundo. No solo pueden causar incomodidad, sino que también pueden afectar la apariencia estética de nuestra sonrisa. En este artículo, exploraremos en profundidad el tratamiento labios secos, abordando las causas, síntomas, tratamientos efectivos y medidas preventivas. Si alguna vez te has preguntado cómo aliviar la sequedad de tus labios, este artículo es para ti.

La importancia de un tratamiento adecuado para los labios secos no puede subestimarse. No solo se trata de un problema estético; los labios secos pueden ser dolorosos y, en algunos casos, pueden llevar a infecciones. Por eso, es vital entender las razones detrás de esta condición y cómo podemos tratarla de manera efectiva. En este artículo, utilizaremos el término tratamiento labios secos en varias ocasiones para asegurarnos de que encuentres toda la información que necesitas.

Entendiendo los Labios Secos

Causas de los Labios Secos

Los labios secos pueden ser causados por una variedad de factores. Aquí hay algunas de las causas más comunes:

  • Factores Ambientales:
    • El clima frío y seco puede deshidratar la piel de los labios.
    • La exposición al sol sin protección puede causar quemaduras y sequedad.
  • Elecciones de Estilo de Vida:
    • La deshidratación, a menudo resultado de no beber suficiente agua, es una de las principales causas.
    • Fumar puede secar los labios y afectar su salud general.
  • Condiciones Médicas:
    • Enfermedades como la diabetes pueden afectar la hidratación de la piel.
    • Alergias a productos cosméticos o alimentos también pueden causar reacciones que resultan en labios secos.

Fisiología de los Labios

Los labios tienen una estructura única que los hace particularmente susceptibles a la sequedad. A diferencia de otras partes del cuerpo, los labios carecen de glándulas sebáceas, lo que significa que no producen aceites naturales para mantener su hidratación. Además, la piel de los labios es más delgada y sensible, lo que los hace vulnerables a factores externos.

Síntomas de Labios Secos

Identificar los síntomas de los labios secos es el primer paso hacia un tratamiento efectivo. Algunos de los síntomas más comunes incluyen:

  • Grietas y Descamación: Los labios pueden comenzar a agrietarse y pelarse, lo que puede ser doloroso.
  • Dolor y Malestar: La sequedad puede causar incomodidad constante.
  • Cambios en el Color y Textura: Los labios pueden volverse más oscuros o perder su suavidad natural.

Cuándo Buscar Ayuda Médica

Si experimentas síntomas persistentes de labios secos, es importante consultar a un médico. Debes buscar atención profesional si:

  • La sequedad no mejora con tratamientos caseros.
  • Hay signos de infección, como enrojecimiento o hinchazón.
  • Experimentas dolor severo o sangrado.

Tratamientos Efectivos para Labios Secos

Existen múltiples enfoques para el tratamiento labios secos, que van desde remedios caseros hasta opciones profesionales.

Remedios Caseros

Los remedios caseros son una excelente manera de comenzar a tratar los labios secos. Aquí hay algunas estrategias efectivas:

  • Hidratación:
    • Beber suficiente agua es esencial. Se recomienda al menos 8 vasos al día.
  • Exfoliación:
    • Exfoliar suavemente los labios puede ayudar a eliminar las células muertas. Puedes usar un cepillo de dientes suave o una mezcla de azúcar y miel.
  • Aceites y Mantecas Naturales:
    • Aplicar aceites como el aceite de coco o mantecas como la manteca de karité proporciona hidratación profunda.

Productos de Venta Libre

Si los remedios caseros no son suficientes, hay varios productos de venta libre que pueden ayudar:

  • Ingredientes a Buscar:
    • Manteca de Karité: Hidratante natural que ayuda a suavizar los labios.
    • Cera de Abejas: Crea una barrera protectora contra la pérdida de humedad.
    • Lanolina: Un emoliente que ayuda a retener la humedad.
IngredienteBeneficios
Manteca de KaritéHidratación profunda
Cera de AbejasProtección contra la deshidratación
LanolinaRetención de humedad

Los Mejores Productos para el Tratamiento de Labios Secos y Cómo Usarlos

A continuación, se presenta una tabla con algunos de los mejores productos para el tratamiento labios secos, junto con instrucciones sobre cómo utilizarlos para obtener los mejores resultados.

ProductoDescripciónCómo Usarlo
Bálsamo Labial de Manteca de KaritéHidratante natural que proporciona una barrera protectora.Aplica una capa generosa en los labios varias veces al día, especialmente antes de salir.
VaselinaCrea una barrera oclusiva que retiene la humedad.Usa una pequeña cantidad en los labios antes de dormir para una hidratación profunda.
Bálsamo Labial con Ácido HialurónicoAtrae y retiene la humedad, ideal para labios muy secos.Aplica en los labios limpios y secos, repitiendo cada 4 horas o según sea necesario.
Gel de Aloe VeraPropiedades hidratantes y antiinflamatorias.Aplica una pequeña cantidad directamente sobre los labios y deja actuar durante 15 minutos antes de enjuagar.
Exfoliante Labial NaturalElimina las células muertas y suaviza la textura de los labios.Usa una vez a la semana, aplicando suavemente con un cepillo de dientes o una mezcla de azúcar y miel.

Detalles de Uso de Cada Producto

1. Bálsamo Labial de Manteca de Karité

  • Descripción: Este bálsamo es rico en nutrientes y proporciona una hidratación intensa. Ideal para climas fríos y secos.
  • Instrucciones: Aplica generosamente en los labios varias veces al día. Es especialmente efectivo antes de salir al aire libre o antes de dormir.

2. Vaselina

  • Descripción: La vaselina es un producto clásico que actúa como una barrera para evitar la pérdida de humedad.
  • Instrucciones: Usa una pequeña cantidad en los labios antes de acostarte. Esto ayudará a mantener tus labios hidratados durante la noche.

3. Bálsamo Labial con Ácido Hialurónico

  • Descripción: Este bálsamo está formulado para atraer y retener la humedad, lo que lo hace perfecto para labios extremadamente secos.
  • Instrucciones: Aplica sobre los labios limpios y secos. Repite cada 4 horas o según sea necesario, especialmente después de comer o beber.

4. Gel de Aloe Vera

  • Descripción: El gel de aloe vera es conocido por sus propiedades hidratantes y curativas.
  • Instrucciones: Aplica una pequeña cantidad directamente sobre los labios. Deja actuar durante 15 minutos y luego enjuaga con agua tibia para mejores resultados.

5. Exfoliante Labial Natural

  • Descripción: Un exfoliante suave ayuda a eliminar las células muertas y a suavizar la superficie de los labios.
  • Instrucciones: Mezcla azúcar con un poco de miel o aceite de oliva. Aplica suavemente en los labios con movimientos circulares una vez a la semana y enjuaga con agua tibia.

Consejos Adicionales para el Uso de Productos

  • Consistencia: La clave para mantener los labios hidratados es la consistencia. Asegúrate de usar estos productos regularmente.
  • Evita Ingredientes Irritantes: Al elegir productos, evita aquellos que contengan fragancias o mentol, ya que pueden irritar los labios.
  • Almacenamiento: Guarda tus bálsamos labiales en un lugar fresco y seco para mantener su efectividad.

Estos productos y sus usos son esenciales para mantener tus labios hidratados y saludables. Incorporar estos tratamientos en tu rutina diaria puede ayudar a prevenir la sequedad y mantener tus labios en óptimas condiciones.

Los Mejores Consejos para Evitar los Labios Secos

Mantente Hidratado

  • Bebe suficiente agua a lo largo del día para mantener tu cuerpo y piel bien hidratados.
  • Los alimentos ricos en agua, como frutas y verduras, también pueden ayudar con la hidratación.

Usa Bálsamo Labial Regularmente

  • Aplica bálsamo labial varias veces al día, especialmente antes de salir al exterior.
  • Busca productos con ingredientes hidratantes como manteca de karité, aceite de coco, vitamina E y cera de abejas.

Protege tus Labios del Sol

  • Usa un bálsamo labial con protección solar para evitar daños por los rayos UV.
  • La protección solar es importante durante todo el año, no solo en verano.

Exfolia Suavemente

  • Exfoliar los labios una vez a la semana ayuda a eliminar la piel muerta y permite una mejor absorción de los productos.
  • Puedes usar un cepillo de dientes suave o una mezcla de azúcar y miel para exfoliar.

Evita Hábitos Dañinos

  • No te lamas ni muerdas los labios, ya que esto empeora la sequedad.
  • Evita productos labiales con ingredientes irritantes como mentol o fragancias.

Aplica Bálsamo Antes de Dormir

  • Aplicar bálsamo labial antes de acostarte mantiene tus labios hidratados durante la noche.

Siguiendo estos consejos y adoptando una rutina de cuidado labial, podrás evitar y aliviar los molestos labios secos. Recuerda que la hidratación, la protección solar y los hábitos saludables son clave para mantener unos labios suaves y saludables.

Tratamientos Profesionales

En casos más severos, los tratamientos profesionales pueden ser necesarios:

  • Inyecciones de Ácido Hialurónico:
    • Estas inyecciones pueden ayudar a restaurar la hidratación y volumen de los labios.
  • Tratamientos con Láser:
    • Los tratamientos láser pueden mejorar la textura de los labios y aumentar la hidratación.

Medidas Preventivas

La prevención es clave para evitar la sequedad de los labios. Aquí hay algunas recomendaciones:

Rutina Diaria de Cuidado de Labios

  • Uso Regular de Bálsamo Labial:
    • Aplica bálsamo labial varias veces al día, especialmente antes de salir al aire libre.
  • Evitar Hábitos Dañinos:
    • Evita lamerte los labios, ya que esto puede empeorar la sequedad.
    • No muerdas o rasques los labios.

Consejos de Cuidado Estacional

  • Cuidado en Climas Fríos:
    • Usa un bálsamo labial con protección solar en invierno.
  • Protección contra el Sol:
    • Aplica un bálsamo labial con SPF para proteger tus labios de los daños solares.
EstaciónConsejos de Cuidado
InviernoUsa bálsamo labial con SPF
VeranoAplica bálsamo labial con protección solar

Preguntas Frecuentes Sobre Tratamiento Labios Secos

¿Qué causa que los labios se vuelvan secos y agrietados?

Los labios pueden volverse secos debido a factores ambientales, deshidratación, hábitos poco saludables y condiciones médicas subyacentes.

Leer también: Aqua Blue Fragrance.

¿Cómo puedo prevenir los labios secos?

Mantente hidratado, usa bálsamo labial regularmente y evita lamerte los labios.

Leer también: Brochas Para Mascarillas.

¿Hay alimentos que ayudan con la hidratación de los labios?

Sí, consumir alimentos ricos en agua como frutas y verduras puede ayudar a mantener la hidratación general de tu cuerpo, incluyendo tus labios.

Leer también: Pintalabios Camaleón.

¿Es seguro usar vaselina en los labios?

Sí, la vaselina puede ser efectiva para sellar la humedad, pero asegúrate de no usarla en exceso, ya que puede causar dependencia.

Leer también: Perfilador Labios Waterproof.

¿Cuándo debo consultar a un dermatólogo sobre mis labios secos?

Si los síntomas persisten a pesar de los tratamientos caseros o si hay signos de infección, es recomendable consultar a un dermatólogo.

Leer también: Pull Ups While Pregnant.

Conclusión

Los labios secos son un problema común que puede afectar a cualquiera, pero con los tratamientos adecuados y medidas preventivas, puedes mantener tus labios saludables y bien hidratados. Recuerda que la clave está en la hidratación y el cuidado regular. Si tus labios secos persisten, no dudes en buscar ayuda profesional. ¡Adopta una rutina de cuidado de labios y disfruta de una sonrisa hermosa y saludable! Este artículo proporciona una guía completa sobre el tratamiento labios secos, abordando todos los aspectos relevantes para ayudar a los lectores a entender y manejar esta condición de manera efectiva.

Leer también: Brillo de Labios Transparente Permanente.

Continue Reading

Beauty Tips

Keratin Hair Growth Oil Review: Transform Your Hair

Published

on

keratin hair growth oil

Here is your complete guide to keratin hair growth oil.

Introduction to Keratin Hair Growth Oil

Keratin hair growth oil has become a popular topic in the world of hair care, and for good reason. Keratin, a protein found in hair, plays a crucial role in maintaining its health and appearance. When applied topically, keratin hair growth oil can promote hair growth, strengthen hair, moisturize and nourish it, and even improve its shine and texture. In this article, we will delve into the world of keratin hair growth oil, exploring its benefits, ingredients, and application methods.

Understanding Keratin

Keratin is a protein that is naturally present in hair, skin, and nails. It is responsible for giving hair its strength, elasticity, and resilience. Keratin is particularly important for hair health because it helps to maintain the structure and integrity of the hair shaft. There are several types of keratin, each with its own unique properties and functions. For example, keratin 1 and keratin 10 are found in the outermost layer of the hair shaft, while keratin 2 and keratin 3 are found in the inner layers.

Benefits of Keratin Hair Growth Oil

Using keratin hair growth oil can have numerous benefits for your hair. Here are some of the most significant advantages:

  • Promotes Hair Growth: Hair growth oil stimulates hair follicles, promoting healthy hair growth and reducing the likelihood of hair loss.
  • Strengthens Hair: Keratin oil helps to strengthen hair, reducing breakage and improving its elasticity.
  • Moisturizes and Nourishes: Keratin oil is rich in moisturizing ingredients that help to hydrate and nourish the hair, leaving it soft and supple.
  • Improves Shine and Texture: Keratin oil can enhance the overall appearance of hair, leaving it with a healthy shine and smooth texture.

Ingredients in Keratin Hair Growth Oil

Keratin hair growth oil typically contains a blend of natural ingredients that work together to promote hair health. Some common ingredients found in hair growth oil include:

  • Argan Oil: Rich in antioxidants and essential fatty acids, argan oil helps to nourish and moisturize the hair.
  • Jojoba Oil: Similar to sebum, jojoba oil helps to balance the scalp’s natural oils and promote healthy hair growth.
  • Coconut Oil: Coconut oil is rich in lauric acid, which helps to moisturize and nourish the hair.
  • Olive Oil: Olive oil is rich in antioxidants and helps to protect the hair from damage.

Benefits of Key Ingredients in Keratin Hair Growth Oil

IngredientBenefitSource
Argan OilMoisturizes and nourishes hairMorocco
Jojoba OilBalances scalp’s natural oilsNorth America
Coconut OilMoisturizes and nourishes hairSoutheast Asia
Olive OilProtects hair from damageMediterranean

Comparison of Keratin Hair Growth Oils

BrandKey IngredientsPriceCustomer Rating
Keratin ComplexKeratin, Argan Oil, Jojoba Oil$20-$304.5/5
MoroccanoilKeratin, Argan Oil, Coconut Oil$30-$404.8/5
KerastaseKeratin, Olive Oil, Argan Oil$40-$504.7/5

How to Use

Using hair growth oil is relatively simple. Here are some tips to help you get the most out of your hair growth oil:

  • Application Methods: You can apply hair growth oil to your hair in several ways, including massaging it into your scalp, applying it to the ends of your hair, or using it as a leave-in treatment.
  • Frequency of Use: For best results, use hair growth oil 2-3 times a week, depending on your hair type and the specific product you are using.

DIY Keratin Hair Growth Oil Recipes

If you prefer to make your own hair growth oil, here are a few simple recipes to get you started:

  • Recipe 1: Mix 1 tablespoon of argan oil with 1 tablespoon of jojoba oil and 1 tablespoon of coconut oil. Apply to your hair and scalp.
  • Recipe 2: Mix 1 tablespoon of olive oil with 1 tablespoon of argan oil and 1 tablespoon of jojoba oil. Apply to your hair and scalp.
  • Tips for Best Results: When making your own hair growth oil, be sure to store it in a cool, dry place and apply it to your hair within 6 months of making it.

DIY Recipes

RecipeIngredientsApplication
Recipe 1Argan Oil, Jojoba Oil, Coconut OilMassage into scalp and hair
Recipe 2Olive Oil, Argan Oil, Jojoba OilApply to hair and scalp
Recipe 3Coconut Oil, Olive Oil, Argan OilUse as a leave-in treatment

Common Myths

There are several myths surrounding hair growth oil that we should address:

  • Myth 1: Hair growth oil is only for people with damaged hair. 
  • Fact: Hair growth oil can benefit all hair types, from dry and damaged to healthy and strong.
  • Myth 2: Hair growth oil is only effective for a short period. 
  • Fact: When used regularly, hair growth oil can provide long-term benefits for your hair.

How Often Should I Apply Keratin Hair Growth Oil for Best Results?

Recommended Frequency of Application

To maximize the benefits of hair growth oil, it is essential to establish a consistent application routine. Here are the general recommendations for how often to apply hair growth oil:

  • 2-3 Times a Week: For most hair types, applying hair growth oil two to three times a week is ideal. This frequency allows the oil to penetrate the hair shaft and scalp effectively, promoting moisture retention and strengthening the hair without overwhelming it.

Application Techniques

Pre-Wash Treatment

  • 30 Minutes Before Washing: Apply hair growth oil to your hair and scalp 30 minutes before washing. This method helps protect your hair from the drying effects of shampoo and enhances moisture retention.

Post-Wash Treatment

  • After Washing: After washing your hair, apply a small amount of keratin oil to the ends while it is still damp. This technique helps seal in moisture and prevent frizz.

Leave-In Treatment

  • Daily Use: For those with particularly dry or damaged hair, using hair growth oil as a leave-in treatment can be beneficial. Apply a small amount to your hair after styling, focusing on the ends to maintain hydration throughout the day.

Benefits of Regular Application

Applying hair growth oil regularly can lead to several improvements in hair health:

  • Stronger Hair: Regular use strengthens the hair structure, reducing breakage and split ends.
  • Enhanced Moisture: Frequent application helps maintain hydration, making hair softer and more manageable.
  • Reduced Frizz: Consistent use can help control frizz and improve the overall appearance of your hair.
  • Improved Shine: Regular application of keratin oil can enhance the shine and luster of your hair, giving it a healthier look.

Considerations for Different Hair Types

  • Fine Hair: If you have fine hair, consider using hair growth oil once or twice a week to avoid weighing it down.
  • Thick or Curly Hair: For thick or curly hair, you may benefit from applying it three times a week or even daily, especially if your hair is prone to dryness.
  • Color-Treated Hair: If your hair is color-treated, using hair growth oil two to three times a week can help maintain vibrancy and moisture.

Customer Reviews and Testimonials

Many people have reported positive results from using this hair growth oil. Here are a few testimonials to give you an idea of what to expect:

  • “I noticed a significant reduction in hair loss and an improvement in the overall health of my hair after using keratin hair growth oil.”
  • “I was amazed at how soft and manageable my hair became after using hair growth oil. It’s now one of my go-to products.”

Customer Reviews

ReviewHair TypeResults
“I noticed a significant reduction in hair loss and an improvement in the overall health of my hair after using keratin hair growth oil.”Dry and damagedImproved hair health and reduced hair loss
“I was amazed at how soft and manageable my hair became after using keratin hair growth oil. It’s now one of my go-to products.”Healthy and strongSoft and manageable hair

Read Also: Strawberry Milk Perfume.

Frequently Asked Questions about Keratin Hair Growth Oil

What is keratin hair growth oil?

Hair growth oil is a topical treatment that contains keratin, a protein found in hair, skin, and nails.

Read Also: Perfume with Sandalwood and Jasmine.

How often should I use keratin hair growth oil?

For best results, use hair growth oil 2-3 times a week.

Read Also: Hair Protein Cream.

Can keratin oil help with hair loss?

Yes, keratin oil can help to stimulate hair growth and reduce hair loss.

Read Also: Peaches and Cream Nails.

Is keratin hair growth oil suitable for all hair types?

Yes, hair growth oil can benefit all hair types, from dry and damaged to healthy and strong.

Read Also: Lymphatic Drainage Cream.

How long does it take to see results?

Results can vary depending on individual hair types and the specific product used. However, most people start to see improvements within 2-3 weeks of regular use.

Read Also: Supplements for Booty Growth.

Conclusion

Keratin hair growth oil is a powerful tool for promoting healthy, strong hair. By understanding the benefits, ingredients, and application methods of hair growth oil, you can unlock the secrets to achieving the hair of your dreams. Whether you choose to use a commercial product or make your own, hair growth oil is a valuable addition to any hair care routine.

Read Also: Brazilian Keratin Oil.

Continue Reading

Beauty Tips

Brazilian Keratin Oil Hair Transformation

Published

on

brazilian keratin oil

Here is your complete guide to brazilian keratin oil.

Introduction to Brazilian Keratin Oil

If you’re on a quest for silky, smooth, and manageable hair, Brazilian keratin oil might just be the solution you’ve been searching for. This transformative hair treatment has gained immense popularity in recent years, and for good reason. Brazilian keratin oil is a versatile and effective solution that can address a wide range of hair concerns, from taming frizz to repairing damage and enhancing shine.

At its core, Brazilian keratin oil is a potent blend of natural ingredients that work in harmony to nourish and revitalize your locks. Derived from the nutrient-rich Amazon rainforest, this oil is packed with keratin, a protein that is essential for the health and strength of your hair. When applied to the hair, Brazilian keratin oil penetrates deep into the strands, helping to smooth the cuticle, reduce frizz, and impart a stunning, salon-worthy shine.

But their benefits don’t stop there. This versatile hair treatment can also:

  • Strengthen and repair damaged hair
  • Protect against heat styling and environmental stressors
  • Extend the life of color-treated hair
  • Improve manageability and ease of styling
  • Enhance overall hair health and vitality

Whether you have fine, thick, curly, or straight hair, keratin oil can be a game-changer in your hair care routine. In the following sections, we’ll dive deeper into the different types of keratin oil, explore how to use it effectively and uncover the numerous benefits it can offer for your unique hair type and needs.

Types of Brazilian Keratin Oil

When it comes to Brazilian keratin oil, there are several different formulations to choose from, each with its own unique features and benefits. Let’s take a closer look at the most popular options:

  1. Pure Brazilian Keratin Oil: This is the most concentrated form of the oil, offering a potent dose of keratin and other nourishing ingredients to transform your hair.
  2. Brazilian Keratin Oil Shampoo: Infused with the power of keratin oil, these specialized shampoos gently cleanse your hair while delivering the benefits of keratin deep into the strands.
  3. Brazilian Keratin Oil Conditioner: Designed to work in tandem with the keratin oil shampoo, these conditioners help to further smooth, strengthen, and hydrate your hair.
  4. Brazilian Keratin Oil Hair Mask: For an intensive hair treatment, keratin oil hair masks offer a concentrated dose of nourishment to deeply condition and revitalize your locks.

Regardless of which keratin oil product you choose, you can expect to see a noticeable difference in the health and appearance of your hair. Each formulation is carefully crafted to address specific hair concerns and deliver transformative results.

How to Use Brazilian Keratin Oil

Incorporating keratin oil into your hair care routine is a straightforward process, but there are a few key steps to ensure you get the best possible results. Here’s a step-by-step guide to using keratin oil effectively:

Cleanse Your Hair

Start by washing your hair with a keratin oil shampoo, which will gently remove any buildup or impurities while preparing your strands for the treatment.

Apply the Brazilian Keratin Oil

Depending on the length and thickness of your hair, dispense a small amount (usually a few drops) of keratin oil into the palm of your hand. Gently massage the oil into your hair, focusing on the mid-lengths and ends, where it’s needed most.

Distribute Evenly

Use your fingers to evenly distribute the keratin oil throughout your hair, ensuring that every strand is coated and nourished.

Allow Time to Absorb

Let the keratin oil sit on your hair for 5-10 minutes, allowing it to penetrate deep into the strands and work its magic.

Rinse and Style

Rinse the keratin oil out of your hair thoroughly, then style as usual. You may notice an immediate difference in the smoothness and manageability of your hair.

For best results, it’s recommended to use it 1-2 times per week, or as needed to maintain the desired level of frizz control and shine. Remember to adjust the amount of oil you use based on the length and thickness of your hair, and be mindful of any specific instructions or recommendations from the product manufacturer.

Benefits of Brazilian Keratin Oil

The transformative power of Brazilian keratin oil lies in its ability to address a wide range of hair concerns, from taming frizz to repairing damage and enhancing shine. Let’s explore the key benefits of incorporating this versatile hair treatment into your routine:

Smooths and Straightens Hair

The keratin in Brazilian keratin oil helps to smooth the hair cuticle, reducing frizz and flyaways and leaving your locks with a sleek, straight appearance.

Reduces Frizz

It creates a protective barrier around each hair strand, locking in moisture and preventing external factors, such as humidity, from causing frizz and unruly hair.

Adds Shine and Luster

The nourishing ingredients in keratin oil work to improve the overall health and appearance of your hair, imparting a beautiful, glossy shine.

Strengthens and Repairs Damaged Hair

Brazilian keratin oil is rich in proteins and other essential nutrients that help to mend split ends, strengthen weak strands, and revitalize damaged hair.

Protects Against Heat Styling

The protective properties of keratin oil help to shield your hair from the damaging effects of heat styling tools, such as blow dryers, straighteners, and curling irons.

Extends the Life of Hair Color

By sealing the hair cuticle and preventing color from fading, keratin oil can help to prolong the vibrancy and longevity of your hair color.

Suitable for All Hair Types

Whether you have fine, thick, curly, or straight hair, keratin oil can be tailored to your specific needs and hair type, delivering transformative results.

To better understand the impact on different hair types, let’s take a closer look at a comparison table:

Hair TypeEffectiveness of Brazilian Keratin Oil
Fine HairHelps to add weight and body, reducing flyaways and improving manageability.
Thick HairSmooths and tames coarse, unruly strands, leaving hair soft and manageable.
Curly HairHelps to reduce frizz and enhance curl definition, while adding shine and softness.
Straight HairHelps to maintain a sleek, straight appearance and prevent static and flyaways.
Damaged HairRepairs and strengthens strands, improving overall hair health and appearance.
Color-Treated HairHelps to extend the life of hair color by preventing fading and protecting the cuticle.

As you can see, it is a versatile and effective solution for a wide range of hair types and concerns, making it a valuable addition to any hair care routine.

Comparison vs Other Hair Treatments

When it comes to achieving smooth, frizz-free, and healthy-looking hair, keratin oil is not the only option available. Let’s take a closer look at how it stacks up against some other popular hair treatments:

TreatmentEffectivenessCostConvenience
Brazilian Keratin OilHighModerateEasy to use at home
Salon Keratin TreatmentHighHighRequires salon visit
Hair MasksModerateLowEasy to use at home
Hair OilsModerateLowEasy to use at home

As the table shows, keratin oil offers a high level of effectiveness in addressing a range of hair concerns, while being relatively affordable and easy to use at home. In comparison, salon keratin treatments can be more effective but come with a higher price tag and the need to visit a professional salon.

Cost and Brands

BrandPrice
Natural World$4.25 – $7.00
Fantasia IC$59.00
L’ANZA$38.00 – $81.50
FIT COSMETICS$7.00 – $12.00

FAQs About Brazilian Keratin Oil

As you explore the world of Brazilian keratin oil, you may have a few questions about its use and effectiveness. Here are some of the most commonly asked questions, along with their answers:

Is Brazilian Keratin Oil safe for color-treated hair?

Yes, keratin oil is generally safe for use on color-treated hair. In fact, it can help to extend the life of your hair color by protecting the cuticle and preventing fading.

How often should I use Brazilian Keratin Oil?

For best results, it’s recommended to use keratin oil 1-2 times per week, or as needed to maintain the desired level of frizz control and shine. Adjust the frequency based on your hair type and individual needs.

Can Brazilian Keratin Oil be used on wet or dry hair?

Brazilian keratin oil can be used on both wet and dry hair, depending on your preference and the specific product instructions. Some formulations may work better on damp hair, while others are designed for application on dry hair.

Read Also: Strawberry Milk Perfume.

How long does it take to see results from using Brazilian Keratin Oil?

The results from using keratin oil can be quite rapid, with many users reporting a noticeable difference in the smoothness, manageability, and shine of their hair after just one or two uses. However, for more long-lasting and transformative results, it’s recommended to use keratin oil consistently as part of your regular hair care routine.

Read Also: Perfume with Sandalwood and Jasmine.

Can Brazilian Keratin Oil be used on all hair types?

Yes, keratin oil is suitable for use on all hair types, from fine and straight to thick and curly. The versatility of this hair treatment allows it to be tailored to the specific needs and characteristics of your individual hair.

Read Also: Hair Protein Cream.

Conclusion

In the world of hair care, Brazilian keratin oil stands out as a true game-changer. This transformative hair treatment, derived from the nutrient-rich Amazon rainforest, offers a wealth of benefits that can dramatically improve the health, appearance, and manageability of your locks.

Read Also: Peaches and Cream Nails.

Whether you’re struggling with frizz, damage, or a lack of shine, Brazilian keratin oil has the power to address these concerns and leave your hair looking and feeling its absolute best. By smoothing the hair cuticle, reducing flyaways, and infusing your strands with essential proteins and nutrients, this versatile oil can help you achieve the silky, smooth, and manageable hair you’ve always desired.

Read Also: Supplements for Booty Growth.

But the benefits of keratin oil don’t stop there. This remarkable hair treatment can also protect your hair from the damaging effects of heat styling, extend the life of your hair color, and be tailored to suit a wide range of hair types, from fine and straight to thick and curly.

Read Also: Lymphatic Drainage Cream.

Continue Reading

Trending