Connect with us

MakeUp Tips

Bitten Lips Makeup: Unveiling the Allure of Subtle Lip Stains

Published

on

bitten lips makeup

Here is your complete guide to bitten lips makeup

Introduction to Bitten Lips Makeup

In the world of makeup, trends come and go, but there’s one timeless look that continues to captivate beauty enthusiasts – “bitten lips makeup.” This trend is all about achieving the effortless charm of slightly flushed lips, as though you’ve just enjoyed a delightful berry snack. In this comprehensive guide, we’ll delve deep into the art of bitten lips makeup, exploring its nuances, techniques, and the top 10 results from Google for added insights.

Understanding the Bitten Lips Makeup Look

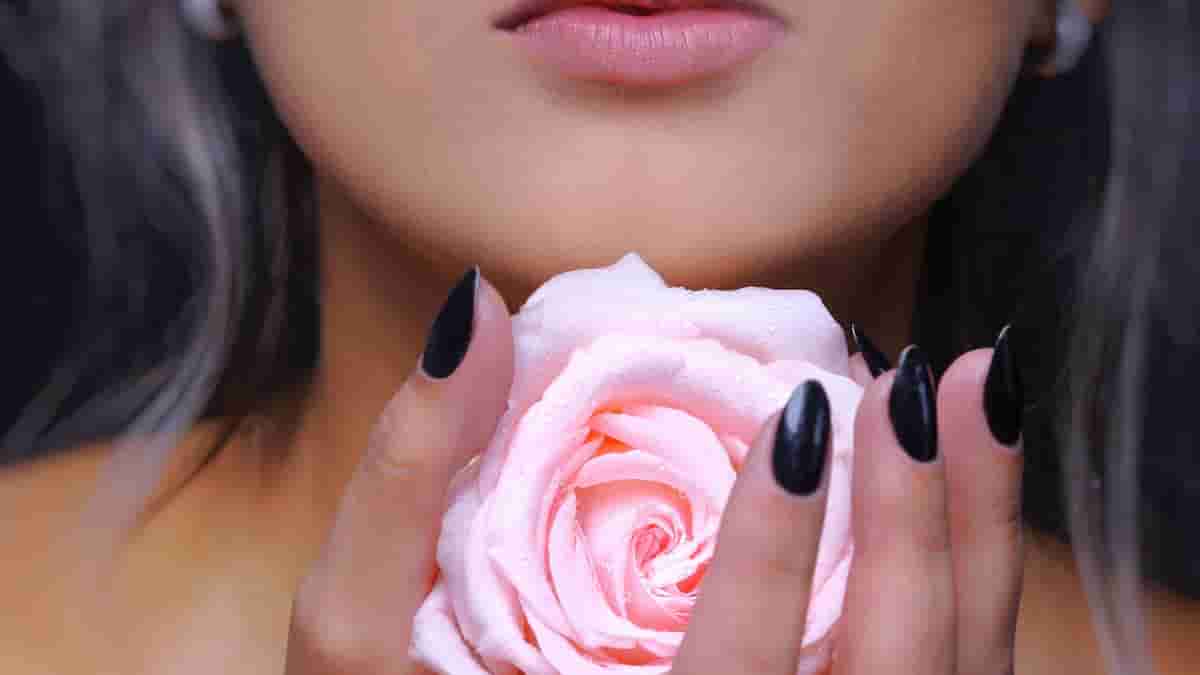
Bitten lips makeup is more than just a trend; it’s a technique that enhances your natural beauty. Imagine lips that appear kissed by a subtle flush, exuding an alluring effect. It’s a look that’s perfect for any occasion, from casual outings to glamorous events.

To master this art, let’s begin by breaking down the key components of bitten lips makeup:

1. Lip Prep

Before you embark on your journey to achieving the bitten lips look, it’s essential to prepare your canvas. Here’s what you need to do:

  • Exfoliate: Start by gently exfoliating your lips to remove any dead skin. You can use a homemade sugar scrub or opt for a lip exfoliant.
  • Moisturize: Apply a lip balm to keep your lips soft and hydrated. It creates a smooth base for the makeup to adhere to.

2. Choosing the Right Lip Products

The choice of lip products is crucial to nailing the bitten lips look. Consider these factors:

  • Lip Tints: These are a go-to choice for achieving the natural flush. Opt for shades that mimic your natural lip color.
  • Lip Stains: Stains offer long-lasting color and a barely-there feel. Look for ones with buildable intensity.
  • Lipsticks: Creamy lipsticks in muted tones can also work well, but they require careful application.

3. Application Techniques

Now, let’s get into the nitty-gritty of applying bitten lips makeup:

  • Layering: Begin with a thin layer of your chosen lip product. You can always build up the intensity gradually.
  • Blending: Use your fingertip or a lip brush to blend the product into your lips. Concentrate the color on the center for that “bitten” effect.
  • Feathering: To make it appear more natural, feather the edges slightly.

4. Adding a Touch of Blush

To enhance the overall look, consider adding a touch of blush:

  • Blush Shade: Choose a blush that complements your lip color. A soft, rosy hue usually works best.
  • Application: Apply a small amount to the apples of your cheeks and blend it gently towards your temples.

5. Setting the Look

To ensure your bitten lips makeup stays flawless:

  • Translucent Powder: A light dusting of translucent powder can set the makeup and prevent smudging.
  • Setting Spray: Alternatively, a setting spray can be used to lock in the look for hours.

Common Challenges and Solutions

While achieving the bitten lips look is relatively straightforward, you may encounter a few challenges along the way. Here’s how to overcome them:

  • Uneven Application: If you notice uneven color, simply blend it out with your fingertip.
  • Smudging: To prevent smudging, avoid touching your lips frequently, and use setting products.
  • Color Bleeding: Use a lip liner to prevent color bleeding outside your lip lines.

FAQs

How long does bitten lips makeup typically last?

The duration varies based on the products used but can last anywhere from 4 to 8 hours. Reapply as needed.

Can I achieve the bitten lips look with drugstore makeup?

Yes, drugstore lip tints and stains are excellent options. Quality matters more than price.

Is bitten lips makeup suitable for all skin tones?

Absolutely! It’s versatile and can be adapted for every skin tone.

Read Also: Lipstick Color with Orange Dress.

What lip care routine should I follow to maintain the look?

Regularly exfoliate and moisturize your lips, and remove makeup before bedtime.

Read Also: Gain Weight on Period.

How to do bitten lips makeup?

Bitten lips makeup involves creating the illusion of lips that have been lightly stained or “bitten.” To achieve this look, follow these steps:

  1. Lip Prep: Start with clean, moisturized lips. Exfoliate gently to remove any dead skin.
  2. Choose the Right Products: Opt for lip tints, stains, or lipsticks in natural or rosy shades.
  3. Application Techniques: Apply a thin layer of the chosen product to your lips, concentrating more on the center. Use your fingertip to blend for a natural effect.
  4. Blush: Add a touch of blush to your cheeks to complement the lip color.
  5. Set the Look: Use translucent powder or setting spray to ensure the makeup stays in place.

Read Also: Cocoa Mocha Cocoa Lipstick.

How do you heal a bitten lip fast?

Healing a bitten lip involves proper care to speed up the process. Here are some tips:

  1. Cleanse Gently: Rinse the bitten area with lukewarm water and mild soap. Avoid harsh scrubbing.
  2. Apply an Antiseptic: Apply an antiseptic ointment to prevent infection.
  3. Ice Pack: Apply a cold compress wrapped in a cloth to reduce swelling and numb the area.
  4. Keep it Moist: Apply a lip balm to keep the area moisturized, preventing further cracking.
  5. Avoid Irritants: Steer clear of spicy or acidic foods that can exacerbate the discomfort.
  6. Over-the-Counter Pain Relief: Consider over-the-counter pain relievers if the pain is severe.

If the injury is deep, or if you notice signs of infection, consult a medical professional.

Read Also: Pink Short Nails.

What is a bitten lip look?

A “bitten lip look” refers to a makeup style that emulates the appearance of lips that have been gently stained or kissed, creating a natural, flushed effect. This style gives the lips a just-bitten, slightly tinted appearance, enhancing their natural beauty without the boldness of traditional lipstick.

Read Also: Matrix Food for Soft Hair.

How long does a bitten lip take to heal?

The healing time for a bitten lip can vary depending on the severity of the injury. Generally, minor bites or cuts on the lip can take anywhere from a few days to a week to heal. However, deeper or more extensive injuries may take longer, potentially up to two weeks or more. Proper care, as mentioned earlier, can help expedite the healing process and reduce discomfort. If you have concerns about the healing progress, consult a healthcare professional.

Read Also: Lipstick Ring Trends.

Are there any variations of the bitten lips makeup style?

Yes, you can experiment with different shades and intensities to create unique variations.

Read Also: Pretty in Pink Lipstick Trends.

Tips for Customizing Your Bitten Lips Look

To make the bitten lips makeup your own:

  • Day vs. Night: Opt for lighter shades during the day and deeper hues for evenings.
  • Seasonal Changes: Adjust your lip color based on the season and occasion.
  • Lip Accessories: Experiment with lip gloss or shimmer for added dimension.

Read Also: Vampy Lipstick.

Celebrity Inspiration

Celebrities often lead the way in setting makeup trends. Here are a few famous faces known for their stunning bitten lips makeup looks:

  • Celebrity: Emma Watson
    • Occasion: Red carpet events
    • Signature Look: Subtle berry-hued lips paired with minimal eye makeup.
  • Celebrity: Zendaya
    • Occasion: Fashion editorials
    • Signature Look: Glossy bitten lips with a hint of shimmer.

Conclusion

In the pursuit of beauty trends that stand the test of time, bitten lips makeup remains a favorite for its simplicity and allure. This versatile style not only enhances your natural beauty but also allows for creative variations to suit different occasions and moods.

Read Also: Lipstick for Purple Dress.

As you embark on your bitten lips makeup journey, remember the essential steps: lip prep, choosing the right products, mastering application techniques, and adding a touch of blush. Setting the look ensures it lasts throughout the day or night.

Read Also: Blonde Hair Under Black Hair.

Continue Reading
Click to comment

Leave a Reply

Your email address will not be published. Required fields are marked *

MakeUp Tips

Out of Office Makeup: Perfecting Professional Eye Looks

Published

on

out of office makeup

Here is your complete guide to out of office makeup

Introduction to Out of Office Makeup

Are you tired of your everyday office makeup routine? Do you want to look professional and polished without spending hours in front of the mirror? Look no further than “out of office makeup” – a subtle and natural look that is perfect for the workplace. In this article, we will guide you through the steps to achieve the perfect out of office makeup look, including base makeup, eye makeup, lip makeup, and tips for different skin types. We will also provide answers to frequently asked questions about office makeup.

When it comes to office makeup, less is more. The goal is to look professional and polished without drawing too much attention to yourself. Out of office makeup is a subtle and natural look that is perfect for the workplace. It involves using minimal makeup to enhance your natural features and create a polished look. In this article, we will guide you through the steps to achieve the perfect out of office makeup look.

Base Makeup

The first step to achieving the perfect out of office makeup look is to create a flawless base. Here are the steps to follow:

  1. Moisturize: Start by applying a moisturizer to your face to hydrate your skin and create a smooth canvas for your makeup.
  2. CC Cream: Use a CC cream to even out your skin tone and provide light coverage. CC creams are perfect for out of office makeup because they are lightweight and provide a natural finish.
  3. Concealer: Use a concealer to cover any problem areas, such as dark circles or blemishes. Apply the concealer in dots all over the problem areas and blend by lightly dabbing with your finger. Always go for a concealer that is one shade lighter than your foundation.
  4. Setting Powder: Finish the base with a setting powder to keep your makeup in place all day. Use a translucent powder to set your base.

Eye Makeup

The eyes are the windows to the soul, and they are also the focal point of your face. Here are the steps to follow to create a natural and professional eye makeup look:

  1. Eyeshadow: Use a neutral eyeshadow palette to create a natural look. Apply a light shade all over your lid and a slightly darker shade in the crease.
  2. Eyeliner: Use a brown or black eyeliner to define your eyes. Apply the eyeliner close to your lash line and smudge it slightly for a natural look.
  3. Mascara: Finish the look with mascara to make your eyes pop. Use a black or brown mascara for a natural look.

Lip Makeup

Lipstick is the finishing touch to any makeup look. Here are the steps to follow to create the perfect lip makeup look:

  1. Lip Color: Choose a lip color that complements your skin tone and outfit. For a natural look, go for a nude or pink shade.
  2. Lip Balm: Apply a lip balm to keep your lips hydrated and prevent your lipstick from drying out.
  3. Lipstick as Blush: Use your lipstick as blush for a natural and cohesive look. Apply a small amount of lipstick to the apples of your cheeks and blend with your fingers.

Brows and Hair

Grooming your eyebrows and hair is just as important as your makeup. Here are the steps to follow:

  1. Eyebrow Grooming: Use an eyebrow pencil or powder to fill in your eyebrows and create a polished look.
  2. Hair Color and Accessories: Use hair color and accessories to complement your outfit and create a cohesive look.

Tips for Different Skin Types

Different skin types require different makeup techniques. Here are some tips for different skin types:

  1. Oily Skin: Control oil production with blotting papers and powder. Use a mattifying primer to keep your makeup in place all day.
  2. Dry Skin: Use hydrating products and avoid harsh makeup. Use a moisturizing primer to create a smooth canvas for your makeup.
  3. Combination Skin: Balance your skin type with a combination of products. Use a mattifying primer on your T-zone and a hydrating primer on the rest of your face.

Makeup for Special Occasions

Sometimes, you need to transition your office makeup for a night out or a special occasion. Here are some tips:

  1. Holiday Parties: Add some sparkle to your out of office makeup with a shimmery eyeshadow or lip gloss.
  2. Other Events: Use a bold lip color or a smoky eye to create a more dramatic look.

Out of Office Makeup Trends

In the ever-evolving landscape of beauty, certain trends stand out as ideal for the versatile professional look:

TrendDescription
Natural GlowEmphasizing radiant, natural-looking skin with minimal foundation
Subtle Smokey EyesSoft, blended eye makeup for a sophisticated yet understated appeal
Multi-Tasking ProductsMakeup items designed for multiple uses, saving time and space

These trends offer a perfect balance between a professional appearance and a touch of individuality.

Essential Makeup Products for the Out of Office Look

Achieving a flawless out-of-office look requires the right arsenal of products:

ProductFeaturesUsage
BB CreamLightweight coverage with skincare benefitsEven out skin tone, moisturize
Neutral PaletteVersatile shades for both day and night looksCreate various eye makeup styles
Lip StainLong-lasting color without frequent touch-upsAdd a pop of color to lips
Setting SprayLocks makeup in place for extended wearEnhance makeup longevity
Multipurpose StickFor cheeks, lips, and eyesStreamline makeup routine with multi-use product

Makeup Routine for the Busy Professional

For the modern professional, time is of the essence. Follow this quick routine for an efficient out-of-office look:

  • Prep: Cleanse, tone, and moisturize for a smooth base.
  • Base: Apply BB cream for light coverage and a natural finish.
  • Eyes: Use neutral shades from the palette for a subtle yet defined eye look.
  • Cheeks and Lips: Use the multipurpose stick for a coordinated finish.
  • Set: Lock the look with setting spray for long-lasting wear.

Transitioning from Office to Evening Look

Transitioning from the office desk to an evening outing is a breeze with minor adjustments:

Day LookNight Look
Natural makeup with neutral tonesIntensify eye makeup with darker shades
Subtle lip colorBold lipstick for a statement
Light blushBuild up blush for a more dramatic look

Makeup Dos and Don’ts for Office Settings

In an office environment, maintaining professionalism with makeup is crucial:

Dos:

  • Opt for natural-looking makeup.
  • Ensure a well-groomed appearance.
  • Use makeup to enhance, not overpower your features.

Don’ts:

  • Avoid heavy makeup that appears distracting.
  • Steer clear of strong fragrances in makeup products.
  • Skip overly vibrant or neon-colored makeup.

Out of Office Makeup for Different Skin Types

Different skin types require tailored approaches to makeup:

Skin TypeRecommended Products
Dry SkinHydrating foundation, cream blush
Oily SkinOil-free foundation, mattifying primer
CombinationDual-finish foundation, powder blush
Sensitive SkinHypoallergenic foundation, mineral makeup

Step-by-Step Guide to Out of Office Makeup

1. Prep Your Skin

Before diving into makeup application, ensure your skin is clean and moisturized:

ProductPurpose
CleanserRemove dirt and impurities from the skin
TonerBalance skin pH and prep for products
MoisturizerHydrate and create a smooth canvas

2. Apply a Light Base

Achieve a natural yet polished look with a lightweight base:

ProductFeaturesUsage
BB CreamLightweight coverage with skincare benefitsApply evenly for a natural finish
Tinted MoisturizerSheer coverage with added hydrationBlend well for a fresh, dewy look

3. Enhance Your Eyes

Subtly define your eyes for a professional appearance:

ProductFeaturesUsage
Neutral Eyeshadow PaletteVersatile shades for day-to-night looksApply neutral shades for a soft, defined look
MascaraLengthen and volumize lashesApply to upper and lower lashes

4. Add Color to Cheeks and Lips

Bring life to your face with coordinated blush and lip color:

ProductFeaturesUsage
Multipurpose StickMulti-use for cheeks, lips, and eyesDab onto cheeks and lips for a coordinated look
Cream BlushBlendable and natural-lookingApply sparingly for a subtle flush

5. Set Your Makeup

Lock in your makeup for extended wear:

ProductFeaturesUsage
Setting SprayIncreases makeup longevitySpray lightly over the face for a lasting finish

Out-of-Office Makeup Brands and Prices

BrandProductsPrice Range (USD)
Fenty BeautyFoundation, Lipsticks$20 – $40
GlossierBrow Gels, Highlighters$12 – $30
MAC CosmeticsLipsticks, Eyeshadow Palettes$15 – $60
NARSBlushes, Concealers$25 – $50
Bobbi BrownBronzers, Mascara$25 – $45
Too FacedEyeliners, Setting Sprays$15 – $40
Urban DecayEyeshadows, Setting Powders$18 – $55
TarteBlushes, Lip Glosses$20 – $45
MaybellineBB Creams, Mascaras$6 – $15
L’Oréal ParisFoundations, Eyeliners$8 – $20

Read Also: Eyebrows Redhead.

FAQs – People Also Ask Section

Can I use the same makeup for the office and evening events?

Yes, by adjusting certain elements like eye makeup intensity and lipstick shades, you can seamlessly transition your look.

Read Also: Shooting Star Makeup.

How can I make my makeup last longer throughout the day?

Using a primer, setting spray, and long-wear products can significantly increase makeup longevity.

Read Also: Is Shea Butter Vegan.

What makeup products should I avoid for an office setting?

Avoid products with excessive glitter or shimmer, as well as overly bright colors.

Read Also: All Natural Room Spray.

Is it necessary to follow a specific order when applying makeup?

Yes, starting with skincare, followed by base, eyes, cheeks, and lips ensures a more polished finish.

Read Also: Black Dress with Black Gloves.

Can I wear bold lipstick colors to the office?

Opt for muted or toned-down versions of bold colors to maintain a professional appearance.

Read Also: Candy Made with Stevia.

Conclusion

Out of office makeup is the perfect way to look professional and polished without spending hours in front of the mirror. Follow these tips and tricks to achieve the perfect out of office makeup look. Remember, less is more when it comes to office makeup. Use minimal makeup to enhance your natural features and create a subtle look.

Read Also: Mascara Wands.

Continue Reading

MakeUp Tips

Mascara Wands: Mastering Eye Charm with Essential Tools!

Published

on

mascara wands

Here is your complete guide to mascara wands

Introduction to Mascara Wands

When it comes to achieving luscious, fluttery lashes, the type of mascara wand you use can make all the difference. From defining and lengthening to volumizing and curling, there are a plethora of mascara wands available, each designed to cater to specific lash needs. In this comprehensive guide, we will explore everything you need to know about mascara wands, including the different types, how to choose the right one for your lashes, maintenance tips, and more.

Different Types of Mascara Wands

Mascara wands come in various shapes and sizes, each serving a unique purpose. Understanding the different types can help you achieve your desired lash look. Here are some common mascara wand types:

  • Straight Wands: Ideal for adding length and definition to the lashes1.
  • Curved Wands: Perfect for lifting and curling the lashes1.
  • Tapered Wands: Great for reaching the inner and outer corner lashes1.
  • Ball Wands: Designed to add volume and separation to the lashes1.
  • Hourglass Wands: Suitable for volumizing and coating each lash evenly1.
  • Comb Wands: Perfect for separating and defining the lashes, especially for those with sparse lashes1.
  • Customizable Wands: Wands that allow you to adjust the bristle length and shape for a customized application.

To better understand the different mascara wand types, refer to the table below:

Mascara Wand TypeDescription
Straight WandsIdeal for lengthening and defining the lashes
Curved WandsDesigned to lift and curl the lashes
Tapered WandsGreat for reaching corner lashes
Ball WandsAdds volume and separation to the lashes
Hourglass WandsSuitable for volumizing and coating each lash evenly
Comb WandsPerfect for separating and defining sparse lashes
Customizable WandsAllows for a customized application by adjusting the bristle length and shape

Evolution of Mascara Wands

The history of mascara wands is a testament to beauty innovation. They’ve evolved from simple brushes to sophisticated, purpose-driven tools. Technological advancements have introduced materials that enhance not only application but also the overall lash health.

Mascara Wand Materials and Their Effects

MaterialEffect on Application
SiliconeOffers precise application
NylonAdds volume to lashes
FiberLengthens lashes

Understanding these materials empowers makeup enthusiasts to choose wands tailored to their desired lash effects.

Impact of Wand Design on Application

Different wand shapes cater to various needs:

  • Curved Wands: Perfect for lifting and curling lashes.
  • Ball-shaped Wands: Ideal for reaching smaller lashes and lower lash lines.
  • Comb Wands: Separate and define lashes with precision.

Best Practices for Using Mascara Wands

  • Preparation Tips: Always curl lashes before applying mascara for an extra lift.
  • Application Techniques: Zigzag the wand from roots to tips for even distribution.

Maintenance and Cleaning of Mascara Wands

Regular cleaning isn’t just hygienic—it’s vital for the wand’s longevity and ensures clump-free application. Follow these steps:

  1. Gently wipe excess product with a tissue.
  2. Dip the wand in makeup remover to dissolve remaining mascara.
  3. Rinse with warm water and mild soap.
  4. Air dry the wand thoroughly before use.

How to Choose the Right Mascara Wand

Choosing the right mascara wand is crucial for achieving your desired lash look. Here are some factors to consider when selecting a mascara wand:

  • Eye Shape: Consider your eye shape when choosing a mascara wand. For example, if you have hooded eyes, a curved wand can help lift and open up your eyes.
  • Lash Type: Different mascara wands cater to various lash types. If you have short lashes, a small wand can help coat each lash, while those with long lashes may benefit from a larger wand.
  • Desired Look: The look you want to achieve, whether it’s length, volume, or curl, can determine the type of mascara wand you should choose.
  • Mascara Formula: The formula of the mascara you use can also influence the type of wand you need. For example, a volumizing mascara may pair well with a ball wand, while a lengthening mascara may work best with a straight wand.
  • Wand Size and Material: The size and material of the mascara wand can also impact the application. A smaller wand can provide more precision, while a larger wand can offer more volume. Additionally, silicone wands are ideal for separating lashes, while fiber wands are great for adding volume.

To further illustrate how to choose the right mascara wand, refer to the table below:

FactorConsiderationRecommended Wand Type
Eye ShapeHooded eyes – Curved wandCurved wand
Lash TypeShort lashes – Small wandSmall wand
Desired LookVolume – Ball wandBall wand
Mascara FormulaVolumizing mascara – Ball wandBall wand
Wand SizePrecision – Small wandSmall wand
Wand MaterialSeparation – Silicone wand, Volume – Fiber wandSilicone wand, Fiber wand

Applying Mascara with Mascara Wands: A Step-by-Step Guide

Preparing Your Lashes

  1. Cleanse and Prime
    • Remove any old mascara using makeup remover.
    • Optionally, use an eyelash primer for added volume and length.

Choosing the Right Mascara Wand

  1. Understanding Wand TypesWand TypeEffect on LashesCurvedLifts and curls lashes.CombDefines and separates lashes.Ball-shapedAdds volume and reaches smaller lashes easily.
  2. Selecting Based on Desired Effect
    • Choose a wand that aligns with your desired lash look (volume, length, definition).

Application Techniques

  1. Basic Application StepsStepsDescriptionStart at the BasePlace wand at the base of lashes and wiggle it to coat evenly.Wiggle and SweepWiggle wand while sweeping upward for even distribution.Focus on TipsApply extra product on the tips for added length and definition.Repeat for VolumeLayer mascara for additional volume (if desired).
  2. Tips for PrecisionTipsDescriptionUse the Wand’s CurveUtilize the wand’s shape to reach corner and lower lashes.Control Product ApplicationRemove excess mascara from the wand for precise coating.Avoid ClumpingUse a lash comb to separate lashes if clumping occurs.

Finishing Touches

  1. Clean-Up
    • Use a cotton swab dipped in makeup remover for any smudges or mistakes.
  2. Setting the Look
    • Optional: Apply a clear mascara or lash sealer for a longer-lasting finish.

Maintenance

  1. Proper Storage
    • Close mascara tightly after use to prevent drying out.
  2. Replacing Mascara
    • Replace mascara every 3-6 months for hygiene and optimal performance.

Best Brands of Mascara Wands

BrandDistinctive FeaturesPrice Range
MaybellineCurved wand for voluminous and lengthened lashes.$5 – $10
L’OréalHourglass-shaped wand for precise application and separation.$8 – $12
CoverGirlComb wand design for lash definition and separation.$6 – $9
Benefit CosmeticsBall-shaped wand for reaching smaller lashes and adding volume.$12 – $20
Too FacedSilicone wand with varied bristle lengths for a customized lash look.$15 – $25

Tips from Experts and Makeup Artists

Expert TipMakeup Artist Recommendation
Experiment with various wand types for best fit.“Different wands offer unique effects; explore them.”
Master application techniques for optimal results.“Technique matters as much as the wand itself.”
Invest time in understanding your lash needs.“Know your lashes to choose the right wand.”
Replace mascara wands regularly for hygiene.“Hygiene is crucial; don’t overlook wand replacement.”

Mascara Wand FAQs

What is the best mascara wand for short lashes?

The best mascara wand for short lashes is a small wand that can coat each lash effectively.

Read Also: RealHer Metallic Bronze Eyeliner.

What is the best mascara wand for long lashes?

For long lashes, a larger wand can help add volume and definition to the lashes.

Read Also: Eyebrows Redhead.

What is the best mascara wand for volume?

A ball wand is ideal for adding volume to the lashes, as it can coat each lash with the volumizing mascara formula.

Read Also: Shooting Star Makeup.

What is the best mascara wand for curling?

A curved wand is perfect for curling the lashes and lifting them for a wide-eyed look.

Read Also: Is Shea Butter Vegan.

What is the best mascara wand for separating lashes?

A comb wand is great for separating and defining sparse lashes, as it can comb through each lash for a clump-free look.

Read Also: All Natural Room Spray.

Can I use different mascara wands for different effects?

Yes, you can use different mascara wands to achieve various lash looks. For example, you can use a ball wand for volume and a curved wand for curling.

Read Also: Candy Made with Stevia.

Conclusion

In conclusion, the right mascara wand can elevate your lash game and help you achieve the perfect fluttery lashes. By understanding the different types of mascara wands and how to choose the right one for your lashes, you can enhance your overall makeup look. Whether you’re aiming for length, volume, or curl, there’s a mascara wand out there to cater to your specific needs. Experiment with different mascara wands to find the perfect match for your lashes and elevate your beauty routine.

Read Also: Black Dress with Black Gloves.

Continue Reading

MakeUp Tips

Shooting Star Makeup: Your Guide to Celestial Glamour

Published

on

shooting star makeup

Here is your complete guide to shooting star makeup

Introduction to Shooting Star Makeup

Shooting star makeup has taken the beauty world by storm, offering a mesmerizing way to add celestial charm to your look. From subtle shimmer to bold galactic designs, this trend allows makeup enthusiasts to explore their creativity while embracing the cosmic allure. Let’s dive into the enchanting realm of shooting star makeup and discover how to achieve stellar looks effortlessly.

The allure of shooting star makeup has taken the beauty world by storm, offering a mesmerizing way to express creativity and individuality. This article aims to explore the enchanting world of shooting star makeup, from its inception to practical application, providing a detailed guide for both beginners and seasoned makeup artists.

History of Shooting Star Makeup

The origins of shooting star makeup can be traced back to the fascination with celestial elements and the desire to embody the mystique of the cosmos. This section will delve into the evolution of this trend, highlighting its journey from a niche concept to a mainstream sensation.

How to Create Shooting Star Makeup

  • Preparing Your Canvas: Before diving into the cosmic realm, ensure your skin is prepped and primed. Cleanse, moisturize, and apply a suitable primer to create a smooth base.
  • Choosing the Right Products: Highlighters, glitters, and eyeshadows are the stars of this makeup trend. Opt for highly pigmented and iridescent products to achieve the celestial glow.
  • Step-by-Step Guide to Application Techniques:
    • Apply a base eyeshadow and blend it outwards to create a subtle background.
    • Use a precise brush to apply the highlighter in a shooting star pattern, emphasizing the high points of your face.
    • Layer glitter in a gradient manner to emulate the twinkling effect of stars.
  • Tools and Brushes Required: Precision brushes and makeup sponges are essential for achieving the intricate details of shooting star makeup.

Inspiring Shooting Star Makeup Looks

The versatility of shooting star makeup allows for a spectrum of awe-inspiring looks:

  • Celestial-Inspired Looks: Embrace the ethereal beauty of the cosmos with soft, pastel hues resembling nebulae and galaxies.
  • Galaxy and Nebula Effects: Create bold, vibrant looks using deep blues, purples, and blacks, mimicking the vastness of space.
  • Day-to-Day Wearable Styles: Subtle shimmer and delicate starry accents make for versatile looks suitable for daily wear.

Best Products for Shooting Star Makeup

Selecting the right products is crucial for achieving an impeccable shooting star look. A detailed review of recommended makeup products, accompanied by a table featuring product names, brands, and unique features, will be provided to assist readers in making informed choices.

Recommended Makeup Products for Shooting Star Makeup

Product NameBrandUnique Features
Celestial EyeshadowStellar Cos.Shimmering pigments for a starry effect
Galaxy HighlighterNebula BeautyMulti-dimensional glow for celestial radiance

Long-Lasting Products Comparison

ProductFeaturesLongevity
Setting SprayLocks in makeupAll-day wear
Touch-Up KitPortable, mini productsQuick touch-ups

Comparison of Shooting Star Makeup Brands

BrandProduct NameDescriptionCostStar Status
Surreal MakeupShooting Star EyeshadowMulticolored iridescence, reflects light like crushed diamonds, perfect for superior sparkle.$15.99★★★★☆
Rare BeautyShooting Star HighlighterCreates a celestial glow, long-lasting, suitable for all skin tones.$24.00★★★★★
Fenty BeautyStarlit Hyper-Glitz LipstickIntense shimmer, long-wearing, available in various celestial shades.$19.00★★★★★
Huda BeautyMercury Retrograde Eyeshadow PaletteVersatile palette with celestial shades, highly pigmented, and blendable.$67.00★★★★☆
ColourPopShooting Star Glitter GelUltra-reflective glitter gel, easy to apply, suitable for face and body.$10.00★★★★☆

The star status is based on customer reviews and popularity. The costs are approximate and may vary based on the retailer. These brands offer a range of shooting makeup products, each with its unique features and appeal, catering to diverse preferences and styles.

Tips for Long-Lasting Shooting Star Makeup

  • Setting Techniques: Lock in your cosmic masterpiece with a setting spray to ensure it lasts throughout the day or night.
  • Touch-Up Suggestions: Carry a small touch-up kit including a mini highlighter and glitter for quick touch-ups.
  • Removal and Skincare After Wearing: Gently remove makeup using a makeup remover suitable for glitter, followed by a hydrating skincare routine.

Step-by-Step Application Guide

StepTechnique
1. Prepare CanvasCleanse, moisturize, and apply primer
2. Base EyeshadowApply a neutral base eyeshadow and blend
3. Shooting StarUse a precise brush for star-shaped highlighter strokes
4. Layer GlitterApply glitter in a gradient for a twinkling effect

Read Also: How to Cover Tyndall Effect with Makeup.

Shooting Star Makeup for Different Occasions

Adapting shooting makeup for various occasions adds versatility to this trend. Readers will discover tailored makeup ideas for parties, festivals, and photo shoots, along with suitable color palettes and styles to complement different events.

Read Also: How Long Does Grease Makeup Take to Dry.

DIY Shooting Star Makeup Kits

Creating your DIY kit is a fun and budget-friendly way to explore this trend. Components may include:

  • A versatile highlighter palette with iridescent shades
  • Glitter eyeshadows in various celestial tones
  • Precision brushes and makeup sponges for detailed application

Read Also: Camping Hairstyles for Curly Hair.

FAQs Section

Based on “People Also Ask”

How to achieve a shooting star makeup look?

Follow our step-by-step guide using high-quality highlighters and glitters for a celestial glow.

Read Also: Maybelline Free Sample.

Are there variations of shooting star makeup for different skin tones?

Absolutely! It is versatile and can be adapted to complement various skin tones.

Read Also: RealHer Metallic Bronze Eyeliner.

What tools are essential for creating shooting star makeup?

Precision brushes and makeup sponges are vital for achieving intricate details.

Read Also: Candy Made with Stevia.

Conclusion

In conclusion, shooting star makeup offers a celestial canvas for artistic expression, allowing individuals to embody the enchanting allure of the cosmos through makeup artistry. Embracing this trend opens up a world of creativity and self-expression, inviting everyone to explore the celestial realm through the transformative power of makeup.

Read Also: Eyebrows Redhead.

Continue Reading

Trending