MakeUp Tips
Steps of How to Apply Makeup: A Comprehensive Guide

Here is your complete guide to steps of how to apply makeup
Introduction to Steps of How to Apply Makeup
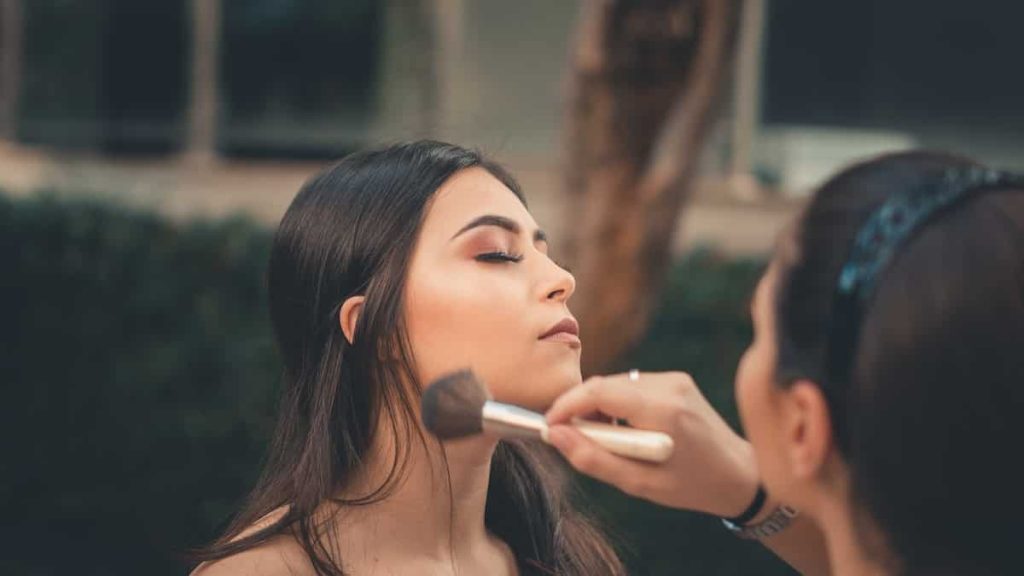
Makeup application can be a creative and empowering process, allowing you to enhance your natural beauty and express your unique style. Whether you’re a makeup novice or looking to refine your skills, this step-by-step guide will walk you through the essential steps of how to apply makeup like a pro. From preparing your face to adding those final touches, we’ve got you covered. Let’s dive in and unlock the secrets to a flawless makeup application. So what do you need to know about the steps of how to apply makeup? Here is your complete guide to steps of how to apply makeup. So let’s explore the steps of how to apply makeup. So what are the steps of how to apply makeup?
Introduction to Steps of How to Apply Makeup
Welcome to the world of makeup! This guide will provide you with the knowledge and techniques you need to achieve a stunning makeup look. Follow these steps and unleash your inner artist. So, let’s get started!
Preparing Your Face
Before diving into the exciting world of makeup, it’s crucial to prepare your face properly. This ensures a smooth and long-lasting application. Follow these steps:
- Cleanse Your Face: Begin by cleansing your face with a gentle facial cleanser, removing any dirt, oil, or impurities. This step ensures a clean canvas for your makeup application. Look for a cleanser that suits your skin type and massage it in a circular motion. Rinse thoroughly and pat dry.
- Apply Moisturizer: Hydrated skin is the key to flawless makeup. Choose a moisturizer that matches your skin type and apply it evenly all over your face. This step helps create a smooth base for your foundation.
- Primer Application: Apply a makeup primer to further enhance the longevity of your makeup. Primers fill in fine lines, pores, and wrinkles, creating a smooth surface. Take a small amount and apply it all over your face, focusing on areas prone to oiliness or large pores.
Creating a Flawless Base
A flawless base sets the stage for the rest of your makeup. Follow these steps to achieve a natural and even complexion:
- Foundation Selection: Choosing the right foundation is crucial for achieving a seamless finish. Consider your skin type, undertone, and desired coverage. Test a few shades on your jawline and select the one that blends seamlessly with your neck. Remember, matching your foundation to your skin tone is essential for a natural look.
- Applying Foundation: Start by applying small dots of foundation on your forehead, cheeks, nose, and chin. Use a beauty sponge or foundation brush to blend the product into your skin. Work in gentle, circular motions to ensure even coverage. Pay extra attention to areas that need more coverage, such as blemishes or redness.
- Concealer Usage: Concealers are your best friends when it comes to hiding imperfections. Choose a shade that matches your skin tone or go for a slightly lighter shade for highlighting. Apply it under your eyes to cover dark circles, on blemishes, and any other areas of discoloration. Gently blend it using a small brush or your fingertips.

Enhancing Your Features
Now that your base is flawless, it’s time to enhance your features and add some color to your face. Follow these steps for captivating eyes, defined brows, and a radiant complexion:
- Eyebrow Shaping and Filling: Well-groomed eyebrows frame your face and give it a polished look. Start by brushing your eyebrows upward with a spoolie brush. Use an eyebrow pencil or powder to fill in any sparse areas. Make short, feathery strokes to mimic the appearance of natural hair. Set your eyebrows in place with a clear or tinted brow gel.
- Eyeshadow Application: Apply a neutral shade all over your eyelid as a base. Then, choose a slightly darker shade for your crease and blend it using a fluffy blending brush. Add depth by applying a darker shade on the outer corner of your eye. Finally, highlight the inner corners and brow bone with a shimmery shade. Blend well for a seamless transition between colors.
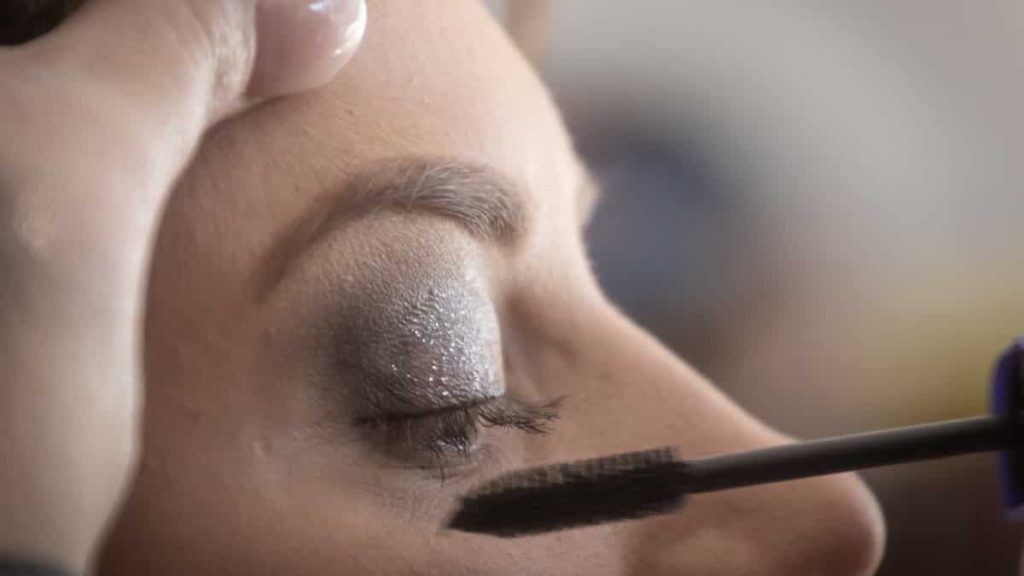
- Eyeliner and Mascara: Eyeliner adds definition and enhances the shape of your eyes. Use a pencil, liquid, or gel eyeliner to create your desired look. Apply it close to the lash line, starting from the inner corner and extending outward. Finish with a coat or two of mascara to add volume and length to your lashes.
- Blush and Bronzer: Bring a healthy glow to your cheeks by applying blush and bronzer. Smile to locate the apples of your cheeks and apply blush in a circular motion. Choose a shade that complements your skin tone. Apply bronzer on the hollows of your cheeks, temples, and jawline for a natural, sun-kissed look.
- Lipstick or Lip Gloss: Choose a lip color that suits your mood and outfit. Outline your lips with a lip liner to define their shape and prevent feathering. Fill in your lips with lipstick or apply lip gloss for a shiny finish. Blot with a tissue and reapply for longer-lasting color.
Read More About Are Brazil Nuts Good for You?
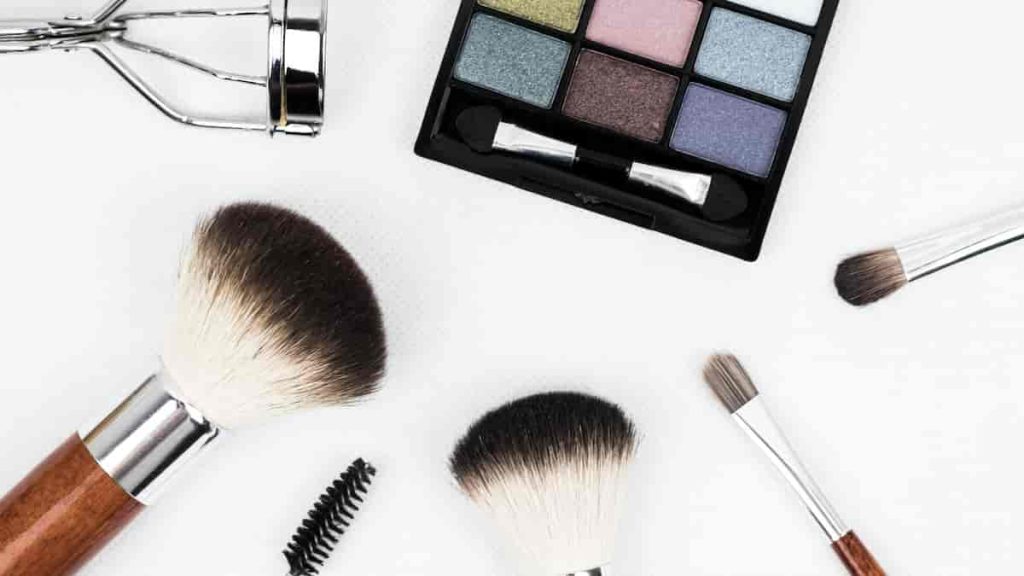
Makeup Brushes and Their Uses
Brush Name | Purpose |
---|---|
Foundation brush | Applying and blending liquid foundation |
Eyeshadow brush | Applying and blending eyeshadow |
Blending brush | Blending and softening harsh lines |
Contour brush | Creating shadows and defining facial features |
Powder brush | Applying loose or pressed powder |

Final Touches and Setting
To ensure your makeup stays in place all day long, follow these final steps:
- Setting Powder or Spray: Set your makeup by applying a light dusting of setting powder or using a setting spray. This step helps to control shine and prolongs the wear of your makeup. Choose a powder that matches your skin tone and use a fluffy brush to apply it gently over your face. Alternatively, mist a setting spray all over your face for a refreshing and long-lasting hold.
- Highlighting and Contouring: Accentuate your best features by highlighting and contouring. Apply a highlighter on the high points of your face, such as the cheekbones, bridge of the nose, and cupid’s bow. Use a contouring powder or cream to create shadows and add definition to areas like the hollows of your cheeks, temples, and jawline. Blend well for a seamless finish.
Read More About The Powerful Benefits of Turmeric with Milk.
Common Makeup Mistakes to Avoid
Mistake | Description |
---|---|
Applying too much foundation, resulting in a cakey appearance. | Over-applying foundation can create a heavy and unnatural look, emphasizing texture and lines on the skin. |
Neglecting to blend your makeup properly, leaving visible lines. | Failure to blend your makeup properly can result in harsh lines and uneven application, detracting from a seamless and natural finish. |
Overdrawing your eyebrows, resulting in an unnatural look. | When eyebrows are drawn on with excessive thickness or length, they can appear fake and unnatural, disrupting the overall harmony of your facial features. |
Applying too much blush, making your cheeks look overly flushed. | Excessive application of blush can lead to an exaggerated, overly flushed appearance, undermining the desired natural and healthy glow. |
Using the wrong shade of lipstick that doesn’t flatter your complexion. | Choosing a lipstick shade that clashes with your skin tone can wash you out or make your complexion appear dull, detracting from your overall makeup look. |

Essential Makeup Products for Beginners
Product | Description |
---|---|
Foundation or BB cream | Provides coverage and evens out skin tone for a flawless complexion. |
Concealer | Helps hide blemishes, dark circles, and other imperfections. |
Eyeshadow palette with neutral shades | Offers a versatile range of neutral colors for everyday eye makeup looks. |
Mascara | Enhances and adds volume to lashes, making eyes appear more defined and awake. |
Blush | Adds a touch of color to the cheeks for a healthy and youthful appearance. |
Lipstick or lip gloss | Adds color and shine to the lips, completing the overall makeup look. |
Makeup brushes (foundation brush, eyeshadow brush, blending brush) | Essential tools for precise and seamless application of makeup products. |
Makeup remover or cleansing oil | Effectively removes makeup and impurities from the skin, allowing it to breathe. |
Moisturizer | Hydrates the skin and creates a smooth base for makeup application. |
Setting powder or spray | Sets makeup in place, controls shine, and prolongs its wear throughout the day. |
Removal and Skincare
At the end of the day, it’s crucial to remove your makeup and take care of your skin. Follow these steps:
- Makeup Removal: Use a gentle makeup remover or cleansing oil to remove your makeup thoroughly. Apply the remover to a cotton pad and gently wipe away the makeup, starting from your eyes and moving to the rest of your face. Rinse with water and pat dry.
- Skincare Routine: Follow up with a skincare routine suited to your skin type. Cleanse your face with a gentle cleanser, apply toner to restore the skin’s pH balance, and moisturize to keep your skin hydrated. Remember to apply an eye cream and sunscreen for added protection.
FAQs
How to apply makeup step by step?
Applying makeup step by step involves several key stages. Start by preparing your face with cleansing, moisturizing, and applying primer. Then, create a flawless base with foundation, concealer, and setting powder. Enhance your features with eyeshadow, eyeliner, mascara, blush, and lipstick. Finish by setting your makeup and adding final touches.
What do I need for a full face of makeup?
For a full face of makeup, you’ll need several essential products. These include foundation or BB cream, concealer, eyeshadow palette, mascara, blush, lipstick or lip gloss. Additionally, you’ll require makeup brushes such as a foundation brush, eyeshadow brush, and blending brush. Don’t forget makeup remover or cleansing oil, moisturizer, and setting powder or spray.
Do you set your makeup before or after foundation?
To achieve a long-lasting makeup application, it’s recommended to set your makeup after applying foundation. Once you have applied your foundation, concealer, and other complexion products, lightly dust setting powder over your face to lock everything in place. This helps control shine and extends the wear of your makeup.
How to do makeup step by step without foundation?
If you prefer to skip foundation in your makeup routine, you can still achieve a beautiful look. Start with a cleansed and moisturized face. Apply concealer to areas that need extra coverage, such as under-eye circles or blemishes. Use a tinted moisturizer or BB cream for a lightweight, sheer coverage. Then proceed with the rest of your makeup routine, focusing on enhancing your eyes, cheeks, and lips.
Conclusion
Congratulations! You’ve now mastered the steps of how to apply makeup like a pro. With practice, you’ll become more confident in creating a variety of looks to suit any occasion. Remember to experiment, have fun, and embrace your unique style. Now go out there and rock your flawless makeup!
Read More About Home Remedies for Fungal Rashes.
So, are you ready to elevate your makeup skills? Explore our table on the different types of makeup brushes and their uses, common makeup mistakes to avoid, and a list of essential makeup products for beginners.
MakeUp Tips
Mascara Wands: Mastering Eye Charm with Essential Tools!

Here is your complete guide to mascara wands
Introduction to Mascara Wands
When it comes to achieving luscious, fluttery lashes, the type of mascara wand you use can make all the difference. From defining and lengthening to volumizing and curling, there are a plethora of mascara wands available, each designed to cater to specific lash needs. In this comprehensive guide, we will explore everything you need to know about mascara wands, including the different types, how to choose the right one for your lashes, maintenance tips, and more.
Different Types of Mascara Wands
Mascara wands come in various shapes and sizes, each serving a unique purpose. Understanding the different types can help you achieve your desired lash look. Here are some common mascara wand types:
- Straight Wands: Ideal for adding length and definition to the lashes1.
- Curved Wands: Perfect for lifting and curling the lashes1.
- Tapered Wands: Great for reaching the inner and outer corner lashes1.
- Ball Wands: Designed to add volume and separation to the lashes1.
- Hourglass Wands: Suitable for volumizing and coating each lash evenly1.
- Comb Wands: Perfect for separating and defining the lashes, especially for those with sparse lashes1.
- Customizable Wands: Wands that allow you to adjust the bristle length and shape for a customized application.
To better understand the different mascara wand types, refer to the table below:
Mascara Wand Type | Description |
---|---|
Straight Wands | Ideal for lengthening and defining the lashes |
Curved Wands | Designed to lift and curl the lashes |
Tapered Wands | Great for reaching corner lashes |
Ball Wands | Adds volume and separation to the lashes |
Hourglass Wands | Suitable for volumizing and coating each lash evenly |
Comb Wands | Perfect for separating and defining sparse lashes |
Customizable Wands | Allows for a customized application by adjusting the bristle length and shape |
Evolution of Mascara Wands
The history of mascara wands is a testament to beauty innovation. They’ve evolved from simple brushes to sophisticated, purpose-driven tools. Technological advancements have introduced materials that enhance not only application but also the overall lash health.
Mascara Wand Materials and Their Effects
Material | Effect on Application |
---|---|
Silicone | Offers precise application |
Nylon | Adds volume to lashes |
Fiber | Lengthens lashes |
Understanding these materials empowers makeup enthusiasts to choose wands tailored to their desired lash effects.
Impact of Wand Design on Application
Different wand shapes cater to various needs:
- Curved Wands: Perfect for lifting and curling lashes.
- Ball-shaped Wands: Ideal for reaching smaller lashes and lower lash lines.
- Comb Wands: Separate and define lashes with precision.
Best Practices for Using Mascara Wands
- Preparation Tips: Always curl lashes before applying mascara for an extra lift.
- Application Techniques: Zigzag the wand from roots to tips for even distribution.
Maintenance and Cleaning of Mascara Wands
Regular cleaning isn’t just hygienic—it’s vital for the wand’s longevity and ensures clump-free application. Follow these steps:
- Gently wipe excess product with a tissue.
- Dip the wand in makeup remover to dissolve remaining mascara.
- Rinse with warm water and mild soap.
- Air dry the wand thoroughly before use.
How to Choose the Right Mascara Wand
Choosing the right mascara wand is crucial for achieving your desired lash look. Here are some factors to consider when selecting a mascara wand:
- Eye Shape: Consider your eye shape when choosing a mascara wand. For example, if you have hooded eyes, a curved wand can help lift and open up your eyes.
- Lash Type: Different mascara wands cater to various lash types. If you have short lashes, a small wand can help coat each lash, while those with long lashes may benefit from a larger wand.
- Desired Look: The look you want to achieve, whether it’s length, volume, or curl, can determine the type of mascara wand you should choose.
- Mascara Formula: The formula of the mascara you use can also influence the type of wand you need. For example, a volumizing mascara may pair well with a ball wand, while a lengthening mascara may work best with a straight wand.
- Wand Size and Material: The size and material of the mascara wand can also impact the application. A smaller wand can provide more precision, while a larger wand can offer more volume. Additionally, silicone wands are ideal for separating lashes, while fiber wands are great for adding volume.
To further illustrate how to choose the right mascara wand, refer to the table below:
Factor | Consideration | Recommended Wand Type |
---|---|---|
Eye Shape | Hooded eyes – Curved wand | Curved wand |
Lash Type | Short lashes – Small wand | Small wand |
Desired Look | Volume – Ball wand | Ball wand |
Mascara Formula | Volumizing mascara – Ball wand | Ball wand |
Wand Size | Precision – Small wand | Small wand |
Wand Material | Separation – Silicone wand, Volume – Fiber wand | Silicone wand, Fiber wand |
Applying Mascara with Mascara Wands: A Step-by-Step Guide
Preparing Your Lashes
- Cleanse and Prime
- Remove any old mascara using makeup remover.
- Optionally, use an eyelash primer for added volume and length.
Choosing the Right Mascara Wand
- Understanding Wand TypesWand TypeEffect on LashesCurvedLifts and curls lashes.CombDefines and separates lashes.Ball-shapedAdds volume and reaches smaller lashes easily.
- Selecting Based on Desired Effect
- Choose a wand that aligns with your desired lash look (volume, length, definition).
Application Techniques
- Basic Application StepsStepsDescriptionStart at the BasePlace wand at the base of lashes and wiggle it to coat evenly.Wiggle and SweepWiggle wand while sweeping upward for even distribution.Focus on TipsApply extra product on the tips for added length and definition.Repeat for VolumeLayer mascara for additional volume (if desired).
- Tips for PrecisionTipsDescriptionUse the Wand’s CurveUtilize the wand’s shape to reach corner and lower lashes.Control Product ApplicationRemove excess mascara from the wand for precise coating.Avoid ClumpingUse a lash comb to separate lashes if clumping occurs.
Finishing Touches
- Clean-Up
- Use a cotton swab dipped in makeup remover for any smudges or mistakes.
- Setting the Look
- Optional: Apply a clear mascara or lash sealer for a longer-lasting finish.
Maintenance
- Proper Storage
- Close mascara tightly after use to prevent drying out.
- Replacing Mascara
- Replace mascara every 3-6 months for hygiene and optimal performance.
Best Brands of Mascara Wands
Brand | Distinctive Features | Price Range |
---|---|---|
Maybelline | Curved wand for voluminous and lengthened lashes. | $5 – $10 |
L’Oréal | Hourglass-shaped wand for precise application and separation. | $8 – $12 |
CoverGirl | Comb wand design for lash definition and separation. | $6 – $9 |
Benefit Cosmetics | Ball-shaped wand for reaching smaller lashes and adding volume. | $12 – $20 |
Too Faced | Silicone wand with varied bristle lengths for a customized lash look. | $15 – $25 |
Tips from Experts and Makeup Artists
Expert Tip | Makeup Artist Recommendation |
---|---|
Experiment with various wand types for best fit. | “Different wands offer unique effects; explore them.” |
Master application techniques for optimal results. | “Technique matters as much as the wand itself.” |
Invest time in understanding your lash needs. | “Know your lashes to choose the right wand.” |
Replace mascara wands regularly for hygiene. | “Hygiene is crucial; don’t overlook wand replacement.” |
Mascara Wand FAQs
What is the best mascara wand for short lashes?
The best mascara wand for short lashes is a small wand that can coat each lash effectively.
Read Also: RealHer Metallic Bronze Eyeliner.
What is the best mascara wand for long lashes?
For long lashes, a larger wand can help add volume and definition to the lashes.
Read Also: Eyebrows Redhead.
What is the best mascara wand for volume?
A ball wand is ideal for adding volume to the lashes, as it can coat each lash with the volumizing mascara formula.
Read Also: Shooting Star Makeup.
What is the best mascara wand for curling?
A curved wand is perfect for curling the lashes and lifting them for a wide-eyed look.
Read Also: Is Shea Butter Vegan.
What is the best mascara wand for separating lashes?
A comb wand is great for separating and defining sparse lashes, as it can comb through each lash for a clump-free look.
Read Also: All Natural Room Spray.
Can I use different mascara wands for different effects?
Yes, you can use different mascara wands to achieve various lash looks. For example, you can use a ball wand for volume and a curved wand for curling.
Read Also: Candy Made with Stevia.
Conclusion
In conclusion, the right mascara wand can elevate your lash game and help you achieve the perfect fluttery lashes. By understanding the different types of mascara wands and how to choose the right one for your lashes, you can enhance your overall makeup look. Whether you’re aiming for length, volume, or curl, there’s a mascara wand out there to cater to your specific needs. Experiment with different mascara wands to find the perfect match for your lashes and elevate your beauty routine.
Read Also: Black Dress with Black Gloves.
MakeUp Tips
Shooting Star Makeup: Your Guide to Celestial Glamour

Here is your complete guide to shooting star makeup
Introduction to Shooting Star Makeup
Shooting star makeup has taken the beauty world by storm, offering a mesmerizing way to add celestial charm to your look. From subtle shimmer to bold galactic designs, this trend allows makeup enthusiasts to explore their creativity while embracing the cosmic allure. Let’s dive into the enchanting realm of shooting star makeup and discover how to achieve stellar looks effortlessly.
The allure of shooting star makeup has taken the beauty world by storm, offering a mesmerizing way to express creativity and individuality. This article aims to explore the enchanting world of shooting star makeup, from its inception to practical application, providing a detailed guide for both beginners and seasoned makeup artists.
History of Shooting Star Makeup
The origins of shooting star makeup can be traced back to the fascination with celestial elements and the desire to embody the mystique of the cosmos. This section will delve into the evolution of this trend, highlighting its journey from a niche concept to a mainstream sensation.
How to Create Shooting Star Makeup
- Preparing Your Canvas: Before diving into the cosmic realm, ensure your skin is prepped and primed. Cleanse, moisturize, and apply a suitable primer to create a smooth base.
- Choosing the Right Products: Highlighters, glitters, and eyeshadows are the stars of this makeup trend. Opt for highly pigmented and iridescent products to achieve the celestial glow.
- Step-by-Step Guide to Application Techniques:
- Apply a base eyeshadow and blend it outwards to create a subtle background.
- Use a precise brush to apply the highlighter in a shooting star pattern, emphasizing the high points of your face.
- Layer glitter in a gradient manner to emulate the twinkling effect of stars.
- Tools and Brushes Required: Precision brushes and makeup sponges are essential for achieving the intricate details of shooting star makeup.
Inspiring Shooting Star Makeup Looks
The versatility of shooting star makeup allows for a spectrum of awe-inspiring looks:
- Celestial-Inspired Looks: Embrace the ethereal beauty of the cosmos with soft, pastel hues resembling nebulae and galaxies.
- Galaxy and Nebula Effects: Create bold, vibrant looks using deep blues, purples, and blacks, mimicking the vastness of space.
- Day-to-Day Wearable Styles: Subtle shimmer and delicate starry accents make for versatile looks suitable for daily wear.
Best Products for Shooting Star Makeup
Selecting the right products is crucial for achieving an impeccable shooting star look. A detailed review of recommended makeup products, accompanied by a table featuring product names, brands, and unique features, will be provided to assist readers in making informed choices.
Recommended Makeup Products for Shooting Star Makeup
Product Name | Brand | Unique Features |
---|---|---|
Celestial Eyeshadow | Stellar Cos. | Shimmering pigments for a starry effect |
Galaxy Highlighter | Nebula Beauty | Multi-dimensional glow for celestial radiance |
Long-Lasting Products Comparison
Product | Features | Longevity |
---|---|---|
Setting Spray | Locks in makeup | All-day wear |
Touch-Up Kit | Portable, mini products | Quick touch-ups |
Comparison of Shooting Star Makeup Brands
Brand | Product Name | Description | Cost | Star Status |
---|---|---|---|---|
Surreal Makeup | Shooting Star Eyeshadow | Multicolored iridescence, reflects light like crushed diamonds, perfect for superior sparkle. | $15.99 | ★★★★☆ |
Rare Beauty | Shooting Star Highlighter | Creates a celestial glow, long-lasting, suitable for all skin tones. | $24.00 | ★★★★★ |
Fenty Beauty | Starlit Hyper-Glitz Lipstick | Intense shimmer, long-wearing, available in various celestial shades. | $19.00 | ★★★★★ |
Huda Beauty | Mercury Retrograde Eyeshadow Palette | Versatile palette with celestial shades, highly pigmented, and blendable. | $67.00 | ★★★★☆ |
ColourPop | Shooting Star Glitter Gel | Ultra-reflective glitter gel, easy to apply, suitable for face and body. | $10.00 | ★★★★☆ |
The star status is based on customer reviews and popularity. The costs are approximate and may vary based on the retailer. These brands offer a range of shooting makeup products, each with its unique features and appeal, catering to diverse preferences and styles.
Tips for Long-Lasting Shooting Star Makeup
- Setting Techniques: Lock in your cosmic masterpiece with a setting spray to ensure it lasts throughout the day or night.
- Touch-Up Suggestions: Carry a small touch-up kit including a mini highlighter and glitter for quick touch-ups.
- Removal and Skincare After Wearing: Gently remove makeup using a makeup remover suitable for glitter, followed by a hydrating skincare routine.
Step-by-Step Application Guide
Step | Technique |
---|---|
1. Prepare Canvas | Cleanse, moisturize, and apply primer |
2. Base Eyeshadow | Apply a neutral base eyeshadow and blend |
3. Shooting Star | Use a precise brush for star-shaped highlighter strokes |
4. Layer Glitter | Apply glitter in a gradient for a twinkling effect |
Read Also: How to Cover Tyndall Effect with Makeup.
Shooting Star Makeup for Different Occasions
Adapting shooting makeup for various occasions adds versatility to this trend. Readers will discover tailored makeup ideas for parties, festivals, and photo shoots, along with suitable color palettes and styles to complement different events.
Read Also: How Long Does Grease Makeup Take to Dry.
DIY Shooting Star Makeup Kits
Creating your DIY kit is a fun and budget-friendly way to explore this trend. Components may include:
- A versatile highlighter palette with iridescent shades
- Glitter eyeshadows in various celestial tones
- Precision brushes and makeup sponges for detailed application
Read Also: Camping Hairstyles for Curly Hair.
FAQs Section
Based on “People Also Ask”
How to achieve a shooting star makeup look?
Follow our step-by-step guide using high-quality highlighters and glitters for a celestial glow.
Read Also: Maybelline Free Sample.
Are there variations of shooting star makeup for different skin tones?
Absolutely! It is versatile and can be adapted to complement various skin tones.
Read Also: RealHer Metallic Bronze Eyeliner.
What tools are essential for creating shooting star makeup?
Precision brushes and makeup sponges are vital for achieving intricate details.
Read Also: Candy Made with Stevia.
Conclusion
In conclusion, shooting star makeup offers a celestial canvas for artistic expression, allowing individuals to embody the enchanting allure of the cosmos through makeup artistry. Embracing this trend opens up a world of creativity and self-expression, inviting everyone to explore the celestial realm through the transformative power of makeup.
Read Also: Eyebrows Redhead.
MakeUp Tips
RealHer Metallic Bronze Eyeliner: Mastering Eye Makeup

Here is your complete guide to realher metallic bronze eyeliner
Introduction to Realher Metallic Bronze Eyeliner
Are you looking for a new way to spice up your makeup routine? Look no further than RealHer Metallic Bronze Eyeliner! This creamy, buildable eyeliner is perfect for any eye color and provides a stunning metallic finish that is waterproof and long-lasting on the waterline. In this article, we’ll provide a comprehensive guide on how to use this eyeliner to create a stunning look that will turn heads.
Before we dive into the details, let’s take a moment to discuss the importance of choosing the right eyeliner for different eye colors. Eyeliner can enhance the natural beauty of your eyes and make them pop. RealHer Metallic Bronze Eyeliner is a great choice for any eye color, but it’s especially flattering on brown and hazel eyes. This eyeliner is buildable, which means you can create a subtle or dramatic look depending on your preference. Additionally, its waterproof formula ensures that your makeup will stay put all day long.
Product Description
RealHer Metallic Bronze Eyeliner is a versatile product that can be used to create a variety of looks. Here are some key features of this eyeliner:
- Creamy, buildable formulation
- Suitable for any eye color
- Metallic finish that is waterproof
- Long-lasting on the waterline
Application Tips
Now that you know the basics of RealHer Metallic Bronze Eyeliner, let’s dive into some application tips. Follow these steps to create a stunning look:
- Start by applying eyeshadow primer to your eyelids. This will help your eyeshadow and eyeliner stay in place all day.
- Apply your favorite eyeshadow to your eyelids. We recommend using warm, earthy tones to complement the bronze eyeliner.
- Take the RealHer Metallic Bronze Eyeliner and draw a thin line along your upper lash line. You can make the line as thick or thin as you like.
- Use a dense smudge brush to blend out the color and create wings. This will give your eyes a sultry, smoky look.
- Clean up the wing with a Q-tip and makeup remover for a crisp look.
- Apply mascara to your lashes to complete the look.
Is It Worth Using RealHer Metallic Bronze Eyeliner?
Overview
It is a versatile product that has garnered attention for its buildable, creamy formulation and stunning metallic finish. It is marketed as suitable for any eye color and is said to be waterproof, making it a long-lasting option for various eye makeup looks.
Customer Reviews
Customer reviews provide valuable insights into the performance and worth of the product. Here’s what some users have to say:
- A customer from YouFromMe praises the eyeliner’s buildable formulation and its suitability for any eye color, emphasizing its waterproof and long-lasting properties.
- Allure’s beauty assistant, Talia Gutierrez, reimagines cat eyes as smudged, smoky bronze wings using the RealHer Metallic Bronze Eyeliner, highlighting its creamy texture and the way it complements dark brown eyes.
- Another customer from Lorde and Belle appreciates the smooth application of the metallic bronze eyeliner, noting that it stays on all day without smudging or rubbing off.
Pricing
Retailer | Price |
---|---|
YouFromMe | $12.00 |
Cosmetics Half Price | $6.40 (on sale) |
Lorde and Belle | $13.60 |
Kroger | $36.00 |
Comparison of RealHer Metallic Bronze Eyeliner with Other Products
When it comes to choosing the right eyeliner, it’s important to consider various factors such as formulation, color, and price. In this section, we’ll compare Metallic Bronze Eyeliner with other similar products to help you make an informed decision.
RealHer Metallic Bronze Eyeliner vs. Eye Am Resilient Metallic Bronze Eyeliner by Lorde and Belle
Both RealHer Metallic Bronze Eyeliner and Eye Am Resilient Metallic Bronze Eyeliner by Lorde and Belle are creamy, buildable eyeliners that provide a metallic finish. However, there are some differences between the two products:
Feature | RealHer Metallic Bronze Eyeliner | Eye Am Resilient Metallic Bronze Eyeliner by Lorde and Belle |
---|---|---|
Price | $12.00 (YouFromMe) | $13.60 (Lorde and Belle) |
Availability | Available at YouFromMe, Cosmetics Half Price, and Lorde and Belle | Available exclusively at Lorde and Belle |
Customer Reviews | Positive reviews for its buildable formulation and waterproof properties | Positive reviews for its smooth application and long-lasting properties |
RealHer Metallic Bronze Eyeliner vs. Other Metallic Bronze Eyeliners
There are several other metallic bronze eyeliners on the market. Here’s how RealHer Metallic Eyeliner compares to some of them:
Feature | RealHer Metallic Bronze Eyeliner | Maybelline New York Master Precise Ink Metallic Liquid Eyeliner | NYX Professional Makeup Metallic Glitter Eyeliner |
---|---|---|---|
Price | $12.00 (YouFromMe) | $8.99 (Ulta) | $7.50 (Ulta) |
Formulation | Creamy pencil | Liquid | Liquid |
Finish | Metallic | Metallic | Glitter |
Customer Reviews | Positive reviews for its buildable formulation and waterproof properties | Positive reviews for its precision and long-lasting properties | Positive reviews for its glittery finish and long-lasting |
Best Tips and Tutorial for RealHer Metallic Bronze Eyeliner
It is a versatile product that can be used to create a variety of looks. Here are some tips and tutorials to help you make the most of this eyeliner:
Tips for Using RealHer Metallic Bronze Eyeliner
- Start by applying eyeshadow primer to your eyelids. This will help your eyeshadow and eyeliner stay in place all day.
- Use short strokes to create your line, rather than one continuous line.
- For a soft and subtle smoky eye, draw a thick line above your upper lash line. With your “Determined To Rise” smudger brush, smudge the line in upwards motions to smoke out the product.
- To sharpen the pencil, use any non-electrical pencil sharpener on hand.
Tutorial: How to Create a Smoky Bronze Wing
- Start by applying eyeshadow primer to your eyelids.
- Apply your favorite eyeshadow to your eyelids. We recommend using warm, earthy tones to complement the bronze eyeliner.
- Take the Metallic Bronze Eyeliner and draw a thin line along your upper lash line. You can make the line as thick or thin as you like.
- Use a dense smudge brush to blend out the color and create wings. This will give your eyes a sultry, smoky look.
- Clean up the wing with a Q-tip and makeup remover for a crisp look.
- Apply mascara to your lashes to complete the look.
Read Also: Can Dirty Makeup Brushes Cause Acne Breakouts.
FAQs
Is the eyeliner suitable for my eye color?
Yes! It is suitable for any eye color, but it’s especially flattering on brown and hazel eyes.
Read Also: How to Cover Tyndall Effect with Makeup.
How do I create a smoky bronze wing with this eyeliner?
To create a smoky bronze wing, use a dense smudge brush to blend out the color and create wings. Clean up the wing with a Q-tip and makeup remover for a crisp look.
Read Also: How Long Does Grease Makeup Take to Dry.
Is the product waterproof and long-lasting?
Yes! It is waterproof and long-lasting on the waterline.
Read Also: Camping Hairstyles for Curly Hair.
Can I use it for a crisp or soft look?
Yes! It is buildable, which means you can create a subtle or dramatic look depending on your preference.
Read Also: Candy Made with Stevia.
Conclusion
RealHer Metallic Bronze Eyeliner is a versatile product that can be used to create a variety of looks. Its creamy, buildable formula and waterproof finish make it a great choice for any occasion. We hope this guide has been helpful in showing you how to use this eyeliner to create a stunning look. Don’t be afraid to experiment and have fun with your makeup!
Read Also: Maybelline Free Sample.
-
Beauty Tips10 months ago
What Is Balayage: Your Ultimate Guide Is Here
-
Dreams Interpretation9 months ago
The Meaning of Teeth Falling Out in a Dream: Exploring the Symbolism
-
Diet Tips9 months ago
What Vitamins C Is Good For? The Ultimate Guide
-
Uncategorized9 months ago
Understanding the Five Languages of Love: A Comprehensive Guide
-
Beauty Tips6 months ago
How to Make Clear Skin: Your Comprehensive Guide
-
Women Tips6 months ago
How Long Breast Augmentation Surgery Take? A Complete Guide
-
Beauty Tips6 months ago
Coconut Oil in Face Benefits: Unlocking the Secrets to Radiant Skin
-
Beauty Tips9 months ago
The Surprising Benefit to Coconut Oil: Your Complete Guide