Connect with us

Beauty Tips

Neon Orange Nails: Elevate Your Look with Vibrant Shades

Published

on

neon orange nails

Here is your complete guide to neon orange nails

Introduction to Neon Orange Nails

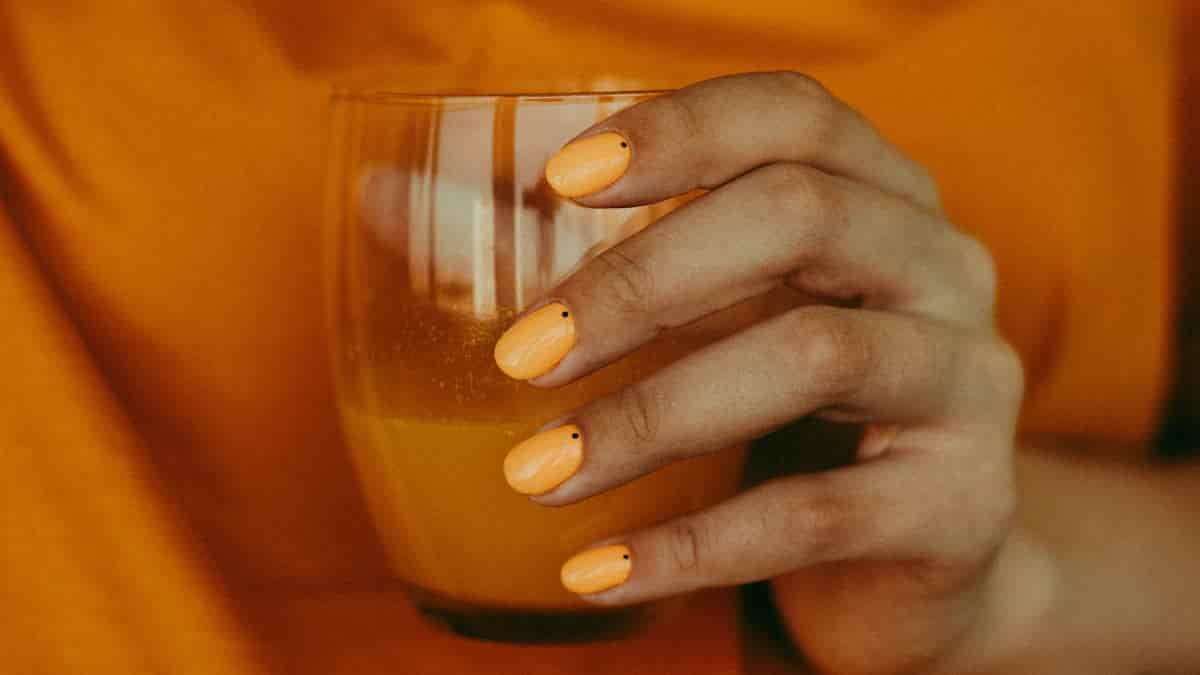
Neon orange nails have been taking the beauty world by storm, captivating fashion enthusiasts and nail art aficionados alike. These vibrant, eye-catching hues have become a symbol of bold self-expression, radiating energy and confidence. In this comprehensive guide, we’ll delve into the fascinating history of neon orange nails, explore the best techniques for achieving this stunning look, and uncover the must-have products to elevate your nail game.

What are Neon Orange Nails?

Neon orange nails are a captivating trend that has emerged from the ever-evolving world of nail art and design. These vibrant, fluorescent shades of orange are characterized by their intense, almost electric-like glow, which instantly commands attention and adds a touch of playfulness to any look. The history of neon colors in nail polish can be traced back to the 1950s and 1960s, when these bold hues first gained popularity, paving the way for the rise of neon orange nails in modern times.

Why Neon Orange Nails are Trending

The appeal of neon orange nails lies in their ability to evoke a sense of energy, optimism, and confidence. These bold hues have the power to instantly lift one’s mood, tapping into the psychological impact of neon colors on our emotions. Furthermore, the rise of social media and the influence of celebrity culture have played a significant role in the widespread popularity of neon orange nails, as these platforms have allowed for the rapid dissemination of nail art trends and inspiration.

History of Neon Orange Nails

Early Beginnings of Neon Colors

The origins of neon colors in nail polish can be traced back to the 1950s and 1960s, when these bold, fluorescent hues first gained popularity. During this era, the introduction of new pigments and advancements in nail polish formulations paved the way for the emergence of neon orange nails and other vibrant nail art trends.

Evolution of Neon Orange Nails

As the decades passed, neon orange nails continued to evolve, adapting to changing fashion and beauty trends. From the bold, statement-making nails of the 1970s and 1980s to the more refined and artistic designs of the 2000s and beyond, neon orange nails have remained a captivating and versatile nail art expression.

Influence of Neon Orange Nails on Fashion and Beauty

The impact of neon orange nails extends far beyond the realm of nail art, as these vibrant hues have also influenced the broader fashion and beauty landscape. From runway shows to editorial spreads, neon nails have become a symbol of bold, unapologetic self-expression, inspiring countless trends and inspiring beauty enthusiasts worldwide.

Comparison Table of Different Shades for Neon Orange Nails

DesignDescription
Floral Glittered Orange NailsOrange nails adorned with floral designs and glitter for a vibrant and feminine look.
Orange & Spider Nail DesignHalloween-inspired nails featuring neon orange polish with spider accents for a spooky touch.
Orange Panther Design on NailsLeopard print nail design in orange, adding a fun and wild element to your nails.
Neon Orange French TipsFrench manicure with neon orange tips for a bold and trendy appearance.
Floral Glittered Orange NailsOrange nails embellished with glitters and floral accents for a tropical and glamorous vibe.
Orange Drip NailsContrasting orange and black drips on French tips for a striking and edgy look.
Stiletto Orange NailsOrange stiletto nails for a unique and individualistic style statement.
Glittered Matte Orange NailsMatte orange nails with added glitters for a chic and sparkling finish.
Pumpkin Nail DesignAdorable pumpkin-themed nail design with vibrant orange color perfect for fall.
Square Orange Print Nail ArtAnimal print nail art in orange and brown hues for a trendy and eye-catching appearance.
Matte Orange Nails with Halloween ThemeLong acrylic nails in bright orange matte polish with Halloween-themed designs.
Plain Neon Orange NailsBold and vibrant neon orange nails for a statement-making and eye-catching look.
Short Orange and Blue NailsCombination of orange and blue shades for a striking and contrasting nail design.
Glittered Orange NailsBrown and orange nail art with added glitters for a shimmering and dynamic effect.
Bling Orange Nail DesignDark orange accent nails covered in glitters for a glamorous and festive appearance.
Matte Orange Nails with Cute Halloween VibesMatte orange nails with cute Halloween-themed nail art for a playful and seasonal look.

This comparison table showcases a variety of stunning neon orange nail designs, each offering a unique and stylish twist to elevate your manicure game.

Choosing the Right Neon Orange Nail Polish

Selecting the perfect neon orange nail polish involves considering several factors:

  • Skin Tone: Choose a shade that complements your natural skin tone.
  • Occasion: Opt for lighter shades for daily wear and brighter shades for special events.
  • Brand Quality: Invest in high-quality brands to ensure longevity and vibrant color.

Step-by-Step Guide to Applying Neon Orange Nail Polish

Achieving perfect neon orange nails requires a careful and methodical approach. Follow these steps for a flawless finish:

1. Preparing Your Nails

  • Clean your nails thoroughly to remove any dirt and oils.
  • Shape your nails using a nail file.
  • Push back cuticles gently.

2. Base Coat Application

  • Apply a thin layer of base coat to protect your nails and enhance polish adhesion.
  • Allow the base coat to dry completely.

3. Applying Neon Orange Nail Polish

  • Apply the first thin layer of neon orange nail polish.
  • Let it dry before applying a second coat for even coverage and vibrant color.

4. Top Coat Application

  • Finish with a top coat to seal the color and add a glossy shine.
  • This step also helps in preventing chipping.

5. Drying Time and Tips

  • Allow ample time for your nails to dry completely.
  • Avoid any activities that could smudge the polish during the drying period.

Techniques for Achieving Neon Orange Nails

Base Coat and Polish Application

Achieving the perfect neon orange nails starts with the foundation. Proper base coat and polish application are crucial to ensure long-lasting, vibrant results. Here are the key steps:

  • Base Coat: Apply a high-quality base coat to create a smooth, even surface for the nail polish. This step helps to prevent staining and improve adhesion.
  • Nail Polish Application: Apply the neon orange nail polish in thin, even coats, allowing each layer to dry completely before adding the next. This technique helps to achieve an opaque, streak-free finish.
  • Drying Time: Be patient and allow ample drying time between each coat to ensure the polish sets properly and doesn’t smudge or chip.

Nail Art and Design

Elevating your neon nails with intricate nail art and design can take your look to the next level. Experiment with various techniques, such as:

  • Nail Stamping: Use a nail stamping plate and a special stamping polish to create intricate patterns and designs on your neon orange nails.
  • Nail Foils: Apply metallic or holographic foils to your neon orange nails for a dazzling, eye-catching effect.
  • Nail Decals: Adhere pre-made nail decals or stickers to your neon orange nails for a quick and easy way to add visual interest.

Top Coat and Finishing Touches

The final step in achieving long-lasting, glossy neon orange nails is the application of a high-quality top coat. This step not only seals in the color but also adds a protective layer to prevent chipping and fading.

Common Mistakes to Avoid

While neon orange nails can be a stunning and eye-catching look, there are a few common mistakes to be aware of:

  • Uneven Application: Applying the nail polish unevenly can result in a streaky, uneven finish.
  • Insufficient Drying Time: Rushing the drying process can lead to smudging, smearing, or chipping of the nail polish.
  • Neglecting Nail Care: Failing to properly maintain and care for your nails can result in discoloration, brittleness, or other issues.

By being mindful of these potential pitfalls and following the right techniques, you can ensure your neon nails look their absolute best.

Products for Achieving Neon Orange Nails

Best Neon Orange Nail Polish Brands

When it comes to achieving the perfect neon orange nails, the quality of your nail polish is paramount. Here are some of the top neon orange nail polish brands to consider:

BrandProductKey Features
OPINeon Orange– Highly pigmented formula
– Long-lasting wear
– Vibrant, fluorescent finish
EssieNeon & Wow– Smooth, easy-to-apply formula
– Chip-resistant
– Wide range of neon shades
ZoyaElectra– Vegan and cruelty-free formula
– Intense, neon-like pigmentation
– Dries to a high-gloss finish
China GlazeNeon and On– Formulated with advanced polymers
– Excellent color payoff
– Durable, long-lasting wear
Sally HansenNeon Fever– Affordable price point
– Vibrant, eye-catching colors
– Quick-drying formula

Best Nail Care Products for Neon Orange Nails

Maintaining the health and appearance of your neon nails requires the right nail care products. Consider these essential items:

  • Nail Polish Remover: Choose a non-acetone formula that gently removes neon orange nail polish without drying out your nails.
  • Nail Strengthener: Incorporate a nail strengthening treatment to help prevent brittleness and breakage.
  • Cuticle Oil: Keep your cuticles hydrated and healthy with a nourishing cuticle oil.
  • Hand Cream: Moisturize your hands and nails with a rich, hydrating hand cream to maintain a youthful, radiant appearance.

Best Nail Art Brushes for Neon Orange Nails

Elevating your neon nails with intricate nail art designs requires the right tools. Invest in high-quality nail art brushes to achieve precise, professional-looking results:

Brush TypeRecommended Brands
Detail Brush– Nail Artistry
– Tweexy
– Paintbox
Striping Brush– Kiara Sky
– Modelones
– Beetles
Dotting Tool– Born Pretty
– Makartt
– Salon Perfect
Fan Brush– Zoya
– Orly
– Essie
Angled Brush– OPI
– Sally Hansen
– China Glaze

By incorporating these top-notch products into your nail care routine, you’ll be well on your way to achieving show-stopping neon nails that turn heads wherever you go.

DIY vs. Professional Neon Orange Nail Manicures

CriteriaDIY Neon Orange NailsProfessional Neon Orange Nails
Skill LevelModerate to DifficultEasy to Difficult
ApplicationCan be uneven and streaky if not done properlyPrecise and even application by skilled nail technicians
LongevityMay chip or peel faster without proper prep and top coatLonger-lasting due to professional techniques and products
Nail ArtLimited to simple designs and patternsIntricate nail art designs and embellishments possible
Product QualityDependent on the quality of at-home nail polishProfessional-grade nail polishes and products used
CostMore affordable, but requires investment in tools and productsHigher cost, but includes the expertise of the nail technician
Time InvestmentTime-consuming process, especially for beginnersQuicker service, especially for complex designs
CustomizationLimited to pre-made polish shades and designsFully customizable to individual preferences
RemovalCan be difficult to remove without damaging nailsProfessionally removed with acetone-based removers
ConvenienceCan be done at home on your own scheduleRequires booking an appointment at a salon

This comparison table highlights the key differences between DIY and professional neon orange nail manicures, allowing you to make an informed decision on the best approach for your needs and preferences.

Seasonal Trends: Neon Orange Nails for Every Occasion

Spring and Summer

During the warmer months, neon nails are the perfect way to embrace the vibrant energy of the season. From bright, citrus-inspired shades to bold, fluorescent hues, neon orange nails can be tailored to suit any spring or summer occasion.

Fall and Winter

While neon nails are traditionally associated with the warmer months, they can also be a stunning choice for the cooler seasons. Pair neon orange with deep, earthy tones or metallic accents for a chic, autumnal look, or use it as a bold contrast to the muted hues of winter.

Holiday Celebrations

Neon orange nails can also be a festive choice for holiday celebrations. Incorporate glitter, rhinestones, or holiday-themed nail art to create a show-stopping manicure for Christmas, New Year’s Eve, or any other special occasion.

Everyday Wear

Neon orange nails aren’t just for special events – they can also be a fun and eye-catching choice for everyday wear. Whether you opt for a simple, solid color or add a touch of nail art, neon nails are sure to turn heads and boost your mood.

Read Also: Facial Filler Before and After.

FAQs

How do I achieve neon orange nails at home?

Achieving neon nails at home is a straightforward process, but it requires attention to detail and the right techniques. Start with a high-quality base coat, then apply two to three thin, even coats of your neon orange nail polish. Be sure to allow ample drying time between each coat. Finish with a top coat to seal in the color and add a glossy shine.

Read Also: Jaw Botox Before and After.

What are the best products for neon orange nails?

When it comes to neon nails, the key products to focus on are:

  • Neon Orange Nail Polish: Look for highly pigmented, long-lasting formulas from top brands like OPI, Essie, and Zoya.
  • Nail Care Products: Invest in a good nail polish remover, nail strengthener, cuticle oil, and hand cream to maintain the health and appearance of your nails.
  • Nail Art Brushes: Experiment with detail brushes, striping brushes, dotting tools, and angled brushes to elevate your neon nails with intricate designs.

Read Also: Korean Plastic Surgery Before and After.

How do I remove neon orange nail polish?

Removing neon orange nail polish can be a bit more challenging than traditional shades, as the intense pigments can be stubborn. Start by soaking a cotton ball in a non-acetone nail polish remover and gently pressing it onto your nails for a few minutes. This will help to break down the polish. Then, use a nail file or buffer to gently remove any remaining color. Be sure to follow up with a nourishing cuticle oil or hand cream to hydrate your nails.

Read Also: Borboleta Lash Serum.

How do I maintain neon orange nails?

Maintaining the vibrancy and longevity of your neon nails requires a few key steps:

  • Reapply Top Coat: Regularly reapply a high-quality top coat to seal in the color and protect against chipping and fading.
  • Avoid Harsh Chemicals: Wear gloves when doing household chores or using harsh cleaning products to prevent premature wear and tear on your nails.
  • Moisturize Regularly: Keep your nails and cuticles hydrated with a nourishing cuticle oil and hand cream to prevent dryness and brittleness.
  • Touch Up Chips: If you notice any chips or wear, touch up the affected areas with a small amount of neon orange nail polish to maintain a flawless look.

By following these simple maintenance tips, you can keep your neon nails looking vibrant and fresh for longer.

Read Also: Classic Eyelashes.

Conclusion

Neon orange nails have undoubtedly made a bold and captivating statement in the world of nail art and beauty. From their humble beginnings in the 1950s and 1960s to their current status as a must-have trend, these vibrant hues have the power to instantly elevate any look and boost one’s mood and confidence.

Read Also: Almond Skin Tone.

By mastering the techniques and incorporating the right products, you can achieve show-stopping neon nails that will turn heads and inspire envy. Remember to have fun with the process, experiment with different nail art designs, and embrace the radiant energy that neon nails bring to the table.

Read Also: Pull Ups While Pregnant.

As we look to the future, it’s clear that neon orange nails will continue to captivate and inspire, pushing the boundaries of what’s possible in the world of nail art and beauty. So, go forth and unleash the radiance of neon nails – your nails and your spirit will thank you.

Read Also: Alto Defense Serum.

Continue Reading
Click to comment

Leave a Reply

Your email address will not be published. Required fields are marked *

Beauty Tips

Tratamiento Labios Secos: Tips para Mantener Labios Suaves

Published

on

tratamiento labios secos

tratamiento labios secos

Introducción a Tratamiento Labios Secos

Los labios secos son un problema común que afecta a muchas personas en todo el mundo. No solo pueden causar incomodidad, sino que también pueden afectar la apariencia estética de nuestra sonrisa. En este artículo, exploraremos en profundidad el tratamiento labios secos, abordando las causas, síntomas, tratamientos efectivos y medidas preventivas. Si alguna vez te has preguntado cómo aliviar la sequedad de tus labios, este artículo es para ti.

La importancia de un tratamiento adecuado para los labios secos no puede subestimarse. No solo se trata de un problema estético; los labios secos pueden ser dolorosos y, en algunos casos, pueden llevar a infecciones. Por eso, es vital entender las razones detrás de esta condición y cómo podemos tratarla de manera efectiva. En este artículo, utilizaremos el término tratamiento labios secos en varias ocasiones para asegurarnos de que encuentres toda la información que necesitas.

Entendiendo los Labios Secos

Causas de los Labios Secos

Los labios secos pueden ser causados por una variedad de factores. Aquí hay algunas de las causas más comunes:

  • Factores Ambientales:
    • El clima frío y seco puede deshidratar la piel de los labios.
    • La exposición al sol sin protección puede causar quemaduras y sequedad.
  • Elecciones de Estilo de Vida:
    • La deshidratación, a menudo resultado de no beber suficiente agua, es una de las principales causas.
    • Fumar puede secar los labios y afectar su salud general.
  • Condiciones Médicas:
    • Enfermedades como la diabetes pueden afectar la hidratación de la piel.
    • Alergias a productos cosméticos o alimentos también pueden causar reacciones que resultan en labios secos.

Fisiología de los Labios

Los labios tienen una estructura única que los hace particularmente susceptibles a la sequedad. A diferencia de otras partes del cuerpo, los labios carecen de glándulas sebáceas, lo que significa que no producen aceites naturales para mantener su hidratación. Además, la piel de los labios es más delgada y sensible, lo que los hace vulnerables a factores externos.

Síntomas de Labios Secos

Identificar los síntomas de los labios secos es el primer paso hacia un tratamiento efectivo. Algunos de los síntomas más comunes incluyen:

  • Grietas y Descamación: Los labios pueden comenzar a agrietarse y pelarse, lo que puede ser doloroso.
  • Dolor y Malestar: La sequedad puede causar incomodidad constante.
  • Cambios en el Color y Textura: Los labios pueden volverse más oscuros o perder su suavidad natural.

Cuándo Buscar Ayuda Médica

Si experimentas síntomas persistentes de labios secos, es importante consultar a un médico. Debes buscar atención profesional si:

  • La sequedad no mejora con tratamientos caseros.
  • Hay signos de infección, como enrojecimiento o hinchazón.
  • Experimentas dolor severo o sangrado.

Tratamientos Efectivos para Labios Secos

Existen múltiples enfoques para el tratamiento labios secos, que van desde remedios caseros hasta opciones profesionales.

Remedios Caseros

Los remedios caseros son una excelente manera de comenzar a tratar los labios secos. Aquí hay algunas estrategias efectivas:

  • Hidratación:
    • Beber suficiente agua es esencial. Se recomienda al menos 8 vasos al día.
  • Exfoliación:
    • Exfoliar suavemente los labios puede ayudar a eliminar las células muertas. Puedes usar un cepillo de dientes suave o una mezcla de azúcar y miel.
  • Aceites y Mantecas Naturales:
    • Aplicar aceites como el aceite de coco o mantecas como la manteca de karité proporciona hidratación profunda.

Productos de Venta Libre

Si los remedios caseros no son suficientes, hay varios productos de venta libre que pueden ayudar:

  • Ingredientes a Buscar:
    • Manteca de Karité: Hidratante natural que ayuda a suavizar los labios.
    • Cera de Abejas: Crea una barrera protectora contra la pérdida de humedad.
    • Lanolina: Un emoliente que ayuda a retener la humedad.
IngredienteBeneficios
Manteca de KaritéHidratación profunda
Cera de AbejasProtección contra la deshidratación
LanolinaRetención de humedad

Los Mejores Productos para el Tratamiento de Labios Secos y Cómo Usarlos

A continuación, se presenta una tabla con algunos de los mejores productos para el tratamiento labios secos, junto con instrucciones sobre cómo utilizarlos para obtener los mejores resultados.

ProductoDescripciónCómo Usarlo
Bálsamo Labial de Manteca de KaritéHidratante natural que proporciona una barrera protectora.Aplica una capa generosa en los labios varias veces al día, especialmente antes de salir.
VaselinaCrea una barrera oclusiva que retiene la humedad.Usa una pequeña cantidad en los labios antes de dormir para una hidratación profunda.
Bálsamo Labial con Ácido HialurónicoAtrae y retiene la humedad, ideal para labios muy secos.Aplica en los labios limpios y secos, repitiendo cada 4 horas o según sea necesario.
Gel de Aloe VeraPropiedades hidratantes y antiinflamatorias.Aplica una pequeña cantidad directamente sobre los labios y deja actuar durante 15 minutos antes de enjuagar.
Exfoliante Labial NaturalElimina las células muertas y suaviza la textura de los labios.Usa una vez a la semana, aplicando suavemente con un cepillo de dientes o una mezcla de azúcar y miel.

Detalles de Uso de Cada Producto

1. Bálsamo Labial de Manteca de Karité

  • Descripción: Este bálsamo es rico en nutrientes y proporciona una hidratación intensa. Ideal para climas fríos y secos.
  • Instrucciones: Aplica generosamente en los labios varias veces al día. Es especialmente efectivo antes de salir al aire libre o antes de dormir.

2. Vaselina

  • Descripción: La vaselina es un producto clásico que actúa como una barrera para evitar la pérdida de humedad.
  • Instrucciones: Usa una pequeña cantidad en los labios antes de acostarte. Esto ayudará a mantener tus labios hidratados durante la noche.

3. Bálsamo Labial con Ácido Hialurónico

  • Descripción: Este bálsamo está formulado para atraer y retener la humedad, lo que lo hace perfecto para labios extremadamente secos.
  • Instrucciones: Aplica sobre los labios limpios y secos. Repite cada 4 horas o según sea necesario, especialmente después de comer o beber.

4. Gel de Aloe Vera

  • Descripción: El gel de aloe vera es conocido por sus propiedades hidratantes y curativas.
  • Instrucciones: Aplica una pequeña cantidad directamente sobre los labios. Deja actuar durante 15 minutos y luego enjuaga con agua tibia para mejores resultados.

5. Exfoliante Labial Natural

  • Descripción: Un exfoliante suave ayuda a eliminar las células muertas y a suavizar la superficie de los labios.
  • Instrucciones: Mezcla azúcar con un poco de miel o aceite de oliva. Aplica suavemente en los labios con movimientos circulares una vez a la semana y enjuaga con agua tibia.

Consejos Adicionales para el Uso de Productos

  • Consistencia: La clave para mantener los labios hidratados es la consistencia. Asegúrate de usar estos productos regularmente.
  • Evita Ingredientes Irritantes: Al elegir productos, evita aquellos que contengan fragancias o mentol, ya que pueden irritar los labios.
  • Almacenamiento: Guarda tus bálsamos labiales en un lugar fresco y seco para mantener su efectividad.

Estos productos y sus usos son esenciales para mantener tus labios hidratados y saludables. Incorporar estos tratamientos en tu rutina diaria puede ayudar a prevenir la sequedad y mantener tus labios en óptimas condiciones.

Los Mejores Consejos para Evitar los Labios Secos

Mantente Hidratado

  • Bebe suficiente agua a lo largo del día para mantener tu cuerpo y piel bien hidratados.
  • Los alimentos ricos en agua, como frutas y verduras, también pueden ayudar con la hidratación.

Usa Bálsamo Labial Regularmente

  • Aplica bálsamo labial varias veces al día, especialmente antes de salir al exterior.
  • Busca productos con ingredientes hidratantes como manteca de karité, aceite de coco, vitamina E y cera de abejas.

Protege tus Labios del Sol

  • Usa un bálsamo labial con protección solar para evitar daños por los rayos UV.
  • La protección solar es importante durante todo el año, no solo en verano.

Exfolia Suavemente

  • Exfoliar los labios una vez a la semana ayuda a eliminar la piel muerta y permite una mejor absorción de los productos.
  • Puedes usar un cepillo de dientes suave o una mezcla de azúcar y miel para exfoliar.

Evita Hábitos Dañinos

  • No te lamas ni muerdas los labios, ya que esto empeora la sequedad.
  • Evita productos labiales con ingredientes irritantes como mentol o fragancias.

Aplica Bálsamo Antes de Dormir

  • Aplicar bálsamo labial antes de acostarte mantiene tus labios hidratados durante la noche.

Siguiendo estos consejos y adoptando una rutina de cuidado labial, podrás evitar y aliviar los molestos labios secos. Recuerda que la hidratación, la protección solar y los hábitos saludables son clave para mantener unos labios suaves y saludables.

Tratamientos Profesionales

En casos más severos, los tratamientos profesionales pueden ser necesarios:

  • Inyecciones de Ácido Hialurónico:
    • Estas inyecciones pueden ayudar a restaurar la hidratación y volumen de los labios.
  • Tratamientos con Láser:
    • Los tratamientos láser pueden mejorar la textura de los labios y aumentar la hidratación.

Medidas Preventivas

La prevención es clave para evitar la sequedad de los labios. Aquí hay algunas recomendaciones:

Rutina Diaria de Cuidado de Labios

  • Uso Regular de Bálsamo Labial:
    • Aplica bálsamo labial varias veces al día, especialmente antes de salir al aire libre.
  • Evitar Hábitos Dañinos:
    • Evita lamerte los labios, ya que esto puede empeorar la sequedad.
    • No muerdas o rasques los labios.

Consejos de Cuidado Estacional

  • Cuidado en Climas Fríos:
    • Usa un bálsamo labial con protección solar en invierno.
  • Protección contra el Sol:
    • Aplica un bálsamo labial con SPF para proteger tus labios de los daños solares.
EstaciónConsejos de Cuidado
InviernoUsa bálsamo labial con SPF
VeranoAplica bálsamo labial con protección solar

Preguntas Frecuentes Sobre Tratamiento Labios Secos

¿Qué causa que los labios se vuelvan secos y agrietados?

Los labios pueden volverse secos debido a factores ambientales, deshidratación, hábitos poco saludables y condiciones médicas subyacentes.

Leer también: Aqua Blue Fragrance.

¿Cómo puedo prevenir los labios secos?

Mantente hidratado, usa bálsamo labial regularmente y evita lamerte los labios.

Leer también: Brochas Para Mascarillas.

¿Hay alimentos que ayudan con la hidratación de los labios?

Sí, consumir alimentos ricos en agua como frutas y verduras puede ayudar a mantener la hidratación general de tu cuerpo, incluyendo tus labios.

Leer también: Pintalabios Camaleón.

¿Es seguro usar vaselina en los labios?

Sí, la vaselina puede ser efectiva para sellar la humedad, pero asegúrate de no usarla en exceso, ya que puede causar dependencia.

Leer también: Perfilador Labios Waterproof.

¿Cuándo debo consultar a un dermatólogo sobre mis labios secos?

Si los síntomas persisten a pesar de los tratamientos caseros o si hay signos de infección, es recomendable consultar a un dermatólogo.

Leer también: Pull Ups While Pregnant.

Conclusión

Los labios secos son un problema común que puede afectar a cualquiera, pero con los tratamientos adecuados y medidas preventivas, puedes mantener tus labios saludables y bien hidratados. Recuerda que la clave está en la hidratación y el cuidado regular. Si tus labios secos persisten, no dudes en buscar ayuda profesional. ¡Adopta una rutina de cuidado de labios y disfruta de una sonrisa hermosa y saludable! Este artículo proporciona una guía completa sobre el tratamiento labios secos, abordando todos los aspectos relevantes para ayudar a los lectores a entender y manejar esta condición de manera efectiva.

Leer también: Brillo de Labios Transparente Permanente.

Continue Reading

Beauty Tips

Keratin Hair Growth Oil Review: Transform Your Hair

Published

on

keratin hair growth oil

Here is your complete guide to keratin hair growth oil.

Introduction to Keratin Hair Growth Oil

Keratin hair growth oil has become a popular topic in the world of hair care, and for good reason. Keratin, a protein found in hair, plays a crucial role in maintaining its health and appearance. When applied topically, keratin hair growth oil can promote hair growth, strengthen hair, moisturize and nourish it, and even improve its shine and texture. In this article, we will delve into the world of keratin hair growth oil, exploring its benefits, ingredients, and application methods.

Understanding Keratin

Keratin is a protein that is naturally present in hair, skin, and nails. It is responsible for giving hair its strength, elasticity, and resilience. Keratin is particularly important for hair health because it helps to maintain the structure and integrity of the hair shaft. There are several types of keratin, each with its own unique properties and functions. For example, keratin 1 and keratin 10 are found in the outermost layer of the hair shaft, while keratin 2 and keratin 3 are found in the inner layers.

Benefits of Keratin Hair Growth Oil

Using keratin hair growth oil can have numerous benefits for your hair. Here are some of the most significant advantages:

  • Promotes Hair Growth: Hair growth oil stimulates hair follicles, promoting healthy hair growth and reducing the likelihood of hair loss.
  • Strengthens Hair: Keratin oil helps to strengthen hair, reducing breakage and improving its elasticity.
  • Moisturizes and Nourishes: Keratin oil is rich in moisturizing ingredients that help to hydrate and nourish the hair, leaving it soft and supple.
  • Improves Shine and Texture: Keratin oil can enhance the overall appearance of hair, leaving it with a healthy shine and smooth texture.

Ingredients in Keratin Hair Growth Oil

Keratin hair growth oil typically contains a blend of natural ingredients that work together to promote hair health. Some common ingredients found in hair growth oil include:

  • Argan Oil: Rich in antioxidants and essential fatty acids, argan oil helps to nourish and moisturize the hair.
  • Jojoba Oil: Similar to sebum, jojoba oil helps to balance the scalp’s natural oils and promote healthy hair growth.
  • Coconut Oil: Coconut oil is rich in lauric acid, which helps to moisturize and nourish the hair.
  • Olive Oil: Olive oil is rich in antioxidants and helps to protect the hair from damage.

Benefits of Key Ingredients in Keratin Hair Growth Oil

IngredientBenefitSource
Argan OilMoisturizes and nourishes hairMorocco
Jojoba OilBalances scalp’s natural oilsNorth America
Coconut OilMoisturizes and nourishes hairSoutheast Asia
Olive OilProtects hair from damageMediterranean

Comparison of Keratin Hair Growth Oils

BrandKey IngredientsPriceCustomer Rating
Keratin ComplexKeratin, Argan Oil, Jojoba Oil$20-$304.5/5
MoroccanoilKeratin, Argan Oil, Coconut Oil$30-$404.8/5
KerastaseKeratin, Olive Oil, Argan Oil$40-$504.7/5

How to Use

Using hair growth oil is relatively simple. Here are some tips to help you get the most out of your hair growth oil:

  • Application Methods: You can apply hair growth oil to your hair in several ways, including massaging it into your scalp, applying it to the ends of your hair, or using it as a leave-in treatment.
  • Frequency of Use: For best results, use hair growth oil 2-3 times a week, depending on your hair type and the specific product you are using.

DIY Keratin Hair Growth Oil Recipes

If you prefer to make your own hair growth oil, here are a few simple recipes to get you started:

  • Recipe 1: Mix 1 tablespoon of argan oil with 1 tablespoon of jojoba oil and 1 tablespoon of coconut oil. Apply to your hair and scalp.
  • Recipe 2: Mix 1 tablespoon of olive oil with 1 tablespoon of argan oil and 1 tablespoon of jojoba oil. Apply to your hair and scalp.
  • Tips for Best Results: When making your own hair growth oil, be sure to store it in a cool, dry place and apply it to your hair within 6 months of making it.

DIY Recipes

RecipeIngredientsApplication
Recipe 1Argan Oil, Jojoba Oil, Coconut OilMassage into scalp and hair
Recipe 2Olive Oil, Argan Oil, Jojoba OilApply to hair and scalp
Recipe 3Coconut Oil, Olive Oil, Argan OilUse as a leave-in treatment

Common Myths

There are several myths surrounding hair growth oil that we should address:

  • Myth 1: Hair growth oil is only for people with damaged hair. 
  • Fact: Hair growth oil can benefit all hair types, from dry and damaged to healthy and strong.
  • Myth 2: Hair growth oil is only effective for a short period. 
  • Fact: When used regularly, hair growth oil can provide long-term benefits for your hair.

How Often Should I Apply Keratin Hair Growth Oil for Best Results?

Recommended Frequency of Application

To maximize the benefits of hair growth oil, it is essential to establish a consistent application routine. Here are the general recommendations for how often to apply hair growth oil:

  • 2-3 Times a Week: For most hair types, applying hair growth oil two to three times a week is ideal. This frequency allows the oil to penetrate the hair shaft and scalp effectively, promoting moisture retention and strengthening the hair without overwhelming it.

Application Techniques

Pre-Wash Treatment

  • 30 Minutes Before Washing: Apply hair growth oil to your hair and scalp 30 minutes before washing. This method helps protect your hair from the drying effects of shampoo and enhances moisture retention.

Post-Wash Treatment

  • After Washing: After washing your hair, apply a small amount of keratin oil to the ends while it is still damp. This technique helps seal in moisture and prevent frizz.

Leave-In Treatment

  • Daily Use: For those with particularly dry or damaged hair, using hair growth oil as a leave-in treatment can be beneficial. Apply a small amount to your hair after styling, focusing on the ends to maintain hydration throughout the day.

Benefits of Regular Application

Applying hair growth oil regularly can lead to several improvements in hair health:

  • Stronger Hair: Regular use strengthens the hair structure, reducing breakage and split ends.
  • Enhanced Moisture: Frequent application helps maintain hydration, making hair softer and more manageable.
  • Reduced Frizz: Consistent use can help control frizz and improve the overall appearance of your hair.
  • Improved Shine: Regular application of keratin oil can enhance the shine and luster of your hair, giving it a healthier look.

Considerations for Different Hair Types

  • Fine Hair: If you have fine hair, consider using hair growth oil once or twice a week to avoid weighing it down.
  • Thick or Curly Hair: For thick or curly hair, you may benefit from applying it three times a week or even daily, especially if your hair is prone to dryness.
  • Color-Treated Hair: If your hair is color-treated, using hair growth oil two to three times a week can help maintain vibrancy and moisture.

Customer Reviews and Testimonials

Many people have reported positive results from using this hair growth oil. Here are a few testimonials to give you an idea of what to expect:

  • “I noticed a significant reduction in hair loss and an improvement in the overall health of my hair after using keratin hair growth oil.”
  • “I was amazed at how soft and manageable my hair became after using hair growth oil. It’s now one of my go-to products.”

Customer Reviews

ReviewHair TypeResults
“I noticed a significant reduction in hair loss and an improvement in the overall health of my hair after using keratin hair growth oil.”Dry and damagedImproved hair health and reduced hair loss
“I was amazed at how soft and manageable my hair became after using keratin hair growth oil. It’s now one of my go-to products.”Healthy and strongSoft and manageable hair

Read Also: Strawberry Milk Perfume.

Frequently Asked Questions about Keratin Hair Growth Oil

What is keratin hair growth oil?

Hair growth oil is a topical treatment that contains keratin, a protein found in hair, skin, and nails.

Read Also: Perfume with Sandalwood and Jasmine.

How often should I use keratin hair growth oil?

For best results, use hair growth oil 2-3 times a week.

Read Also: Hair Protein Cream.

Can keratin oil help with hair loss?

Yes, keratin oil can help to stimulate hair growth and reduce hair loss.

Read Also: Peaches and Cream Nails.

Is keratin hair growth oil suitable for all hair types?

Yes, hair growth oil can benefit all hair types, from dry and damaged to healthy and strong.

Read Also: Lymphatic Drainage Cream.

How long does it take to see results?

Results can vary depending on individual hair types and the specific product used. However, most people start to see improvements within 2-3 weeks of regular use.

Read Also: Supplements for Booty Growth.

Conclusion

Keratin hair growth oil is a powerful tool for promoting healthy, strong hair. By understanding the benefits, ingredients, and application methods of hair growth oil, you can unlock the secrets to achieving the hair of your dreams. Whether you choose to use a commercial product or make your own, hair growth oil is a valuable addition to any hair care routine.

Read Also: Brazilian Keratin Oil.

Continue Reading

Beauty Tips

Brazilian Keratin Oil Hair Transformation

Published

on

brazilian keratin oil

Here is your complete guide to brazilian keratin oil.

Introduction to Brazilian Keratin Oil

If you’re on a quest for silky, smooth, and manageable hair, Brazilian keratin oil might just be the solution you’ve been searching for. This transformative hair treatment has gained immense popularity in recent years, and for good reason. Brazilian keratin oil is a versatile and effective solution that can address a wide range of hair concerns, from taming frizz to repairing damage and enhancing shine.

At its core, Brazilian keratin oil is a potent blend of natural ingredients that work in harmony to nourish and revitalize your locks. Derived from the nutrient-rich Amazon rainforest, this oil is packed with keratin, a protein that is essential for the health and strength of your hair. When applied to the hair, Brazilian keratin oil penetrates deep into the strands, helping to smooth the cuticle, reduce frizz, and impart a stunning, salon-worthy shine.

But their benefits don’t stop there. This versatile hair treatment can also:

  • Strengthen and repair damaged hair
  • Protect against heat styling and environmental stressors
  • Extend the life of color-treated hair
  • Improve manageability and ease of styling
  • Enhance overall hair health and vitality

Whether you have fine, thick, curly, or straight hair, keratin oil can be a game-changer in your hair care routine. In the following sections, we’ll dive deeper into the different types of keratin oil, explore how to use it effectively and uncover the numerous benefits it can offer for your unique hair type and needs.

Types of Brazilian Keratin Oil

When it comes to Brazilian keratin oil, there are several different formulations to choose from, each with its own unique features and benefits. Let’s take a closer look at the most popular options:

  1. Pure Brazilian Keratin Oil: This is the most concentrated form of the oil, offering a potent dose of keratin and other nourishing ingredients to transform your hair.
  2. Brazilian Keratin Oil Shampoo: Infused with the power of keratin oil, these specialized shampoos gently cleanse your hair while delivering the benefits of keratin deep into the strands.
  3. Brazilian Keratin Oil Conditioner: Designed to work in tandem with the keratin oil shampoo, these conditioners help to further smooth, strengthen, and hydrate your hair.
  4. Brazilian Keratin Oil Hair Mask: For an intensive hair treatment, keratin oil hair masks offer a concentrated dose of nourishment to deeply condition and revitalize your locks.

Regardless of which keratin oil product you choose, you can expect to see a noticeable difference in the health and appearance of your hair. Each formulation is carefully crafted to address specific hair concerns and deliver transformative results.

How to Use Brazilian Keratin Oil

Incorporating keratin oil into your hair care routine is a straightforward process, but there are a few key steps to ensure you get the best possible results. Here’s a step-by-step guide to using keratin oil effectively:

Cleanse Your Hair

Start by washing your hair with a keratin oil shampoo, which will gently remove any buildup or impurities while preparing your strands for the treatment.

Apply the Brazilian Keratin Oil

Depending on the length and thickness of your hair, dispense a small amount (usually a few drops) of keratin oil into the palm of your hand. Gently massage the oil into your hair, focusing on the mid-lengths and ends, where it’s needed most.

Distribute Evenly

Use your fingers to evenly distribute the keratin oil throughout your hair, ensuring that every strand is coated and nourished.

Allow Time to Absorb

Let the keratin oil sit on your hair for 5-10 minutes, allowing it to penetrate deep into the strands and work its magic.

Rinse and Style

Rinse the keratin oil out of your hair thoroughly, then style as usual. You may notice an immediate difference in the smoothness and manageability of your hair.

For best results, it’s recommended to use it 1-2 times per week, or as needed to maintain the desired level of frizz control and shine. Remember to adjust the amount of oil you use based on the length and thickness of your hair, and be mindful of any specific instructions or recommendations from the product manufacturer.

Benefits of Brazilian Keratin Oil

The transformative power of Brazilian keratin oil lies in its ability to address a wide range of hair concerns, from taming frizz to repairing damage and enhancing shine. Let’s explore the key benefits of incorporating this versatile hair treatment into your routine:

Smooths and Straightens Hair

The keratin in Brazilian keratin oil helps to smooth the hair cuticle, reducing frizz and flyaways and leaving your locks with a sleek, straight appearance.

Reduces Frizz

It creates a protective barrier around each hair strand, locking in moisture and preventing external factors, such as humidity, from causing frizz and unruly hair.

Adds Shine and Luster

The nourishing ingredients in keratin oil work to improve the overall health and appearance of your hair, imparting a beautiful, glossy shine.

Strengthens and Repairs Damaged Hair

Brazilian keratin oil is rich in proteins and other essential nutrients that help to mend split ends, strengthen weak strands, and revitalize damaged hair.

Protects Against Heat Styling

The protective properties of keratin oil help to shield your hair from the damaging effects of heat styling tools, such as blow dryers, straighteners, and curling irons.

Extends the Life of Hair Color

By sealing the hair cuticle and preventing color from fading, keratin oil can help to prolong the vibrancy and longevity of your hair color.

Suitable for All Hair Types

Whether you have fine, thick, curly, or straight hair, keratin oil can be tailored to your specific needs and hair type, delivering transformative results.

To better understand the impact on different hair types, let’s take a closer look at a comparison table:

Hair TypeEffectiveness of Brazilian Keratin Oil
Fine HairHelps to add weight and body, reducing flyaways and improving manageability.
Thick HairSmooths and tames coarse, unruly strands, leaving hair soft and manageable.
Curly HairHelps to reduce frizz and enhance curl definition, while adding shine and softness.
Straight HairHelps to maintain a sleek, straight appearance and prevent static and flyaways.
Damaged HairRepairs and strengthens strands, improving overall hair health and appearance.
Color-Treated HairHelps to extend the life of hair color by preventing fading and protecting the cuticle.

As you can see, it is a versatile and effective solution for a wide range of hair types and concerns, making it a valuable addition to any hair care routine.

Comparison vs Other Hair Treatments

When it comes to achieving smooth, frizz-free, and healthy-looking hair, keratin oil is not the only option available. Let’s take a closer look at how it stacks up against some other popular hair treatments:

TreatmentEffectivenessCostConvenience
Brazilian Keratin OilHighModerateEasy to use at home
Salon Keratin TreatmentHighHighRequires salon visit
Hair MasksModerateLowEasy to use at home
Hair OilsModerateLowEasy to use at home

As the table shows, keratin oil offers a high level of effectiveness in addressing a range of hair concerns, while being relatively affordable and easy to use at home. In comparison, salon keratin treatments can be more effective but come with a higher price tag and the need to visit a professional salon.

Cost and Brands

BrandPrice
Natural World$4.25 – $7.00
Fantasia IC$59.00
L’ANZA$38.00 – $81.50
FIT COSMETICS$7.00 – $12.00

FAQs About Brazilian Keratin Oil

As you explore the world of Brazilian keratin oil, you may have a few questions about its use and effectiveness. Here are some of the most commonly asked questions, along with their answers:

Is Brazilian Keratin Oil safe for color-treated hair?

Yes, keratin oil is generally safe for use on color-treated hair. In fact, it can help to extend the life of your hair color by protecting the cuticle and preventing fading.

How often should I use Brazilian Keratin Oil?

For best results, it’s recommended to use keratin oil 1-2 times per week, or as needed to maintain the desired level of frizz control and shine. Adjust the frequency based on your hair type and individual needs.

Can Brazilian Keratin Oil be used on wet or dry hair?

Brazilian keratin oil can be used on both wet and dry hair, depending on your preference and the specific product instructions. Some formulations may work better on damp hair, while others are designed for application on dry hair.

Read Also: Strawberry Milk Perfume.

How long does it take to see results from using Brazilian Keratin Oil?

The results from using keratin oil can be quite rapid, with many users reporting a noticeable difference in the smoothness, manageability, and shine of their hair after just one or two uses. However, for more long-lasting and transformative results, it’s recommended to use keratin oil consistently as part of your regular hair care routine.

Read Also: Perfume with Sandalwood and Jasmine.

Can Brazilian Keratin Oil be used on all hair types?

Yes, keratin oil is suitable for use on all hair types, from fine and straight to thick and curly. The versatility of this hair treatment allows it to be tailored to the specific needs and characteristics of your individual hair.

Read Also: Hair Protein Cream.

Conclusion

In the world of hair care, Brazilian keratin oil stands out as a true game-changer. This transformative hair treatment, derived from the nutrient-rich Amazon rainforest, offers a wealth of benefits that can dramatically improve the health, appearance, and manageability of your locks.

Read Also: Peaches and Cream Nails.

Whether you’re struggling with frizz, damage, or a lack of shine, Brazilian keratin oil has the power to address these concerns and leave your hair looking and feeling its absolute best. By smoothing the hair cuticle, reducing flyaways, and infusing your strands with essential proteins and nutrients, this versatile oil can help you achieve the silky, smooth, and manageable hair you’ve always desired.

Read Also: Supplements for Booty Growth.

But the benefits of keratin oil don’t stop there. This remarkable hair treatment can also protect your hair from the damaging effects of heat styling, extend the life of your hair color, and be tailored to suit a wide range of hair types, from fine and straight to thick and curly.

Read Also: Lymphatic Drainage Cream.

Continue Reading

Trending