Connect with us

Beauty Tips

Lip Filler Side Profile: Amazing Transformations

Published

on

lip filler side profile

Here is your complete guide to lip filler side profile

Introduction Lip Filler Side Profile

In the ever-evolving world of beauty and aesthetics, lip filler side profile has emerged as a game-changer, offering individuals the opportunity to enhance their facial features and achieve a more harmonious, balanced appearance. One of the most significant impacts of lip filler side profile is their ability to transform the side profile, creating a more defined, lifted, and symmetrical look.

As the side profile is a crucial aspect of facial aesthetics, the strategic placement of lip filler side profile can play a vital role in improving overall facial harmony. By injecting filler into specific areas of the lips, practitioners can address a variety of concerns, such as thin or uneven lips, a receding chin, or a lack of facial symmetry. This not only enhances the appearance of the lips but can also improve the overall proportions and balance of the face.

In this comprehensive guide, we will explore the science behind lip filler placement, the different techniques used to achieve the desired side profile, and the potential risks and considerations to keep in mind. We will also delve into the factors to consider when choosing a qualified practitioner and the steps to take to ensure a safe and successful treatment experience.

Understanding Lip Filler Placement

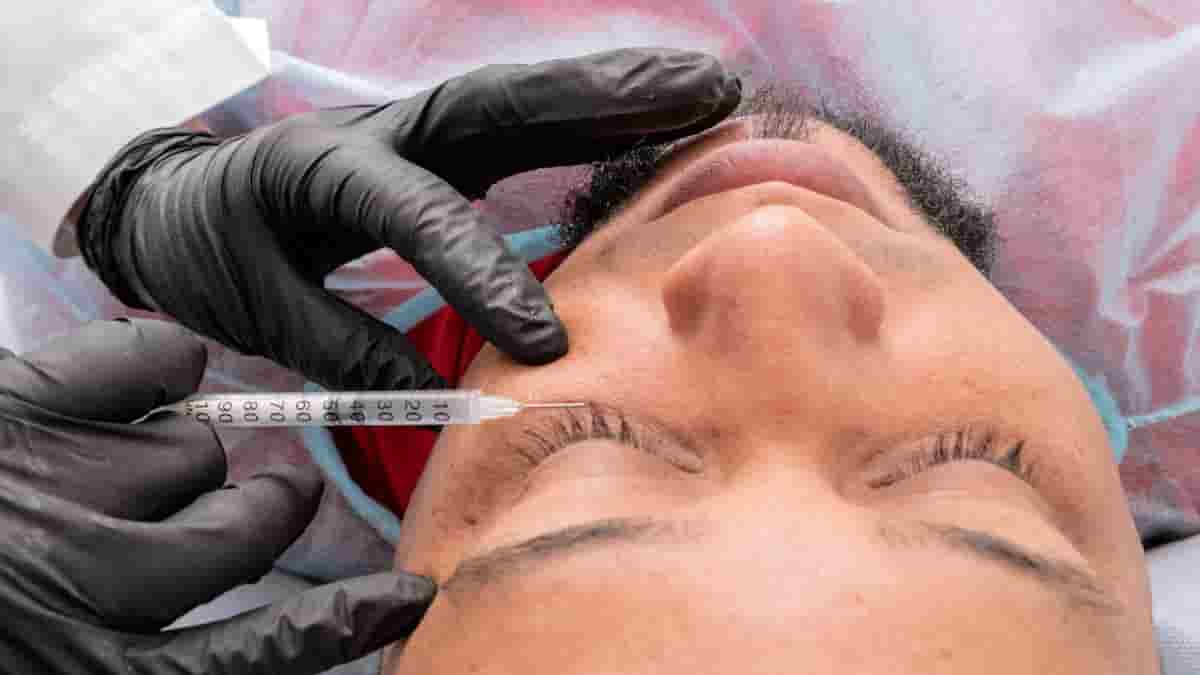
The strategic placement of lip fillers is crucial in achieving a harmonious side profile. Practitioners must have a deep understanding of the facial anatomy and the intricate network of blood vessels and nerves that run through the lips and surrounding areas.

One of the key factors in achieving a natural-looking side profile is the use of the right type and amount of filler. Different filler formulations, such as hyaluronic acid-based products, can have varying degrees of firmness and elasticity, which can impact the final result. Practitioners must carefully assess the patient’s facial features and desired outcome to determine the appropriate filler and injection technique.

Another important consideration is the injection technique itself. Practitioners may use a variety of techniques, such as linear threading, fanning, or serial puncture, to strategically place the filler and achieve the desired side profile. The depth and angle of the injections can also play a crucial role in the final result.

To ensure the safety and effectiveness of lip filler treatments, practitioners should also be well-versed in the potential risks and complications, such as vascular occlusion, infection, and asymmetry. By understanding these factors and taking the necessary precautions, practitioners can help their patients achieve a natural-looking and harmonious side profile.

Techniques for Achieving the Desired Side Profile

There are several techniques that practitioners can use to enhance the side profile using lip fillers. One of the most common approaches is the “9-point injection technique” (9-PIT), which involves strategically placing filler in nine specific points around the lips to achieve a lifted, contoured, and symmetrical appearance.

Another technique is the use of “corner lifts,” which involve injecting filler into the corners of the lips to create a more pronounced, upturned appearance. This can help to balance the side profile and create a more youthful, rejuvenated look.

In addition to these targeted injection techniques, practitioners may also use filler to address other facial features that can impact the side profile, such as the chin or jawline. By combining lip filler treatments with other facial rejuvenation procedures, such as chin augmentation or jawline contouring, practitioners can create a more harmonious and balanced overall appearance.

It’s important to note that the specific techniques used will depend on the individual patient’s facial anatomy, desired outcome, and the practitioner’s expertise. Patients should always consult with a qualified and experienced practitioner to determine the best course of action for their unique needs.

Comparison of Lip Filler Techniques for Side Profile Enhancement

TechniqueDescriptionPotential Benefits
9-Point Injection Technique (9-PIT)Strategically placing filler in 9 specific points around the lips– Achieves a lifted, contoured, and symmetrical appearance
– Helps to balance the side profile
Corner LiftsInjecting filler into the corners of the lips– Creates a more pronounced, upturned appearance
– Helps to balance the side profile and create a more youthful look
Combination TreatmentsUsing lip fillers in conjunction with other facial rejuvenation procedures, such as chin augmentation or jawline contouring– Addresses multiple facial features to create a more harmonious and balanced overall appearance

Factors to Consider When Choosing a Lip Filler Technique

FactorConsiderations
Facial Anatomy– Unique facial features and proportions
– Existing asymmetries or imbalances
Desired Outcome– Specific aesthetic goals (e.g., enhanced lip volume, lifted corners, balanced side profile)
– Preference for a natural or more dramatic look
Practitioner Expertise– Experience with various lip filler techniques
– Understanding of facial anatomy and proportions
Patient Safety– Practitioner’s adherence to safety protocols
– Ability to manage potential complications

Cost of Lip Filler Side Profile

LocationAverage Cost
United States$959
Oklahoma$787
Minnesota$1,218

The average cost of lip fillers in the U.S. is $959, but prices can range from $332 up to $2,354 for one treatment. Lip fillers are priced by the quantity of syringe injections and typically last between four and 12 months.

The cost of lip fillers varies depending on the provider’s location, the type of filler used, the amount of filler needed, and whether the provider charges a consultation fee. At the low end is Oklahoma at $787, while on the high end is Minnesota at $1,218.Factors that may influence the cost include:

  • The provider’s location and expertise
  • The type of filler used (e.g., Juvederm, Restylane, Belotero)
  • The amount of filler needed to achieve the desired result
  • Whether a consultation fee is charged

It’s important to note that lip fillers are not permanent, and if you want to maintain the results, you’ll need to get additional treatments. Health insurance typically does not cover the cost of lip fillers, as they are considered a cosmetic procedure.

Potential Risks and Considerations

While lip fillers can be an effective way to enhance the side profile, it’s important to be aware of the potential risks and considerations associated with these treatments. Some of the potential risks include:

  • Vascular Occlusion: Improper injection technique or the use of too much filler can lead to the blockage of blood vessels, which can result in serious complications such as tissue necrosis or blindness.
  • Infection: As with any injectable treatment, there is a risk of infection if the injection site is not properly cleaned and sterilized.
  • Asymmetry: Uneven or unbalanced filler placement can lead to asymmetry in the lips and side profile.
  • Allergic Reactions: Some patients may have an allergic reaction to the filler material, which can cause swelling, redness, and other adverse reactions.

To mitigate these risks, it’s essential to choose a qualified and experienced practitioner who is well-versed in the anatomy of the lips and the proper injection techniques. Patients should also be aware of the potential side effects and follow all post-treatment instructions to ensure a safe and successful outcome.

Potential Risks and Complications of Lip Filler Treatments

Risk/ComplicationDescriptionMitigation Strategies
Vascular OcclusionBlockage of blood vessels, leading to tissue necrosis or blindness– Proper injection technique
– Awareness of facial anatomy and blood vessel locations
– Immediate recognition and management of symptoms
InfectionBacterial or viral infection at the injection site– Strict adherence to sterile injection protocols
– Proper cleaning and disinfection of the treatment area
AsymmetryUneven or unbalanced filler placement, resulting in an unnatural appearance– Thorough assessment of facial features and proportions
– Precise injection technique and dosage
Allergic ReactionsAdverse immune response to the filler material– Comprehensive patient medical history review
– Patch testing for potential allergies
– Availability of emergency medical care

Factors to Consider When Choosing a Qualified Practitioner

FactorConsiderations
Credentials and Experience– Board certification in a relevant medical specialty (e.g., dermatology, plastic surgery)
– Extensive experience with lip filler treatments and side profile enhancement
Safety Protocols– Adherence to sterile injection techniques
– Ability to recognize and manage potential complications
Communication and Transparency– Clear explanation of the treatment process and expected outcomes
– Willingness to address patient concerns and answer questions
Customized Approach– Thorough assessment of the patient’s facial features and desired results
– Tailored treatment plan to achieve the best possible outcome

FAQs

How long do lip fillers last for side profile enhancement?

The longevity of lip fillers can vary depending on the type of filler used, the individual’s metabolism, and the specific treatment area. On average, lip fillers can last anywhere from 6 to 12 months before requiring a touch-up or re-treatment.

Can lip fillers be used to address a receding chin?

Yes, lip fillers can be used in conjunction with other facial rejuvenation procedures, such as chin augmentation, to create a more balanced and harmonious side profile. By strategically placing filler in the lips and chin area, practitioners can help to address issues like a receding chin and improve overall facial symmetry.

Are there any alternatives to lip fillers for side profile enhancement?

Yes, there are other non-surgical options for side profile enhancement, such as Botox injections to relax the muscles around the lips and create a more lifted appearance, or dermal fillers in other areas of the face to address issues like a receding chin or jawline.

Read Also: Green Oil Hair.

How can I ensure a safe and successful lip filler treatment for side profile enhancement?

To ensure a safe and successful lip filler treatment, it’s important to choose a qualified and experienced practitioner who is well-versed in the anatomy of the lips and the proper injection techniques. Patients should also be aware of the potential risks and complications and follow all post-treatment instructions carefully.

Read Also: Curl Keratin Treated Hair.

What are the key factors to consider when choosing a lip filler technique for side profile enhancement?

The key factors to consider when choosing a lip filler technique for side profile enhancement include the patient’s facial anatomy, desired outcome, the practitioner’s expertise, and the potential risks and safety considerations. A thorough assessment and a customized treatment plan are essential for achieving the best possible results.

Read Also: Keratin Granulations Treatment.

Conclusion

Lip fillers have emerged as a powerful tool for enhancing the side profile and creating a more balanced, harmonious facial appearance. By understanding the science behind lip filler placement, the various techniques used to achieve the desired results, and the potential risks and considerations, individuals can make informed decisions about their treatment options and work with qualified practitioners to achieve their aesthetic goals.

Read Also: Filler Around Mouth Before After.

Whether you’re looking to address issues like thin or uneven lips, a receding chin, or a lack of facial symmetry, lip fillers can be a safe and effective solution. By taking the time to research your options and work with a skilled practitioner, you can achieve a natural-looking and rejuvenated side profile that boosts your confidence and enhances your overall appearance.

Read Also: Pull Ups While Pregnant.

Remember, the key to a successful lip filler treatment for side profile enhancement lies in choosing a qualified and experienced practitioner, understanding the potential risks and considerations, and following all post-treatment instructions carefully. With the right approach, you can unlock the transformative power of lip fillers and achieve the side profile of your dreams.

Read Also: Labial Filler Injection Before and After.

Continue Reading
Click to comment

Leave a Reply

Your email address will not be published. Required fields are marked *

Beauty Tips

Hair Botox vs Keratin: Treatment Results

Published

on

hair botox vs keratin

Here is your complete guide to hair botox vs keratin

Introduction to Hair Botox vs Keratin

What are the differences between hair botox vs keratin? In the world of hair treatments, two of the most popular options for revitalizing, smoothing, and straightening locks are Hair Botox vs Keratin treatments. While both treatments aim to transform your hair, they differ in their composition, application process, and results. Understanding the differences between hair botox vs keratin treatments is crucial to make an informed decision about which treatment is best suited for your hair type and goals.

In this comprehensive article, we’ll explore the world of Hair Botox and Keratin treatments, delving into their unique characteristics, benefits, and drawbacks. By the end of this article, you’ll have a clear understanding of which treatment is right for you, empowering you to make a confident choice for your hair’s health and beauty.

What is Hair Botox?

Hair Botox, also known as a hair smoothing treatment, is a chemical-free treatment that aims to repair damaged hair, fill in gaps, and make hair stronger and less frizzy. The main ingredients used in Hair Botox include:

  • Caviar oil
  • Vitamin E
  • Vitamin B5
  • Collagen complex

The treatment works by penetrating deep into the hair shaft, providing nourishment and hydration. Hair Botox is applied to washed hair and left for a few minutes before being rinsed off. The results are instant, leaving hair healthier, softer, and shinier.

What is Keratin Treatment?

Keratin treatment, on the other hand, is a chemical-based treatment that uses formaldehyde and other chemicals to straighten hair. The main goal of Keratin treatment is to leave hair soft, shiny, and smooth, with reduced frizz and waves.The application process of Keratin treatment involves:

  1. Applying the solution to damp hair
  2. Straightening the hair in sections to seal the product

The entire process typically takes around 3 hours to complete.

Differences Between Hair Botox and Keratin

While both Hair Botox and Keratin treatments aim to transform hair, there are several key differences between the two:

CharacteristicHair BotoxKeratin Treatment
CompositionChemical-freeContains formaldehyde and other chemicals
Application ProcessApplied to washed hair and left for a few minutes before being rinsed offApplied to damp hair and straightened in sections to seal the product
Time to Complete1.5-2 hours3 hours
SafetySafer than Keratin treatmentCan emit toxic fumes during application and is not recommended for pregnant or nursing mothers

Another significant difference lies in the longevity of each treatment. Hair Botox typically lasts anywhere between 2-4 months, while Keratin treatment lasts 4-6 months. The frequency of each treatment will depend on the growth rate of the hair and how it is maintained after each treatment session.

How Long Does Each Treatment Last?

The longevity of Hair Botox and Keratin treatments can vary depending on several factors:

  • Hair type
  • Hair condition
  • Lifestyle
  • Maintenance after each treatment session

In general:

  • Hair Botox lasts 2-4 months
  • Keratin treatment lasts 4-6 months

It’s important to note that the frequency of each treatment will depend on the growth rate of the hair and how it is maintained after each treatment session.

Which Treatment is Right for You?

When choosing between Hair Botox and Keratin treatments, it’s essential to consider several factors, such as hair type, hair condition, and desired results. Here’s a breakdown of which treatment may be more suitable for different hair types:

Hair TypeHair BotoxKeratin Treatment
Thick, extra-frizzy, or unmanageable hairMay be too harshWorks best
Fine or thin hairSuitableMay be too harsh
Damaged hairSuitableMay be too harsh

Keratin treatment works best for thick, extra-frizzy, or unmanageable hair, but may be too harsh for very damaged, fine, or thin hair. Hair Botox, on the other hand, works for any hair type and is suitable for fine or heavily lightened hair.

It’s also important to consider the differences in styling results. Keratin treatment is more effective at smoothing waves and curls, while Hair Botox provides a more natural look.

Consulting with a professional stylist is highly recommended to determine which treatment is right for you based on your specific hair type and goals.

The Best Hair Botox Routine

Preparing Your Hair

  • Avoid washing your hair for at least 24 hours before the treatment
  • Inform your stylist about any allergies or sensitivities you may have
  • Discuss your desired results and any concerns with your stylist

The Hair Botox Treatment Process

  1. Your hair will be washed with a clarifying shampoo to remove any buildup or residue
  2. The Hair Botox solution will be applied to your hair and left on for 10-15 minutes
  3. Your hair will be rinsed thoroughly to remove the solution
  4. A deep conditioning treatment will be applied to your hair and left on for 5-10 minutes
  5. Your hair will be rinsed again and gently towel-dried

Aftercare and Maintenance

  • Avoid washing your hair for at least 48 hours after the treatment
  • Use a sulfate-free, color-safe shampoo and conditioner
  • Limit heat styling and use a heat protectant product
  • Schedule regular trims to maintain healthy ends and prevent split ends
  • The results of Hair Botox typically last 2-4 months

The Best Keratin Treatment Routine

Preparing Your Hair

  • Avoid washing your hair for at least 24 hours before the treatment
  • Inform your stylist about any allergies or sensitivities you may have
  • Discuss your desired results and any concerns with your stylist

The Keratin Treatment Process

  1. Your hair will be washed with a clarifying shampoo to remove any buildup or residue
  2. The Keratin solution will be applied to your hair and left on for 30-45 minutes
  3. Your hair will be blow-dried straight
  4. A flat iron will be used to seal the Keratin into your hair
  5. Your hair will be styled as desired

Aftercare and Maintenance

  • Avoid washing your hair for at least 72 hours after the treatment
  • Use a sulfate-free, color-safe shampoo and conditioner
  • Limit heat styling and use a heat protectant product
  • Schedule regular trims to maintain healthy ends and prevent split ends
  • The results of Keratin treatment typically last 4-6 months

Both Hair Botox and Keratin treatments offer unique benefits for transforming your hair. Consulting with a professional stylist is highly recommended to determine which treatment is right for you based on your specific hair type, condition, and goals.

Cost of Hair Botox vs Keratin

TreatmentCost
Hair Botox$150 to $400 per session
Keratin$200 to $600 per session

The cost of Hair Botox and Keratin treatments can vary depending on several factors:

Hair Botox Cost

  • Hair Botox treatment can cost anywhere from $150 to $400 per session
  • The cost may be higher or lower depending on the length and thickness of your hair
  • It is essential to consult with a professional stylist to determine the exact cost for your hair type and condition

Keratin Treatment Cost

  • Keratin treatment can cost between $200 to $600 per session
  • The cost may be higher or lower depending on the salon’s location, the stylist’s expertise, and your hair’s length and thickness
  • Salons located in upscale areas or metropolitan cities may charge more due to higher operational costs compared to those in smaller towns
  • Highly experienced stylists or those with specialized training in Keratin treatment may command higher fees due to their expertise
  • Well-known and high-end salons often charge more due to their market positioning and the premium services they offer

It is important to note that both Hair Botox and Keratin treatments are not permanent solutions. Hair Botox treatment results can last up to three months, while the effects of Keratin hair treatment can last for up to six months.

FAQs

Is Hair Botox the same as Keratin?

No, Hair Botox and Keratin treatments are not the same. While they both aim to transform hair, they differ in their composition, application process, and results.

Read Also: Shampoo for Summer.

Which treatment is more expensive?

The cost of Hair Botox and Keratin treatments can vary depending on several factors, such as location, salon, and the length and thickness of your hair. In general, Keratin treatments tend to be more expensive due to the use of chemicals and the longer application process.

Read Also: Summer Dip Nails.

Does Keratin last longer than Botox?

Yes, Keratin treatment typically lasts longer than Hair BotoxKeratin treatment can last 4-6 months, while Hair Botox lasts 2-4 months.

Read Also: Red Glitter Lipstick.

How long does each treatment last?

  • Hair Botox lasts 2-4 months
  • Keratin treatment lasts 4-6 months

Read Also: Dark Glitter Lipstick.

Which treatment is safer?

Hair Botox is considered safer than Keratin treatment because it is chemical-free. Keratin treatment can emit toxic fumes during application and is not recommended for pregnant or nursing mothers.

Read Also: Glitter Lipstick Pink.

    Conclusion

    In conclusion, both Hair Botox and Keratin treatments offer unique benefits for transforming your locks. Hair Botox is a chemical-free treatment that repairs damaged hair, fills in gaps, and makes hair stronger and less frizzy, while Keratin treatment uses chemicals to straighten hair and leave it soft, shiny, and smooth.

    Read Also: Korean Face Oil.

    When choosing between the two, it’s essential to consider your hair type, hair condition, and desired results. Consulting with a professional stylist is highly recommended to determine which treatment is right for you.

    Read Also: Pull Ups While Pregnant.

    Regardless of which treatment you choose, both Hair Botox and Keratin treatments offer a chance to revitalize your hair and boost your confidence. Embrace the transformation and enjoy the journey to healthier, more beautiful locks.

    Read Also: Oil Keratin.

    Continue Reading

    Beauty Tips

    Oil Keratin: Transform Your Hair Instantly

    Published

    on

    oil keratin

    Here is your complete guide oil keratin

    Introduction to Oil Keratin

    Are you tired of frizzy, unmanageable hair that never seems to cooperate with your styling efforts? Look no further than oil keratin treatment! This revolutionary hair treatment has been taking the beauty world by storm, offering a range of benefits for all hair types. From smoothing and straightening to nourishing and strengthening, oil keratin is the solution you’ve been searching for.

    In this comprehensive guide, we’ll dive deep into the world of oil keratin, exploring its benefits, safety, and the step-by-step process of applying it at home. We’ll also address common questions and provide expert advice to help you achieve salon-worthy results without breaking the bank. Get ready to say goodbye to bad hair days and hello to the healthiest, smoothest locks of your life!

    What is Oil Keratin Treatment?

    Oil keratin treatment is a hair treatment that combines the power of keratin with the nourishing properties of organic oils and acids. Unlike traditional keratin treatments, which can be harsh on the hair and contain potentially harmful chemicals like formaldehyde, oil keratin is a gentler alternative that still delivers impressive results.

    The key ingredients in oil keratin treatments include:

    • Keratin: A protein that strengthens and smooths the hair
    • Organic oils: Such as argan, coconut, and olive oil, which nourish and protect the hair
    • Acids: Like citric acid, which helps seal the cuticles and lock in moisture

    By combining these powerful ingredients, oil keratin treatments work to straighten and smooth the hair while also improving its overall health and appearance.

    Benefits of Oil Keratin for Hair

    One of the biggest advantages of oil keratin treatment is its ability to transform even the most unruly hair into a smooth, manageable mane. Here are some of the key benefits:

    Straightening and Smoothing

    Oil keratin treatments work to straighten and smooth the hair, reducing frizz and creating a sleek, polished look. This makes styling easier and helps you achieve your desired hairstyle with less effort.

    Increased Shine and Luster

    The nourishing oils in oil keratin treatments help to seal the cuticles and lock in moisture, resulting in a beautiful, glossy shine that lasts for weeks.

    Sealing Cuticles and Reducing Frizz

    By sealing the cuticles, oil keratin treatments help to reduce frizz and flyaways, keeping your hair looking smooth and polished even in humid or dry conditions.

    Nourishing and Strengthening

    The combination of keratin and organic oils in oil keratin treatments helps to nourish and strengthen the hair, reducing breakage and improving overall hair health.

    Improved Manageability and Reduced Styling Time

    With smoother, more manageable hair, you’ll find that styling takes less time and effort. Say goodbye to endless brushing and hello to effortless, salon-worthy looks.

    Safety of At-Home Oil Keratin Treatments

    One of the biggest concerns when it comes to oil keratin treatment is safety. Many traditional keratin treatments contain formaldehyde, a potentially harmful chemical that can cause irritation and even long-term health issues. However, when using quality, formaldehyde-free products, oil keratin treatments are a safe and effective option for achieving healthy, beautiful hair.

    Another advantage of at-home oil keratin treatments is the comfort and convenience they offer. You can achieve salon-worthy results in the comfort of your own home, without the added cost and hassle of visiting a salon. Additionally, at-home treatments are often more cost-effective, making it easier to maintain your hair’s health and appearance.

    Preparing for an Oil Keratin Treatment

    Before starting your treatment, it’s important to have all the necessary supplies on hand. This includes:

    • Shampoo and conditioner specifically formulated for treated hair
    • Styling products like serum or oil to maintain the treatment
    • Gloves and eye protection for safety
    • Clips or clamps for sectioning the hair

    It’s also crucial to start with clean, dry hair. Avoid washing your hair for at least 24 hours before the treatment, as this will help the product adhere better to your strands.

    Applying the Oil Keratin Treatment

    Once you have all your supplies ready, it’s time to begin the treatment process. Follow these steps for best results:

    1. Section your hair into manageable pieces, using clips or clamps to keep it in place.
    2. Apply the treatment to each section, starting from the roots and working your way down to the ends.
    3. Use a wide-tooth comb or your fingers to evenly distribute the product throughout your hair.
    4. Allow the treatment to sit for the recommended time, usually around 30 minutes to an hour.
    5. Rinse the treatment out thoroughly, making sure to remove all traces of product.

    It’s important to follow the manufacturer’s instructions carefully and to use protective equipment like gloves and eye protection to ensure your safety during the process.

    Best Products for Oil Keratin Treatments

    BrandProductKey FeaturesPrice
    L’ANZAKeratin Healing Oil– Nourishes and revives dry, damaged hair and scalp
    – Sulfate-free formula with Phyto IV Complex
    – Provides UV protection
    $43.78
    OGXFrizz-Free + Keratin Smoothing Oil Miracle Gloss Spray– 5-in-1 formula de-frizzes and adds shine
    – Contains argan oil
    – Affordable drugstore option
    $8.99
    LusetaKeratin Hair Oil Serum– Strengthens and nourishes color-treated, damaged, and dry hair
    – Sulfate, paraben, and gluten-free
    – Affordable price point
    $19.49
    HASKKeratin Protein Smoothing Oil– Helps smooth and add shine to hair
    – Affordable drugstore option
    – Cruelty-free
    $6.99
    MoroccanoilMoroccanoil Treatment– Iconic argan oil-infused formula
    – Adds shine and softness
    – Lightweight texture suitable for all hair types
    $44.00
    Parachute AdvansedGold Coconut Hair Oil– Infused with coconut oil and keratin
    – Helps nourish and strengthen hair
    – Affordable price point
    $3.99
    K KerotinKeratin Hair Treatment Oil– Helps repair damaged hair
    – Adds shine and softness
    – Affordable drugstore option
    $14.99

    Key Takeaways:

    • L’ANZA and Moroccanoil offer premium, salon-quality treatments
    • OGX and HASK provide affordable, drugstore-available options
    • Luseta and Parachute Advansed offer keratin-infused oils at a lower price point
    • Most brands offer sulfate-free, cruelty-free formulas for added safety and efficacy

    Reference:

    The Best Routine for Oil Keratin Treatments

    Achieving salon-quality results with an oil keratin treatment at home is easy when you follow a consistent hair care routine. Here’s a step-by-step guide to help you get the most out of your oil keratin treatment:

    Preparing Your Hair

    • Wash your hair with a sulfate-free, keratin-infused shampoo for at least a week before your treatment to prepare your hair.
    • Avoid using hair oils or heavy styling products in the days leading up to your treatment.
    • Make sure your hair is clean, dry, and free of any residue before applying the treatment.

    Drying and Styling

    • Gently pat your hair dry with a soft, absorbent microfiber towel.
    • Use a blow dryer on the lowest heat setting, keeping the nozzle at least six inches away from your hair to prevent heat damage.
    • Style your hair as desired, using a small amount of keratin-infused serum or oil to help maintain the treatment and keep your hair looking its best.

    Maintaining Your Treatment

    • Wash your hair less frequently, using a sulfate-free, keratin-infused shampoo and conditioner.
    • Avoid using hot tools like curling irons or straighteners, as they can cause damage and reduce the effectiveness of the treatment.
    • If you do use hot tools, make sure to use a heat protectant product and keep the temperature as low as possible.
    • Brush your hair gently with a wide-tooth comb or a boar bristle brush to avoid breakage and maintain the treatment’s results.

    By following this routine and using quality, keratin-infused products, you can keep your treatment looking its best for weeks to come. Remember to be gentle with your hair and avoid any harsh chemicals or styling techniques that could compromise the treatment’s effectiveness.

    Rinsing and Drying the Treatment

    After applying the treatment, it’s time to rinse and dry your hair. Start by thoroughly rinsing out the product, making sure to remove all traces of it from your hair. Use cool water to help seal the cuticles and lock in the treatment’s benefits.

    Once your hair is rinsed, gently pat it dry with a towel. Avoid rubbing or twisting your hair, as this can cause damage and frizz. If you’re using a blow dryer, make sure to use the lowest heat setting and keep the nozzle at least six inches away from your hair to prevent heat damage.

    Comparing Oil Keratin to Other Hair Oils

    FeatureOil KeratinArgan OilCoconut OilMoroccan Oil
    Main IngredientKeratin, organic oils, acidsArgan oilCoconut oilArgan oil
    Hair BenefitsStraightening, smoothing, increased shine, reduced frizz, nourishing, strengtheningSoftening, frizz reduction, shine enhancementMoisturizing, strengthening, frizz reductionSoftening, frizz reduction, shine enhancement
    SafetyFormaldehyde-free, gentle alternative to traditional keratin treatmentsGenerally safe for all hair typesGenerally safe for all hair typesGenerally safe for all hair types
    ApplicationApply to clean, dry hair, allow to sit for 30 mins to 1 hour, rinse thoroughlyApply to damp or dry hair, leave inApply to scalp and hair, leave in overnight or for a few hours before washingApply to damp or dry hair, leave in
    LongevityLasts 3-6 months with proper maintenanceLasts until next washLasts until next washLasts until next wash
    CostVaries depending on brand and salon vs. at-home treatmentAffordableAffordableAffordable

    Key Takeaways:

    • The treatments provide more long-lasting results compared to other oils
    • Argan, coconut, and Moroccan oils are generally safe for all hair types
    • It is a gentler alternative to traditional keratin treatments
    • Applying oils to clean, dry hair and allowing them to sit before rinsing maximizes benefits

    Styling After an Oil Keratin Treatment

    One of the best things about keratin treatments is how easy they make styling your hair. With smoother, more manageable strands, you’ll find that your styling routine takes less time and effort. Here are some tips for styling after treatment:

    • Use a small amount of styling product, like serum or oil, to help maintain the treatment and keep your hair looking its best.
    • Avoid using hot tools like curling irons or straighteners, as they can cause damage and reduce the effectiveness of the treatment.
    • If you do use hot tools, make sure to use a heat protectant product and keep the temperature as low as possible.
    • Brush your hair gently with a wide-tooth comb or a boar bristle brush to avoid breakage and maintain the treatment’s results.

    By following these tips and using quality products, you can keep your treatment looking its best for weeks to come.

    Read Also: Shampoo for Summer.

    Frequently Asked Questions (FAQs)

    How often should I get an oil keratin treatment?

    The frequency of oil treatments depends on your hair type and the specific product you’re using. Most treatments last between 3-6 months, so you may need to get them done every 4-6 weeks to maintain the results.

    Read Also: Summer Dip Nails.

    Can I color my hair after an oil keratin treatment?

    It’s best to wait at least 2-3 weeks after a keratin treatment before coloring your hair. This allows the treatment to fully set and prevents any potential damage from the color process.

    Read Also: Red Glitter Lipstick.

    Is it safe to use hot tools on my hair after an oil keratin treatment?

    While it’s best to avoid using hot tools as much as possible after an oil treatment, they can be used in moderation. Make sure to use a heat protectant product and keep the temperature as low as possible to prevent damage.

    Read Also: Dark Glitter Lipstick.

    How do I maintain my oil keratin treatment at home?

    To maintain your oil treatment at home, use a sulfate-free shampoo and conditioner, avoid washing your hair too frequently, and use a small amount of styling product like serum or oil to keep your hair looking its best.

    Read Also: Glitter Lipstick Pink.

    Can oil keratin treatments damage my hair?

    When used properly with quality products, the treatments are safe and effective for most hair types. However, if you have extremely damaged or fragile hair, it’s best to consult with a professional before getting the treatment.

    Read Also: Pull Ups While Pregnant.

    Conclusion

    If you’re looking for a way to transform your hair from frizzy and unmanageable to smooth, shiny, and healthy, oil keratin treatment is the solution you’ve been searching for. With its range of benefits, including straightening, smoothing, and nourishing, oil keratin is a game-changer for anyone who wants to achieve salon-worthy results at home.By following the tips and advice in this guide, you can safely and effectively apply oil keratin treatments to your hair and maintain the results for weeks to come. Say goodbye to bad hair days and hello to the healthiest, most beautiful locks of your life!

    Read Also: Korean Face Oil.

    Continue Reading

    Beauty Tips

    Korean Face Oil: How to Use Guide

    Published

    on

    korean face oil

    Here is your complete guide to korean face oil

    Introduction to Korean Face Oil

    Korean face oil has taken the beauty world by storm, and for good reason. These nourishing elixirs are formulated with a blend of natural ingredients that work together to deeply hydrate, nourish, and revitalize the skin. Whether you’re dealing with dry, dehydrated skin, signs of aging, or uneven skin tone, Korean face oil offers a solution that is both effective and luxurious.

    In this comprehensive guide, we’ll explore the benefits of Korean face oil, the best ingredients to look for, and how to incorporate them into your skincare routine for optimal results. By the end of this article, you’ll have a better understanding of why Korean face oil is a must-have in your beauty arsenal and how to choose the perfect one for your skin type and concerns.

    The Benefits of Korean Face Oil

    Deeply Hydrating

    One of the primary benefits of Korean face oil is their ability to deeply hydrate the skin. These oils are rich in fatty acids and antioxidants that penetrate deep into the skin’s layers, providing long-lasting moisture and preventing water loss. As a result, your skin will feel soft, supple, and radiant.

    Improves Skin Barrier Function

    Many Korean face oil contain ingredients like ceramides and fatty acids that help to strengthen and repair the skin’s natural barrier. This barrier is responsible for keeping moisture in and environmental stressors out. By improving barrier function, Korean face oil help to prevent moisture loss and protect the skin from damage.

    Anti-Aging Properties

    Korean face oil is often formulated with ingredients like vitamin C, retinol, and CoQ10 that help to reduce the appearance of fine lines and wrinkles. These ingredients work by stimulating collagen production, improving skin elasticity, and evening out skin tone. Regular use of Korean face oils can help to keep your skin looking youthful and radiant.

    Calms Inflammation

    Some Korean face oil contains soothing ingredients like centella asiatica and cica that help to calm redness, irritation, and inflammation. This makes them particularly beneficial for those with sensitive or acne-prone skin, as they can help to reduce the appearance of blemishes and prevent future breakouts.

    Brightens Complexion

    Many Korean face oil contains natural brightening ingredients like niacinamide, licorice root extract, and vitamin C that help to even out skin tone and reduce the appearance of dark spots and hyperpigmentation. Regular use can help to reveal a more radiant, even complexion.

    The Best Ingredients in Korean Face Oil

    When choosing a Korean face oil, it’s important to look for high-quality ingredients that are suitable for your skin type and concerns. Here are some of the best ingredients to look for:

    Camellia Oil

    Camellia oil is a lightweight, non-greasy oil that is rich in oleic acid, antioxidants, and vitamins A, B, C, and E. It helps to deeply nourish and hydrate the skin while improving skin elasticity and reducing the appearance of fine lines and wrinkles.

    Rosehip Seed Oil

    Rosehip seed oil is a dry oil that is high in linoleic acid, vitamin C, and retinol. It helps to improve skin texture, reduce the appearance of scars and hyperpigmentation, and promote collagen production.

    Marula Oil

    Marula oil is a lightweight, fast-absorbing oil that is rich in oleic acid, antioxidants, and vitamins C and E. It helps to deeply hydrate the skin, reduce inflammation, and improve skin barrier function.

    Argan Oil

    Argan oil is a rich, nourishing oil that is high in fatty acids, antioxidants, and vitamin E. It helps to deeply hydrate the skin, improve skin elasticity, and reduce the appearance of fine lines and wrinkles.

    Jojoba Oil

    Jojoba oil is a lightweight, non-greasy oil that closely resembles the skin’s natural sebum. It helps to regulate oil production, reduce the appearance of pores, and improve skin texture.

    Korean Face Oil Benefits

    IngredientBenefits
    Camellia Oil– Deeply nourishes and hydrates the skin
    – Improves skin elasticity
    – Reduces the appearance of fine lines and wrinkles
    Rosehip Seed Oil– Improves skin texture
    – Reduces the appearance of scars and hyperpigmentation
    – Promotes collagen production
    Marula Oil– Deeply hydrates the skin
    – Reduces inflammation
    – Improves skin barrier function
    Argan Oil– Deeply hydrates the skin
    – Improves skin elasticity
    – Reduces the appearance of fine lines and wrinkles
    Jojoba Oil– Regulates oil production
    – Reduces the appearance of pores
    – Improves skin texture

    Recommended Korean Face Oil by Skin Type

    Skin TypeRecommended Korean Face Oil
    Oily/Acne-Prone– Jojoba Oil
    – Rosehip Seed Oil
    Dry/Mature– Camellia Oil
    – Argan Oil
    Sensitive– Look for fragrance-free and non-irritating formulas

    How to Incorporate Korean Face Oil into Your Routine

    Korean face oil can be easily incorporated into your existing skincare routine. Here’s how to do it:

    1. Cleanse your face with a gentle, non-drying cleanser to remove any dirt, oil, or makeup.
    2. Apply a few drops of your chosen face oil to your fingertips and gently massage it into your skin, focusing on areas that are particularly dry or dehydrated.
    3. Allow the oil to fully absorb into your skin before applying any other skincare products.
    4. Follow up with your usual moisturizer to lock in the benefits of the oil.
    5. Use the oil both morning and night for best results.

    It’s important to note that face oil is not a replacement for moisturizer, but rather a complementary step in your skincare routine. They help to provide an extra boost of hydration and nourishment to the skin.

    Choosing the Right Korean Face Oil for Your Skin Type

    The key to getting the most out of your face oil is choosing one that’s suitable for your skin type and concerns. Here are some recommendations:

    • For normal skin, opt for lightweight oils like jojoba, marula, and squalane.
    • For dry skin, choose richer oils like argan, rosehip, and camellia.
    • For oily skin, try oils like tea tree, grapeseed, and jojoba that won’t clog pores.
    • For combination skin, marula, jojoba, and grapeseed oils are good options.
    • For sensitive skin, moringa oil is gentle and non-irritating.
    • For acne-prone skin, tea tree, jojoba, and rosehip oils can help control breakouts.

    Remember, it’s always best to do a patch test first to ensure the oil doesn’t cause any irritation. If you have any specific concerns, consult with a dermatologist to get personalized recommendations.

    Frequency of Use

    Frequency of UseRecommendation
    Morning and Night– For best results, use a Korean face oil both morning and night
    Once Daily– If you have particularly oily skin, use the oil only once a day, preferably at night

    Using Korean Face Oils During Pregnancy

    PregnancyRecommendation
    Safe to Use– Many Korean face oils are safe to use during pregnancy, but always consult with your healthcare provider first
    Avoid Certain Ingredients– Avoid oils that contain retinol or other ingredients that may be contraindicated during pregnancy

    Using Korean Face Oils on the Body

    Body UseRecommendation
    Beneficial for Dry Areas– Korean face oils can be used on the body, especially on dry, rough areas like elbows, knees, and heels
    Patch Test First– Always do a patch test first to ensure that the oil does not cause any irritation

    Read Also: Face Mask for Summer.

    Frequently Asked Questions

    Can Korean face oil be used on all skin types?

    Korean face oil can be used on all skin types, but it’s important to choose an oil that is suitable for your specific skin type and concerns. Those with oily or acne-prone skin may want to opt for lighter, non-comedogenic oils like jojoba or rosehip seed oil, while those with dry or mature skin may prefer richer oils like camellia or argan oil.

    Read Also: Shampoo for Summer.

    How often should I use a Korean face oil?

    Most experts recommend using a face oil both morning and night for best results. However, if you have particularly oily skin, you may want to use it only once a day, preferably at night.

    Read Also: Summer Dip Nails.

    Can Korean face oils be used during pregnancy?

    Many Korean face oils are safe to use during pregnancy, but it’s always best to consult with your healthcare provider before using any new skincare products. Avoid oils that contain retinol or other ingredients that may be contraindicated during pregnancy.

    Read Also: Red Glitter Lipstick.

    How do I choose the right Korean face oil for my skin type?

    When choosing a face oil, consider your skin type and concerns. Look for oils that are high in fatty acids and antioxidants, and choose a formula that is suitable for your skin type. If you have sensitive skin, look for oils that are fragrance-free and non-irritating.

    Read Also: Dark Glitter Lipstick.

    Can Korean face oil be used on the body?

    Many face oil can be used on the body as well as the face. They can be particularly beneficial for dry, rough areas like elbows, knees, and heels. Always do a patch test first to ensure that the oil does not cause any irritation.

    Read Also: Pull Ups While Pregnant.

    Conclusion

    Korean face oil is a powerful addition to any skincare routine, providing deep hydration, nourishment, and anti-aging benefits. By incorporating a high-quality face oil into your routine, you can achieve healthier, more radiant skin. Remember to choose an oil that is suitable for your skin type and concerns, and to use it consistently for best results. With so many amazing Korean face oil on the market, there’s sure to be one that’s perfect for you.

    Read Also: Glitter Lipstick Pink.

    Continue Reading

    Trending