Connect with us

Beauty Tips

Lip Filler vs Botox: The Ultimate Comparison

Published

on

lip filler vs botox

Here is your complete guide to lip filler vs botox

Introduction to Lip Filler vs Botox

When it comes to achieving the perfect pout, the choice between lip filler vs botox can be a daunting one. Both treatments offer unique benefits and considerations, and understanding the differences is crucial for making an informed decision. In this comprehensive guide, we’ll explore the world of “lip filler vs botox” and provide you with the insights you need to enhance your lips with precision.

The “lip filler vs botox” debate is a common one among those seeking to improve the appearance of their lips. Lip fillers and Botox are two of the most popular cosmetic treatments available, each with its own set of advantages and drawbacks. By understanding the key differences between these two options, you can make an informed decision that aligns with your aesthetic goals and personal preferences.

The Botox Lip Flip

Botox, a neurotoxin derived from the Clostridium botulinum bacteria, is a popular choice for those seeking a subtle lip enhancement. The Botox Lip Flip is a technique that involves injecting small doses of Botox into the muscles around the lips, causing them to relax and “flip” outward. This creates the illusion of fuller lips without actually increasing their volume.

The Botox Lip Flip is a good option for those who want a more natural-looking result or are hesitant about the idea of injectable fillers. The procedure is relatively quick, with minimal downtime, and the effects typically last between two to four months. However, it’s important to note that Botox does not physically add volume to the lips, and the results may be more subtle compared to lip fillers.
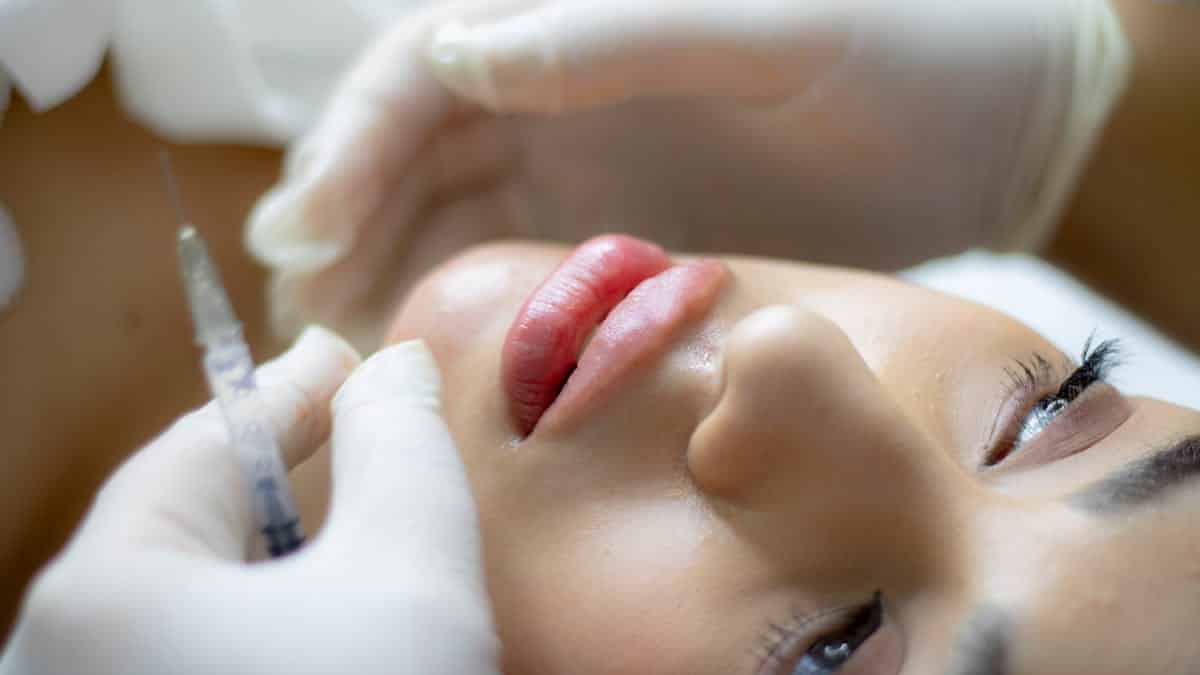
Lip Fillers

Lip fillers, on the other hand, are injectable gels that are used to plump and enhance the lips. These fillers, often made from hyaluronic acid, are injected directly into the lips to add volume and definition. Unlike Botoxlip fillers physically increase the size and shape of the lips, providing a more dramatic and long-lasting result.

The effects of lip fillers can last anywhere from six months to two years, depending on the type of filler used and the individual’s metabolism. While the initial results are often immediate, there may be some swelling and bruising in the days following the procedure. It’s important to choose a skilled and experienced provider to ensure natural-looking results and minimize the risk of complications.

One of the key advantages of lip fillers is their ability to address a wider range of concerns, such as thin or asymmetrical lips, as well as the appearance of fine lines and wrinkles around the mouth. By strategically injecting the filler, providers can create a more balanced and youthful-looking pout.

Combining Botox and Lip Fillers

For some individuals, the optimal solution may involve a combination of Botox and lip fillers. By using Botox to relax the muscles around the lips and fillers to add volume, it’s possible to achieve a comprehensive lip enhancement that addresses both dynamic and static wrinkles.

This approach can be particularly beneficial for those who want to address a range of concerns, such as fine lines, volume loss, and asymmetry. The Botox Lip Flip can help to create the illusion of fuller lips, while the fillers provide the actual volume and definition.

It’s important to note that combining these treatments should be done under the guidance of a skilled and experienced provider, as the synergistic effects can be powerful and require a delicate touch. A thorough consultation is essential to ensure that the treatment plan aligns with your specific goals and desired outcomes.

Factors to Consider

When deciding between lip fillers and Botox, there are several key factors to consider:

  1. Desired Outcome: Do you want to add volume and definition to your lips, or create the illusion of fuller lips through muscle relaxation?
  2. Duration of ResultsLip fillers typically last longer than Botox, with results ranging from six months to two years.
  1. Cost: The cost of each treatment can vary depending on your location, the provider, and the amount of product used.
  2. Potential Risks: Both Botox and lip fillers carry some risks, such as bruising, swelling, and in rare cases, more serious complications. It’s essential to choose a qualified provider to minimize these risks.

By carefully considering these factors, you can make an informed decision that aligns with your aesthetic goals and personal preferences.

Comparing Botox and Lip Fillers

To help you better understand the differences between Botox and lip fillers, let’s take a closer look at some key comparisons:

Desired Outcome

FeatureBotoxLip Fillers
Primary GoalCreate the illusion of fuller lips by relaxing the muscles around the mouthPhysically add volume and definition to the lips
AppearanceMore subtle, natural-looking enhancementMore dramatic, noticeable increase in lip size and shape

Duration of Results

FeatureBotoxLip Fillers
Average Duration2-4 months6 months to 2 years
LongevityTemporary, requires regular maintenanceLonger-lasting, but still requires periodic touch-ups

Cost Breakdown

FeatureBotoxLip Fillers
Average Cost per Treatment$300 to $600 per area$500 to $2,000 per syringe
Ongoing CostsRequires regular maintenance every 2-4 monthsRequires periodic touch-ups every 6 months to 2 years
Total Estimated Yearly Cost$900 to $2,400$500 to $2,000

Pain Differences

FeatureBotoxLip Fillers
Pain LevelMild to moderate discomfort, often managed with numbing creams or local anesthesiaMild to moderate discomfort, often managed with numbing creams or local anesthesia
Discomfort DurationRelatively quick procedure, with minimal downtimeSlightly longer procedure, with potential for swelling and bruising in the days following
Overall Pain ExperienceGenerally well-tolerated, with a quick recovery periodSlightly more discomfort, but still manageable for most patients

Potential Risks

FeatureBotoxLip Fillers
Common RisksBruising, swelling, headache, drooping eyelidsBruising, swelling, lumpiness, asymmetry
Serious RisksRare, but can include difficulty swallowing or breathingRare, but can include vascular occlusion or tissue necrosis

By understanding these key comparisons, you can better evaluate which treatment option aligns with your specific needs and preferences.

FAQs

As you navigate the world of lip filler vs botox, you may have several questions. Here are some of the most common inquiries and their answers:

What is the difference between Botox and lip fillers?

Botox is a neurotoxin that relaxes the muscles around the lips, creating the illusion of fuller lips. Lip fillers, on the other hand, are injectable gels that physically add volume and definition to the lips.

How long do the results of Botox and lip fillers last?

The effects of Botox typically last between 2-4 months, while lip fillers can last anywhere from 6 months to 2 years, depending on the type of filler used.

Which is more painful, Botox or lip fillers?

Both Botox and lip fillers can cause some discomfort during the procedure, but the level of pain is generally mild and manageable. Many providers use numbing creams or local anesthesia to minimize any discomfort.

Can Botox be used for lip enhancement?

Yes, Botox can be used to enhance the appearance of the lips through the Botox Lip Flip technique. This involves injecting small amounts of Botox into the muscles around the lips, causing them to relax and “flip” outward, creating the illusion of fuller lips.

Read Also: Botox Smile Lift Before After.

How much do Botox and lip filler treatments cost?

The cost of Botox and lip filler treatments can vary depending on your location, the provider, and the amount of product used. On average, Botox treatments can range from $300 to $600 per area, while lip filler treatments can range from $500 to $2,000 per syringe.

Read Also: Botox at 35 Before and After.

Can Botox and lip fillers be combined?

Yes, Botox and lip fillers can be combined to achieve a comprehensive lip enhancement. By using Botox to relax the muscles around the lips and fillers to add volume, it’s possible to address both dynamic and static wrinkles for a more youthful and balanced appearance.

Read Also: Botox Masque.

What are the potential risks of Botox and lip fillers?

Both Botox and lip fillers carry some risks, such as bruising, swelling, and in rare cases, more serious complications. It’s essential to choose a qualified and experienced provider to minimize these risks and ensure natural-looking results.

Read Also: When to Get Botox Before Wedding.

Conclusion

In the world of lip enhancement, the choice between lip fillers and Botox can be a complex one. Both treatments offer unique benefits and considerations, and understanding the key differences is crucial for making an informed decision. Whether you’re seeking a subtle enhancement or a more dramatic transformation, there is a solution that can help you achieve your desired look.

Read Also: Can You Go Tanning After Botox?

By carefully weighing the factors, such as desired outcome, duration of results, cost, and potential risks, you can make a decision that aligns with your aesthetic goals and personal preferences. And for those who want to address a range of concerns, the combination of Botox and lip fillers can be a powerful and comprehensive solution.

Read Also: Pull Ups While Pregnant.

Ultimately, the key to achieving the perfect pout lies in working with a skilled and experienced provider who can guide you through the process and help you make the best choice for your unique needs. With the right approach, you can enhance your lips with precision and confidence.

Read Also: Can You Use Retinol After Botox?

Continue Reading
Click to comment

Leave a Reply

Your email address will not be published. Required fields are marked *

Beauty Tips

Hair Botox vs Keratin: Treatment Results

Published

on

hair botox vs keratin

Here is your complete guide to hair botox vs keratin

Introduction to Hair Botox vs Keratin

What are the differences between hair botox vs keratin? In the world of hair treatments, two of the most popular options for revitalizing, smoothing, and straightening locks are Hair Botox vs Keratin treatments. While both treatments aim to transform your hair, they differ in their composition, application process, and results. Understanding the differences between hair botox vs keratin treatments is crucial to make an informed decision about which treatment is best suited for your hair type and goals.

In this comprehensive article, we’ll explore the world of Hair Botox and Keratin treatments, delving into their unique characteristics, benefits, and drawbacks. By the end of this article, you’ll have a clear understanding of which treatment is right for you, empowering you to make a confident choice for your hair’s health and beauty.

What is Hair Botox?

Hair Botox, also known as a hair smoothing treatment, is a chemical-free treatment that aims to repair damaged hair, fill in gaps, and make hair stronger and less frizzy. The main ingredients used in Hair Botox include:

  • Caviar oil
  • Vitamin E
  • Vitamin B5
  • Collagen complex

The treatment works by penetrating deep into the hair shaft, providing nourishment and hydration. Hair Botox is applied to washed hair and left for a few minutes before being rinsed off. The results are instant, leaving hair healthier, softer, and shinier.

What is Keratin Treatment?

Keratin treatment, on the other hand, is a chemical-based treatment that uses formaldehyde and other chemicals to straighten hair. The main goal of Keratin treatment is to leave hair soft, shiny, and smooth, with reduced frizz and waves.The application process of Keratin treatment involves:

  1. Applying the solution to damp hair
  2. Straightening the hair in sections to seal the product

The entire process typically takes around 3 hours to complete.

Differences Between Hair Botox and Keratin

While both Hair Botox and Keratin treatments aim to transform hair, there are several key differences between the two:

CharacteristicHair BotoxKeratin Treatment
CompositionChemical-freeContains formaldehyde and other chemicals
Application ProcessApplied to washed hair and left for a few minutes before being rinsed offApplied to damp hair and straightened in sections to seal the product
Time to Complete1.5-2 hours3 hours
SafetySafer than Keratin treatmentCan emit toxic fumes during application and is not recommended for pregnant or nursing mothers

Another significant difference lies in the longevity of each treatment. Hair Botox typically lasts anywhere between 2-4 months, while Keratin treatment lasts 4-6 months. The frequency of each treatment will depend on the growth rate of the hair and how it is maintained after each treatment session.

How Long Does Each Treatment Last?

The longevity of Hair Botox and Keratin treatments can vary depending on several factors:

  • Hair type
  • Hair condition
  • Lifestyle
  • Maintenance after each treatment session

In general:

  • Hair Botox lasts 2-4 months
  • Keratin treatment lasts 4-6 months

It’s important to note that the frequency of each treatment will depend on the growth rate of the hair and how it is maintained after each treatment session.

Which Treatment is Right for You?

When choosing between Hair Botox and Keratin treatments, it’s essential to consider several factors, such as hair type, hair condition, and desired results. Here’s a breakdown of which treatment may be more suitable for different hair types:

Hair TypeHair BotoxKeratin Treatment
Thick, extra-frizzy, or unmanageable hairMay be too harshWorks best
Fine or thin hairSuitableMay be too harsh
Damaged hairSuitableMay be too harsh

Keratin treatment works best for thick, extra-frizzy, or unmanageable hair, but may be too harsh for very damaged, fine, or thin hair. Hair Botox, on the other hand, works for any hair type and is suitable for fine or heavily lightened hair.

It’s also important to consider the differences in styling results. Keratin treatment is more effective at smoothing waves and curls, while Hair Botox provides a more natural look.

Consulting with a professional stylist is highly recommended to determine which treatment is right for you based on your specific hair type and goals.

The Best Hair Botox Routine

Preparing Your Hair

  • Avoid washing your hair for at least 24 hours before the treatment
  • Inform your stylist about any allergies or sensitivities you may have
  • Discuss your desired results and any concerns with your stylist

The Hair Botox Treatment Process

  1. Your hair will be washed with a clarifying shampoo to remove any buildup or residue
  2. The Hair Botox solution will be applied to your hair and left on for 10-15 minutes
  3. Your hair will be rinsed thoroughly to remove the solution
  4. A deep conditioning treatment will be applied to your hair and left on for 5-10 minutes
  5. Your hair will be rinsed again and gently towel-dried

Aftercare and Maintenance

  • Avoid washing your hair for at least 48 hours after the treatment
  • Use a sulfate-free, color-safe shampoo and conditioner
  • Limit heat styling and use a heat protectant product
  • Schedule regular trims to maintain healthy ends and prevent split ends
  • The results of Hair Botox typically last 2-4 months

The Best Keratin Treatment Routine

Preparing Your Hair

  • Avoid washing your hair for at least 24 hours before the treatment
  • Inform your stylist about any allergies or sensitivities you may have
  • Discuss your desired results and any concerns with your stylist

The Keratin Treatment Process

  1. Your hair will be washed with a clarifying shampoo to remove any buildup or residue
  2. The Keratin solution will be applied to your hair and left on for 30-45 minutes
  3. Your hair will be blow-dried straight
  4. A flat iron will be used to seal the Keratin into your hair
  5. Your hair will be styled as desired

Aftercare and Maintenance

  • Avoid washing your hair for at least 72 hours after the treatment
  • Use a sulfate-free, color-safe shampoo and conditioner
  • Limit heat styling and use a heat protectant product
  • Schedule regular trims to maintain healthy ends and prevent split ends
  • The results of Keratin treatment typically last 4-6 months

Both Hair Botox and Keratin treatments offer unique benefits for transforming your hair. Consulting with a professional stylist is highly recommended to determine which treatment is right for you based on your specific hair type, condition, and goals.

Cost of Hair Botox vs Keratin

TreatmentCost
Hair Botox$150 to $400 per session
Keratin$200 to $600 per session

The cost of Hair Botox and Keratin treatments can vary depending on several factors:

Hair Botox Cost

  • Hair Botox treatment can cost anywhere from $150 to $400 per session
  • The cost may be higher or lower depending on the length and thickness of your hair
  • It is essential to consult with a professional stylist to determine the exact cost for your hair type and condition

Keratin Treatment Cost

  • Keratin treatment can cost between $200 to $600 per session
  • The cost may be higher or lower depending on the salon’s location, the stylist’s expertise, and your hair’s length and thickness
  • Salons located in upscale areas or metropolitan cities may charge more due to higher operational costs compared to those in smaller towns
  • Highly experienced stylists or those with specialized training in Keratin treatment may command higher fees due to their expertise
  • Well-known and high-end salons often charge more due to their market positioning and the premium services they offer

It is important to note that both Hair Botox and Keratin treatments are not permanent solutions. Hair Botox treatment results can last up to three months, while the effects of Keratin hair treatment can last for up to six months.

FAQs

Is Hair Botox the same as Keratin?

No, Hair Botox and Keratin treatments are not the same. While they both aim to transform hair, they differ in their composition, application process, and results.

Read Also: Shampoo for Summer.

Which treatment is more expensive?

The cost of Hair Botox and Keratin treatments can vary depending on several factors, such as location, salon, and the length and thickness of your hair. In general, Keratin treatments tend to be more expensive due to the use of chemicals and the longer application process.

Read Also: Summer Dip Nails.

Does Keratin last longer than Botox?

Yes, Keratin treatment typically lasts longer than Hair BotoxKeratin treatment can last 4-6 months, while Hair Botox lasts 2-4 months.

Read Also: Red Glitter Lipstick.

How long does each treatment last?

  • Hair Botox lasts 2-4 months
  • Keratin treatment lasts 4-6 months

Read Also: Dark Glitter Lipstick.

Which treatment is safer?

Hair Botox is considered safer than Keratin treatment because it is chemical-free. Keratin treatment can emit toxic fumes during application and is not recommended for pregnant or nursing mothers.

Read Also: Glitter Lipstick Pink.

    Conclusion

    In conclusion, both Hair Botox and Keratin treatments offer unique benefits for transforming your locks. Hair Botox is a chemical-free treatment that repairs damaged hair, fills in gaps, and makes hair stronger and less frizzy, while Keratin treatment uses chemicals to straighten hair and leave it soft, shiny, and smooth.

    Read Also: Korean Face Oil.

    When choosing between the two, it’s essential to consider your hair type, hair condition, and desired results. Consulting with a professional stylist is highly recommended to determine which treatment is right for you.

    Read Also: Pull Ups While Pregnant.

    Regardless of which treatment you choose, both Hair Botox and Keratin treatments offer a chance to revitalize your hair and boost your confidence. Embrace the transformation and enjoy the journey to healthier, more beautiful locks.

    Read Also: Oil Keratin.

    Continue Reading

    Beauty Tips

    Oil Keratin: Transform Your Hair Instantly

    Published

    on

    oil keratin

    Here is your complete guide oil keratin

    Introduction to Oil Keratin

    Are you tired of frizzy, unmanageable hair that never seems to cooperate with your styling efforts? Look no further than oil keratin treatment! This revolutionary hair treatment has been taking the beauty world by storm, offering a range of benefits for all hair types. From smoothing and straightening to nourishing and strengthening, oil keratin is the solution you’ve been searching for.

    In this comprehensive guide, we’ll dive deep into the world of oil keratin, exploring its benefits, safety, and the step-by-step process of applying it at home. We’ll also address common questions and provide expert advice to help you achieve salon-worthy results without breaking the bank. Get ready to say goodbye to bad hair days and hello to the healthiest, smoothest locks of your life!

    What is Oil Keratin Treatment?

    Oil keratin treatment is a hair treatment that combines the power of keratin with the nourishing properties of organic oils and acids. Unlike traditional keratin treatments, which can be harsh on the hair and contain potentially harmful chemicals like formaldehyde, oil keratin is a gentler alternative that still delivers impressive results.

    The key ingredients in oil keratin treatments include:

    • Keratin: A protein that strengthens and smooths the hair
    • Organic oils: Such as argan, coconut, and olive oil, which nourish and protect the hair
    • Acids: Like citric acid, which helps seal the cuticles and lock in moisture

    By combining these powerful ingredients, oil keratin treatments work to straighten and smooth the hair while also improving its overall health and appearance.

    Benefits of Oil Keratin for Hair

    One of the biggest advantages of oil keratin treatment is its ability to transform even the most unruly hair into a smooth, manageable mane. Here are some of the key benefits:

    Straightening and Smoothing

    Oil keratin treatments work to straighten and smooth the hair, reducing frizz and creating a sleek, polished look. This makes styling easier and helps you achieve your desired hairstyle with less effort.

    Increased Shine and Luster

    The nourishing oils in oil keratin treatments help to seal the cuticles and lock in moisture, resulting in a beautiful, glossy shine that lasts for weeks.

    Sealing Cuticles and Reducing Frizz

    By sealing the cuticles, oil keratin treatments help to reduce frizz and flyaways, keeping your hair looking smooth and polished even in humid or dry conditions.

    Nourishing and Strengthening

    The combination of keratin and organic oils in oil keratin treatments helps to nourish and strengthen the hair, reducing breakage and improving overall hair health.

    Improved Manageability and Reduced Styling Time

    With smoother, more manageable hair, you’ll find that styling takes less time and effort. Say goodbye to endless brushing and hello to effortless, salon-worthy looks.

    Safety of At-Home Oil Keratin Treatments

    One of the biggest concerns when it comes to oil keratin treatment is safety. Many traditional keratin treatments contain formaldehyde, a potentially harmful chemical that can cause irritation and even long-term health issues. However, when using quality, formaldehyde-free products, oil keratin treatments are a safe and effective option for achieving healthy, beautiful hair.

    Another advantage of at-home oil keratin treatments is the comfort and convenience they offer. You can achieve salon-worthy results in the comfort of your own home, without the added cost and hassle of visiting a salon. Additionally, at-home treatments are often more cost-effective, making it easier to maintain your hair’s health and appearance.

    Preparing for an Oil Keratin Treatment

    Before starting your treatment, it’s important to have all the necessary supplies on hand. This includes:

    • Shampoo and conditioner specifically formulated for treated hair
    • Styling products like serum or oil to maintain the treatment
    • Gloves and eye protection for safety
    • Clips or clamps for sectioning the hair

    It’s also crucial to start with clean, dry hair. Avoid washing your hair for at least 24 hours before the treatment, as this will help the product adhere better to your strands.

    Applying the Oil Keratin Treatment

    Once you have all your supplies ready, it’s time to begin the treatment process. Follow these steps for best results:

    1. Section your hair into manageable pieces, using clips or clamps to keep it in place.
    2. Apply the treatment to each section, starting from the roots and working your way down to the ends.
    3. Use a wide-tooth comb or your fingers to evenly distribute the product throughout your hair.
    4. Allow the treatment to sit for the recommended time, usually around 30 minutes to an hour.
    5. Rinse the treatment out thoroughly, making sure to remove all traces of product.

    It’s important to follow the manufacturer’s instructions carefully and to use protective equipment like gloves and eye protection to ensure your safety during the process.

    Best Products for Oil Keratin Treatments

    BrandProductKey FeaturesPrice
    L’ANZAKeratin Healing Oil– Nourishes and revives dry, damaged hair and scalp
    – Sulfate-free formula with Phyto IV Complex
    – Provides UV protection
    $43.78
    OGXFrizz-Free + Keratin Smoothing Oil Miracle Gloss Spray– 5-in-1 formula de-frizzes and adds shine
    – Contains argan oil
    – Affordable drugstore option
    $8.99
    LusetaKeratin Hair Oil Serum– Strengthens and nourishes color-treated, damaged, and dry hair
    – Sulfate, paraben, and gluten-free
    – Affordable price point
    $19.49
    HASKKeratin Protein Smoothing Oil– Helps smooth and add shine to hair
    – Affordable drugstore option
    – Cruelty-free
    $6.99
    MoroccanoilMoroccanoil Treatment– Iconic argan oil-infused formula
    – Adds shine and softness
    – Lightweight texture suitable for all hair types
    $44.00
    Parachute AdvansedGold Coconut Hair Oil– Infused with coconut oil and keratin
    – Helps nourish and strengthen hair
    – Affordable price point
    $3.99
    K KerotinKeratin Hair Treatment Oil– Helps repair damaged hair
    – Adds shine and softness
    – Affordable drugstore option
    $14.99

    Key Takeaways:

    • L’ANZA and Moroccanoil offer premium, salon-quality treatments
    • OGX and HASK provide affordable, drugstore-available options
    • Luseta and Parachute Advansed offer keratin-infused oils at a lower price point
    • Most brands offer sulfate-free, cruelty-free formulas for added safety and efficacy

    Reference:

    The Best Routine for Oil Keratin Treatments

    Achieving salon-quality results with an oil keratin treatment at home is easy when you follow a consistent hair care routine. Here’s a step-by-step guide to help you get the most out of your oil keratin treatment:

    Preparing Your Hair

    • Wash your hair with a sulfate-free, keratin-infused shampoo for at least a week before your treatment to prepare your hair.
    • Avoid using hair oils or heavy styling products in the days leading up to your treatment.
    • Make sure your hair is clean, dry, and free of any residue before applying the treatment.

    Drying and Styling

    • Gently pat your hair dry with a soft, absorbent microfiber towel.
    • Use a blow dryer on the lowest heat setting, keeping the nozzle at least six inches away from your hair to prevent heat damage.
    • Style your hair as desired, using a small amount of keratin-infused serum or oil to help maintain the treatment and keep your hair looking its best.

    Maintaining Your Treatment

    • Wash your hair less frequently, using a sulfate-free, keratin-infused shampoo and conditioner.
    • Avoid using hot tools like curling irons or straighteners, as they can cause damage and reduce the effectiveness of the treatment.
    • If you do use hot tools, make sure to use a heat protectant product and keep the temperature as low as possible.
    • Brush your hair gently with a wide-tooth comb or a boar bristle brush to avoid breakage and maintain the treatment’s results.

    By following this routine and using quality, keratin-infused products, you can keep your treatment looking its best for weeks to come. Remember to be gentle with your hair and avoid any harsh chemicals or styling techniques that could compromise the treatment’s effectiveness.

    Rinsing and Drying the Treatment

    After applying the treatment, it’s time to rinse and dry your hair. Start by thoroughly rinsing out the product, making sure to remove all traces of it from your hair. Use cool water to help seal the cuticles and lock in the treatment’s benefits.

    Once your hair is rinsed, gently pat it dry with a towel. Avoid rubbing or twisting your hair, as this can cause damage and frizz. If you’re using a blow dryer, make sure to use the lowest heat setting and keep the nozzle at least six inches away from your hair to prevent heat damage.

    Comparing Oil Keratin to Other Hair Oils

    FeatureOil KeratinArgan OilCoconut OilMoroccan Oil
    Main IngredientKeratin, organic oils, acidsArgan oilCoconut oilArgan oil
    Hair BenefitsStraightening, smoothing, increased shine, reduced frizz, nourishing, strengtheningSoftening, frizz reduction, shine enhancementMoisturizing, strengthening, frizz reductionSoftening, frizz reduction, shine enhancement
    SafetyFormaldehyde-free, gentle alternative to traditional keratin treatmentsGenerally safe for all hair typesGenerally safe for all hair typesGenerally safe for all hair types
    ApplicationApply to clean, dry hair, allow to sit for 30 mins to 1 hour, rinse thoroughlyApply to damp or dry hair, leave inApply to scalp and hair, leave in overnight or for a few hours before washingApply to damp or dry hair, leave in
    LongevityLasts 3-6 months with proper maintenanceLasts until next washLasts until next washLasts until next wash
    CostVaries depending on brand and salon vs. at-home treatmentAffordableAffordableAffordable

    Key Takeaways:

    • The treatments provide more long-lasting results compared to other oils
    • Argan, coconut, and Moroccan oils are generally safe for all hair types
    • It is a gentler alternative to traditional keratin treatments
    • Applying oils to clean, dry hair and allowing them to sit before rinsing maximizes benefits

    Styling After an Oil Keratin Treatment

    One of the best things about keratin treatments is how easy they make styling your hair. With smoother, more manageable strands, you’ll find that your styling routine takes less time and effort. Here are some tips for styling after treatment:

    • Use a small amount of styling product, like serum or oil, to help maintain the treatment and keep your hair looking its best.
    • Avoid using hot tools like curling irons or straighteners, as they can cause damage and reduce the effectiveness of the treatment.
    • If you do use hot tools, make sure to use a heat protectant product and keep the temperature as low as possible.
    • Brush your hair gently with a wide-tooth comb or a boar bristle brush to avoid breakage and maintain the treatment’s results.

    By following these tips and using quality products, you can keep your treatment looking its best for weeks to come.

    Read Also: Shampoo for Summer.

    Frequently Asked Questions (FAQs)

    How often should I get an oil keratin treatment?

    The frequency of oil treatments depends on your hair type and the specific product you’re using. Most treatments last between 3-6 months, so you may need to get them done every 4-6 weeks to maintain the results.

    Read Also: Summer Dip Nails.

    Can I color my hair after an oil keratin treatment?

    It’s best to wait at least 2-3 weeks after a keratin treatment before coloring your hair. This allows the treatment to fully set and prevents any potential damage from the color process.

    Read Also: Red Glitter Lipstick.

    Is it safe to use hot tools on my hair after an oil keratin treatment?

    While it’s best to avoid using hot tools as much as possible after an oil treatment, they can be used in moderation. Make sure to use a heat protectant product and keep the temperature as low as possible to prevent damage.

    Read Also: Dark Glitter Lipstick.

    How do I maintain my oil keratin treatment at home?

    To maintain your oil treatment at home, use a sulfate-free shampoo and conditioner, avoid washing your hair too frequently, and use a small amount of styling product like serum or oil to keep your hair looking its best.

    Read Also: Glitter Lipstick Pink.

    Can oil keratin treatments damage my hair?

    When used properly with quality products, the treatments are safe and effective for most hair types. However, if you have extremely damaged or fragile hair, it’s best to consult with a professional before getting the treatment.

    Read Also: Pull Ups While Pregnant.

    Conclusion

    If you’re looking for a way to transform your hair from frizzy and unmanageable to smooth, shiny, and healthy, oil keratin treatment is the solution you’ve been searching for. With its range of benefits, including straightening, smoothing, and nourishing, oil keratin is a game-changer for anyone who wants to achieve salon-worthy results at home.By following the tips and advice in this guide, you can safely and effectively apply oil keratin treatments to your hair and maintain the results for weeks to come. Say goodbye to bad hair days and hello to the healthiest, most beautiful locks of your life!

    Read Also: Korean Face Oil.

    Continue Reading

    Beauty Tips

    Korean Face Oil: How to Use Guide

    Published

    on

    korean face oil

    Here is your complete guide to korean face oil

    Introduction to Korean Face Oil

    Korean face oil has taken the beauty world by storm, and for good reason. These nourishing elixirs are formulated with a blend of natural ingredients that work together to deeply hydrate, nourish, and revitalize the skin. Whether you’re dealing with dry, dehydrated skin, signs of aging, or uneven skin tone, Korean face oil offers a solution that is both effective and luxurious.

    In this comprehensive guide, we’ll explore the benefits of Korean face oil, the best ingredients to look for, and how to incorporate them into your skincare routine for optimal results. By the end of this article, you’ll have a better understanding of why Korean face oil is a must-have in your beauty arsenal and how to choose the perfect one for your skin type and concerns.

    The Benefits of Korean Face Oil

    Deeply Hydrating

    One of the primary benefits of Korean face oil is their ability to deeply hydrate the skin. These oils are rich in fatty acids and antioxidants that penetrate deep into the skin’s layers, providing long-lasting moisture and preventing water loss. As a result, your skin will feel soft, supple, and radiant.

    Improves Skin Barrier Function

    Many Korean face oil contain ingredients like ceramides and fatty acids that help to strengthen and repair the skin’s natural barrier. This barrier is responsible for keeping moisture in and environmental stressors out. By improving barrier function, Korean face oil help to prevent moisture loss and protect the skin from damage.

    Anti-Aging Properties

    Korean face oil is often formulated with ingredients like vitamin C, retinol, and CoQ10 that help to reduce the appearance of fine lines and wrinkles. These ingredients work by stimulating collagen production, improving skin elasticity, and evening out skin tone. Regular use of Korean face oils can help to keep your skin looking youthful and radiant.

    Calms Inflammation

    Some Korean face oil contains soothing ingredients like centella asiatica and cica that help to calm redness, irritation, and inflammation. This makes them particularly beneficial for those with sensitive or acne-prone skin, as they can help to reduce the appearance of blemishes and prevent future breakouts.

    Brightens Complexion

    Many Korean face oil contains natural brightening ingredients like niacinamide, licorice root extract, and vitamin C that help to even out skin tone and reduce the appearance of dark spots and hyperpigmentation. Regular use can help to reveal a more radiant, even complexion.

    The Best Ingredients in Korean Face Oil

    When choosing a Korean face oil, it’s important to look for high-quality ingredients that are suitable for your skin type and concerns. Here are some of the best ingredients to look for:

    Camellia Oil

    Camellia oil is a lightweight, non-greasy oil that is rich in oleic acid, antioxidants, and vitamins A, B, C, and E. It helps to deeply nourish and hydrate the skin while improving skin elasticity and reducing the appearance of fine lines and wrinkles.

    Rosehip Seed Oil

    Rosehip seed oil is a dry oil that is high in linoleic acid, vitamin C, and retinol. It helps to improve skin texture, reduce the appearance of scars and hyperpigmentation, and promote collagen production.

    Marula Oil

    Marula oil is a lightweight, fast-absorbing oil that is rich in oleic acid, antioxidants, and vitamins C and E. It helps to deeply hydrate the skin, reduce inflammation, and improve skin barrier function.

    Argan Oil

    Argan oil is a rich, nourishing oil that is high in fatty acids, antioxidants, and vitamin E. It helps to deeply hydrate the skin, improve skin elasticity, and reduce the appearance of fine lines and wrinkles.

    Jojoba Oil

    Jojoba oil is a lightweight, non-greasy oil that closely resembles the skin’s natural sebum. It helps to regulate oil production, reduce the appearance of pores, and improve skin texture.

    Korean Face Oil Benefits

    IngredientBenefits
    Camellia Oil– Deeply nourishes and hydrates the skin
    – Improves skin elasticity
    – Reduces the appearance of fine lines and wrinkles
    Rosehip Seed Oil– Improves skin texture
    – Reduces the appearance of scars and hyperpigmentation
    – Promotes collagen production
    Marula Oil– Deeply hydrates the skin
    – Reduces inflammation
    – Improves skin barrier function
    Argan Oil– Deeply hydrates the skin
    – Improves skin elasticity
    – Reduces the appearance of fine lines and wrinkles
    Jojoba Oil– Regulates oil production
    – Reduces the appearance of pores
    – Improves skin texture

    Recommended Korean Face Oil by Skin Type

    Skin TypeRecommended Korean Face Oil
    Oily/Acne-Prone– Jojoba Oil
    – Rosehip Seed Oil
    Dry/Mature– Camellia Oil
    – Argan Oil
    Sensitive– Look for fragrance-free and non-irritating formulas

    How to Incorporate Korean Face Oil into Your Routine

    Korean face oil can be easily incorporated into your existing skincare routine. Here’s how to do it:

    1. Cleanse your face with a gentle, non-drying cleanser to remove any dirt, oil, or makeup.
    2. Apply a few drops of your chosen face oil to your fingertips and gently massage it into your skin, focusing on areas that are particularly dry or dehydrated.
    3. Allow the oil to fully absorb into your skin before applying any other skincare products.
    4. Follow up with your usual moisturizer to lock in the benefits of the oil.
    5. Use the oil both morning and night for best results.

    It’s important to note that face oil is not a replacement for moisturizer, but rather a complementary step in your skincare routine. They help to provide an extra boost of hydration and nourishment to the skin.

    Choosing the Right Korean Face Oil for Your Skin Type

    The key to getting the most out of your face oil is choosing one that’s suitable for your skin type and concerns. Here are some recommendations:

    • For normal skin, opt for lightweight oils like jojoba, marula, and squalane.
    • For dry skin, choose richer oils like argan, rosehip, and camellia.
    • For oily skin, try oils like tea tree, grapeseed, and jojoba that won’t clog pores.
    • For combination skin, marula, jojoba, and grapeseed oils are good options.
    • For sensitive skin, moringa oil is gentle and non-irritating.
    • For acne-prone skin, tea tree, jojoba, and rosehip oils can help control breakouts.

    Remember, it’s always best to do a patch test first to ensure the oil doesn’t cause any irritation. If you have any specific concerns, consult with a dermatologist to get personalized recommendations.

    Frequency of Use

    Frequency of UseRecommendation
    Morning and Night– For best results, use a Korean face oil both morning and night
    Once Daily– If you have particularly oily skin, use the oil only once a day, preferably at night

    Using Korean Face Oils During Pregnancy

    PregnancyRecommendation
    Safe to Use– Many Korean face oils are safe to use during pregnancy, but always consult with your healthcare provider first
    Avoid Certain Ingredients– Avoid oils that contain retinol or other ingredients that may be contraindicated during pregnancy

    Using Korean Face Oils on the Body

    Body UseRecommendation
    Beneficial for Dry Areas– Korean face oils can be used on the body, especially on dry, rough areas like elbows, knees, and heels
    Patch Test First– Always do a patch test first to ensure that the oil does not cause any irritation

    Read Also: Face Mask for Summer.

    Frequently Asked Questions

    Can Korean face oil be used on all skin types?

    Korean face oil can be used on all skin types, but it’s important to choose an oil that is suitable for your specific skin type and concerns. Those with oily or acne-prone skin may want to opt for lighter, non-comedogenic oils like jojoba or rosehip seed oil, while those with dry or mature skin may prefer richer oils like camellia or argan oil.

    Read Also: Shampoo for Summer.

    How often should I use a Korean face oil?

    Most experts recommend using a face oil both morning and night for best results. However, if you have particularly oily skin, you may want to use it only once a day, preferably at night.

    Read Also: Summer Dip Nails.

    Can Korean face oils be used during pregnancy?

    Many Korean face oils are safe to use during pregnancy, but it’s always best to consult with your healthcare provider before using any new skincare products. Avoid oils that contain retinol or other ingredients that may be contraindicated during pregnancy.

    Read Also: Red Glitter Lipstick.

    How do I choose the right Korean face oil for my skin type?

    When choosing a face oil, consider your skin type and concerns. Look for oils that are high in fatty acids and antioxidants, and choose a formula that is suitable for your skin type. If you have sensitive skin, look for oils that are fragrance-free and non-irritating.

    Read Also: Dark Glitter Lipstick.

    Can Korean face oil be used on the body?

    Many face oil can be used on the body as well as the face. They can be particularly beneficial for dry, rough areas like elbows, knees, and heels. Always do a patch test first to ensure that the oil does not cause any irritation.

    Read Also: Pull Ups While Pregnant.

    Conclusion

    Korean face oil is a powerful addition to any skincare routine, providing deep hydration, nourishment, and anti-aging benefits. By incorporating a high-quality face oil into your routine, you can achieve healthier, more radiant skin. Remember to choose an oil that is suitable for your skin type and concerns, and to use it consistently for best results. With so many amazing Korean face oil on the market, there’s sure to be one that’s perfect for you.

    Read Also: Glitter Lipstick Pink.

    Continue Reading

    Trending