Connect with us

Beauty Tips

Benefits of Mugwort For Skin: Enhancing Your Skin’s Health

Published

on

benefits of mugwort for skin

Here is your complete guide to the benefits of mugwort for skin

Introduction to Benefits of Mugwort for Skin

Skincare enthusiasts are increasingly turning to natural remedies for healthier and more radiant skin. One such ingredient that has gained popularity in recent years is mugwort. Known for its remarkable properties, mugwort offers a wide range of benefits for the skin. In this article, we will explore the various advantages of incorporating mugwort into your skincare routine. From its anti-inflammatory and antioxidant properties to its moisturizing and calming effects, mugwort can work wonders for your skin’s health and appearance. Here is your complete guide to the benefits of mugwort for skin.

What is Mugwort?

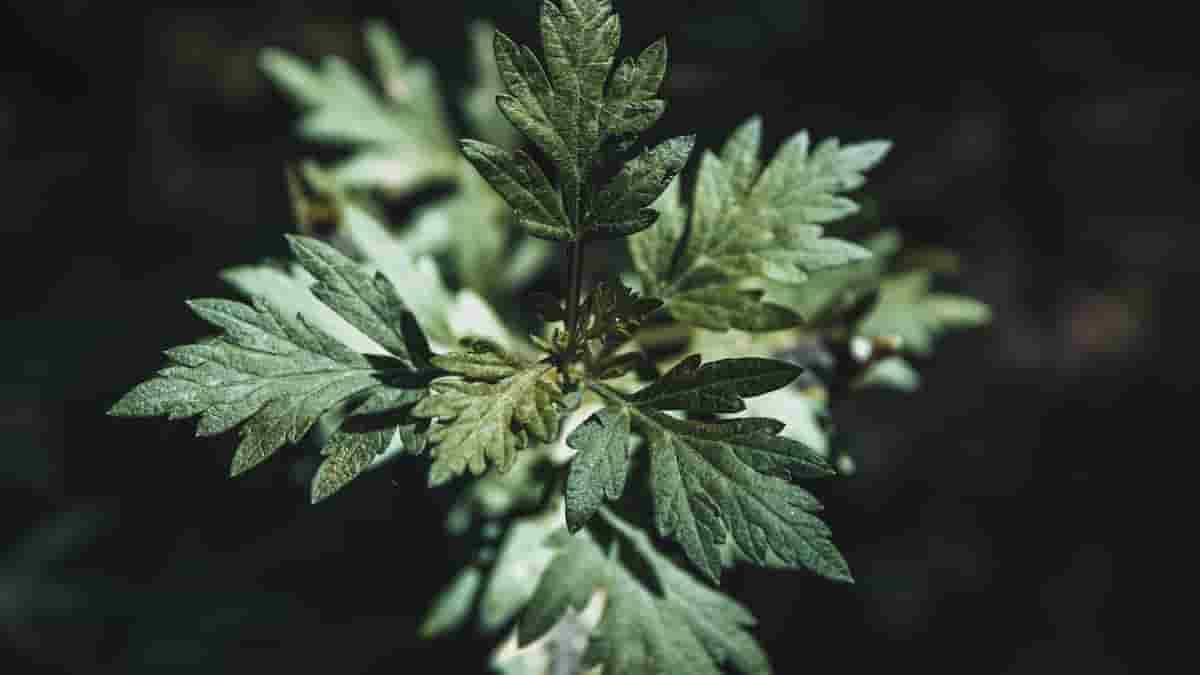
Mugwort, scientifically known as Artemisia vulgaris, is a perennial herb native to Asia, Europe, and North America. Throughout history, mugwort has been widely used in traditional medicine due to its therapeutic properties. In skincare, mugwort has gained attention for its ability to address various skin concerns effectively.

Active Compounds in Mugwort

Mugwort contains a range of active compounds that contribute to its beneficial effects on the skin. Some of the key compounds found in mugwort include sesquiterpene lactones, flavonoids, and coumarin derivatives. These compounds possess anti-inflammatory, antioxidant, and antimicrobial properties, making mugwort an excellent choice for skincare.

Active Compounds in Mugwort

Active CompoundsBenefits for the Skin
Sesquiterpene lactonesAnti-inflammatory properties
FlavonoidsAntioxidant effects
Coumarin derivativesMoisturizing and soothing effects

Anti-Inflammatory Properties

Mugwort’s anti-inflammatory properties make it an ideal ingredient for addressing skin conditions characterized by redness, swelling, and inflammation. Whether you’re dealing with acne, eczema, or rosacea, incorporating mugwort into your skincare routine can help calm and soothe your skin. Scientific studies have shown promising results, demonstrating mugwort’s ability to reduce inflammation and promote healthier skin.

Antioxidant Benefits

Antioxidants play a crucial role in maintaining healthy skin by protecting it from free radicals and environmental damage. Mugwort is rich in antioxidants that help combat oxidative stress and prevent premature aging. By incorporating mugwort into your skincare regimen, you can enjoy the benefits of a natural and effective antioxidant treatment for your skin.

Moisturizing and Hydrating Effects

Dry and dehydrated skin can often feel tight, dull, and lackluster. Mugwort offers moisturizing and hydrating effects that can help combat these issues. By retaining moisture, mugwort improves skin elasticity and prevents dryness. Incorporating mugwort-infused products or DIY masks into your routine can provide the hydration your skin craves.

Anti-Bacterial and Anti-Fungal Properties

Mugwort’s anti-bacterial and anti-fungal properties make it a valuable ingredient for combating microbial-related skin issues. Whether you’re dealing with acne breakouts or fungal infections, mugwort’s natural properties can help cleanse and purify your skin. By incorporating mugwort-based products into your skincare routine, you can potentially reduce the occurrence of these problems.

Soothing and Calming Effects

For those with sensitive or irritated skin, mugwort’s soothing and calming effects can be a game-changer. It has been found to alleviate itchiness, redness, and inflammation associated with various skin conditions. If you struggle with skin sensitivity or often experience skin irritation, incorporating mugwort-infused products can provide relief and restore balance to your skin.

Skincare Issues and Mugwort Solutions

Skin ConcernMugwort Benefits
AcneAnti-inflammatory and antimicrobial properties
EczemaAnti-inflammatory and soothing effects
RosaceaAnti-inflammatory and calming effects
DrynessMoisturizing and hydrating effects
Irritation/RednessSoothing and calming effects

How to Use Mugwort for Skincare

Incorporating mugwort into your skincare routine is easier than you might think. Here are some simple ways to utilize mugwort for its skin benefits:

  • Mugwort DIY Face Mask: Create a homemade face mask by blending fresh or dried mugwort leaves with other nourishing ingredients like honey, yogurt, or aloe vera gel. Apply the mask to your face, leave it on for 15-20 minutes, then rinse off with warm water.
  • Mugwort-Infused Toner: Look for skincare products that contain mugwort extract or infuse your favorite toner with a few drops of mugwort essential oil. Apply the toner after cleansing to enhance its soothing and hydrating effects.
  • Mugwort Steam Facial: Add dried mugwort leaves to a bowl of hot water and let it steep for a few minutes. Place a towel over your head to create a steam tent and lean over the bowl, allowing the steam to open your pores and deliver the benefits of mugwort to your skin.
  • Mugwort Bath Soak: Add a handful of dried mugwort leaves or a few drops of mugwort essential oil to your bathwater for a relaxing and rejuvenating experience. Soak in the tub for 15-20 minutes to let the mugwort-infused water nourish your skin.
  • Mugwort-Infused Skincare Products: Explore skincare brands that offer products formulated with mugwort. Look for cleansers, moisturizers, serums, or masks that contain mugwort as a key ingredient.

It’s important to note that while mugwort is generally safe for most people, it’s recommended to perform a patch test before using it extensively on your skin. This will help determine if you have any allergies or sensitivities to mugwort.

Methods of Using Mugwort in Skincare

Skincare ApplicationBenefits
DIY Face MaskDeep cleansing, soothing, and hydration
Infused TonerCalming, balancing, and moisturizing effects
Steam FacialPore opening, detoxification, and purification
Bath SoakRelaxation, rejuvenation, and overall skin nourishment
Infused Skincare ProductsConvenient and targeted delivery of mugwort’s benefits to the skin

Possible Side Effects of Mugwort on the Skin

Side EffectsRecommendations
Allergic reactionsPerform a patch test before extensive use; discontinue if adverse effects occur
Skin irritationDiscontinue use and consult a healthcare professional if irritation persists

Mugwort and Pregnancy/Breastfeeding

StageRecommendations
PregnancyAvoid use due to limited research on safety during pregnancy
BreastfeedingAvoid use due to limited research on safety during breastfeeding

Frequently Asked Questions

Can mugwort be used for acne-prone skin?

Yes, mugwort’s anti-inflammatory and antimicrobial properties make it suitable for acne-prone skin. It can help reduce inflammation, soothe acne breakouts, and prevent bacterial growth.

Read More About Fruit with High Protein.

Is mugwort safe for sensitive skin?

Mugwort’s soothing and calming effects make it suitable for sensitive skin. However, it’s always advisable to perform a patch test to check for any adverse reactions.

Read Also: Damage to the Skin Wearing Away the Upper Layer.

Can mugwort help with eczema flare-ups?

Mugwort’s anti-inflammatory properties can help alleviate the symptoms of eczema, such as redness, itching, and inflammation. However, individual results may vary, and it’s best to consult with a dermatologist for personalized advice.

Read Also: Hot Makeup Tips.

Are there any side effects of using mugwort on the skin?

While mugwort is generally safe for topical use, some individuals may experience allergic reactions or skin irritation. If you notice any adverse effects, discontinue use and consult a healthcare professional.

Read Also: Makeup Tips for Over 40.

Is mugwort good for your skin?

Yes, mugwort is good for your skin. It offers a range of benefits such as anti-inflammatory, antioxidant, moisturizing, and calming effects. Mugwort can help address various skin concerns, including redness, inflammation, dryness, and irritation. Its natural properties make it a valuable ingredient in skincare products.

Read Also: Tip Beauty Lip Gloss.

What does mugwort do for your face?

Mugwort provides several benefits for your face. It has anti-inflammatory properties that help reduce redness, swelling, and inflammation. Mugwort also contains antioxidants that protect your skin from free radicals and environmental damage. Additionally, mugwort can moisturize and hydrate your skin, improve elasticity, and promote a healthy, radiant complexion.

Read Also: The Nutrition Facts of a Peanut Butter and Jelly Sandwich.

Does mugwort lighten skin?

Mugwort is not primarily known for its skin-lightening properties. However, its ability to reduce inflammation and promote skin health may contribute to a more even skin tone. By calming redness and irritation, mugwort can create a brighter and more balanced complexion. It’s important to note that individual results may vary, and specific skin-lightening effects may require targeted treatments.

Read Also: Flatter Me Bra Guide.

Does mugwort clear acne?

Yes, mugwort can help clear acne. Its anti-inflammatory and antimicrobial properties make it effective in reducing inflammation, soothing acne breakouts, and preventing bacterial growth. Mugwort’s natural compounds can help calm irritated skin, unclog pores, and promote a clearer complexion. However, the effectiveness of mugwort in clearing acne may vary depending on the individual and the severity of the acne condition. It’s advisable to incorporate mugwort into a comprehensive skincare routine and consult with a dermatologist for personalized advice.

Read Also: Tip Beauty Nails Review.

Can pregnant or breastfeeding individuals use mugwort for skincare?

It’s recommended for pregnant or breastfeeding individuals to avoid using mugwort due to the limited research available on its safety during these stages. Consult with a healthcare professional before incorporating mugwort into your skincare routine.

Read Also: How to Do a No Makeup Look.

Conclusion

Mugwort is a versatile herb that offers numerous benefits for the skin. From its anti-inflammatory and antioxidant properties to its moisturizing and calming effects, mugwort can address various skin concerns effectively. By incorporating mugwort-infused products or trying DIY recipes at home, you can harness the power of this natural ingredient for healthier, more radiant skin. Embrace the wonders of mugwort and discover the transformative effects it can have on your skincare journey.

Read Also: Beauty Nails Tip.

Continue Reading
Click to comment

Leave a Reply

Your email address will not be published. Required fields are marked *

Beauty Tips

Korean Hyaluronic Serum: Skin Transformation Essentials

Published

on

korean hyaluronic serum

Here is your complete guide to korean hyaluronic serum

Introduction to Korean Hyaluronic Serum

In the ever-evolving world of skincare, Korean hyaluronic serum has emerged as a game-changer, captivating the attention of beauty enthusiasts worldwide. Harnessing the power of hyaluronic acid, these innovative serums have become a staple in the routines of those seeking radiant, youthful-looking skin.

Hyaluronic acid is a naturally occurring substance in the human body, responsible for maintaining skin hydration and elasticity. Korean skincare products, renowned for their cutting-edge formulations and effective results, have taken this ingredient to new heights, creating serums that deliver unparalleled skin benefits.

In this comprehensive guide, we’ll delve into the world of Korean hyaluronic serum, exploring its key features, the top products on the market, and how to incorporate it into your skincare routine for optimal results. Whether you’re a seasoned skincare aficionado or just starting your journey, this article will equip you with the knowledge to make an informed decision and achieve the glowing, hydrated skin you’ve been craving.

What is Hyaluronic Acid?

Hyaluronic acid is a remarkable molecule that plays a crucial role in skin health and hydration. It is a naturally occurring polysaccharide found in the human body, primarily in the skin, joints, and connective tissues.

This versatile ingredient has the remarkable ability to attract and retain water, making it an essential component for maintaining skin’s moisture levels. Hyaluronic acid acts as a powerful humectant, drawing water into the skin and preventing it from evaporating, resulting in a plump, dewy, and youthful-looking complexion.

In addition to its hydrating properties, hyaluronic acid also contributes to the skin’s overall health and appearance. It helps to:

  • Reduce the appearance of fine lines and wrinkles: By plumping and smoothing the skin, hyaluronic acid can diminish the visible signs of aging.
  • Improve skin elasticity: This ingredient helps to maintain the skin’s structural integrity, keeping it supple and firm.
  • Soothe and calm irritated skin: Hyaluronic acid has anti-inflammatory properties, making it beneficial for those with sensitive or compromised skin barriers.
  • Enhance skin barrier function: By locking in moisture, hyaluronic acid strengthens the skin’s protective barrier, preventing water loss and environmental stressors.

Why Choose Korean Hyaluronic Serum?

The Korean skincare industry has long been renowned for its innovative and effective formulations, and Korean hyaluronic serums are no exception. These serums offer a unique and compelling proposition for those seeking to elevate their skincare routine.

Unique Formulations

Korean hyaluronic serums often feature a blend of high-quality, skin-nourishing ingredients that go beyond just hyaluronic acid. Many of these serums incorporate additional active components, such as:

  • Vitamin C for brightening and antioxidant protection
  • Niacinamide for evening out skin tone and minimizing pores
  • Peptides for firming and anti-aging benefits
  • Botanical extracts for soothing and calming the skin

This synergistic combination of ingredients allows Korean hyaluronic serums to deliver a comprehensive approach to skin hydration and overall skin health.

Potent Hyaluronic Acid Concentrations

One of the standout features of Korean hyaluronic serums is their high concentration of hyaluronic acid. Many of these formulations contain a blend of different molecular weights of hyaluronic acid, allowing for deeper penetration and more effective hydration at multiple skin levels.

Innovative Delivery Systems

Korean skincare brands are known for their cutting-edge delivery systems, and Korean hyaluronic serums are no exception. Some serums utilize advanced technologies, such as liposomal encapsulation or time-release mechanisms, to ensure optimal absorption and prolonged hydration.

Gentle and Suitable for All Skin Types

Korean hyaluronic serums are typically formulated with a focus on gentle, non-irritating ingredients, making them suitable for a wide range of skin types, including sensitive and acne-prone complexions.

Proven Efficacy and User Testimonials

The popularity and success of Korean hyaluronic serums are further bolstered by the overwhelmingly positive reviews and testimonials from users who have experienced the transformative effects of these products on their skin.

Top 10 Korean Hyaluronic Serums

To help you navigate the vast array of Korean hyaluronic serums available, we’ve compiled a list of the top 10 products that have garnered praise from skincare enthusiasts and industry experts alike.

1. COSRX Advanced Snail 96 Mucin Power Essence

Key Ingredients: Snail Secretion Filtrate, Hyaluronic Acid
Benefits: Hydration, Skin Barrier Repair, Brightening

2. Missha Time Revolution The First Treatment Essence

Key Ingredients: Fermented Yeast Extract, Hyaluronic Acid
Benefits: Hydration, Radiance, Pore Refinement

3. Innisfree Jeju Volcanic Color Clay Mask

Key Ingredients: Volcanic Rock Mineral, Hyaluronic Acid
Benefits: Detoxification, Pore Cleansing, Hydration

4. The Face Shop Rice Water Bright Cleansing Foam

Key Ingredients: Rice Water, Hyaluronic Acid
Benefits: Gentle Cleansing, Hydration, Brightening

5. Etude House Soon Jung pH 6.0 Relief Toner

Key Ingredients: Panthenol, Hyaluronic Acid
Benefits: Soothing, Hydration, Calming

6. Laneige Water Bank Hydro Essence

Key Ingredients: Mineral Water, Hyaluronic Acid
Benefits: Intense Hydration, Plumping, Radiance

7. Skin Food Black Sugar Mask Wash Off

Key Ingredients: Black Sugar, Hyaluronic Acid
Benefits: Exfoliation, Hydration, Brightening

8. Tony Moly Chok Chok Green Tea Watery Cream

Key Ingredients: Green Tea, Hyaluronic Acid
Benefits: Hydration, Nourishment, Soothing

9. Sulwhasoo Concentrated Ginseng Renewing Serum

Key Ingredients: Korean Red Ginseng, Hyaluronic Acid
Benefits: Anti-Aging, Firming, Radiance

10. Innisfree Jeju Volcanic Color Clay Mask

Key Ingredients: Volcanic Rock Mineral, Hyaluronic Acid
Benefits: Detoxification, Pore Cleansing, Hydration

How to Use Korean Hyaluronic Serum

Incorporating Korean hyaluronic serum into your skincare routine is a straightforward process that can yield remarkable results. Here’s a step-by-step guide to help you maximize the benefits of this transformative product:

  1. Cleanse your face: Begin by thoroughly cleansing your skin to remove any impurities, makeup, or excess oil. This will ensure that your skin is primed and ready to absorb the serum.
  2. Apply the serum: Dispense a small amount of the Korean hyaluronic serum onto your fingertips and gently pat it into your skin, focusing on areas that need extra hydration, such as the cheeks, forehead, and under-eye area.
  3. Massage the serum: Gently massage the serum into your skin using upward and outward motions. This will help to improve absorption and ensure even distribution.
  4. Follow with other skincare products: After applying the Korean hyaluronic serum, you can proceed with the rest of your skincare routine, such as using a moisturizer, eye cream, or facial oil.
  1. Use the serum consistently: For best results, incorporate the Korean hyaluronic serum into your daily skincare routine, both morning and evening. Consistency is key to achieving the desired hydration and skin benefits.
  2. Adjust usage as needed: If you have particularly dry or dehydrated skin, you may want to use the Korean hyaluronic serum more frequently or apply a thicker layer. Conversely, if you have oily or combination skin, you may want to use a lighter application.

Remember, the key to unlocking the full potential of Korean hyaluronic serum is to listen to your skin’s needs and adjust your usage accordingly. With regular and proper application, you’ll be well on your way to achieving the radiant, hydrated complexion you’ve been craving.

Ingredients to Look for in Korean Hyaluronic Serums

When selecting a Korean hyaluronic serum, it’s important to be mindful of the ingredients that make these products so effective. Here are some of the key components to look for:

Hyaluronic Acid

The star ingredient in Korean hyaluronic serums, hyaluronic acid, comes in various molecular weights to ensure deep penetration and long-lasting hydration.

Botanical Extracts

Many Korean hyaluronic serums incorporate soothing and nourishing botanical extracts, such as green tea, centella, and cica, to provide additional skin benefits.

Antioxidants

Ingredients like vitamin C, vitamin E, and ferulic acid can help to protect the skin from environmental stressors and free radical damage.

Peptides

Peptides, such as palmitoyl tripeptide-1 and palmitoyl tetrapeptide-7, can help to improve skin elasticity and reduce the appearance of fine lines and wrinkles.

Ceramides

Ceramides are essential for maintaining the skin’s protective barrier, and their inclusion in Korean hyaluronic serums can help to lock in moisture and prevent water loss.By familiarizing yourself with these key ingredients, you can make an informed decision when selecting the Korean hyaluronic serum that best suits your skin’s needs.

Comparison Table of Top 10 Korean Hyaluronic Serums

Serum NameKey IngredientsBenefitsPrice Range
Torriden Dive-In SerumPanthenol, Hyaluronic AcidSkin rejuvenation, Moisturization$30-$40
Huxley Secret of Sahara Grab Water EssenceCactus Extract, Hyaluronic AcidHydration, Nourishment$35-$45
Korea Devilkin Hyaluronic Acid 90% Peptides Water-Locking AmpouleHyaluronic Acid, PeptidesSkin hydration, Anti-aging$40-$50
COSRX Propolis AmpoulePropolis Extract, Hyaluronic AcidSkin repair, Nourishment$25-$35
CNP Laboratory Propolis Energy Ampule SerumPropolis Extract, Hyaluronic AcidEnergy boost, Skin revitalization$30-$40
Beplain Multi Hyaluronic Acid AmpouleHyaluronic Acid, Agave Tequilana Leaf ExtractIntense hydration, Moisture lock$35-$45
Sulwhasoo First Care Activating SerumGinseng Extract, Hyaluronic AcidSkin activation, Radiance$50-$60
SkinCeuticals Hyaluronic Acid IntensifierLicorice Root Extract, Hyaluronic AcidSkin elasticity, Wrinkle reduction$70-$80
Jumiso Waterfull Hyaluronic Acid SerumHyaluronic Acid, Vitamin EHydration, Antioxidant protection$25-$35
Ample:N Ceramide Shot AmpouleCeramides, Hyaluronic AcidSkin barrier repair, Nourishment$40-$50

FAQs about Korean Hyaluronic Serum

What are the benefits of using a Korean hyaluronic serum?

Korean hyaluronic serums offer a range of benefits for the skin, including:

  • Intense hydration and plumping
  • Reduced appearance of fine lines and wrinkles
  • Improved skin elasticity and firmness
  • Soothing and calming effects for sensitive skin
  • Brightening and evening out of skin tone
  • Enhanced skin barrier function and protection

Read Also: What Massage Oils Are Best.

How often should I use a Korean hyaluronic serum?

For best results, it’s recommended to use a Korean hyaluronic serum twice a day, once in the morning and once in the evening, as part of your skincare routine. However, you can adjust the frequency based on your skin’s individual needs and preferences.

Read Also: Gua Sha Oil.

Can Korean hyaluronic serum be used on all skin types?

Yes, Korean hyaluronic serums are generally suitable for all skin types, including sensitive, acne-prone, and mature skin. The gentle, non-irritating formulations make them a versatile choice for a wide range of complexions.

Read Also: Cheek filler before and after over 50.

How long does it take to see results from using a Korean hyaluronic serum?

The results from using a Korean hyaluronic serum can vary, but most users report seeing improvements in skin hydration and plumpness within the first few weeks of consistent use. For more visible anti-aging and skin-smoothing benefits, it may take 4-8 weeks of regular application.

Read Also: Black Facial Peel Mask.

Can Korean hyaluronic serum be used with other skincare products?

Absolutely! Korean hyaluronic serums can be seamlessly incorporated into your existing skincare routine. They can be used in conjunction with other products, such as cleansers, moisturizers, and facial oils, to enhance the overall effectiveness of your regimen.

Read Also: Partial Veneers Before and After.

Conclusion

Korean hyaluronic serum has undoubtedly revolutionized the world of skincare, offering a transformative solution for those seeking radiant, youthful-looking skin. By harnessing the power of hyaluronic acid and incorporating a range of skin-nourishing ingredients, these innovative serums have become a must-have in the routines of beauty enthusiasts worldwide.

Read Also: Hunter Green Gel Nail Polish.

Whether you’re looking to combat the signs of aging, improve skin hydration, or simply achieve a healthy, glowing complexion, Korean hyaluronic serum is a versatile and effective addition to your skincare arsenal. By understanding the key ingredients, usage guidelines, and top product recommendations, you can embark on a journey to unlock the full potential of your skin and enjoy the transformative benefits of these remarkable serums.

Read Also: Pull Ups While Pregnant.

So, what are you waiting for? Dive into the world of Korean hyaluronic serum and experience the radiance and hydration your skin deserves.

Read Also: Water Activated Eyeshadow.

Continue Reading

Beauty Tips

Hunter Green Gel Nail Polish: Indulge in Luxurious Nail Shades

Published

on

hunter green gel nail polish

Here is your complete guide to hunter green gel nail polish

Introduction to Hunter Green Gel Nail Polish

In the ever-evolving world of nail care, hunter green gel nail polish has emerged as a captivating and versatile choice, captivating the hearts of beauty enthusiasts worldwide. This timeless hue, with its rich and sophisticated undertones, has become a staple in the nail care industry, offering a unique blend of elegance and modern flair.

As the popularity of hunter green gel nail polish continues to soar, it’s no wonder that more and more individuals are drawn to its allure. Whether you’re a seasoned nail polish aficionado or a newcomer to the world of gel manicures, this classic color has the power to transform your nails and elevate your overall look. In this comprehensive guide, we’ll delve into the world of hunter green gel nail polish, exploring its key benefits, the art of selection, the intricacies of application, and the secrets to maintaining its long-lasting brilliance.

Understanding Hunter Green Gel Nail Polish

Hunter green gel nail polish is a unique and captivating nail color that has captured the hearts of beauty enthusiasts worldwide. Unlike traditional nail polish, gel-based formulas offer a distinct set of advantages, including exceptional longevity, chip-resistance, and a high-shine finish that can elevate any look.

The composition of hunter green gel nail polish sets it apart from its conventional counterparts. Formulated with a blend of specialized gel-based ingredients, this nail color is designed to provide a long-lasting, glossy, and durable finish that can withstand the rigors of everyday life. The curing process, which involves the use of a UV or LED lamp, is a crucial step in ensuring the proper application and adherence of the gel polish to the nails.

Choosing the Right Hunter Green Gel Nail Polish

When it comes to selecting the perfect hunter green gel nail, there are several factors to consider to ensure a flawless and long-lasting manicure. From brand reputation to formula composition, each element plays a crucial role in the overall quality and performance of the nail color.

To help you navigate the vast array of options, we’ve compiled a comprehensive table comparing the top hunter green gel nail brands, highlighting their key features, price range, and customer ratings:

BrandFormulaFinishPrice RangeCustomer Rating
OPIGel-based, long-lastingGlossy, high-shine$15 – $254.8/5
EssieGel-couture formula, chip-resistantSatin, subtle sheen$12 – $184.6/5
GelishSalon-quality gel, durableGlossy, high-shine$12 – $204.7/5
CND ShellacGel-based, salon-gradeGlossy, high-shine$18 – $254.8/5
Kiara SkyGel-based, long-lastingGlossy, high-shine$10 – $154.5/5

When selecting a hunter green gel nail, it’s essential to consider factors such as the brand’s reputation, the formula’s composition, the desired finish, and the overall value. By carefully evaluating these elements, you can ensure that you choose a high-quality product that will deliver a flawless and long-lasting manicure.

Applying Hunter Green Gel Nail Polish

Mastering the art of applying hunter green gel nail is crucial for achieving a professional-looking manicure that can last for weeks. The process involves several key steps, each of which plays a vital role in ensuring a smooth, even, and durable application.

Nail Preparation

  • Thoroughly clean and file the nails to remove any existing polish or debris.
  • Push back the cuticles gently to create a clean, well-groomed canvas.
  • Buff the nails lightly to create a smooth surface for the gel polish application.

Base Coat Application

  • Apply a thin, even layer of a gel-based base coat to the nails, ensuring complete coverage.
  • Cure the base coat under a UV or LED lamp according to the manufacturer’s instructions.

Color Application

  • Carefully apply a thin, even layer of hunter green gel nail to the nails, starting at the cuticle and working your way towards the tip.
  • Cure the color coat under the UV or LED lamp, following the recommended curing time.
  • Repeat the color application process, if necessary, to achieve the desired opacity and coverage.

Top Coat Application

  • Apply a generous layer of a gel-based top coat to the nails, sealing in the color and providing a glossy, high-shine finish.
  • Cure the top coat under the UV or LED lamp, ensuring a complete and durable seal.

Finishing Touches

  • Gently wipe the nails with a lint-free cloth to remove any tacky residue.
  • Trim and shape the nails as desired, ensuring a polished and well-groomed appearance.

By following these step-by-step instructions and incorporating the proper techniques, you can achieve a flawless hunter green gel nail manicure that will leave your nails looking stunning and long-lasting.

Maintaining Hunter Green Gel Nail Polish

Maintaining the vibrant and glossy appearance of your hunter green gel nail manicure is essential for ensuring its longevity. With the right care and attention, you can extend the life of your gel polish and keep your nails looking their best.

Wear Time and Longevity

One of the primary advantages of hunter green gel nail is its exceptional wear time and longevity. Depending on the brand and formula, a well-applied gel manicure can last anywhere from 2 to 4 weeks, with minimal chipping or fading.

Removal and Reapplication

When it’s time to remove your hunter green gel nail, it’s crucial to use the proper techniques to avoid damage to your natural nails. Acetone-based removers are the most effective, but it’s important to soak the nails and gently file away the gel polish, rather than peeling or picking it off.

To maintain the integrity of your nails, it’s recommended to have your hunter green gel nail removed by a professional at a nail salon. They have the expertise and tools to ensure a gentle and thorough removal process.

Nail Care Routine

Incorporating a regular nail care routine can help you maintain the vibrant and glossy appearance of your hunter green gel nail manicure. This may include:

  • Applying cuticle oil or moisturizer to keep the nails and surrounding skin hydrated.
  • Using a nail buffer to gently smooth and shine the nails between manicures.
  • Avoiding activities that may cause excessive wear or chipping, such as manual labor or household chores.

By following these maintenance tips, you can ensure that your hunter green gel nail manicure remains flawless and long-lasting, allowing you to enjoy the timeless elegance of this captivating nail color.

Read Also: Lash Extension Styles.

FAQs about Hunter Green Gel Nail Polish

How long does hunter green gel nail polish typically last?

The longevity of hunter green gel nail can vary depending on the brand and formula, but a well-applied gel manicure can generally last between 2 to 4 weeks with minimal chipping or fading.

Read Also: Marula Oil for Hair.

Is hunter green gel nail polish suitable for all skin tones?

Yes, hunter green gel nail is a versatile color that can complement a wide range of skin tones. The rich, sophisticated hue of hunter green is particularly flattering on fair, medium, and olive skin tones.

Read Also: Walnut Oil.

How do I remove hunter green gel nail polish properly?

To remove hunter green gel nail, it’s recommended to use an acetone-based remover and soak the nails for 10-15 minutes. Gently file away the gel polish, rather than peeling or picking it off, to avoid damage to the natural nails.

Read Also: What Massage Oils Are Best.

Can I use hunter green gel nail polish for nail art designs?

Absolutely! The bold and rich color of hunter green gel nail makes it an excellent choice for creating intricate nail art designs. Whether you opt for simple geometric patterns or more elaborate floral motifs, this versatile hue can elevate your nail art to new heights.

Read Also: Gua Sha Oil.

How do I maintain the glossy finish of my hunter green gel nail polish manicure?

To maintain the glossy finish of your hunter green gel nail manicure, be sure to apply a high-quality gel-based top coat and cure it properly under a UV or LED lamp. Additionally, using a nail buffer to gently shine the nails between manicures can help preserve the vibrant and glossy appearance.

Read Also: Cheek filler before and after over 50.

Conclusion

In the captivating world of nail care, hunter green gel nail polish has emerged as a true standout, offering a timeless and sophisticated look that can elevate any ensemble. From its rich and captivating hue to its exceptional longevity and high-shine finish, this versatile nail color has captured the hearts of beauty enthusiasts worldwide.

Read Also: Black Facial Peel Mask.

Whether you’re a seasoned gel manicure aficionado or a newcomer to the world of nail care, we hope this comprehensive guide has provided you with the knowledge and confidence to embrace the allure of hunter green gel nail. By understanding the unique properties of this captivating color, mastering the art of application, and maintaining its long-lasting brilliance, you can transform your nails into a true work of art.

Read Also: Pull Ups While Pregnant.

So, why not elevate your nail game and indulge in the timeless elegance of hunter green gel nail polish? Embrace the power of this captivating hue and let it be the finishing touch that elevates your overall look and leaves a lasting impression.

Read Also: Partial Veneers Before and After.

Continue Reading

Beauty Tips

Partial Veneers Before and After: Smile Transformation Wonders

Published

on

partial veneers before and after

Here is your complete guide to partial veneers before and after

Introduction to Partial Veneers Before and After

Are you tired of feeling self-conscious about your smile? Do you wish you could achieve a more polished and confident look without undergoing extensive dental work? If so, partial veneers might be the solution you’ve been searching for. In this comprehensive guide, we’ll explore the world of partial veneers, delving into the before and after transformations that have captivated countless individuals.

They are a game-changing dental treatment that can address a wide range of cosmetic concerns, from discolored and misshapen teeth to gaps and alignment issues. Unlike traditional full veneers, which cover the entire visible surface of the tooth, partial veneers are designed to target specific problem areas, offering a more conservative and cost-effective approach to enhancing your smile.

Throughout this article, we’ll guide you through the partial veneers before and after process, providing you with a detailed understanding of what to expect, from the initial consultation to the stunning results. Get ready to embark on a journey that could forever change the way you view your smile.

What are Partial Veneers?

Partial veneers, also known as “dental veneers” or “composite veneers,” are thin, custom-made shells that are bonded to the front surface of your teeth. These shells are typically made of porcelain or a composite resin material, and they are designed to improve the appearance of your teeth by addressing a variety of cosmetic concerns.

Unlike full veneers, which cover the entire visible surface of the tooth, partial veneers are tailored to address specific problem areas, such as discoloration, chips, cracks, or misshapen teeth. This targeted approach allows for a more conservative and cost-effective solution, making it an attractive option for those seeking to enhance their smile without undergoing extensive dental work.

The primary purpose of partial veneers is to improve the aesthetic appearance of your teeth, but they can also provide some functional benefits, such as protecting weakened or damaged tooth enamel and improving the overall health of your teeth.

Before the Procedure

Before you can undergo the partial veneers procedure, you’ll need to schedule a consultation with your dentist. During this initial appointment, your dentist will thoroughly examine your teeth and discuss your specific concerns and goals.

During the consultation, your dentist will:

  • Assess the condition of your teeth and gums
  • Determine if you are a suitable candidate for partial veneers
  • Discuss the various treatment options available to you
  • Explain the partial veneers procedure in detail
  • Provide an estimate of the cost and timeline for the treatment

It’s important to be honest with your dentist about your dental history, any existing conditions, and your expectations for the outcome. This will help your dentist develop a personalized treatment plan that addresses your unique needs and ensures the best possible results.

During the Procedure

Once you and your dentist have agreed on the treatment plan, the partial veneers procedure can begin. The process typically involves the following steps:

  1. Tooth Preparation: Your dentist will lightly buff the surface of the teeth that will receive the partial veneers. This step is necessary to create a rough surface that will help the veneers adhere securely.
  2. Impression Taking: Your dentist will take an impression of your teeth, which will be used to create the custom-made partial veneers.
  3. Temporary Veneers: In some cases, your dentist may place temporary veneers on your teeth to protect them while the permanent partial veneers are being fabricated.
  1. Veneer Placement: When the partial veneers are ready, your dentist will carefully bond them to the front of your teeth using a special adhesive. They will then trim and polish the veneers to ensure a seamless and natural-looking finish.
  2. Final Adjustments: Your dentist may make minor adjustments to the partial veneers to ensure a comfortable and aesthetically pleasing fit.

The entire veneers procedure typically takes two to three visits, depending on the complexity of your case and the number of teeth being treated.

Aftercare and Recovery

After the partial veneers procedure, it’s important to follow your dentist’s instructions for proper aftercare and recovery. This may include:

  • Avoiding Certain Foods: For the first few days, you may need to avoid hard, crunchy, or sticky foods that could potentially dislodge or damage the new veneers.
  • Maintaining Oral Hygiene: Brushing and flossing your teeth regularly is crucial to keep the veneers and surrounding teeth healthy.
  • Attending Follow-up Appointments: Your dentist will likely schedule one or more follow-up appointments to ensure the veneers are functioning properly and to make any necessary adjustments.
  • Protecting the Veneers: Wearing a nightguard or mouthguard during sleep can help prevent grinding or clenching, which can potentially damage the veneers over time.

It’s important to note that while they are generally durable and long-lasting, they may require occasional maintenance or replacement over time. Your dentist will provide you with specific instructions on how to care for your new veneers and ensure their longevity.

Benefits of Partial Veneers

Partial veneers offer a range of benefits that make them an attractive option for those seeking to enhance their smile:

  1. Aesthetic Improvements: They can dramatically improve the appearance of your teeth, addressing issues such as discoloration, chips, cracks, and misshapen or uneven teeth.
  2. Minimal Tooth Preparation: Unlike full veneers, they require less tooth preparation, preserving more of your natural tooth structure.
  3. Cost-Effective: They are generally more affordable than full veneers, making them a more accessible option for many patients.
  4. Reversible TreatmentPartial veneers can be removed without causing permanent damage to your natural teeth, providing you with more flexibility in the future.
  1. Improved Confidence: By transforming your smile, partial veneers can boost your self-esteem and help you feel more confident in social and professional settings.

Risks and Considerations

While partial veneers are generally a safe and effective dental treatment, there are a few risks and considerations to keep in mind:

  1. Tooth Sensitivity: Some patients may experience temporary tooth sensitivity after the partial veneers procedure, particularly to hot or cold temperatures.
  2. Gum Irritation: The placement of veneers can sometimes cause minor gum irritation, which can be managed with proper oral hygiene and follow-up care.
  3. Chipping or Cracking: Although partial veneers are durable, they can still be susceptible to chipping or cracking, especially if subjected to excessive force or biting on hard objects.
  4. Discoloration: Over time, the veneers may become discolored, particularly if they are not properly maintained or if you consume staining foods and beverages.
  5. Suitability: Not everyone is a suitable candidate for veneers. Your dentist will evaluate your oral health and determine if this treatment is the best option for you.

Cost of Partial Veneers Before and After

Cost AspectBefore Partial VeneersAfter Partial Veneers
Per Tooth Cost$800 – $2,500 per tooth$925 – $2,500 per tooth
Full Mouth Cost$4,800 – $20,000 for 6-8 veneers$5,550 – $20,000 for 6-8 veneers
Insurance CoverageUnlikely to be covered, considered cosmeticUnlikely to be covered, considered cosmetic
Financing OptionsPayment plans available, 0% interestPayment plans available, 0% interest
LongevityN/A5-10 years on average, can last up to 20 years with proper care

The cost can vary significantly depending on factors such as the number of teeth being treated, the materials used (porcelain vs. composite), the dentist’s experience, and the geographic location.

Before getting partial veneers, the per-tooth cost typically ranges from $800 to $2,500. For a full mouth treatment of 6-8 veneers, the total cost can be anywhere from $4,800 to $20,000.After the procedure, the per-tooth cost remains in the $925 to $2,500 range, with a full mouth treatment of 6-8 veneers costing between $5,550 and $20,000.It’s important to note that dental insurance is unlikely to cover the cost, as they are generally considered a cosmetic treatment. However, many dentists offer financing options, including 0% interest payment plans, to help make the treatment more affordable for patients.

Partial veneers are a long-lasting solution, with an average lifespan of 5 to 10 years. With proper care and maintenance, they can even last up to 20 years, making them a worthwhile investment in the long run.

Partial Veneers Before and After: Visual Comparisons

One of the most compelling aspects of partial veneers is the dramatic transformation they can bring to your smile. By carefully selecting the right teeth to receive the veneers, your dentist can create a seamless and natural-looking improvement that can significantly boost your confidence and self-esteem.

To give you a better understanding of the partial veneers before and after results, let’s take a look at some real-life examples:

Example 1: Discolored and Misshapen Teeth

Before: The patient had several discolored and misshapen teeth, which caused them to feel self-conscious about their smile.After: With the application of partial veneers, the patient’s teeth were transformed, becoming brighter, more uniform in shape, and significantly more aesthetically pleasing.

Example 2: Chipped and Uneven Teeth

Before: The patient had several chipped and uneven teeth, which detracted from the overall appearance of their smile.After: They were used to restore the damaged teeth, creating a more symmetrical and harmonious smile.

Example 3: Gaps and Alignment Issues

Before: The patient had noticeable gaps between their teeth, as well as some misalignment, which made them feel self-conscious.After: They were strategically placed to close the gaps and improve the overall alignment of the teeth, resulting in a more polished and confident smile.

These examples showcase the remarkable transformative power of veneers, demonstrating how this innovative dental treatment can address a wide range of cosmetic concerns and deliver stunning results.

FAQs

As you consider partial veneers as a solution for your smile, you may have several questions. Here are some of the most frequently asked questions, along with detailed answers:

How long do partial veneers last?

They are designed to be a long-lasting solution for improving the appearance of your teeth. With proper care and maintenance, they can typically last between 5 to 10 years, and in some cases, even longer. The longevity of your veneers will depend on factors such as your oral hygiene habits, the materials used, and any underlying dental issues.

Are partial veneers reversible?

Yes, they are generally considered a reversible dental treatment. Unlike full veneers, which require the removal of a significant amount of tooth enamel, they can be removed without causing permanent damage to your natural teeth. This makes them a more conservative option for those who may want to explore alternative treatments in the future.

Read Also: Lash Extension Styles.

Do partial veneers stain?

Partial veneers, particularly those made of porcelain, are generally resistant to staining. However, it’s important to maintain good oral hygiene habits, such as regular brushing and flossing, to prevent discoloration. Additionally, avoiding staining foods and beverages, like coffee, tea, and red wine, can help keep your veneers looking their best.

Read Also: Marula Oil for Hair.

Can partial veneers be whitened?

While veneers themselves cannot be whitened, the surrounding natural teeth can be. Your dentist may recommend professional teeth whitening treatments to help brighten the appearance of your smile and create a more uniform look.

Read Also: Walnut Oil.

How much do partial veneers cost?

The cost can vary depending on several factors, including the number of teeth being treated, the materials used, and the location of your dentist. On average, the cost can range from $800 to $2,000 per tooth. It’s important to discuss the specific costs with your dentist during your initial consultation.

Read Also: What Massage Oils Are Best.

It’s important to discuss these risks and considerations with your dentist during your initial consultation to ensure that veneers are the right choice for your specific needs and goals.

Read Also: Gua Sha Oil.

Conclusion

If you’re looking to transform your smile without undergoing extensive dental work, partial veneers may be the solution you’ve been searching for. By addressing specific cosmetic concerns, this innovative treatment can deliver stunning results that can boost your confidence and improve your overall appearance.

Read Also: Cheek filler before and after over 50.

Throughout this comprehensive guide, we’ve explored the world of partial veneers before and after, providing you with a detailed understanding of the procedure, the potential benefits, and the associated risks and considerations. With the help of your trusted dentist, you can embark on a journey towards a more beautiful and confident smile.

Read Also: Pull Ups While Pregnant.

So, what are you waiting for? Take the first step towards your dream smile and schedule a consultation with a qualified dental professional today. Get ready to unveil the transformation and embrace the power of partial veneers.

Read Also: Black Facial Peel Mask.

Continue Reading

Trending