Connect with us

Beauty Tips

Bent Eyeliner Brush Elegance: Effortless Beauty at Your Fingertips

Published

on

bent eyeliner brush

Here is your complete guide to bent eyeliner brush

Introduction to Bent Eyeliner Brush

A bent eyeliner brush is a makeup tool designed to help create precise and elegant winged eyeliner looks. Its unique shape, which resembles a slanted spoon, allows for better control and ease of application, making it a popular choice among makeup enthusiasts and professionals alike. With its ability to create sharp, defined lines, a bent eyeliner brush can elevate the overall look of your eye makeup, whether you’re going for a subtle daytime look or a dramatic nighttime style. In this article, we’ll explore the history, types, and benefits of using a bent eyeliner brush, as well as how to use it effectively, maintain it, and review the top products on the market. So, if you’re ready to master your eyeliner game, let’s dive in!

History of Bent Eyeliner Brushes

It has a rich history dating back to the early 20th century. Its design evolved over time, with the aim of providing better control and precision in applying eyeliner. The modern bent eyeliner brush we know today is a result of these innovations, offering a more efficient and precise way to apply eyeliner.

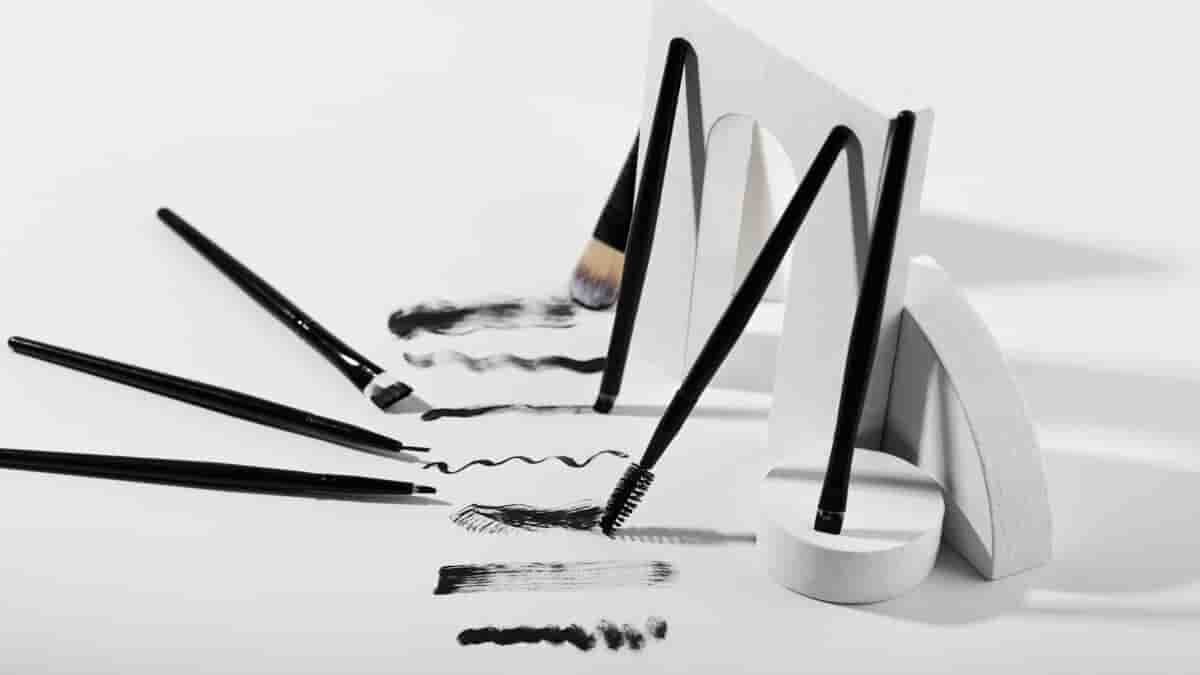
Types of Bent Eyeliner Brushes

There are various shapes and sizes of bent eyeliner brushes, as well as different materials used in their construction. Some common materials include natural hair, synthetic hair, and plastic. The shape of the brush can also vary, with some being more angled than others. A comparison table of various bent eyeliner brushes can help you determine which one is best suited to your needs and preferences.

How to Use a Bent Eyeliner Brush

Using a bent eyeliner brush involves a few simple steps. Here’s a step-by-step guide to help you achieve a perfect winged eyeliner look:

  1. Start by ensuring your eyes are clean and makeup-free.
  2. Apply a primer to your eyes if you want your eyeliner to stay in place all day long.
  3. Choose a suitable eyeliner product, such as a liquid or gel liner, that complements your eye color.
  4. Dip your bent eyeliner brush into the eyeliner product, ensuring it’s well-coated.
  5. Begin at the inner corner of your eye and extend the brush towards the outer corner, creating a slight upward flick at the end.
  6. Continue to thicken the line as you extend it out.
  7. Go back and clean up any uneven edges or gaps.
  8. If you want a thicker or thinner line, repeat the process until you achieve your desired look.

Benefits of Using a Bent Eyeliner Brush

It offers several advantages over traditional eyeliner brushes:

  • Precision: The unique shape of the brush allows for better control and precision, making it easier to create sharp, defined lines.
  • Versatility: It can be used for various eye shapes and sizes, as well as different types of eyeliner products.
  • Comparison Table of Application Results with and without the Brush: This table can help you visualize the difference in application results between using a bent eyeliner brush and a traditional brush.
Before (Liner Brush)After (Bent Eyeliner Brush)
1Diffused and uneven linesPrecise and defined lines
2Uneven and jagged edgesClean and sharp edges
3Limited wing extensionDramatic and extended wing

Maintenance and Cleaning

Proper care for your eyeliner brush ensures its longevity and optimal performance. Here are some tips for maintaining your brush:

  1. Use a gentle, oil-free cleanser to remove makeup residue after each use.
  2. Avoid using the brush with wet or damp hands, as excess moisture can damage the bristles.
  3. Store your brush in a cool, dry place to prevent mold and mildew growth.
  4. Replace the brush as needed, as damaged bristles can affect the quality of your eyeliner application.

Pros of Bent Eyeliner Brushes

BrandPros
Make Up For Ever 260 Bent Eyeliner BrushSuper small, super precise. The small flat edge helps fill in the shape.
E820 – Bent Eye Liner BrushVital tool for achieving the desirable cat’s eye look. Microfine brush enables drawing a smooth line near the upper and lower lashes. The bent angle allows detailed application of gel, cream, or powder in fine lines on the eyelid or brow. Sculpted vegan bristles are firm enough for precision but gentle on the skin. Unique design allows drawing a line along the upper and lower eyelashes with accuracy. Works well with gel liner.

Top 10 Bent Eyeliner Brushes

BrandPrice
wet n wild Eyebrow and Liner Brush$1.00
Fine Angled Eyeliner Brush, JASSINS Ultra thin Precision Makeup Brushes Set$4.99
Eyeliner Brush Fine Angled – PRO Precision Gel Eye Liner Makeup Brush -Ultra Thin Slanted Flat Angle$9.99
HOSAILY 2Pcs Eyeliner Stencils 5 in 1 Silicone Winged Tip Eyeliner Eyebrow Eyelash Contour and Lip$6.99
5-Piece Set of Etercycle Eyeliner Brushes for Precision Makeup Application – Fine Angled & Ultra$5.99
Eyeliner Brush Fine Angled Set – For Liquid Gel Liner Applicator Bent Stencils Thin Pencil Pen Real$9.99
Fine Angled Eyeliner Brushes, Ultra thin Precision Eye Liner Makeup Brushes set$3.99
Sigma B12 Bent Liner Makeup Brush – Precise Eyeliner Brush for Gel, Liquid or Powder$18.00
Bdellium Tools Professional Makeup Brush Pink Bambu Series – 714 Flat Eye Definer$9.99
5 Pcs Bent Eyeliner Brush, Bent Liner Makeup Brush, Pinceaux Eyeliner Coudés Multifonctionnels$7.99

Comparison of Bent Eyeliner Brushes vs. Other Eyeliner Brushes

BrandDescriptionPrice
wet n wild Eyebrow and Liner BrushFlat Makeup Angled Liner Brush, Ultra-Thin Precision, Soft Fibers$1.00
Fine Angled Eyeliner Brush, JASSINSUltra thin Precision Makeup Brushes Set, Point Eyeliner, Synthetic Bristles Eye Makeup Tool (3 Pcs)$4.99
Eyeliner Brush Fine Angled – PRO Precision Gel Eye Liner Makeup BrushUltra Thin Slanted Flat Angle$9.99
HOSAILY 2Pcs Eyeliner Stencils 5 in 1 Silicone Winged Tip Eyeliner Eyebrow Eyelash Contour and Lip5 in 1 Silicone Winged Tip Eyeliner Eyebrow Eyelash Contour and Lip$6.99
5-Piece Set of Etercycle Eyeliner BrushesFine Angled & Ultra$5.99
Eyeliner Brush Fine Angled SetFor Liquid Gel Liner Applicator Bent Stencils Thin Pencil Pen Real$9.99
Sigma Beauty Professional E06 Eye Liner BrushFine Angled Eyeliner Brush with Pointed Tip for Cat Eyeliner & Winged Liner (1 Brush)$16.00
Bdellium Tools Professional Makeup Brush Pink Bambu Series – 714 Flat Eye DefinerFlat Eye Definer$9.99
Make Up For Ever 260 Bent Eyeliner BrushSuper small, super precise. The small flat edge helps fill in the shape.Price not available
E820 – Bent Eye Liner BrushVital tool for achieving the desirable cat’s eye look. Microfine brush enables drawing a smooth line near the upper and lower lashes. The bent angle allows detailed application of gel, cream, or powder in fine lines on the eyelid or brow. Sculpted vegan bristles are firm enough for precision but gentle on the skin.$10.10

FAQs

Can I use a bent eyeliner brush with water-based eyeliner products?

Yes, you can use it with water-based eyeliner products. Just ensure the brush is made of synthetic hair, as natural hair may absorb the water-based product.

Read Also: Ion Demi Permanent Hair Color.

How do I clean my bent eyeliner brush?

To clean your eyeliner brush, swirl the brush in a gentle, oil-free cleanser to remove makeup residue. Rinse thoroughly with water and pat dry with a clean towel.

Read Also: Protective Hairstyles for White Hair.

Can I use a bent eyeliner brush for other makeup purposes, such as brows or lip liner?

While it is primarily designed for eye makeup, its precision and control can also be beneficial for brows and lip liner application.

Read Also: Jelly Gel Nails.

How often should I replace my bent eyeliner brush?

Replace your eyeliner brush as needed, as damaged bristles can affect the quality of your eyeliner application. Generally, a good quality brush can last several months with proper care.

Read Also: French Manicure Strips.

Are there any vegan or cruelty-free bent eyeliner brushes available?

Yes, there are vegan and cruelty-free bent eyeliner brushes available in the market. Look for brushes made of synthetic hair or vegan-friendly materials.

Read Also: Butt Blasting.

Conclusion

In conclusion, it is a valuable addition to your makeup collection, offering precision and versatility in creating stunning winged eyeliner looks. By following our guide on how to use a bent eyeliner brush, maintaining your brush, and choosing the right product, you’ll be well on your way to mastering this elegant makeup technique. So, go ahead and give it a try, and elevate your eye makeup game to new heights!

Read Also: Black Nail Polish Spiritual Meaning.

Continue Reading
Click to comment

Leave a Reply

Your email address will not be published. Required fields are marked *

Beauty Tips

Press on naglar: Steg-för-steg applicering

Published

on

press on naglar

Här är din kompletta guide till press on naglar

Introduktion till Press on naglar

Press on naglar har blivit en allt populärare lösning för att få snygga och trendiga naglar utan att behöva gå till en salong. Dessa lössnaglar är enkla att applicera, kostnadseffektiva och ger ett professionellt resultat. I den här guiden kommer vi att gå igenom allt du behöver veta om press on naglar, från historia och typer till applicering och underhåll.

Historien bakom Press On Naglar

Press on naglar har funnits i många år, men de har utvecklats avsevärt sedan de först introducerades. Ursprungligen var de gjorda av plast och hade ett ganska artificiellt utseende. Men med tidens gång har materialen förbättrats och designerna blivit mer naturliga och snygga.

Idag finns det ett stort utbud av press on naglar i olika material, former och stilar. De har blivit ett populärt alternativ för de som vill ha snygga naglar utan att behöva gå till en salong varje gång.

Typer av Press On Naglar

Det finns flera olika typer av press on naglar att välja mellan. Här är några av de vanligaste:

Material

  • Akryl: Dessa är de mest hållbara och ger ett naturligt utseende. De är dock också de dyraste.
  • Plast: Billigare alternativ som inte är lika hållbara som akryl.
  • Gel: Ger ett blankt och glänsande resultat. Mer flexibla än akryl.

Former

  • Mandel: En klassisk form som passar de flesta händer.
  • Oval: Ger en mjuk och elegant look.
  • Kvadratisk: Ger en modern och tydlig look.
  • Stiletto: En spetsig form som är populär för tillfällen.

Längder

  • Kort: Bra för de som vill ha ett naturligt utseende.
  • Medium: En populär längd som passar de flesta.
  • Lång: För de som vill ha en dramatisk look.

Jämförelse av Press On Naglar-typer

TypMaterialHållbarhetKostnadsspann
AkrylAkrylplast2-4 veckor300-600 kr/set
GelGelplast2-3 veckor200-400 kr/set
PlastPlast1-2 veckor50-150 kr/set

Hur man applicerar Press On Naglar

Att applicera press on naglar är ganska enkelt, men det tar lite övning. Här är en steg-för-steg-guide:

  1. Rengör och fila dina naglar för att få en jämn yta.
  2. Välj rätt storlek på press on naglarna för varje finger.
  3. Applicera lim på nagelns baksida och på din egen nagel.
  4. Tryck fast press on nageln på din egen nagel och håll i 30 sekunder.
  5. Upprepa steg 3-4 för varje finger.
  6. Fila bort eventuella ojämnheter i kanterna.

För bästa resultat, följ instruktionerna som medföljer ditt press on naglar-kit. Det kan ta lite övning, men med tiden kommer du att bli en proffs på att applicera dem.

Fördelar och nackdelar med Press On Naglar

Precis som med alla andra nagellösningar, finns det både för- och nackdelar med press. Här är några av de viktigaste:

Fördelar

  • Billigare än akryl- eller gelnaglar.
  • Snabbare och enklare att applicera.
  • Skadas inte dina egna naglar.
  • Kan tas bort när som helst.
  • Stort utbud av stilar och färger.

Nackdelar

  • Inte lika hållbara som akryl- eller gelnaglar.
  • Kan lossna lättare än andra alternativ.
  • Begränsad livslängd (vanligtvis 1-2 veckor).
  • Kan se artificiella ut om de inte appliceras korrekt.

Press On Naglar vs. Traditionella Nagelteknik

När du jämför press on naglar med traditionella nagelteknik som akryl och gel, finns det några viktiga skillnader att tänka på:

EgenskapPress On NaglarAkrylGel
AppliceringstidSnabb (15-30 min)Långsam (1-2 timmar)Medel (45-60 min)
KostnadLåg (10-30 kr/set)Hög (500-1000 kr/besök)Medel (300-600 kr/besök)
Skada på naglarIngenVissViss
Hållbarhet1-2 veckor2-4 veckor2-3 veckor
AvlägsnandeEnkelSvårMedel

Så i sammanfattning, press on naglar är ett snabbt, billigt och skonsamt alternativ som passar bra för tillfälliga eller kortvariga behov. Men för mer långvariga lösningar, kan akryl eller gel vara bättre alternativ.

Populära Press On Naglar-trender

TrendBeskrivningPassar bäst för
GlitterNaglar täckta i glitter och paljetterFestliga tillfällen
MarmorNaglar med marmorimitationElegant look
NeonNaglar i knallstarka färgerSomrig känsla
FransarNaglar med påklistrade fransarDramatisk touch
MinimalistiskNaglar i neutrala färgerKlassisk stil

Underhåll av Press On Naglar

För att få ut så mycket som möjligt av dina press, är det viktigt att ta hand om dem ordentligt. Här är några tips:

  • Undvik att diska utan handskar för att förhindra att de lossnar i förtid.
  • Använd en nagelfil för att jämna till kanterna om de börjar lossna.
  • Applicera nagellack eller topplack för att förlänga hållbarheten.
  • Rengör regelbundet under press on naglarna för att förhindra bakterietillväxt.

Med rätt underhåll, kan dina press hålla i upp till 2 veckor. Men kom ihåg att ta bort dem försiktigt när det är dags, för att undvika skador på dina egna naglar.

Borttagning av Press On Naglar

När det är dags att ta bort dina press on naglar, är det viktigt att göra det på rätt sätt för att undvika skador. Här är några tips:

  1. Blötlägg naglarna i varmt vatten i 10-15 minuter för att mjuka upp limmet.
  2. Använd en nagelfil för att försiktigt fila bort ytan på press on nageln.
  3. Använd en apelsinpinne för att försiktigt lossa press on nageln från din egen nagel.
  4. Applicera nagellotion eller olja på naglarna för att återfukta dem.

Om press on naglarna sitter väldigt hårt, kan du behöva blötlägga dem ytterligare eller besöka en salong för professionell borttagning. Men i de flesta fall, kan du ta bort dem själv på ett säkert sätt.

Trender och Designs för Press On Naglar

En av de bästa delarna med press är att de finns i ett stort utbud av trender och designs. Här är några av de populäraste:

  • Glitter och paljetter för festliga tillfällen.
  • Marmormönster för en elegant look.
  • Neon och pastell för en somrig känsla.
  • Fransar och stenar för en dramatisk touch.
  • Minimalistiska och neutrala för en klassisk stil.

Oavsett din personliga stil, finns det säkert ett par press som passar dig perfekt. Prova dig fram och ha kul med olika trender och designs!

Bästa Produkter för Press On Naglar och Deras Kostnader

ProduktKostnad
Olive & June Press-On SystemCirka 100 kr per set
Glamnetic Press-On NailsHögre prisklass
KISS Salon Acrylic Press-On NailsBillig, finns på apotek
Chillhouse Chill Tips Återanvändbara Press-On NaglarKostnad ej angiven
Très She Sexting Press On AkrylnaglarKostnad ej angiven
Dashing Diva Magic Press-On NaglarPrisvärt alternativ

Olive & June Press-On System är ett prisvärt alternativ, där många set kostar runt 100 kr. Glamnetic har en högre prisklass, medan KISS Salon Acrylic Press-On Nails är billiga och finns på apotek. Kostnaderna för Chillhouse Chill Tips Återanvändbara Press, Très She Sexting Press On Akrylnaglar och Dashing Diva Magic Press anges inte i sökresultaten.

Bästa Tips för Användning av Press On Naglar

Förbered Naglarna

  • Fila och putsa naglarna för att få en jämn yta
  • Avlägsna all gammal lack eller gelé
  • Rengör naglarna med aceton för att ta bort fett och smuts

Välj Rätt Storlek

  • Mät din nagelbädd och jämför med storlekarna i press kitet
  • Gå hellre upp en storlek än ner för bästa passform
  • Klipp eller fila press on naglarna om de är för stora

Applicera Limmet Korrekt

  • Applicera ett tunt lager lim på både din egen nagel och press on nageln
  • Låt limmet torka i 30 sekunder tills det blir klibbigt
  • Tryck fast press on nageln på plats och håll i 30 sekunder

Fila Kanterna

  • Använd en nagelfil för att jämna till kanterna på press on naglarna
  • Fila i en enda riktning för att undvika att de lossnar i förtid
  • Applicera nagellack eller topplack för extra hållbarhet

Underhåll Naglarna

  • Undvik att diska utan handskar för att förhindra att de lossnar
  • Rengör regelbundet under press on naglarna för att förhindra bakterietillväxt
  • Applicera nagellotion eller olja på naglarna för att återfukta dem

Ta Bort Försiktigt

  • Blötlägg naglarna i varmt vatten i 10-15 minuter för att mjuka upp limmet
  • Använd en nagelfil för att försiktigt fila bort ytan på press on nageln
  • Använd en apelsinpinne för att försiktigt lossa nageln från din egen nagel

Genom att följa dessa tips kan du få dina press att sitta säkert och se snygga ut i upp till 2 veckor. Kom ihåg att ta bort dem försiktigt när det är dags för att undvika skador på dina egna naglar.

Vanliga Frågor

Hur länge håller press on naglar?

Vanligtvis 1-2 veckor, beroende på hur väl du tar hand om dem.

Kan man återanvända press on naglar?

Ja, om du tar bort dem försiktigt kan du ofta återanvända dem flera gånger.

Läs också: Hermes Parfym.

Skadar press on naglar mina egna naglar?

Nej, de skadar inte dina naglar om du applicerar och tar bort dem korrekt.

Läs också: Replica Parfym.

Hur vet jag vilken storlek jag ska välja?

Mät din nagelbädd och jämför med storlekarna i press on naglar-kitet. Gå hellre upp en storlek än ner.

Läs också: LOreal Mascara.

Kan press on naglar anpassas?

Ja, du kan klippa och fila dem för att få exakt den form och längd du vill ha.

Läs också: Cream Bronzer.

Slutsats

Press on naglar är ett fantastiskt alternativ för de som vill ha snygga naglar utan att behöva gå till en salong. De är enkla att applicera, kostnadseffektiva och finns i ett stort utbud av stilar och trender. Med rätt underhåll, kan dina press hålla i upp till 2 veckor.

Läs också: Pull Ups While Pregnant.

Så varför inte prova på press on naglar själv? Det är ett roligt och kreativt sätt att uttrycka din personliga stil. Gå loss med olika färger, mönster och dekorationer – himlen är gränsen!

Läs också: Mont Blanc Explorer.

Continue Reading

Beauty Tips

Skincare for Sensitive Skin Mastery: Unlock Your Glow

Published

on

skincare for sensitive skin

Here is your complete guide to skincare for sensitive skin

Introduction to Skincare for Sensitive Skin

Having sensitive skin can be a frustrating and challenging experience, but with the right approach, you can achieve a healthy, glowing complexion. In this comprehensive guide, we’ll delve into the intricacies of skincare for sensitive skin, providing you with the knowledge and tools to navigate the world of skincare with confidence.

Sensitive skin is a common condition that affects a significant portion of the population. It’s characterized by a heightened reaction to various environmental factors, skincare products, and even certain foods. Individuals with sensitive skin often experience redness, irritation, dryness, and even breakouts, making it crucial to adopt a tailored skincare routine that caters to their unique needs.

In this article, we’ll explore the underlying causes of sensitive skin, the importance of understanding your skin type, and the essential steps to building a skincare routine for sensitive skin that will leave your complexion radiant and healthy. We’ll also dive into the ingredients to avoid, the best products to incorporate, and lifestyle tips to support your skin’s well-being.

Understanding Sensitive Skin

Sensitive skin is a complex condition that can be influenced by a variety of factors, including genetics, environmental stressors, and the use of harsh or unsuitable skincare products. To better understand your sensitive skin, let’s explore the key characteristics and potential causes.

Characteristics of Sensitive Skin

Individuals with sensitive skin often experience the following symptoms:

  • Redness and flushing
  • Stinging or burning sensation
  • Dryness and flakiness
  • Increased sensitivity to environmental factors like wind, cold, or heat
  • Reactivity to certain skincare ingredients or products

Causes of Sensitive Skin

The causes of sensitive skin can be multifaceted, but some of the most common factors include:

  • Genetics: Some people are simply predisposed to having more reactive and delicate skin.
  • Environmental factors: Exposure to pollution, harsh weather conditions, and UV radiation can contribute to skin sensitivity.
  • Skincare products: The use of harsh, drying, or irritating ingredients in skincare products can disrupt the skin’s natural barrier and lead to sensitivity.
  • Underlying skin conditions: Conditions like rosacea, eczema, or dermatitis can also manifest as sensitive skin.

Understanding the unique characteristics and potential causes of your sensitive skin is the first step in developing an effective skincare routine.

Building a Skincare Routine for Sensitive Skin

Crafting a skincare routine for sensitive skin requires a delicate balance of gentle, nourishing ingredients and a thoughtful approach to each step. Let’s explore the key components of a sensitive skin routine.

Cleansing

When it comes to sensitive skin, the cleansing step is crucial. Opt for gentle cleansers that are free of harsh surfactants, fragrances, and alcohol. These ingredients can strip the skin of its natural oils, leading to further irritation and dryness.

Look for cleansers that contain soothing ingredients like:

  • Ceramides
  • Glycerin
  • Aloe vera
  • Chamomile
  • Oatmeal

Avoid cleansers with the following ingredients:

  • Sodium lauryl sulfate (SLS)
  • Alcohol
  • Fragrances
  • Essential oils

Moisturizing

Proper hydration is essential for sensitive skin. Choose moisturizers that are fragrance-freenon-comedogenic, and formulated with calming, nourishing ingredients.

Some moisturizing ingredients to look for include:

  • Hyaluronic acid
  • Ceramides
  • Glycerin
  • Squalane
  • Niacinamide

Steer clear of moisturizers containing the following:

  • Alcohol
  • Fragrances
  • Essential oils
  • Retinoids

Sun Protection

Protecting your sensitive skin from the harmful effects of UV radiation is crucial. Sunscreens for sensitive skin should be mineral-basedfragrance-free, and non-comedogenic.

Look for sunscreens containing:

  • Zinc oxide
  • Titanium dioxide

Avoid sunscreens with:

  • Chemical filters (oxybenzone, avobenzone)
  • Fragrances
  • Alcohol

Treatment Products

Incorporating targeted treatment products can help address specific concerns for sensitive skin. However, it’s essential to introduce new products slowly and with caution to avoid further irritation.

Some treatment products to consider include:

  • Serums with calming ingredients like centella, green tea, or cica
  • Facial oils rich in nourishing fatty acids
  • Gentle exfoliants with lactic acid or enzymatic formulas

Avoid treatment products with the following:

  • Retinoids
  • AHAs (glycolic acid, lactic acid)
  • Fragrances
  • Essential oils

Ingredients to Avoid for Sensitive Skin

When it comes to skincare for sensitive skin, it’s crucial to be mindful of the ingredients in your products. Certain ingredients can trigger irritation, inflammation, and further sensitivity. Let’s explore the common culprits to steer clear of.

Fragrances

Synthetic fragrances are a leading cause of skin sensitivity. They can irritate the skin, leading to redness, itching, and even allergic reactions. Opt for fragrance-free products whenever possible.

Alcohol

Alcohol-based products can be drying and disruptive to the skin’s natural barrier, exacerbating sensitivity. Avoid tonersastringents, and cleansers that contain alcohol.

Harsh Chemicals

Ingredients like sodium lauryl sulfate (SLS)parabens, and formaldehyde-releasing preservatives can be harsh and irritating for sensitive skin.

Essential Oils

While natural, essential oils can be potent and potentially irritating for sensitive skin. Steer clear of products containing essential oils like peppermintcitrus, or eucalyptus.

Retinoids

Retinoids, such as retinol and tretinoin, can be too potent for sensitive skin. They can cause dryness, peeling, and increased sensitivity to the sun.

By being mindful of these irritating ingredients, you can ensure that your skincare routine for sensitive skin is tailored to your unique needs, promoting a healthy, radiant complexion.

Best Skincare Products for Sensitive Skin

Navigating the vast array of skincare products for sensitive skin can be overwhelming, but fear not! We’ve curated a selection of top-recommended products that cater to the specific needs of sensitive skin.

Cleansers

ProductKey Features
CeraVe Hydrating Facial Cleanser– Fragrance-free
– Contains ceramides and hyaluronic acid
– Gentle, non-irritating formula
La Roche-Posay Toleriane Hydrating Gentle Cleanser– Fragrance-free
– Formulated with thermal spring water
– Suitable for dry to sensitive skin
Cetaphil Daily Facial Cleanser– Fragrance-free
– Gentle, non-irritating formula
– Suitable for all skin types, including sensitive

Moisturizers

ProductKey Features
Vanicream Moisturizing Cream– Fragrance-free
– Contains ceramides and glycerin
– Suitable for very dry, sensitive skin
CeraVe Moisturizing Cream– Fragrance-free
– Contains ceramides and hyaluronic acid
– Helps restore the skin’s natural barrier
Avène Tolerance Extreme Emulsion– Fragrance-free
– Formulated with Avène thermal spring water
– Soothing and calming for sensitive skin

Sunscreens

ProductKey Features
EltaMD UV Clear Broad-Spectrum SPF 46– Mineral-based formula
– Contains niacinamide and hyaluronic acid
– Non-comedogenic and fragrance-free
La Roche-Posay Anthelios Mineral Sunscreen SPF 50– Mineral-based formula
– Contains antioxidants and soothing ingredients
– Suitable for sensitive and acne-prone skin
Neutrogena Sensitive Skin Mineral Sunscreen SPF 50– Mineral-based formula
– Fragrance-free and non-comedogenic
– Gentle and suitable for sensitive skin

Treatment Products

ProductKey Features
The Ordinary Niacinamide 10% + Zinc 1%– Helps reduce the appearance of blemishes
– Calms and soothes the skin
– Fragrance-free and suitable for sensitive skin
Drunk Elephant Protini Polypeptide Cream– Contains a blend of signal peptides and growth factors
– Helps improve skin’s appearance and texture
– Fragrance-free and non-irritating
SkinCeuticals Phyto Corrective Gel– Formulated with botanical extracts like cucumber and thyme
– Helps soothe and calm sensitive skin
– Fragrance-free and non-comedogenic

By incorporating these sensitive skin-friendly products into your routine, you can address your specific concerns while maintaining a healthy, balanced complexion.

Lifestyle Tips for Sensitive Skin

While a tailored skincare routine is essential, your overall lifestyle and habits can also have a significant impact on the health and appearance of sensitive skin. Let’s explore some key lifestyle tips to support your skin’s well-being.

Diet and Hydration

Maintaining a balanced, nutrient-rich diet and staying hydrated can have a positive effect on sensitive skin. Incorporate foods rich in antioxidants, healthy fats, and anti-inflammatory properties, such as:

  • Omega-3-rich foods (salmon, walnuts, chia seeds)
  • Fruits and vegetables (berries, leafy greens, bell peppers)
  • Probiotic-rich foods (yogurt, kefir, fermented vegetables)

Staying hydrated by drinking plenty of water can also help support the skin’s natural barrier and reduce inflammation.

Stress Management

Chronic stress can take a toll on the skin, exacerbating sensitivity and leading to various skin concerns. Incorporate stress-reducing practices into your daily routine, such as:

  • Meditation or mindfulness exercises
  • Gentle exercise like yoga or walking
  • Engaging in relaxing hobbies or activities

By managing stress, you can help calm the skin and promote a healthier, more resilient complexion.

Adequate Sleep

Getting enough quality sleep is crucial for skin health. Aim for 7-9 hours of sleep each night to allow your skin to regenerate and repair itself, which can help reduce sensitivity and improve overall skin appearance.

By incorporating these lifestyle tips into your routine, you can provide additional support for your sensitive skin, complementing your tailored skincare routine for optimal results.

Best Brands and Products for Skincare for Sensitive Skin

Best Brands

BrandDescription
BentonOffers gentle and soothing skincare products suitable for sensitive skin.
By WishtrendProvides effective and calming skincare solutions specifically designed for sensitive skin.
COSRXKnown for a range of products formulated without harsh ingredients, ideal for sensitive skin.
IsntreeOffers gentle and nourishing skincare options tailored to the needs of sensitive skin.
La Roche-PosayProvides dermatologist-recommended products that are gentle and suitable for sensitive skin.

Best Products

ProductDescription
Vanicream Daily Facial Moisturizer With Ceramides and Hyaluronic AcidProvides hydration and soothing for sensitive skin.
The Original MakeUp EraserA gentle makeup remover suitable for sensitive skin.
BeamCream Smoothing Body Moisturizer by Ole HenriksenA body moisturizer that calms and hydrates sensitive skin.
Alpha Beta Daily Cleanser by Dr. Dennis Gross SkincareA gentle exfoliating cleanser that prevents pore buildup without damaging the skin barrier.
Bakuchiol Lightweight Cream by HerbivoreA lightweight, alcohol-free moisturizer suitable for sensitive and blemish-prone skin.

FAQs – People Also Ask

What are the best ingredients for sensitive skin?

The best ingredients for sensitive skin are those that are gentle, nourishing, and calming. Some of the top ingredients to look for include:

  • Ceramides
  • Glycerin
  • Hyaluronic acid
  • Niacinamide
  • Squalane
  • Centella asiatica
  • Green tea
  • Aloe vera

These ingredients help to soothe, hydrate, and strengthen the skin’s natural barrier, reducing sensitivity and irritation.

Can sensitive skin be cured?

While sensitive skin cannot be “cured” per se, it can be effectively managed and improved through the right skincare routine and lifestyle adjustments. By identifying and avoiding triggers, using gentle and nourishing products, and supporting the skin’s overall health, you can significantly reduce the symptoms of sensitive skin and achieve a more resilient, healthy complexion.

Read Also: Summer Shampoo.

How to soothe sensitive skin reactions?

If you experience a sensitive skin reaction, such as redness, irritation, or stinging, there are several steps you can take to soothe the skin:

  • Cleanse with a gentle, fragrance-free cleanser
  • Apply a cool, damp cloth to the affected area to help reduce inflammation
  • Use a fragrance-free, hypoallergenic moisturizer to hydrate and calm the skin
  • Avoid any additional skincare products or makeup until the reaction subsides
  • Protect the skin from further irritation by staying out of the sun and using a mineral-based sunscreen

With the right approach, you can help your sensitive skin recover and return to a healthy, balanced state.

Read Also: lip lift before and after.

Is natural skincare better for sensitive skin?

While natural skincare products can be a good option for sensitive skin, it’s important to note that “natural” does not always mean “non-irritating.” Some natural ingredients, such as essential oils or certain plant extracts, can still be potential triggers for sensitive skin.

The key is to look for natural, gentle, and non-irritating ingredients that are specifically formulated for sensitive skin. Avoid products with a long list of unfamiliar or potentially irritating natural ingredients. Instead, focus on simple, minimalist formulas that contain soothing, nourishing, and non-reactive ingredients.

Read Also: lip lift before and after.

How to build a skincare routine for sensitive skin?

Building a skincare routine for sensitive skin involves a thoughtful and gradual approach. Start with the following steps:

  1. Cleanse with a gentle, fragrance-free cleanser to remove impurities without stripping the skin.
  2. Moisturize with a fragrance-free, non-comedogenic moisturizer that contains hydrating and calming ingredients.
  3. Protect your skin with a mineral-based, fragrance-free sunscreen to shield it from harmful UV rays.
  4. Gradually introduce treatment products, such as serums or facial oils, that are specifically formulated for sensitive skin.
  5. Listen to your skin and make adjustments as needed, removing any products that cause irritation or discomfort.

By building a tailored, gentle skincare routine, you can effectively address the unique needs of your sensitive skin and achieve a healthy, radiant complexion.

Read Also: lip lift before and after.

Conclusion

Navigating the world of skincare for sensitive skin can be a journey, but with the right knowledge and approach, you can unlock the secrets to a radiant, healthy complexion. Remember to be mindful of the ingredients in your products, build a gentle, nourishing routine, and incorporate lifestyle habits that support your skin’s well-being.

Read Also: Pull Ups While Pregnant.

By following the tips and recommendations outlined in this comprehensive guide, you’ll be well on your way to achieving the glowing, resilient skin you deserve. Embrace your sensitive skin and embark on a journey of self-care and skin empowerment.

Read Also: Emface Before and After.

Continue Reading

Beauty Tips

Emface Before and After: Embrace Magic through Transformation

Published

on

Here is your complete guide to emface before and after

Introduction to Emface Before and After

In the ever-evolving world of aesthetic treatments, a new and innovative solution has been capturing the attention of those seeking to enhance their facial appearance. Emface, a cutting-edge technology that combines high-intensity focused electromagnetic (HIFEM) energy with radiofrequency (RF) technology, has been making waves in the beauty industry, promising remarkable Emface before and after results.

As the demand for non-invasive facial rejuvenation continues to grow, Emface has emerged as a game-changer, offering a unique approach to improving facial contours, reducing wrinkles, and achieving an overall more youthful and radiant complexion. In this comprehensive article, we’ll delve into the world of Emface, exploring its working mechanism, the treatment process, and the transformative Emface before and after results that have been captivating individuals across the globe.

What is Emface?

Emface is a revolutionary facial treatment that harnesses the power of HIFEM and RF technologies to stimulate muscle contractions and improve skin appearance. Unlike traditional cosmetic procedures, Emface is a non-invasive solution that targets the underlying facial muscles, triggering a series of contractions that lead to visible improvements in facial contours and skin texture.

The Emface technology works by delivering high-intensity focused electromagnetic energy to the targeted facial areas, causing the muscles to undergo intense contractions. This muscle stimulation not only helps to tone and tighten the facial features but also promotes the production of collagen, a crucial protein responsible for maintaining skin elasticity and youthfulness.

In addition to the HIFEM component, Emface also utilizes radiofrequency (RF) technology to further enhance the treatment’s effectiveness. The RF energy heats the deeper layers of the skin, stimulating the production of new collagen and improving overall skin quality.

Emface Procedure: Step-by-Step

The Emface treatment process is designed to be comfortable and efficient, with minimal downtime for the patient. Here’s a step-by-step overview of the Emface procedure:

  1. Consultation: Before the treatment, patients will undergo a consultation with a qualified healthcare professional, who will assess their facial concerns and determine if Emface is the most suitable solution.
  1. Preparation: The treatment area is thoroughly cleaned, and any necessary markings are made to ensure precise targeting of the desired facial regions.
  2. Treatment: During the Emface procedure, the patient will recline comfortably while the healthcare provider gently applies the Emface applicator to the targeted areas. The device then delivers the HIFEM and RF energy, causing the facial muscles to contract and the skin to heat up.
  3. Duration: A typical Emface treatment session lasts approximately 20-30 minutes, depending on the specific areas being addressed.
  4. Post-Treatment Care: After the procedure, patients may experience mild redness or tingling sensations, which typically subside within a few hours. No significant downtime is required, and patients can resume their normal daily activities immediately.
  1. Treatment Plan: Most patients require a series of 4-6 Emface treatments, scheduled approximately one week apart, to achieve optimal results.

To better understand the treatment process, let’s take a look at the following table:

StepDescription
ConsultationAssessment of facial concerns and suitability for Emface treatment
PreparationCleaning and marking of the treatment area
TreatmentDelivery of HIFEM and RF energy to stimulate muscle contractions and skin heating
DurationApproximately 20-30 minutes per session
Post-Treatment CareMild redness or tingling, no significant downtime
Treatment Plan4-6 sessions scheduled one week apart for optimal results

Emface Before and After: Real-Life Transformations

The true power of Emface can be seen in the remarkable before and after results that patients have experienced. By stimulating the facial muscles and promoting collagen production, Emface has the ability to:

  • Improve Facial Contours: It can help to tighten and tone the facial muscles, leading to a more defined and sculpted appearance.
  • Reduce Wrinkles and Fine Lines: The treatment’s ability to stimulate collagen production helps to smooth out wrinkles and fine lines, resulting in a more youthful and rejuvenated complexion.
  • Enhance Skin Texture and Radiance: It can improve overall skin quality, leaving it smoother, more even-toned, and with a healthy, radiant glow.

Let’s take a closer look at some real-life before and after transformations:

BeforeAfter
Emface BeforeEmface After
This patient’s facial contours appear more defined, with a noticeable reduction in wrinkles and fine lines around the eyes and forehead.The patient’s skin appears smoother, more radiant, and with a more youthful, rejuvenated appearance.
BeforeAfter
Emface BeforeEmface After
The patient’s jawline and neck area appear more toned and sculpted, with a more defined and contoured appearance.The patient’s skin texture has improved, with a reduction in sagging and a more lifted, rejuvenated look.

These before and after showcase the remarkable transformative power of this innovative facial treatment. Patients have reported feeling more confident, youthful, and satisfied with their appearance after undergoing the procedure.

Emface vs. Other Facial Treatments

As the demand for non-invasive facial rejuvenation continues to grow, Emface has emerged as a unique and compelling alternative to traditional cosmetic procedures. Let’s compare to some other popular facial treatments:

Emface vs. Alternative Solutions

TreatmentKey FeaturesDurationResultsCustomization
EmfaceImmediate lifting effects, full results in 12 weeks, improves facial contours and youthful appearance20 minutes per session, 4-6 sessions recommendedLasting results up to a year, natural-looking improvements in wrinkles and fine linesLimited customization, focuses on facial muscles and skin tightening
UltherapyGradual results over several months, lasting up to three years, improved facial contours and youthful appearanceResults may vary, multiple sessions requiredLong-lasting results, gradual improvement in facial contoursVaries, may require multiple sessions for optimal results
BotoxRestores facial contours, reduces wrinkles, improves sagging skinQuick procedure, maintenance sessions every 3-4 monthsTemporary results, requires ongoing maintenanceLimited customization, focuses on specific areas of the face
V FaceLifts and tightens jawline and cheeks, reduces wrinkles, improves skin tone and texture40-45 minutes per session, customizable treatmentsTargeted results, stronger contractions, asymmetry correctionHighly customizable, tailored to individual needs
ThermageMitigates aging signs, diminishes wrinkles and sagging skin, enhances facial contours45 minutes to 1.5 hours per session, multiple sessions recommendedCorrects skin laxity, improves skin tone and textureLimited customization, focuses on deeper skin layers

As this table illustrates, Emface stands out from traditional facial treatments by offering a unique combination of benefits. Unlike Botox or fillers, which primarily address specific wrinkles or volume loss, it takes a more holistic approach, targeting the underlying facial muscles and skin quality to deliver comprehensive and long-lasting results.

Furthermore, it boasts a significantly shorter recovery period compared to many other facial treatments, allowing patients to resume their normal routines with minimal disruption.

Cost Comparison: Emface vs. Alternative Solutions

TreatmentCost per SessionTotal Treatment Cost
Emface$1,250$5,000 (4 sessions + 1 maintenance session every 6-12 months)
Ultherapy$3,000 – $5,000$3,000 – $15,000 (multiple sessions may be required)
Botox$300 – $600 per area$900 – $1,800 (every 3-4 months for maintenance)
V Face$500 – $1,000$2,000 – $4,000 (4 sessions)
Thermage$3,000 – $5,000$3,000 – $15,000 (multiple sessions may be required)

As the table shows, Emface is generally more expensive than some alternative solutions like Botox, but it offers a more comprehensive and long-lasting approach to facial rejuvenation. The total treatment cost for Emface, including the initial 4 sessions and a maintenance session every 6-12 months, can range from $5,000 to $7,500.

In comparison, treatments like Ultherapy and Thermage, which also use radiofrequency technology, can have a higher overall cost due to the need for multiple sessions to achieve the desired results. Botox, while more affordable per session, requires ongoing maintenance treatments every 3-4 months to maintain the effects.

The V Face treatment, which combines both HIFEM and RF technologies like Emface, falls in the middle range in terms of cost, with a total treatment plan typically costing between $2,000 and $4,000.

It’s important to note that the actual cost of these treatments may vary depending on the location, the healthcare provider’s experience, and any additional fees or discounts that may be available. Patients should always consult with a qualified professional to discuss the specific costs and payment options for their desired treatment.

Frequently Asked Questions (FAQs)

As Emface continues to gain popularity, patients often have questions about the treatment. Here are some of the most frequently asked questions:

Who is an ideal candidate for Emface?

  • It is suitable for individuals of various ages who are looking to improve the appearance of their facial features, reduce wrinkles, and enhance overall skin quality.
  • The treatment is particularly beneficial for those who are starting to notice signs of aging, such as sagging skin, loss of facial volume, and the development of fine lines and wrinkles.

Read Also: Summer Nails with Glitter.

How long do the Emface results last?

  • The results from Emface can last for several months, with many patients reporting continued improvements in their facial appearance for up to a year or more.
  • To maintain the results, most patients require a series of follow-up treatments, typically scheduled every 6-12 months.

Read Also: Summerween Nails.

Is Emface safe?

  • It is considered a safe and well-tolerated treatment, as it is non-invasive and does not involve any incisions or injections.
  • The treatment has been extensively studied and approved for use, with a low risk of side effects or complications.

Read Also: Dip Nails Summer.

How much does Emface cost?

  • The cost can vary depending on the location, the healthcare provider performing the treatment, and the number of sessions required.
  • On average, the cost of a single treatment can range from $500 to $1,000, with a full treatment plan typically costing between $2,000 and $5,000.

Read Also: Summer Shampoo.

Does Emface hurt?

  • Most patients report that the treatment is relatively comfortable, with only mild sensations of muscle contractions and skin heating during the procedure.
  • Any discomfort experienced is typically minimal and well-tolerated, with no significant pain or downtime.

By addressing these frequently asked questions, we hope to provide you with a comprehensive understanding of the Emface treatment and its potential benefits.

Read Also: Juicy Fruit Perfume.

Conclusion

In the ever-evolving world of aesthetic treatments, Emface has emerged as a game-changer, offering a unique and innovative approach to facial rejuvenation. By harnessing the power of HIFEM and RF technologies, Emface is able to stimulate the underlying facial muscles, promote collagen production, and deliver remarkable Emface before and after results.

Read Also: Dark Cherry Lip.

Whether you’re seeking to improve facial contours, reduce wrinkles, or enhance overall skin quality, it may be the solution you’ve been searching for. With its non-invasive nature, minimal downtime, and long-lasting results, this cutting-edge treatment has the potential to transform the way we approach facial aesthetics.

Read Also: Pull Ups While Pregnant.

If you’re intrigued by the transformative power of Emface, we encourage you to consult with a qualified healthcare professional to learn more about this innovative treatment and determine if it’s the right choice for you. Unlock the secrets to a more youthful, radiant, and confident appearance with Emface.

Read Also: lip lift before and after.

Continue Reading

Trending