Connect with us

Beauty Tips

Botox Before and After Eyes: Unveiling Youthful Transformation

Published

on

botox before and after eyes

Here is your complete guide to botox before and after eyes

Introduction to Botox Before and After Eyes

In the quest for a more youthful appearance, Botox for eyes has become a popular choice for many individuals looking to reduce the signs of aging. This comprehensive guide will take you through everything you need to know about Botox before and after eyes, from understanding the procedure to the expected results and potential risks.

What is Botox for Eyes?

Botox is a neurotoxin that works by temporarily paralyzing muscles, thereby reducing the appearance of wrinkles and fine lines. When used around the eyes, it can target areas such as crow’s feet and forehead lines, providing a smoother and more youthful look.

Understanding Botox Treatment for the Eyes

To appreciate the impact of Botox on the eyes, it’s crucial to grasp how the treatment works and its expected outcomes:

  • Botox targets the underlying muscles responsible for causing wrinkles, particularly the orbicularis oculi muscles around the eyes.
  • Upon injection, Botox temporarily inhibits muscle contractions, smoothing out fine lines and wrinkles.
  • Results typically become noticeable within a few days to a week and can last for three to four months before requiring touch-up injections.

Common Target Areas for Botox Injections Around the Eyes

AreaDescription
Crow’s feetWrinkles extending from the corners of the eyes
Forehead wrinklesHorizontal lines above the eyebrows
Brow furrowsVertical lines between the eyebrows
Under-eye wrinklesFine lines and creases beneath the eyes

How Does Botox Work for Eyes?

  • Botox works by blocking signals from the nerves to the muscles, preventing them from contracting.
  • This relaxation of the muscles helps to smooth out wrinkles and lines around the eyes.
  • The effects of Botox typically last for several months before gradually wearing off.

Best Age for Botox Before and After Eyes

Age RangeSkin ConditionRecommendation
20sFew wrinkles, healthy skinConsider preventative Botox in late 20s or early 30s to prevent wrinkles from developing.
Early 30sInitial signs of wrinklesStart Botox to treat early wrinkles before they become permanent.
Mid to late 30sVisible wrinklesContinue Botox treatments to maintain results and prevent further wrinkles.
40sDeeper lines and wrinklesUse Botox to soften deeper lines around eyes, forehead, and frown lines.
50sPronounced lines and menopause changesUse Botox to reduce the appearance of lines and maintain a refreshed look.
60s and upDesire for rejuvenated skinUse Botox to look fresher and avoid aiming for a significantly younger appearance.

In summary, the best age for Botox before and after eyes depends on individual skin conditions and aesthetic goals. Preventative Botox can be beneficial in the late 20s or early 30s, while those in their 30s and beyond can use Botox to treat and maintain the reduction of wrinkles and lines. It is essential to consult with a professional to determine the best course of action for your unique situation.

Preparing for Botox for Eyes

Before undergoing a treatment for your eyes, it is essential to:

  • Find a qualified injector who specializes in facial aesthetics.
  • Schedule a consultation to discuss your goals and expectations.
  • Follow any pre-treatment instructions provided by your injector to ensure optimal results.

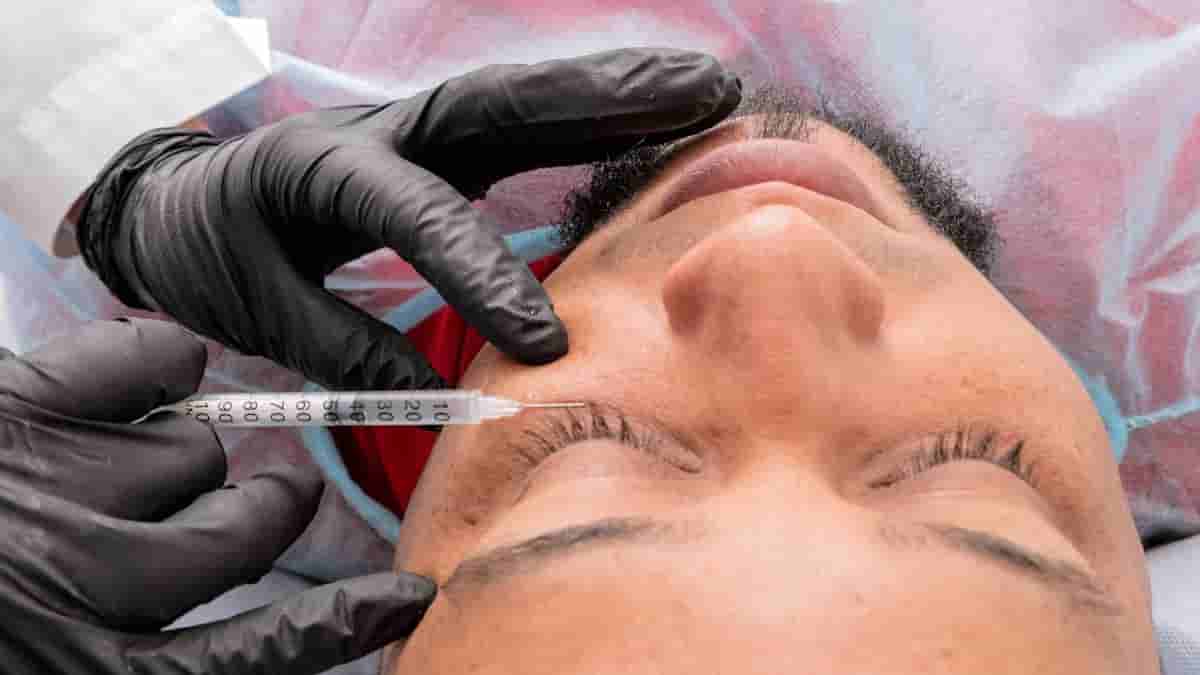
The Botox Procedure for Eyes

The Botox procedure typically involves:

  • The injector marking the targeted areas around the eyes.
  • Administering the injections using a fine needle.
  • The entire procedure usually takes around 15-30 minutes, depending on the areas being treated.

Botox Before and After Eyes

One of the most exciting aspects of Botox treatment is witnessing the transformation from before to after. Here is a comparison table showcasing the typical changes:

Before BotoxAfter Botox
Crow’s feet visibleSmoother eye area
Forehead lines prominentReduced wrinkles
Tired appearanceRefreshed look

How Long Do Botox Results Last for Eyes?

The duration of results for eyes can vary but typically lasts between 3-6 months. Factors such as metabolism, muscle strength, and lifestyle choices can influence how long the effects of Botox last.

Best Tips and Advice for Botox Before and After Eyes

  • Choosing a Qualified Injector
    • Ensure the injector is a medical professional with proper training and experience in administering Botox.
    • Check their credentials, reviews, and before/after photos to assess their expertise.
  • Pre-Treatment Consultation
    • Discuss your goals, expectations, and concerns with the injector.
    • Provide a complete medical history, including any medications, supplements, or medical conditions that may affect the treatment.
  • Preparing for Botox
    • Avoid alcohol, blood thinners, and anti-inflammatory medications for 24-48 hours before the treatment.
    • Do not wear makeup or skincare products on the day of the treatment.
    • Avoid strenuous activities, massages, or facial treatments for 24 hours before the treatment.

Post-Treatment Care

  • Immediate Post-Botox Care
    • Avoid Touching or Massaging the Treated Area
      • Do not touch or massage the treated area for at least 24 hours after the treatment.
    • Stay Upright
      • Avoid lying down for at least four hours following the treatment.
    • Avoid Strenuous Activities
      • Avoid physical activity, especially strenuous exercise, for 24 hours following a treatment.
    • Use Ice Packs
      • Applying ice packs or cold compresses to the treated area can help reduce swelling and bruising.
    • Avoid Excessive Heat or Sun Exposure
      • Direct exposure to heat, such as saunas or hot showers, and prolonged sun exposure should be avoided for at least 24 hours post-treatment.
  • Long-Term Post-Botox Care
    • Avoid Alcohol
      • Avoid alcohol for at least 24 hours after the treatment to prevent bruising or unwanted dissipation.
    • Skip the Accessories (and the Nap)
      • Do not wear hats or visors for at least four hours after having your foreheads treated.
      • Avoid taking aspirin, ibuprofen, vitamin E, and fish oil for 48 hours after the injection.
      • Wait four hours before lying down after Botox.
      • When sleeping at night, elevate your head with extra pillows.
    • The Do’s: After-Botox Skin Care Products
      • Use gentle skincare products and avoid dermabrasion, microdermabrasion, radiofrequency, or lasers for several hours after the injection.
      • Drink lots of water to keep your skin moisturized and enhance the effects of Botox.
      • Protect the skin around your eyes by using hydrating skincare products and wearing sunscreen products.
  • Potential Complications and Seeking Medical Assistance
    • Be aware of potential complications such as allergic reactions, infection, flu-like symptoms, and vision problems.
    • If you experience any concerning symptoms or side effects after your Botox injections, seek medical assistance immediately.

By following these tips and advice for Botox, you can ensure optimal results and maintain your rejuvenated appearance. Always consult with a qualified healthcare professional for personalized guidance and expert advice on post-botox care.

Botox for Eyes Side Effects and Risks

While Botox for eyes is generally safe, there are potential side effects and risks to be aware of:

  • Temporary redness or swelling at the injection site.
  • Rarely, droopy eyelids or double vision may occur.
  • It is crucial to choose a skilled injector to minimize the risk of complications.

Botox for Eyes Cost

The cost of Botox for eyes can vary depending on factors such as the injector’s expertise, location, and the number of units required. On average, the cost ranges from $200 to $600 per treatment session.

FAQs

What is the best age to start getting Botox for eyes?

The ideal age to start Botox varies for each individual but is typically in the late 20s to early 30s.

How often should I get Botox for eyes?

Botox is recommended every 3-6 months to maintain results.

Read Also: Summer Toe Nail Designs.

Is Botox for eyes painful?

Discomfort during the procedure is minimal, with some patients describing it as a slight pinch.

Read Also: Prosa Mascara.

Can Botox for eyes cause droopy eyelids?

While rare, droopy eyelids can occur as a temporary side effect of Botox for eyes.

Read Also: Water Activated Eyeliner.

How much does Botox for eyes cost?

The cost of Botox varies but typically ranges from $200 to $600 per treatment session.

Read Also: Pull Ups While Pregnant.

Conclusion

In conclusion, Botox before and after eyes can be a transformative treatment for achieving a more youthful and refreshed appearance around the eyes. By understanding the procedure, expected results, and potential risks, you can make an informed decision about whether Botox for eyes is right for you. Remember to consult with a qualified injector to ensure safe and effective results.

Read Also: SkinVive Before and After.

Continue Reading
Click to comment

Leave a Reply

Your email address will not be published. Required fields are marked *

Beauty Tips

Jelly Roll Botox: Discover the Magic of Youthful Radiance!

Published

on

jelly roll botox

Here is your complete guide to jelly roll botox

Introduction to Jelly Roll Botox

In the world of cosmetic enhancements, jelly roll botox has emerged as a popular solution for addressing the pesky appearance of lumps and bumps in certain areas of the body. This innovative treatment offers a non-invasive way to smooth out uneven contours and enhance one’s overall appearance. Let’s delve into the details of jelly roll botox, from what it is to how it works, its benefits, potential risks, and more.

Jelly roll botox is a specialized cosmetic procedure designed to target and improve the appearance of jelly roll, a common concern for many individuals seeking to enhance their body contours. This treatment involves the strategic use of Botox injections to smooth out the lumpy or uneven areas, providing a more streamlined and toned look.

Understanding Jelly Roll Appearance

  • Definition: Jelly roll refers to the appearance of uneven, lumpy contours in areas such as the abdomen, thighs, or buttocks.
  • Causes: Factors like weight fluctuations, aging, and skin laxity can contribute to the development of jelly roll.
  • Impact: The presence of jelly roll can affect one’s self-esteem and confidence, making it a concern for those seeking aesthetic improvements.

The Science Behind Jelly Roll Botox

Understanding the Mechanism of Action

Jelly roll Botox involves the strategic use of botulinum toxin injections to target specific muscles responsible for the appearance of under-eye puffiness. By precisely injecting Botox into the overactive muscles, the treatment aims to relax these muscles, thereby reducing the bulges or “jelly rolls” that form under the eyes when smiling or squinting.

Neuromodulator Effects on Muscle Activity

Botulinum toxin, commonly known as Botox, acts as a neuromodulator by blocking the release of acetylcholine, a neurotransmitter that signals muscle contractions. In the case of jelly roll Botox, the toxin temporarily inhibits the activity of the orbicularis oculi muscle, which is often overactive and contributes to the formation of under-eye puffiness.

Precision and Dosage Considerations

Achieving optimal results with jelly Botox requires precision in injection placement and dosage. Injectors must carefully target the specific muscles involved in creating the jelly roll effect while ensuring that the dosage is sufficient to relax the muscle without causing over-relaxation, which could lead to unintended side effects like swelling.

Longevity and Maintenance

The effects of jelly Botox typically last for 3-6 months, after which touch-up appointments may be necessary to maintain the results. The longevity of the treatment depends on various factors, including individual metabolism, muscle activity, and lifestyle habits. Regular maintenance sessions can help sustain the smooth and youthful appearance of the under-eye area.

Safety and Efficacy

When administered by qualified and experienced providers, jelly Botox is considered a safe and effective treatment for addressing under-eye puffiness. Providers must adhere to proper injection techniques and dosage guidelines to minimize the risk of adverse effects and ensure optimal outcomes for patients seeking to enhance their under-eye contours.

Jelly Roll Botox: The Procedure Explained

To address jelly roll, jelly botox utilizes the muscle-relaxing properties of Botox injections to smooth out the affected areas. Here’s a breakdown of the procedure:

  1. Consultation: A thorough consultation with a qualified provider to assess the individual’s concerns and goals.
  2. Treatment: Precise injections of Botox into targeted areas to relax the underlying muscles causing the lumps.
  3. Results: Over the following days and weeks, the treated area gradually smooths out, providing a more toned appearance.
  4. Maintenance: Periodic touch-up treatments may be recommended to sustain the results.

Advantages of Jelly Botox

  • Smoothing and tightening of the jelly roll area for a more contoured look.
  • Improved body confidence and self-image.
  • Long-lasting results with proper maintenance.
  • Comparatively less invasive than surgical options.

Potential Risks and Considerations

While jelly botox is generally considered safe, it’s essential to be aware of potential risks and considerations:

  • Common side effects such as temporary redness or bruising at the injection site.
  • Choosing a qualified and experienced provider is crucial for optimal results.
  • Individual factors like skin type and lifestyle habits can influence the outcome.

Aftercare and Maintenance

Proper aftercare following jelly botox treatment is essential for optimal results:

  • Avoiding strenuous activities immediately after treatment.
  • Following any specific post-treatment instructions provided by the provider.
  • Maintaining a healthy lifestyle to prolong the effects of the treatment.

Cost of Jelly Botox

ClinicCost (USD)
Facefull Aesthetics$150
Sarasin ClinicFrom $60
The MW Clinic London$295
Glow TheoryVaries

Comparison of Jelly Botox with Other Treatments

TreatmentCost Range (USD)Duration of ResultsMain Benefits
Jelly Roll Botox$60 – $1503-4 monthsSmoothing under-eye wrinkles and fine lines
Chin Botox$1503-4 monthsEnhancing chin contour and definition
Forehead Botox$2003-4 monthsSmoothing forehead lines and wrinkles
Lip Filler$120 – $2206-12 monthsEnhancing lip volume and definition
Cheek Filler$300 – $40012-18 monthsAdding volume and contour to the cheeks

Read Also: Black Facial Peel Mask.

FAQs

How long does jelly roll Botox last?

The duration of jelly botox results can vary but typically lasts several months before touch-up treatments may be needed.

Read Also: Partial Veneers Before and After.

Is jelly roll Botox painful?

Discomfort during the procedure is minimal, with some individuals experiencing mild discomfort at the injection sites.

Read Also: Hunter Green Gel Nail Polish.

Can jelly roll Botox be combined with other treatments?

Combining jelly botox with other complementary treatments may be possible, depending on individual goals and provider recommendations.

Read Also: Water Activated Eyeshadow.

How much does jelly roll Botox cost?

The cost of jelly botox can vary based on factors like the provider’s expertise, location, and the extent of treatment needed.

Read Also: Korean Hyaluronic Serum.

Who is a good candidate for jelly roll Botox?

Ideal candidates for jelly botox are individuals looking to address specific areas of jelly roll and improve their body contours without undergoing surgery.

Read Also: Pull Ups While Pregnant.

Conclusion

In conclusion, jelly roll botox offers a promising solution for those seeking to smooth out lumps and bumps in various body areas. With its non-invasive nature, long-lasting results, and minimal downtime, this treatment can be a game-changer for individuals looking to enhance their body contours and boost their confidence. If you’re considering jelly botox, consult with a qualified provider to explore how this innovative treatment can help you achieve your aesthetic goals.

Read Also: Olive Green Dip Nails.

Continue Reading

Beauty Tips

Olive Green Dip Nails: Master the Art of Manicures

Published

on

olive green dip nails

Here is your complete guide to olive green dip nails

Introduction to Olive Green Dip Nails

In the ever-evolving world of nail care, olive green dip nails have emerged as a captivating trend that has captured the hearts of beauty enthusiasts worldwide. These versatile and long-lasting nail enhancements not only add a touch of elegance to your hands but also provide a healthier alternative to traditional nail polish.

Olive green dip nails offer a unique blend of strength, durability, and a stunning color palette that can complement a wide range of personal styles. Whether you’re a seasoned nail aficionado or just starting to explore the world of nail art, this comprehensive guide will take you on a journey to discover the benefits, application process, and maintenance tips for achieving the perfect olive green dip nails.

The Benefits of Olive Green Dip Nails

Olive green dip nails offer a multitude of advantages that make them a popular choice among nail enthusiasts. Let’s delve into the key benefits:

  1. Long-Lasting Color: The dipping powder used in olive green dip nails provides a vibrant and long-lasting color that can withstand the wear and tear of everyday life. Unlike traditional nail polish, which can chip and fade over time, olive green dip nails maintain their rich hue for weeks, allowing you to enjoy your manicure for an extended period.
  2. Nail Strengthening: The dipping powder used in olive green dip nails contains a blend of natural ingredients that help strengthen and fortify your nails. This can be particularly beneficial for those with weak, brittle, or damaged nails, as the dip powder helps to reinforce and protect the nail bed.
  3. Variety of Shades: The olive green color palette offers a wide range of shades, from deep, earthy tones to lighter, more vibrant hues. This versatility allows you to experiment with different shades and find the perfect match for your personal style and skin tone.
  1. Healthier AlternativeOlive green dip nails are generally considered a healthier alternative to traditional nail polish, as they do not contain the harsh chemicals often found in conventional nail products. This makes them a more gentle and nourishing option for your nails.

Importance of Choosing the Right Color

When it comes to nail fashion, color plays a pivotal role in expressing one’s personality and style. Olive green, with its earthy tones and timeless appeal, exudes elegance and sophistication. Choosing the right shade of olive green for your dip nails can elevate your look and make a lasting impression.

Achieving Olive Green Dip Nails

Mastering the art of olive green nails is a straightforward process that can be done at home or in a professional salon. Here’s a step-by-step guide to help you achieve the perfect manicure:

Required Materials and Tools

  • Olive green dipping powder
  • Nail primer
  • Activator
  • Buffer and file
  • Cuticle pusher
  • Topcoat (optional)

Step-by-Step Application

  1. Prepare Your Nails: Begin by filing and shaping your nails to your desired length and shape. Gently push back your cuticles and ensure your nails are clean and free of any oils or residue.
  2. Apply Nail Primer: Brush on a thin layer of nail primer to the surface of your nails, ensuring even coverage. This step helps to create a strong bond between your nails and the dipping powder.
  3. Dip Your Nails: Dip your nails into the olive green dipping powder, one at a time, until the desired coverage is achieved. Gently tap off any excess powder.
  4. Activate the Powder: Use the activator solution to seal the dipping powder onto your nails. Apply a thin layer, ensuring it covers the entire nail surface.
  5. File and Buff: Use a buffer to smooth out the surface of your olive green nails, removing any uneven edges or bumps.
  6. Topcoat (Optional): For an extra glossy finish, you can apply a clear topcoat over your olive green nails. This step is optional and depends on your personal preference.
  7. Repeat as Needed: Depending on the desired thickness and coverage, you may need to repeat the dipping and activating process until you achieve your desired look.

Maintenance and Care

Proper maintenance is key to ensuring your olive green nails last as long as possible. Here are some tips to keep your nails looking their best:

  1. Avoid Water Exposure: Try to limit the amount of time your olive green nails are exposed to water, as prolonged exposure can cause the powder to lift or become discolored.
  2. Use Cuticle Oil: Regularly applying cuticle oil to the skin around your nails can help keep them hydrated and prevent dryness.
  3. Avoid Harsh Chemicals: Steer clear of harsh chemicals, such as those found in cleaning products, that can potentially damage your olive green nails.
  4. Schedule Regular Fills: To maintain the longevity of your olive green nails, schedule regular fill-in appointments every 2-3 weeks, depending on your nail growth.
  5. Proper Removal: When it’s time to remove your olive green nails, it’s essential to follow the correct removal process to avoid damaging your natural nails.

Olive Green Dip Nails Inspiration

Unleash your creativity and explore the endless possibilities of olive green dip nails with these inspiring designs and styles:

Trending Designs

  • Minimalist olive green with a matte finish
  • Ombre olive green nails transitioning to a lighter shade
  • Olive green with gold or silver accent nails
  • Olive green nails with intricate nail art designs

Seasonal Variations

  • Olive green nails with a touch of glitter for the holidays
  • Olive green nails paired with warm, earthy tones for fall
  • Olive green nails with a fresh, pastel twist for spring
  • Olive green dip nails complemented by bright, vibrant shades for summer

Celebrity Inspiration

  • Rihanna’s olive green nails with a sleek, modern twist
  • Zendaya’s olive green nails with a subtle, natural look
  • Beyoncé’s olive green nails accentuated by intricate nail art

Top 10 Olive Green Dip Nails Products

Elevate your nail game with these top-rated olive green nails products:

ProductDescriptionPrice
Kiara Sky Dip Powder – Olive GreenA high-quality dipping powder in a rich olive green shade.$12.99
SNS Nails Dipping Powder – Olive LeafA long-lasting olive green dipping powder with a natural finish.$15.99
Revel Nail Dip Powder – Olive BranchA versatile olive green dip powder that can be used for various nail designs.$14.99
DipWell Dip Powder – Olive YouA creamy olive green dip powder with a smooth application.$11.99
Modelones Dip Powder – Olive MartiniA vibrant olive green dip powder with a subtle shimmer.$13.99
Nailboo Dip Powder – Olive YouA long-lasting olive green dip powder with a matte finish.$16.99
Beetles Dip Powder – Olive LeafA high-pigmented olive green dip powder for bold nail looks.$12.99
Makartt Dip Powder – Olive GroveA versatile olive green dip powder that can be layered for depth.$14.99
Nailish Dip Powder – Olive JuiceA creamy olive green dip powder with a satin-like finish.$15.99
Gershion Dip Powder – Olive BlossomA soft, pastel olive green dip powder for a delicate look.$13.99

Emerging Olive Green Dip Nails Trends

As the beauty industry continues to evolve, olive green nails have become a captivating trend that showcases the versatility and creativity of nail art. Let’s explore some of the latest and most exciting developments in this space:

Innovative Techniques

  • Ombre olive green nails: Transitioning from a deeper olive green at the cuticle to a lighter shade at the tip
  • Negative space olive green nails: Incorporating a minimalist design with a portion of the nail left bare
  • 3D olive green dip nail art: Incorporating dimensional elements, such as flowers or geometric shapes, into the dip nail design

Color Combinations

  • Olive green nails paired with metallic accents (gold, silver, or bronze)
  • Olive green nails combined with earthy, neutral tones for a natural, bohemian look
  • Olive green nails contrasted with bright, vibrant colors for a bold, eye-catching statement

Sustainability and Eco-Friendly Alternatives

As consumers become more conscious of their environmental impact, the demand for eco-friendly nail care products has risen. Many brands are now offering olive green dip nail powders that are free from harsh chemicals, making them a more sustainable option for nail enthusiasts.

Olive Green Dip Nails vs. Other Nail Trends

In the ever-evolving world of nail care, olive green nails stand out as a unique and compelling option, offering distinct advantages over other popular nail trends. Let’s explore the key differences:

Gel Nails

  • Gel nails provide a glossy, high-shine finish, while olive green nails offer a more matte, natural appearance.
  • Gel nails require UV/LED light curing, while olive green nails can be applied without any special lighting.
  • Gel nails are generally more prone to chipping and lifting, while olive green nails are known for their long-lasting wear.

Acrylic Nails

  • Acrylic nails can be more damaging to the natural nail bed, while olive green nails are a gentler, more nourishing option.
  • Acrylic nails require a more extensive application process, while olive green nails can be applied more quickly and easily.
  • Acrylic nails can be more prone to lifting and separation, while olive green nails offer a more seamless and secure fit.

Traditional Nail Polish

  • Traditional nail polish is more susceptible to chipping, fading, and peeling, while olive green nails maintain their vibrant color for weeks.
  • Nail polish often requires multiple coats for full coverage, whereas olive green nails can achieve a uniform, opaque finish in fewer applications.
  • Nail polish can be more drying and damaging to the natural nail, while olive green nails help to strengthen and protect the nail bed.

Comparison: Olive Green Dip Nails vs. Traditional Nail Polish

AspectOlive Green Dip NailsTraditional Nail Polish
DurabilityRemarkably durable, lasting for two full weeks or more. Odor-free and less messy.Tends to chip and fade over time, requiring more frequent touch-ups.
Application ProcessSealed with pigmented powder, no UV or LED lamps needed.Lacquer refined to protect nails, quick and easy to apply.
Removal ProcessProcess needed for removal can be challenging.Removal process involves using acetone solution.
SanitationConcerns about unsanitary practices during application and removal.Generally more straightforward and hygienic application and removal process.
MaintenanceRequires specific removal process and after-care to avoid damage.May require more frequent touch-ups due to chipping.

Olive Green Dip Nails FAQs

What is the difference between olive green dip nails and traditional nail polish?

Olive green nails offer a longer-lasting and healthier alternative to traditional nail polish. The dipping powder used in dip nails helps to strengthen and protect the natural nail, while nail polish can be more prone to chipping and fading over time.

Read Also: Cheek filler before and after over 50.

How long do olive green dip nails typically last?

With proper care and maintenance, olive green nails can last anywhere from 2 to 4 weeks, depending on your nail growth and lifestyle.

Read Also: Black Facial Peel Mask.

Can olive green dip nails be removed at home?

While it is possible to remove olive green nails at home, it’s recommended to have them professionally removed to avoid damaging your natural nails.

Read Also: Partial Veneers Before and After.

Are olive green dip nails safe for my nails?

Yes, olive green nails are generally considered a safer and more nourishing option for your nails compared to traditional nail polish, as they do not contain harsh chemicals.

Read Also: Hunter Green Gel Nail Polish.

How do I maintain the appearance of my olive green dip nails?

To maintain the appearance of your olive green nails, it’s important to avoid excessive water exposure, use cuticle oil regularly, and schedule regular fill-in appointments every 2-3 weeks.

Read Also: Water Activated Eyeshadow.

Conclusion

In the captivating world of nail care, olive green dip nails have emerged as a standout trend that combines stunning aesthetics, long-lasting durability, and a healthier approach to nail enhancement. Whether you’re a seasoned nail enthusiast or just beginning to explore the world of nail art, this comprehensive guide has provided you with the knowledge and inspiration to elevate your nails with the timeless elegance of olive green nails.

Read Also: Pull Ups While Pregnant.

As you embark on your olive green dip nails journey, remember to embrace your creativity, experiment with different designs and techniques, and most importantly, have fun! Share your olive green nails experiences with us and inspire others to join in on this captivating nail trend.

Read Also: Korean Hyaluronic Serum.

Continue Reading

Beauty Tips

Korean Hyaluronic Serum: Skin Transformation Essentials

Published

on

korean hyaluronic serum

Here is your complete guide to korean hyaluronic serum

Introduction to Korean Hyaluronic Serum

In the ever-evolving world of skincare, Korean hyaluronic serum has emerged as a game-changer, captivating the attention of beauty enthusiasts worldwide. Harnessing the power of hyaluronic acid, these innovative serums have become a staple in the routines of those seeking radiant, youthful-looking skin.

Hyaluronic acid is a naturally occurring substance in the human body, responsible for maintaining skin hydration and elasticity. Korean skincare products, renowned for their cutting-edge formulations and effective results, have taken this ingredient to new heights, creating serums that deliver unparalleled skin benefits.

In this comprehensive guide, we’ll delve into the world of Korean hyaluronic serum, exploring its key features, the top products on the market, and how to incorporate it into your skincare routine for optimal results. Whether you’re a seasoned skincare aficionado or just starting your journey, this article will equip you with the knowledge to make an informed decision and achieve the glowing, hydrated skin you’ve been craving.

What is Hyaluronic Acid?

Hyaluronic acid is a remarkable molecule that plays a crucial role in skin health and hydration. It is a naturally occurring polysaccharide found in the human body, primarily in the skin, joints, and connective tissues.

This versatile ingredient has the remarkable ability to attract and retain water, making it an essential component for maintaining skin’s moisture levels. Hyaluronic acid acts as a powerful humectant, drawing water into the skin and preventing it from evaporating, resulting in a plump, dewy, and youthful-looking complexion.

In addition to its hydrating properties, hyaluronic acid also contributes to the skin’s overall health and appearance. It helps to:

  • Reduce the appearance of fine lines and wrinkles: By plumping and smoothing the skin, hyaluronic acid can diminish the visible signs of aging.
  • Improve skin elasticity: This ingredient helps to maintain the skin’s structural integrity, keeping it supple and firm.
  • Soothe and calm irritated skin: Hyaluronic acid has anti-inflammatory properties, making it beneficial for those with sensitive or compromised skin barriers.
  • Enhance skin barrier function: By locking in moisture, hyaluronic acid strengthens the skin’s protective barrier, preventing water loss and environmental stressors.

Why Choose Korean Hyaluronic Serum?

The Korean skincare industry has long been renowned for its innovative and effective formulations, and Korean hyaluronic serums are no exception. These serums offer a unique and compelling proposition for those seeking to elevate their skincare routine.

Unique Formulations

Korean hyaluronic serums often feature a blend of high-quality, skin-nourishing ingredients that go beyond just hyaluronic acid. Many of these serums incorporate additional active components, such as:

  • Vitamin C for brightening and antioxidant protection
  • Niacinamide for evening out skin tone and minimizing pores
  • Peptides for firming and anti-aging benefits
  • Botanical extracts for soothing and calming the skin

This synergistic combination of ingredients allows Korean hyaluronic serums to deliver a comprehensive approach to skin hydration and overall skin health.

Potent Hyaluronic Acid Concentrations

One of the standout features of Korean hyaluronic serums is their high concentration of hyaluronic acid. Many of these formulations contain a blend of different molecular weights of hyaluronic acid, allowing for deeper penetration and more effective hydration at multiple skin levels.

Innovative Delivery Systems

Korean skincare brands are known for their cutting-edge delivery systems, and Korean hyaluronic serums are no exception. Some serums utilize advanced technologies, such as liposomal encapsulation or time-release mechanisms, to ensure optimal absorption and prolonged hydration.

Gentle and Suitable for All Skin Types

Korean hyaluronic serums are typically formulated with a focus on gentle, non-irritating ingredients, making them suitable for a wide range of skin types, including sensitive and acne-prone complexions.

Proven Efficacy and User Testimonials

The popularity and success of Korean hyaluronic serums are further bolstered by the overwhelmingly positive reviews and testimonials from users who have experienced the transformative effects of these products on their skin.

Top 10 Korean Hyaluronic Serums

To help you navigate the vast array of Korean hyaluronic serums available, we’ve compiled a list of the top 10 products that have garnered praise from skincare enthusiasts and industry experts alike.

1. COSRX Advanced Snail 96 Mucin Power Essence

Key Ingredients: Snail Secretion Filtrate, Hyaluronic Acid
Benefits: Hydration, Skin Barrier Repair, Brightening

2. Missha Time Revolution The First Treatment Essence

Key Ingredients: Fermented Yeast Extract, Hyaluronic Acid
Benefits: Hydration, Radiance, Pore Refinement

3. Innisfree Jeju Volcanic Color Clay Mask

Key Ingredients: Volcanic Rock Mineral, Hyaluronic Acid
Benefits: Detoxification, Pore Cleansing, Hydration

4. The Face Shop Rice Water Bright Cleansing Foam

Key Ingredients: Rice Water, Hyaluronic Acid
Benefits: Gentle Cleansing, Hydration, Brightening

5. Etude House Soon Jung pH 6.0 Relief Toner

Key Ingredients: Panthenol, Hyaluronic Acid
Benefits: Soothing, Hydration, Calming

6. Laneige Water Bank Hydro Essence

Key Ingredients: Mineral Water, Hyaluronic Acid
Benefits: Intense Hydration, Plumping, Radiance

7. Skin Food Black Sugar Mask Wash Off

Key Ingredients: Black Sugar, Hyaluronic Acid
Benefits: Exfoliation, Hydration, Brightening

8. Tony Moly Chok Chok Green Tea Watery Cream

Key Ingredients: Green Tea, Hyaluronic Acid
Benefits: Hydration, Nourishment, Soothing

9. Sulwhasoo Concentrated Ginseng Renewing Serum

Key Ingredients: Korean Red Ginseng, Hyaluronic Acid
Benefits: Anti-Aging, Firming, Radiance

10. Innisfree Jeju Volcanic Color Clay Mask

Key Ingredients: Volcanic Rock Mineral, Hyaluronic Acid
Benefits: Detoxification, Pore Cleansing, Hydration

How to Use Korean Hyaluronic Serum

Incorporating Korean hyaluronic serum into your skincare routine is a straightforward process that can yield remarkable results. Here’s a step-by-step guide to help you maximize the benefits of this transformative product:

  1. Cleanse your face: Begin by thoroughly cleansing your skin to remove any impurities, makeup, or excess oil. This will ensure that your skin is primed and ready to absorb the serum.
  2. Apply the serum: Dispense a small amount of the Korean hyaluronic serum onto your fingertips and gently pat it into your skin, focusing on areas that need extra hydration, such as the cheeks, forehead, and under-eye area.
  3. Massage the serum: Gently massage the serum into your skin using upward and outward motions. This will help to improve absorption and ensure even distribution.
  4. Follow with other skincare products: After applying the Korean hyaluronic serum, you can proceed with the rest of your skincare routine, such as using a moisturizer, eye cream, or facial oil.
  1. Use the serum consistently: For best results, incorporate the Korean hyaluronic serum into your daily skincare routine, both morning and evening. Consistency is key to achieving the desired hydration and skin benefits.
  2. Adjust usage as needed: If you have particularly dry or dehydrated skin, you may want to use the Korean hyaluronic serum more frequently or apply a thicker layer. Conversely, if you have oily or combination skin, you may want to use a lighter application.

Remember, the key to unlocking the full potential of Korean hyaluronic serum is to listen to your skin’s needs and adjust your usage accordingly. With regular and proper application, you’ll be well on your way to achieving the radiant, hydrated complexion you’ve been craving.

Ingredients to Look for in Korean Hyaluronic Serums

When selecting a Korean hyaluronic serum, it’s important to be mindful of the ingredients that make these products so effective. Here are some of the key components to look for:

Hyaluronic Acid

The star ingredient in Korean hyaluronic serums, hyaluronic acid, comes in various molecular weights to ensure deep penetration and long-lasting hydration.

Botanical Extracts

Many Korean hyaluronic serums incorporate soothing and nourishing botanical extracts, such as green tea, centella, and cica, to provide additional skin benefits.

Antioxidants

Ingredients like vitamin C, vitamin E, and ferulic acid can help to protect the skin from environmental stressors and free radical damage.

Peptides

Peptides, such as palmitoyl tripeptide-1 and palmitoyl tetrapeptide-7, can help to improve skin elasticity and reduce the appearance of fine lines and wrinkles.

Ceramides

Ceramides are essential for maintaining the skin’s protective barrier, and their inclusion in Korean hyaluronic serums can help to lock in moisture and prevent water loss.By familiarizing yourself with these key ingredients, you can make an informed decision when selecting the Korean hyaluronic serum that best suits your skin’s needs.

Comparison Table of Top 10 Korean Hyaluronic Serums

Serum NameKey IngredientsBenefitsPrice Range
Torriden Dive-In SerumPanthenol, Hyaluronic AcidSkin rejuvenation, Moisturization$30-$40
Huxley Secret of Sahara Grab Water EssenceCactus Extract, Hyaluronic AcidHydration, Nourishment$35-$45
Korea Devilkin Hyaluronic Acid 90% Peptides Water-Locking AmpouleHyaluronic Acid, PeptidesSkin hydration, Anti-aging$40-$50
COSRX Propolis AmpoulePropolis Extract, Hyaluronic AcidSkin repair, Nourishment$25-$35
CNP Laboratory Propolis Energy Ampule SerumPropolis Extract, Hyaluronic AcidEnergy boost, Skin revitalization$30-$40
Beplain Multi Hyaluronic Acid AmpouleHyaluronic Acid, Agave Tequilana Leaf ExtractIntense hydration, Moisture lock$35-$45
Sulwhasoo First Care Activating SerumGinseng Extract, Hyaluronic AcidSkin activation, Radiance$50-$60
SkinCeuticals Hyaluronic Acid IntensifierLicorice Root Extract, Hyaluronic AcidSkin elasticity, Wrinkle reduction$70-$80
Jumiso Waterfull Hyaluronic Acid SerumHyaluronic Acid, Vitamin EHydration, Antioxidant protection$25-$35
Ample:N Ceramide Shot AmpouleCeramides, Hyaluronic AcidSkin barrier repair, Nourishment$40-$50

FAQs about Korean Hyaluronic Serum

What are the benefits of using a Korean hyaluronic serum?

Korean hyaluronic serums offer a range of benefits for the skin, including:

  • Intense hydration and plumping
  • Reduced appearance of fine lines and wrinkles
  • Improved skin elasticity and firmness
  • Soothing and calming effects for sensitive skin
  • Brightening and evening out of skin tone
  • Enhanced skin barrier function and protection

Read Also: What Massage Oils Are Best.

How often should I use a Korean hyaluronic serum?

For best results, it’s recommended to use a Korean hyaluronic serum twice a day, once in the morning and once in the evening, as part of your skincare routine. However, you can adjust the frequency based on your skin’s individual needs and preferences.

Read Also: Gua Sha Oil.

Can Korean hyaluronic serum be used on all skin types?

Yes, Korean hyaluronic serums are generally suitable for all skin types, including sensitive, acne-prone, and mature skin. The gentle, non-irritating formulations make them a versatile choice for a wide range of complexions.

Read Also: Cheek filler before and after over 50.

How long does it take to see results from using a Korean hyaluronic serum?

The results from using a Korean hyaluronic serum can vary, but most users report seeing improvements in skin hydration and plumpness within the first few weeks of consistent use. For more visible anti-aging and skin-smoothing benefits, it may take 4-8 weeks of regular application.

Read Also: Black Facial Peel Mask.

Can Korean hyaluronic serum be used with other skincare products?

Absolutely! Korean hyaluronic serums can be seamlessly incorporated into your existing skincare routine. They can be used in conjunction with other products, such as cleansers, moisturizers, and facial oils, to enhance the overall effectiveness of your regimen.

Read Also: Partial Veneers Before and After.

Conclusion

Korean hyaluronic serum has undoubtedly revolutionized the world of skincare, offering a transformative solution for those seeking radiant, youthful-looking skin. By harnessing the power of hyaluronic acid and incorporating a range of skin-nourishing ingredients, these innovative serums have become a must-have in the routines of beauty enthusiasts worldwide.

Read Also: Hunter Green Gel Nail Polish.

Whether you’re looking to combat the signs of aging, improve skin hydration, or simply achieve a healthy, glowing complexion, Korean hyaluronic serum is a versatile and effective addition to your skincare arsenal. By understanding the key ingredients, usage guidelines, and top product recommendations, you can embark on a journey to unlock the full potential of your skin and enjoy the transformative benefits of these remarkable serums.

Read Also: Pull Ups While Pregnant.

So, what are you waiting for? Dive into the world of Korean hyaluronic serum and experience the radiance and hydration your skin deserves.

Read Also: Water Activated Eyeshadow.

Continue Reading

Trending