Beauty Tips
Botox at 35 Before and After: Real Transformations
![botox at 35 before and after](https://crankiewomen.com/wp-content/uploads/2024/06/pexels-shvetsa-4586708-min.jpg)
Here is your complete guide to Botox at 35 before and after
Introduction to Botox at 35 Before and After
As we age, the inevitable signs of time begin to show on our faces. Fine lines, wrinkles, and a loss of elasticity can make us feel self-conscious and older than our years. However, for those in their mid-30s, Botox at 35 before and after can be a game-changer. This popular cosmetic treatment has become increasingly common among younger individuals who are proactively addressing the early signs of aging.
In this comprehensive guide, we’ll explore the benefits of Botox at 35 before and after, the ideal timing for starting treatments, the procedure itself, and the remarkable before-and-after results that can be achieved. We’ll also delve into the growing trend of men embracing Botox, the importance of maintenance, and the safety considerations to keep in mind. By the end of this article, you’ll have a thorough understanding of how Botox at 35 before and after can help you maintain a youthful, refreshed appearance.
When to Start Botox
The decision to start Botox is a highly personal one, and the ideal age can vary depending on individual factors. However, many experts recommend considering Botox treatments in your early to mid-30s as a preventative measure against the formation of dynamic wrinkles.
Dynamic wrinkles are those that are caused by the repeated contraction of facial muscles, such as frown lines, forehead wrinkles, and crow’s feet. By using Botox to temporarily relax these muscles, you can prevent the development of these wrinkles, effectively “freezing” the aging process in its tracks.
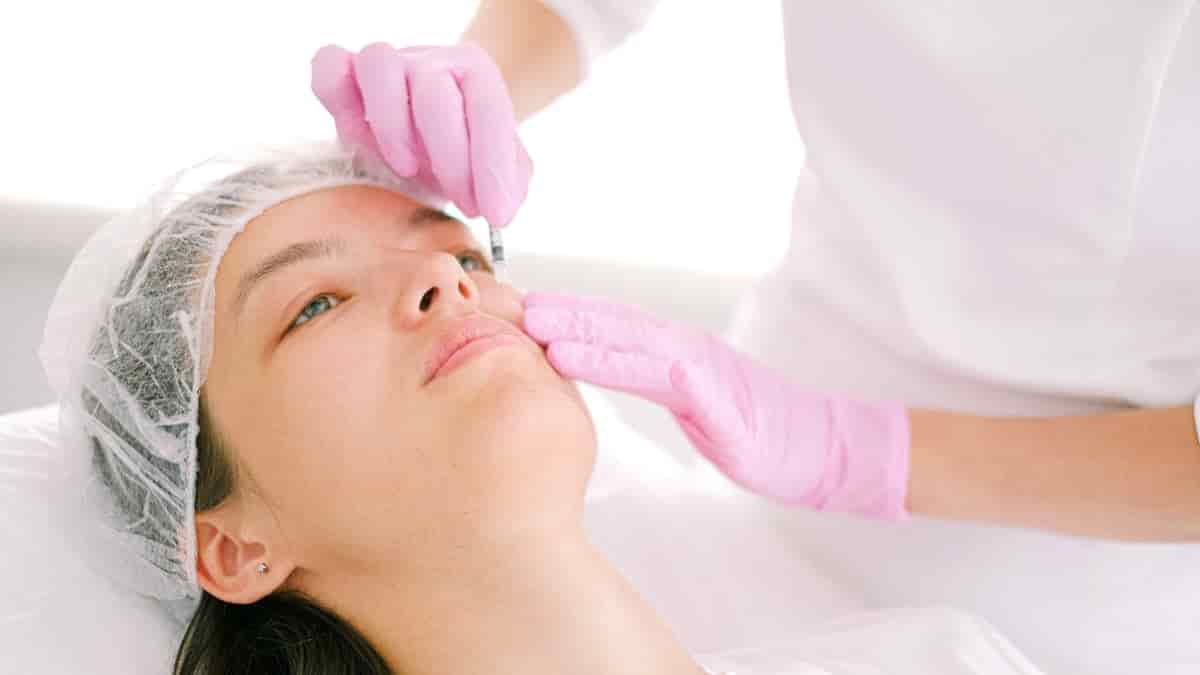
The Botox Procedure
The Botox procedure is a quick and relatively painless process that can be completed in a single office visit. During the treatment, a licensed healthcare professional will use a fine needle to inject small amounts of the Botox solution into the targeted areas of the face.
The Botox solution works by blocking the signals from the nerves to the muscles, preventing them from contracting and causing wrinkles. This results in a smoother, more youthful appearance that can last for several months.
Here’s a step-by-step breakdown of the Botox procedure:
- Consultation: Your healthcare provider will discuss your goals and concerns, and assess the areas of your face that could benefit from Botox treatment.
- Numbing: The treatment areas may be numbed with a topical anesthetic to minimize any discomfort.
- Injection: Using a fine needle, the Botox solution is injected into the targeted muscles, typically in the forehead, frown lines, and crow’s feet.
- Recovery: After the procedure, you may experience some minor swelling or bruising, but these side effects are usually mild and resolve within a few days.
Botox for Men
While Botox has traditionally been associated with women, the trend of men embracing this cosmetic treatment is on the rise. In fact, according to the American Society of Plastic Surgeons, the number of men receiving Botox injections has increased by over 300% in the last two decades.
Men in their 30s and 40s are turning to Botox to achieve a more youthful, refreshed appearance, often targeting areas such as the forehead, frown lines, and crow’s feet. Botox can help men maintain a professional, confident look by smoothing out wrinkles and fine lines, without dramatically altering their natural features.
Botox Maintenance
Maintaining the results of Botox is crucial for those who want to continue enjoying the benefits of a smoother, more youthful appearance. Botox treatments typically last for 3-4 months, after which the muscles gradually regain their ability to contract, and the wrinkles and fine lines begin to reappear.
To maintain the desired results, it’s recommended to schedule regular Botox treatments every 3-4 months. This consistent approach helps to prevent the formation of new wrinkles and maintain a refreshed, rejuvenated look.
It’s important to note that the cost of Botox treatments can vary depending on your location, the provider, and the number of areas being treated. On average, a single Botox treatment can range from $300 to $600 per session. To budget for Botox effectively, consider the following factors:
Factor | Approximate Cost |
---|---|
Cost per unit of Botox | $10 – $15 |
Number of units required per area | 10 – 30 units |
Number of areas treated | 1 – 4 areas |
Total cost per treatment | $300 – $600 |
By understanding the typical costs associated with Botox treatments, you can plan and budget accordingly to maintain your desired results.
Botox Safety and Side Effects
Botox is a safe and FDA-approved treatment when administered by a licensed healthcare professional. However, as with any medical procedure, there are potential side effects to be aware of.The most common side effects of Botox include:
- Bruising or swelling at the injection site
- Headaches
- Temporary muscle weakness or paralysis
- Drooping of the eyelid or brow (in rare cases)
To minimize the risk of side effects and ensure a smooth recovery, it’s essential to follow your healthcare provider’s instructions and avoid activities that could increase the risk of bruising or swelling, such as strenuous exercise, for the first 24-48 hours after the treatment.
Botox Alternatives
While Botox is a highly effective treatment for reducing the appearance of wrinkles and fine lines, it’s not the only option available. For those who prefer alternative approaches or are not suitable candidates for Botox, there are other treatments worth considering:
- Dermal Fillers: These injectable treatments can help fill in and plump up areas of the face, reducing the appearance of wrinkles and adding volume to the skin.
- Laser Treatments: Laser skin resurfacing can stimulate collagen production and improve the overall texture and appearance of the skin, reducing the visibility of fine lines and wrinkles.
- Topical Retinoids: Prescription-strength retinoids, such as tretinoin, can help improve skin cell turnover and reduce the appearance of wrinkles over time.
It’s important to consult with a licensed healthcare provider to determine the best course of action for your individual needs and concerns.
How Botox at 35 Can Make You Happy
Improved Self-Confidence
One of the most significant benefits of Botox at 35 is the boost in self-confidence it can provide. By smoothing out wrinkles and fine lines, Botox can help you feel more youthful, refreshed, and attractive. This newfound confidence can positively impact various aspects of your life, from personal relationships to professional success.
Reduced Signs of Aging
As we age, the inevitable signs of time begin to show on our faces. Fine lines, wrinkles, and a loss of elasticity can make us feel self-conscious and older than our years. Botox at 35 can effectively minimize these visible signs of aging, creating a more youthful and rejuvenated appearance. By addressing the early signs of aging proactively, you can maintain a refreshed look and feel more comfortable in your own skin.
Preventative Measures
One of the key advantages of starting Botox in your 30s is the ability to use it as a preventative measure against the formation of dynamic wrinkles. By temporarily relaxing the facial muscles that cause wrinkles, Botox can prevent the development of fine lines and etched wrinkles. This proactive approach can help you maintain a smooth, youthful appearance for longer, ultimately leading to greater happiness and confidence in your appearance.
Maintenance and Consistency
To maintain the desired results of Botox at 35, it’s recommended to schedule regular treatments every 3-4 months. While this may require a consistent commitment, the benefits of maintaining a refreshed, rejuvenated look can be incredibly rewarding. By sticking to a regular treatment schedule, you can enjoy the confidence and happiness that comes with feeling comfortable in your own skin.
Alternatives for Those Who Prefer Other Options
For those who prefer alternative approaches or are not suitable candidates for Botox, there are other treatments worth considering, such as dermal fillers and laser treatments. These alternatives can also help reduce the appearance of wrinkles and fine lines, providing another avenue for achieving a more youthful, happy appearance.
FAQs
What is the best age to start Botox?
Many experts recommend considering Botox treatments in your early to mid-30s as a preventative measure against the formation of dynamic wrinkles.
How long does Botox last?
Botox results typically last for 3-4 months, after which the muscles gradually regain their ability to contract, and the wrinkles and fine lines begin to reappear.
Is Botox safe for people in their 30s?
Botox is a safe and FDA-approved treatment when administered by a licensed healthcare professional. The most common side effects include bruising, swelling, and headaches, which are usually mild and resolve within a few days.
Read Also: Skin Show Long Beach.
Can Botox be used to prevent wrinkles?
Yes, Botox can be used as a preventative measure to avoid the formation of dynamic wrinkles. By temporarily relaxing the facial muscles, Botox can prevent the development of wrinkles and fine lines.
Read Also: Red Hair Extensions.
How much does Botox cost?
The cost of Botox treatments can vary depending on your location, the provider, and the number of areas being treated. On average, a single Botox treatment can range from $300 to $600 per session.
Read Also: Glittery Red Lipstick.
Conclusion
As we’ve explored, Botox at 35 can be a highly effective way to address the early signs of aging and maintain a youthful, refreshed appearance. By starting Botox treatments in your 30s, you can proactively prevent the formation of dynamic wrinkles and enjoy the benefits of a smoother, more rejuvenated look.
Read Also: Solar Oil for Nails.
Whether you’re a man or a woman, Botox can be a valuable tool in your anti-aging arsenal. By understanding the procedure, the potential results, and the importance of maintenance, you can make an informed decision about whether Botox is the right choice for you.
Read Also: Pull Ups While Pregnant.
Remember, the key to achieving the best possible outcomes with Botox is to work with a licensed and experienced healthcare provider who can assess your individual needs and develop a customized treatment plan. With the right approach, Botox at 35 can be a game-changer in your quest for a more youthful, confident appearance.
Read Also: Botox Smile Lift Before After.
Beauty Tips
Hair Botox vs Keratin: Treatment Results
![hair botox vs keratin](https://crankiewomen.com/wp-content/uploads/2024/07/pexels-cottonbro-7440054-min.jpg)
Here is your complete guide to hair botox vs keratin
Introduction to Hair Botox vs Keratin
What are the differences between hair botox vs keratin? In the world of hair treatments, two of the most popular options for revitalizing, smoothing, and straightening locks are Hair Botox vs Keratin treatments. While both treatments aim to transform your hair, they differ in their composition, application process, and results. Understanding the differences between hair botox vs keratin treatments is crucial to make an informed decision about which treatment is best suited for your hair type and goals.
In this comprehensive article, we’ll explore the world of Hair Botox and Keratin treatments, delving into their unique characteristics, benefits, and drawbacks. By the end of this article, you’ll have a clear understanding of which treatment is right for you, empowering you to make a confident choice for your hair’s health and beauty.
What is Hair Botox?
Hair Botox, also known as a hair smoothing treatment, is a chemical-free treatment that aims to repair damaged hair, fill in gaps, and make hair stronger and less frizzy. The main ingredients used in Hair Botox include:
- Caviar oil
- Vitamin E
- Vitamin B5
- Collagen complex
The treatment works by penetrating deep into the hair shaft, providing nourishment and hydration. Hair Botox is applied to washed hair and left for a few minutes before being rinsed off. The results are instant, leaving hair healthier, softer, and shinier.
What is Keratin Treatment?
Keratin treatment, on the other hand, is a chemical-based treatment that uses formaldehyde and other chemicals to straighten hair. The main goal of Keratin treatment is to leave hair soft, shiny, and smooth, with reduced frizz and waves.The application process of Keratin treatment involves:
- Applying the solution to damp hair
- Straightening the hair in sections to seal the product
The entire process typically takes around 3 hours to complete.
Differences Between Hair Botox and Keratin
While both Hair Botox and Keratin treatments aim to transform hair, there are several key differences between the two:
Characteristic | Hair Botox | Keratin Treatment |
---|---|---|
Composition | Chemical-free | Contains formaldehyde and other chemicals |
Application Process | Applied to washed hair and left for a few minutes before being rinsed off | Applied to damp hair and straightened in sections to seal the product |
Time to Complete | 1.5-2 hours | 3 hours |
Safety | Safer than Keratin treatment | Can emit toxic fumes during application and is not recommended for pregnant or nursing mothers |
Another significant difference lies in the longevity of each treatment. Hair Botox typically lasts anywhere between 2-4 months, while Keratin treatment lasts 4-6 months. The frequency of each treatment will depend on the growth rate of the hair and how it is maintained after each treatment session.
How Long Does Each Treatment Last?
The longevity of Hair Botox and Keratin treatments can vary depending on several factors:
- Hair type
- Hair condition
- Lifestyle
- Maintenance after each treatment session
In general:
- Hair Botox lasts 2-4 months
- Keratin treatment lasts 4-6 months
It’s important to note that the frequency of each treatment will depend on the growth rate of the hair and how it is maintained after each treatment session.
Which Treatment is Right for You?
When choosing between Hair Botox and Keratin treatments, it’s essential to consider several factors, such as hair type, hair condition, and desired results. Here’s a breakdown of which treatment may be more suitable for different hair types:
Hair Type | Hair Botox | Keratin Treatment |
---|---|---|
Thick, extra-frizzy, or unmanageable hair | May be too harsh | Works best |
Fine or thin hair | Suitable | May be too harsh |
Damaged hair | Suitable | May be too harsh |
Keratin treatment works best for thick, extra-frizzy, or unmanageable hair, but may be too harsh for very damaged, fine, or thin hair. Hair Botox, on the other hand, works for any hair type and is suitable for fine or heavily lightened hair.
It’s also important to consider the differences in styling results. Keratin treatment is more effective at smoothing waves and curls, while Hair Botox provides a more natural look.
Consulting with a professional stylist is highly recommended to determine which treatment is right for you based on your specific hair type and goals.
The Best Hair Botox Routine
Preparing Your Hair
- Avoid washing your hair for at least 24 hours before the treatment
- Inform your stylist about any allergies or sensitivities you may have
- Discuss your desired results and any concerns with your stylist
The Hair Botox Treatment Process
- Your hair will be washed with a clarifying shampoo to remove any buildup or residue
- The Hair Botox solution will be applied to your hair and left on for 10-15 minutes
- Your hair will be rinsed thoroughly to remove the solution
- A deep conditioning treatment will be applied to your hair and left on for 5-10 minutes
- Your hair will be rinsed again and gently towel-dried
Aftercare and Maintenance
- Avoid washing your hair for at least 48 hours after the treatment
- Use a sulfate-free, color-safe shampoo and conditioner
- Limit heat styling and use a heat protectant product
- Schedule regular trims to maintain healthy ends and prevent split ends
- The results of Hair Botox typically last 2-4 months
The Best Keratin Treatment Routine
Preparing Your Hair
- Avoid washing your hair for at least 24 hours before the treatment
- Inform your stylist about any allergies or sensitivities you may have
- Discuss your desired results and any concerns with your stylist
The Keratin Treatment Process
- Your hair will be washed with a clarifying shampoo to remove any buildup or residue
- The Keratin solution will be applied to your hair and left on for 30-45 minutes
- Your hair will be blow-dried straight
- A flat iron will be used to seal the Keratin into your hair
- Your hair will be styled as desired
Aftercare and Maintenance
- Avoid washing your hair for at least 72 hours after the treatment
- Use a sulfate-free, color-safe shampoo and conditioner
- Limit heat styling and use a heat protectant product
- Schedule regular trims to maintain healthy ends and prevent split ends
- The results of Keratin treatment typically last 4-6 months
Both Hair Botox and Keratin treatments offer unique benefits for transforming your hair. Consulting with a professional stylist is highly recommended to determine which treatment is right for you based on your specific hair type, condition, and goals.
Cost of Hair Botox vs Keratin
Treatment | Cost |
---|---|
Hair Botox | $150 to $400 per session |
Keratin | $200 to $600 per session |
The cost of Hair Botox and Keratin treatments can vary depending on several factors:
Hair Botox Cost
- Hair Botox treatment can cost anywhere from $150 to $400 per session
- The cost may be higher or lower depending on the length and thickness of your hair
- It is essential to consult with a professional stylist to determine the exact cost for your hair type and condition
Keratin Treatment Cost
- Keratin treatment can cost between $200 to $600 per session
- The cost may be higher or lower depending on the salon’s location, the stylist’s expertise, and your hair’s length and thickness
- Salons located in upscale areas or metropolitan cities may charge more due to higher operational costs compared to those in smaller towns
- Highly experienced stylists or those with specialized training in Keratin treatment may command higher fees due to their expertise
- Well-known and high-end salons often charge more due to their market positioning and the premium services they offer
It is important to note that both Hair Botox and Keratin treatments are not permanent solutions. Hair Botox treatment results can last up to three months, while the effects of Keratin hair treatment can last for up to six months.
FAQs
Is Hair Botox the same as Keratin?
No, Hair Botox and Keratin treatments are not the same. While they both aim to transform hair, they differ in their composition, application process, and results.
Read Also: Shampoo for Summer.
Which treatment is more expensive?
The cost of Hair Botox and Keratin treatments can vary depending on several factors, such as location, salon, and the length and thickness of your hair. In general, Keratin treatments tend to be more expensive due to the use of chemicals and the longer application process.
Read Also: Summer Dip Nails.
Does Keratin last longer than Botox?
Yes, Keratin treatment typically lasts longer than Hair Botox. Keratin treatment can last 4-6 months, while Hair Botox lasts 2-4 months.
Read Also: Red Glitter Lipstick.
How long does each treatment last?
- Hair Botox lasts 2-4 months
- Keratin treatment lasts 4-6 months
Read Also: Dark Glitter Lipstick.
Which treatment is safer?
Hair Botox is considered safer than Keratin treatment because it is chemical-free. Keratin treatment can emit toxic fumes during application and is not recommended for pregnant or nursing mothers.
Read Also: Glitter Lipstick Pink.
Conclusion
In conclusion, both Hair Botox and Keratin treatments offer unique benefits for transforming your locks. Hair Botox is a chemical-free treatment that repairs damaged hair, fills in gaps, and makes hair stronger and less frizzy, while Keratin treatment uses chemicals to straighten hair and leave it soft, shiny, and smooth.
Read Also: Korean Face Oil.
When choosing between the two, it’s essential to consider your hair type, hair condition, and desired results. Consulting with a professional stylist is highly recommended to determine which treatment is right for you.
Read Also: Pull Ups While Pregnant.
Regardless of which treatment you choose, both Hair Botox and Keratin treatments offer a chance to revitalize your hair and boost your confidence. Embrace the transformation and enjoy the journey to healthier, more beautiful locks.
Read Also: Oil Keratin.
Beauty Tips
Oil Keratin: Transform Your Hair Instantly
![oil keratin](https://crankiewomen.com/wp-content/uploads/2024/07/pexels-gabby-k-6620838-min.jpg)
Here is your complete guide oil keratin
Introduction to Oil Keratin
Are you tired of frizzy, unmanageable hair that never seems to cooperate with your styling efforts? Look no further than oil keratin treatment! This revolutionary hair treatment has been taking the beauty world by storm, offering a range of benefits for all hair types. From smoothing and straightening to nourishing and strengthening, oil keratin is the solution you’ve been searching for.
In this comprehensive guide, we’ll dive deep into the world of oil keratin, exploring its benefits, safety, and the step-by-step process of applying it at home. We’ll also address common questions and provide expert advice to help you achieve salon-worthy results without breaking the bank. Get ready to say goodbye to bad hair days and hello to the healthiest, smoothest locks of your life!
What is Oil Keratin Treatment?
Oil keratin treatment is a hair treatment that combines the power of keratin with the nourishing properties of organic oils and acids. Unlike traditional keratin treatments, which can be harsh on the hair and contain potentially harmful chemicals like formaldehyde, oil keratin is a gentler alternative that still delivers impressive results.
The key ingredients in oil keratin treatments include:
- Keratin: A protein that strengthens and smooths the hair
- Organic oils: Such as argan, coconut, and olive oil, which nourish and protect the hair
- Acids: Like citric acid, which helps seal the cuticles and lock in moisture
By combining these powerful ingredients, oil keratin treatments work to straighten and smooth the hair while also improving its overall health and appearance.
Benefits of Oil Keratin for Hair
One of the biggest advantages of oil keratin treatment is its ability to transform even the most unruly hair into a smooth, manageable mane. Here are some of the key benefits:
Straightening and Smoothing
Oil keratin treatments work to straighten and smooth the hair, reducing frizz and creating a sleek, polished look. This makes styling easier and helps you achieve your desired hairstyle with less effort.
Increased Shine and Luster
The nourishing oils in oil keratin treatments help to seal the cuticles and lock in moisture, resulting in a beautiful, glossy shine that lasts for weeks.
Sealing Cuticles and Reducing Frizz
By sealing the cuticles, oil keratin treatments help to reduce frizz and flyaways, keeping your hair looking smooth and polished even in humid or dry conditions.
Nourishing and Strengthening
The combination of keratin and organic oils in oil keratin treatments helps to nourish and strengthen the hair, reducing breakage and improving overall hair health.
Improved Manageability and Reduced Styling Time
With smoother, more manageable hair, you’ll find that styling takes less time and effort. Say goodbye to endless brushing and hello to effortless, salon-worthy looks.
Safety of At-Home Oil Keratin Treatments
One of the biggest concerns when it comes to oil keratin treatment is safety. Many traditional keratin treatments contain formaldehyde, a potentially harmful chemical that can cause irritation and even long-term health issues. However, when using quality, formaldehyde-free products, oil keratin treatments are a safe and effective option for achieving healthy, beautiful hair.
Another advantage of at-home oil keratin treatments is the comfort and convenience they offer. You can achieve salon-worthy results in the comfort of your own home, without the added cost and hassle of visiting a salon. Additionally, at-home treatments are often more cost-effective, making it easier to maintain your hair’s health and appearance.
Preparing for an Oil Keratin Treatment
Before starting your treatment, it’s important to have all the necessary supplies on hand. This includes:
- Shampoo and conditioner specifically formulated for treated hair
- Styling products like serum or oil to maintain the treatment
- Gloves and eye protection for safety
- Clips or clamps for sectioning the hair
It’s also crucial to start with clean, dry hair. Avoid washing your hair for at least 24 hours before the treatment, as this will help the product adhere better to your strands.
Applying the Oil Keratin Treatment
Once you have all your supplies ready, it’s time to begin the treatment process. Follow these steps for best results:
- Section your hair into manageable pieces, using clips or clamps to keep it in place.
- Apply the treatment to each section, starting from the roots and working your way down to the ends.
- Use a wide-tooth comb or your fingers to evenly distribute the product throughout your hair.
- Allow the treatment to sit for the recommended time, usually around 30 minutes to an hour.
- Rinse the treatment out thoroughly, making sure to remove all traces of product.
It’s important to follow the manufacturer’s instructions carefully and to use protective equipment like gloves and eye protection to ensure your safety during the process.
Best Products for Oil Keratin Treatments
Brand | Product | Key Features | Price |
---|---|---|---|
L’ANZA | Keratin Healing Oil | – Nourishes and revives dry, damaged hair and scalp – Sulfate-free formula with Phyto IV Complex – Provides UV protection | $43.78 |
OGX | Frizz-Free + Keratin Smoothing Oil Miracle Gloss Spray | – 5-in-1 formula de-frizzes and adds shine – Contains argan oil – Affordable drugstore option | $8.99 |
Luseta | Keratin Hair Oil Serum | – Strengthens and nourishes color-treated, damaged, and dry hair – Sulfate, paraben, and gluten-free – Affordable price point | $19.49 |
HASK | Keratin Protein Smoothing Oil | – Helps smooth and add shine to hair – Affordable drugstore option – Cruelty-free | $6.99 |
Moroccanoil | Moroccanoil Treatment | – Iconic argan oil-infused formula – Adds shine and softness – Lightweight texture suitable for all hair types | $44.00 |
Parachute Advansed | Gold Coconut Hair Oil | – Infused with coconut oil and keratin – Helps nourish and strengthen hair – Affordable price point | $3.99 |
K Kerotin | Keratin Hair Treatment Oil | – Helps repair damaged hair – Adds shine and softness – Affordable drugstore option | $14.99 |
Key Takeaways:
- L’ANZA and Moroccanoil offer premium, salon-quality treatments
- OGX and HASK provide affordable, drugstore-available options
- Luseta and Parachute Advansed offer keratin-infused oils at a lower price point
- Most brands offer sulfate-free, cruelty-free formulas for added safety and efficacy
Reference:
The Best Routine for Oil Keratin Treatments
Achieving salon-quality results with an oil keratin treatment at home is easy when you follow a consistent hair care routine. Here’s a step-by-step guide to help you get the most out of your oil keratin treatment:
Preparing Your Hair
- Wash your hair with a sulfate-free, keratin-infused shampoo for at least a week before your treatment to prepare your hair.
- Avoid using hair oils or heavy styling products in the days leading up to your treatment.
- Make sure your hair is clean, dry, and free of any residue before applying the treatment.
Drying and Styling
- Gently pat your hair dry with a soft, absorbent microfiber towel.
- Use a blow dryer on the lowest heat setting, keeping the nozzle at least six inches away from your hair to prevent heat damage.
- Style your hair as desired, using a small amount of keratin-infused serum or oil to help maintain the treatment and keep your hair looking its best.
Maintaining Your Treatment
- Wash your hair less frequently, using a sulfate-free, keratin-infused shampoo and conditioner.
- Avoid using hot tools like curling irons or straighteners, as they can cause damage and reduce the effectiveness of the treatment.
- If you do use hot tools, make sure to use a heat protectant product and keep the temperature as low as possible.
- Brush your hair gently with a wide-tooth comb or a boar bristle brush to avoid breakage and maintain the treatment’s results.
By following this routine and using quality, keratin-infused products, you can keep your treatment looking its best for weeks to come. Remember to be gentle with your hair and avoid any harsh chemicals or styling techniques that could compromise the treatment’s effectiveness.
Rinsing and Drying the Treatment
After applying the treatment, it’s time to rinse and dry your hair. Start by thoroughly rinsing out the product, making sure to remove all traces of it from your hair. Use cool water to help seal the cuticles and lock in the treatment’s benefits.
Once your hair is rinsed, gently pat it dry with a towel. Avoid rubbing or twisting your hair, as this can cause damage and frizz. If you’re using a blow dryer, make sure to use the lowest heat setting and keep the nozzle at least six inches away from your hair to prevent heat damage.
Comparing Oil Keratin to Other Hair Oils
Feature | Oil Keratin | Argan Oil | Coconut Oil | Moroccan Oil |
---|---|---|---|---|
Main Ingredient | Keratin, organic oils, acids | Argan oil | Coconut oil | Argan oil |
Hair Benefits | Straightening, smoothing, increased shine, reduced frizz, nourishing, strengthening | Softening, frizz reduction, shine enhancement | Moisturizing, strengthening, frizz reduction | Softening, frizz reduction, shine enhancement |
Safety | Formaldehyde-free, gentle alternative to traditional keratin treatments | Generally safe for all hair types | Generally safe for all hair types | Generally safe for all hair types |
Application | Apply to clean, dry hair, allow to sit for 30 mins to 1 hour, rinse thoroughly | Apply to damp or dry hair, leave in | Apply to scalp and hair, leave in overnight or for a few hours before washing | Apply to damp or dry hair, leave in |
Longevity | Lasts 3-6 months with proper maintenance | Lasts until next wash | Lasts until next wash | Lasts until next wash |
Cost | Varies depending on brand and salon vs. at-home treatment | Affordable | Affordable | Affordable |
Key Takeaways:
- The treatments provide more long-lasting results compared to other oils
- Argan, coconut, and Moroccan oils are generally safe for all hair types
- It is a gentler alternative to traditional keratin treatments
- Applying oils to clean, dry hair and allowing them to sit before rinsing maximizes benefits
Styling After an Oil Keratin Treatment
One of the best things about keratin treatments is how easy they make styling your hair. With smoother, more manageable strands, you’ll find that your styling routine takes less time and effort. Here are some tips for styling after treatment:
- Use a small amount of styling product, like serum or oil, to help maintain the treatment and keep your hair looking its best.
- Avoid using hot tools like curling irons or straighteners, as they can cause damage and reduce the effectiveness of the treatment.
- If you do use hot tools, make sure to use a heat protectant product and keep the temperature as low as possible.
- Brush your hair gently with a wide-tooth comb or a boar bristle brush to avoid breakage and maintain the treatment’s results.
By following these tips and using quality products, you can keep your treatment looking its best for weeks to come.
Read Also: Shampoo for Summer.
Frequently Asked Questions (FAQs)
How often should I get an oil keratin treatment?
The frequency of oil treatments depends on your hair type and the specific product you’re using. Most treatments last between 3-6 months, so you may need to get them done every 4-6 weeks to maintain the results.
Read Also: Summer Dip Nails.
Can I color my hair after an oil keratin treatment?
It’s best to wait at least 2-3 weeks after a keratin treatment before coloring your hair. This allows the treatment to fully set and prevents any potential damage from the color process.
Read Also: Red Glitter Lipstick.
Is it safe to use hot tools on my hair after an oil keratin treatment?
While it’s best to avoid using hot tools as much as possible after an oil treatment, they can be used in moderation. Make sure to use a heat protectant product and keep the temperature as low as possible to prevent damage.
Read Also: Dark Glitter Lipstick.
How do I maintain my oil keratin treatment at home?
To maintain your oil treatment at home, use a sulfate-free shampoo and conditioner, avoid washing your hair too frequently, and use a small amount of styling product like serum or oil to keep your hair looking its best.
Read Also: Glitter Lipstick Pink.
Can oil keratin treatments damage my hair?
When used properly with quality products, the treatments are safe and effective for most hair types. However, if you have extremely damaged or fragile hair, it’s best to consult with a professional before getting the treatment.
Read Also: Pull Ups While Pregnant.
Conclusion
If you’re looking for a way to transform your hair from frizzy and unmanageable to smooth, shiny, and healthy, oil keratin treatment is the solution you’ve been searching for. With its range of benefits, including straightening, smoothing, and nourishing, oil keratin is a game-changer for anyone who wants to achieve salon-worthy results at home.By following the tips and advice in this guide, you can safely and effectively apply oil keratin treatments to your hair and maintain the results for weeks to come. Say goodbye to bad hair days and hello to the healthiest, most beautiful locks of your life!
Read Also: Korean Face Oil.
Beauty Tips
Korean Face Oil: How to Use Guide
![korean face oil](https://crankiewomen.com/wp-content/uploads/2024/07/pexels-olha-ruskykh-6954633-min.jpg)
Here is your complete guide to korean face oil
Introduction to Korean Face Oil
Korean face oil has taken the beauty world by storm, and for good reason. These nourishing elixirs are formulated with a blend of natural ingredients that work together to deeply hydrate, nourish, and revitalize the skin. Whether you’re dealing with dry, dehydrated skin, signs of aging, or uneven skin tone, Korean face oil offers a solution that is both effective and luxurious.
In this comprehensive guide, we’ll explore the benefits of Korean face oil, the best ingredients to look for, and how to incorporate them into your skincare routine for optimal results. By the end of this article, you’ll have a better understanding of why Korean face oil is a must-have in your beauty arsenal and how to choose the perfect one for your skin type and concerns.
The Benefits of Korean Face Oil
Deeply Hydrating
One of the primary benefits of Korean face oil is their ability to deeply hydrate the skin. These oils are rich in fatty acids and antioxidants that penetrate deep into the skin’s layers, providing long-lasting moisture and preventing water loss. As a result, your skin will feel soft, supple, and radiant.
Improves Skin Barrier Function
Many Korean face oil contain ingredients like ceramides and fatty acids that help to strengthen and repair the skin’s natural barrier. This barrier is responsible for keeping moisture in and environmental stressors out. By improving barrier function, Korean face oil help to prevent moisture loss and protect the skin from damage.
Anti-Aging Properties
Korean face oil is often formulated with ingredients like vitamin C, retinol, and CoQ10 that help to reduce the appearance of fine lines and wrinkles. These ingredients work by stimulating collagen production, improving skin elasticity, and evening out skin tone. Regular use of Korean face oils can help to keep your skin looking youthful and radiant.
Calms Inflammation
Some Korean face oil contains soothing ingredients like centella asiatica and cica that help to calm redness, irritation, and inflammation. This makes them particularly beneficial for those with sensitive or acne-prone skin, as they can help to reduce the appearance of blemishes and prevent future breakouts.
Brightens Complexion
Many Korean face oil contains natural brightening ingredients like niacinamide, licorice root extract, and vitamin C that help to even out skin tone and reduce the appearance of dark spots and hyperpigmentation. Regular use can help to reveal a more radiant, even complexion.
The Best Ingredients in Korean Face Oil
When choosing a Korean face oil, it’s important to look for high-quality ingredients that are suitable for your skin type and concerns. Here are some of the best ingredients to look for:
Camellia Oil
Camellia oil is a lightweight, non-greasy oil that is rich in oleic acid, antioxidants, and vitamins A, B, C, and E. It helps to deeply nourish and hydrate the skin while improving skin elasticity and reducing the appearance of fine lines and wrinkles.
Rosehip Seed Oil
Rosehip seed oil is a dry oil that is high in linoleic acid, vitamin C, and retinol. It helps to improve skin texture, reduce the appearance of scars and hyperpigmentation, and promote collagen production.
Marula Oil
Marula oil is a lightweight, fast-absorbing oil that is rich in oleic acid, antioxidants, and vitamins C and E. It helps to deeply hydrate the skin, reduce inflammation, and improve skin barrier function.
Argan Oil
Argan oil is a rich, nourishing oil that is high in fatty acids, antioxidants, and vitamin E. It helps to deeply hydrate the skin, improve skin elasticity, and reduce the appearance of fine lines and wrinkles.
Jojoba Oil
Jojoba oil is a lightweight, non-greasy oil that closely resembles the skin’s natural sebum. It helps to regulate oil production, reduce the appearance of pores, and improve skin texture.
Korean Face Oil Benefits
Ingredient | Benefits |
---|---|
Camellia Oil | – Deeply nourishes and hydrates the skin – Improves skin elasticity – Reduces the appearance of fine lines and wrinkles |
Rosehip Seed Oil | – Improves skin texture – Reduces the appearance of scars and hyperpigmentation – Promotes collagen production |
Marula Oil | – Deeply hydrates the skin – Reduces inflammation – Improves skin barrier function |
Argan Oil | – Deeply hydrates the skin – Improves skin elasticity – Reduces the appearance of fine lines and wrinkles |
Jojoba Oil | – Regulates oil production – Reduces the appearance of pores – Improves skin texture |
Recommended Korean Face Oil by Skin Type
Skin Type | Recommended Korean Face Oil |
---|---|
Oily/Acne-Prone | – Jojoba Oil – Rosehip Seed Oil |
Dry/Mature | – Camellia Oil – Argan Oil |
Sensitive | – Look for fragrance-free and non-irritating formulas |
How to Incorporate Korean Face Oil into Your Routine
Korean face oil can be easily incorporated into your existing skincare routine. Here’s how to do it:
- Cleanse your face with a gentle, non-drying cleanser to remove any dirt, oil, or makeup.
- Apply a few drops of your chosen face oil to your fingertips and gently massage it into your skin, focusing on areas that are particularly dry or dehydrated.
- Allow the oil to fully absorb into your skin before applying any other skincare products.
- Follow up with your usual moisturizer to lock in the benefits of the oil.
- Use the oil both morning and night for best results.
It’s important to note that face oil is not a replacement for moisturizer, but rather a complementary step in your skincare routine. They help to provide an extra boost of hydration and nourishment to the skin.
Choosing the Right Korean Face Oil for Your Skin Type
The key to getting the most out of your face oil is choosing one that’s suitable for your skin type and concerns. Here are some recommendations:
- For normal skin, opt for lightweight oils like jojoba, marula, and squalane.
- For dry skin, choose richer oils like argan, rosehip, and camellia.
- For oily skin, try oils like tea tree, grapeseed, and jojoba that won’t clog pores.
- For combination skin, marula, jojoba, and grapeseed oils are good options.
- For sensitive skin, moringa oil is gentle and non-irritating.
- For acne-prone skin, tea tree, jojoba, and rosehip oils can help control breakouts.
Remember, it’s always best to do a patch test first to ensure the oil doesn’t cause any irritation. If you have any specific concerns, consult with a dermatologist to get personalized recommendations.
Frequency of Use
Frequency of Use | Recommendation |
---|---|
Morning and Night | – For best results, use a Korean face oil both morning and night |
Once Daily | – If you have particularly oily skin, use the oil only once a day, preferably at night |
Using Korean Face Oils During Pregnancy
Pregnancy | Recommendation |
---|---|
Safe to Use | – Many Korean face oils are safe to use during pregnancy, but always consult with your healthcare provider first |
Avoid Certain Ingredients | – Avoid oils that contain retinol or other ingredients that may be contraindicated during pregnancy |
Using Korean Face Oils on the Body
Body Use | Recommendation |
---|---|
Beneficial for Dry Areas | – Korean face oils can be used on the body, especially on dry, rough areas like elbows, knees, and heels |
Patch Test First | – Always do a patch test first to ensure that the oil does not cause any irritation |
Read Also: Face Mask for Summer.
Frequently Asked Questions
Can Korean face oil be used on all skin types?
Korean face oil can be used on all skin types, but it’s important to choose an oil that is suitable for your specific skin type and concerns. Those with oily or acne-prone skin may want to opt for lighter, non-comedogenic oils like jojoba or rosehip seed oil, while those with dry or mature skin may prefer richer oils like camellia or argan oil.
Read Also: Shampoo for Summer.
How often should I use a Korean face oil?
Most experts recommend using a face oil both morning and night for best results. However, if you have particularly oily skin, you may want to use it only once a day, preferably at night.
Read Also: Summer Dip Nails.
Can Korean face oils be used during pregnancy?
Many Korean face oils are safe to use during pregnancy, but it’s always best to consult with your healthcare provider before using any new skincare products. Avoid oils that contain retinol or other ingredients that may be contraindicated during pregnancy.
Read Also: Red Glitter Lipstick.
How do I choose the right Korean face oil for my skin type?
When choosing a face oil, consider your skin type and concerns. Look for oils that are high in fatty acids and antioxidants, and choose a formula that is suitable for your skin type. If you have sensitive skin, look for oils that are fragrance-free and non-irritating.
Read Also: Dark Glitter Lipstick.
Can Korean face oil be used on the body?
Many face oil can be used on the body as well as the face. They can be particularly beneficial for dry, rough areas like elbows, knees, and heels. Always do a patch test first to ensure that the oil does not cause any irritation.
Read Also: Pull Ups While Pregnant.
Conclusion
Korean face oil is a powerful addition to any skincare routine, providing deep hydration, nourishment, and anti-aging benefits. By incorporating a high-quality face oil into your routine, you can achieve healthier, more radiant skin. Remember to choose an oil that is suitable for your skin type and concerns, and to use it consistently for best results. With so many amazing Korean face oil on the market, there’s sure to be one that’s perfect for you.
Read Also: Glitter Lipstick Pink.
-
Beauty Tips1 year ago
What Is Balayage: Your Ultimate Guide Is Here
-
Dreams Interpretation1 year ago
The Meaning of Teeth Falling Out in a Dream: Exploring the Symbolism
-
Diet Tips1 year ago
What Vitamins C Is Good For? The Ultimate Guide
-
Uncategorized1 year ago
What Are The Five Languages Of Love: Your Complete Guide
-
Beauty Tips1 year ago
How to Make Clear Skin: Your Comprehensive Guide
-
Beauty Tips1 year ago
Coconut Oil in Face Benefits: Unlocking the Secrets to Radiant Skin
-
Women Tips1 year ago
How Long Breast Augmentation Surgery Take? A Complete Guide
-
Beauty Tips1 year ago
The Surprising Benefit to Coconut Oil: Your Complete Guide