
Here is your complete guide to how to thin out hair with a razor
Introduction to How to Thin Out Hair with a Razor
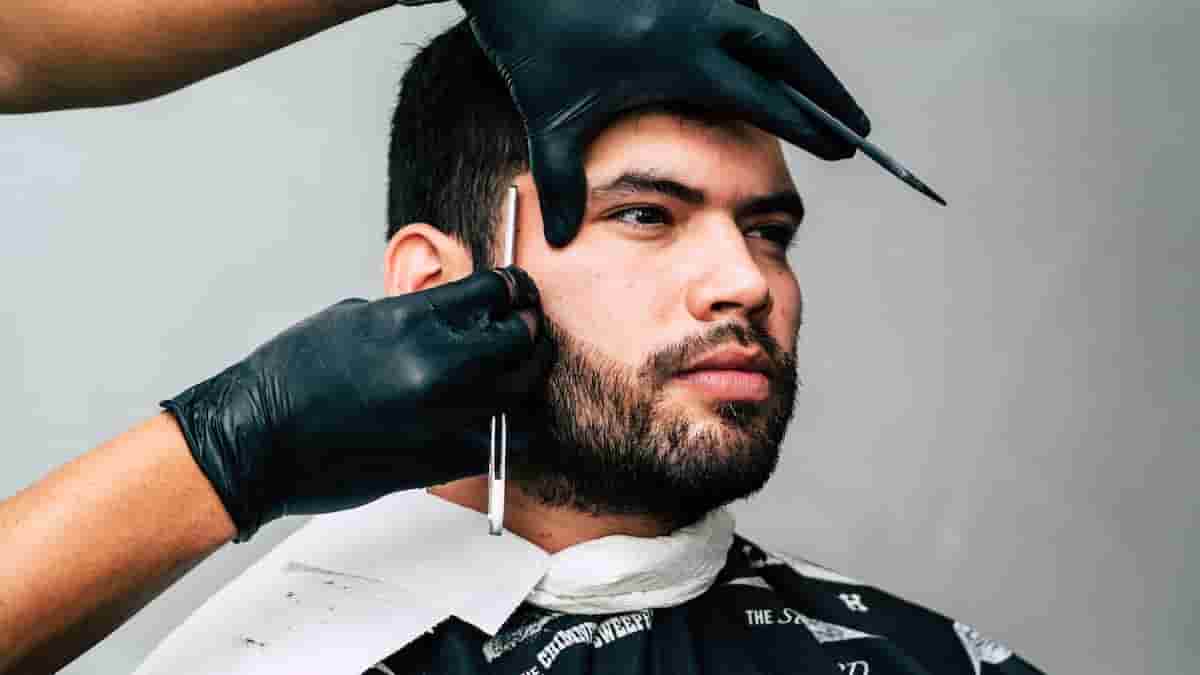
In the quest for the perfect hairstyle, you may find yourself desiring to thin out your hair with a razor. Thinning your hair can add texture, volume, and a touch of style to your locks. In this detailed guide, we will explore the techniques, tools, and tips you need to achieve professional-looking results. Let’s dive into the world of razor hair thinning.
Why Thin Out Hair with a Razor?
Hair thinning with a razor offers numerous benefits:
- Texture and Volume: Razor thinning adds texture and volume to your hair, making it easier to style.
- Weight Reduction: Thinning heavy, thick hair can reduce its weight, making it more manageable.
- Enhanced Styling: Razor thinning allows for more creative and versatile hairstyles.
Tools and Materials
Before we get started, you’ll need the following tools:
| Tools and Materials | Description |
|---|---|
| Hair Razor | A sharp, professional-grade razor. |
| Comb | To detangle and section your hair. |
| Hair Scissors | For precision trimming, if necessary. |
| Hair Clip | To hold sections of hair in place. |
| Spray Bottle | Filled with water for dampening hair. |
| Mirror | A full-length mirror for better control. |
Preparation
Proper preparation ensures the best results:
- Wash Your Hair: Start with clean, dry hair. Remove any product buildup or oils.
- Detangle: Use a wide-toothed comb to detangle your hair gently.
- Section Your Hair: Divide your hair into manageable sections using clips.
- Dampen Your Hair: Lightly mist your hair with water to make it more pliable.
Techniques for Thinning Hair with a Razor
There are various techniques to thin out your hair with a razor:
Point Cutting
Point cutting involves using the razor to cut small, random points into your hair. This technique creates a softer, textured look.
Slicing
Slicing is ideal for reducing hair volume. It involves making thin, diagonal cuts using the razor.
Feathering
Feathering creates a seamless transition between layers. It involves light, upward strokes with the razor.
Step-by-Step Guide
Let’s go through the process of thinning your hair with a razor:
Step 1: Section Your Hair
Using your comb, create sections: Section your hair into workable sections using clips.
Step 2: Begin Thinning
- Start with the bottom sections: Begin with the sections closest to the nape of your neck.
- Hold the hair taut: Hold a small section of hair taut with your fingers.
- Angle the razor: Hold the razor at a 45-degree angle to your hair.
- Make short, controlled strokes: Use the razor to make short, controlled strokes along the hair shaft.
- Thin the ends: Concentrate on thinning the ends of your hair to avoid creating gaps.
- Repeat for each section: Work your way up, thinning each section systematically.
Step 3: Check for Balance
- Regularly check for balance: Use a mirror to check that both sides of your head are balanced.
- Adjust as needed: If you notice any unevenness, make adjustments as necessary.
Step 4: Style as Desired
- Style your hair: Finish by styling your hair as desired. You’ll notice improved texture and manageability.
Safety Tips
Ensure your safety during the hair-thinning process:
- Use a sharp razor: A dull razor can lead to uneven results and potential injury.
- Work in good lighting: Proper lighting helps you see what you’re doing.
- Avoid over-thinning: Go slow and thin gradually to avoid overdoing it.
- Seek professional help: If you’re unsure, consult a hairstylist for guidance.
Maintenance
Maintaining your razored hair is essential:
- Regular trims: Schedule regular trims to maintain your razor-thinned style.
- Use quality products: Use hair care products designed for your specific hair type.
- Avoid excessive heat: Limit the use of heat styling tools to prevent damage.
Pros and Cons of Razor Thinning
Let’s weigh the pros and cons:
Pros:
- Adds texture and volume.
- Enhances styling options.
- Reduces hair weight.
- Creates a natural, lived-in look.
Cons:
- Requires practice for precision.
- Risk of uneven results.
- Potential for damage with improper technique.
FAQs (Based on People Also Ask)
Can I thin my hair with a regular razor?
Yes, you can, but it’s recommended to use a hair razor for better results and safety.
How often should I thin my hair with a razor?
For most people, thinning your hair every 6-8 weeks is sufficient to maintain the style.
Read Also: Glass Press On Nails.
Is razor thinning suitable for all hair types?
Razor thinning can work for various hair types, but consult a professional if you’re unsure.
Read Also: How to Get Lipstick Off a Mirror.
Can I thin my hair with a razor at home?
Yes, you can, but practice and caution are essential. Consider professional help if you’re uncertain.
Read Also: Cognac Spice Hair Color.
Is razor cutting good for thick hair?
Razor cutting can be a great option for thick hair. It helps reduce the density of thick hair, making it more manageable and creating a lighter, textured look. However, it’s important to use the razor correctly and consider seeking professional guidance if you’re not experienced with this technique.
Read Also: How to Remove Sticker Nails.
How do you thin out thick hair?
Thinning out thick hair involves using techniques such as razor cutting or point cutting with scissors. Here’s a simple method:
- Section your hair into workable parts.
- Hold a small section taut.
- Use a razor or scissors to make controlled, diagonal cuts, focusing on the ends.
- Repeat this process for each section until you achieve your desired thickness.
Remember to go slow and make gradual changes to avoid over-thinning.
Read Also: Death Banding Hair.
Is it better to cut hair with scissors or razor?
The choice between scissors and a razor depends on your desired result:
- Scissors: Ideal for precise, blunt cuts and maintaining a clean line.
- Razor: Best for adding texture, creating softer edges, and thinning hair. It’s excellent for achieving a more relaxed, lived-in look.
The choice ultimately depends on your hairstyle goals and the effect you want to achieve.
Read Also: Joah Mascara Review.
How do you thin out hair with clippers?
Thinning hair with clippers is a different process from using a razor or scissors. Clippers are typically used for buzz cuts or shorter hairstyles. If you want to thin your hair with clippers, it’s advisable to consult a professional barber who can use the appropriate clipper attachments and techniques to achieve the desired result without causing damage or unevenness.
Read Also: Gain Weight on Period.
Will razor thinning damage my hair?
When done correctly, razor thinning should not cause damage. However, improper technique can lead to issues.
Read Also: Nourishing Lipstick.
Conclusion
In conclusion, thinning out your hair with a razor is an art that, when mastered, can transform your hairstyle. With the right tools, techniques, and safety precautions, you can achieve stunning results. Remember to take your time, practice, and enjoy the journey to textured, voluminous locks!
Read Also: Pre Rinsed Braiding Hair.